
Introduction
This article explains how to build VMware vSphere Bitfusion in a vSphere 8 environment. I have not verified it, but I believe the same procedure should work in environments other than vSphere 8.
Prerequisite knowledge
What is VMware vSphere Bitfusion?
VMware vSphere Bitfusion is a GPU virtualization solution for AI and ML (machine learning) workloads. Bitfusion improves GPU utilization efficiency and reduces costs by making remote GPU resources available over the network. https://docs.vmware.com/jp/VMware-vSphere-Bitfusion/index.html
Environment
This is the environment used in this article.
| Environment |
|---|
| VMware ESXi 8 |
| VMware vCenter 8 |
| HPE ML350 Gen9 |
| NVIDIA Tesla P40 |
Building Bitfusion Server
Bitfusion Server is a server component for sharing GPU resources over the network. Bitfusion Server virtualizes physical GPU resources and presents them over the network. This allows remote client machines and virtual machines to utilize GPU resources as and when they need them.
Download files
-
Visit the site below. https://customerconnect.vmware.com/downloads/details?downloadGroup=BITFUSION-454&productId=1345
-
Log in with your VMware Customer Connect account.
-
Click the “DOWNLOAD NOW” button in the “Bitfusion Server” column.

-
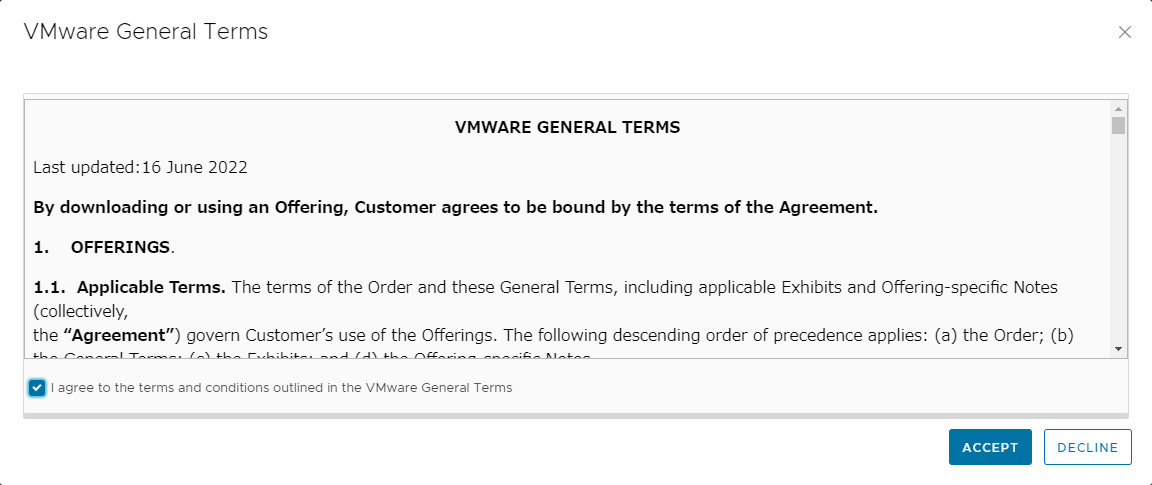
If you are asked for consent when downloading, check the checkbox and click “ACCEPT”.
Deploying the OVA
-
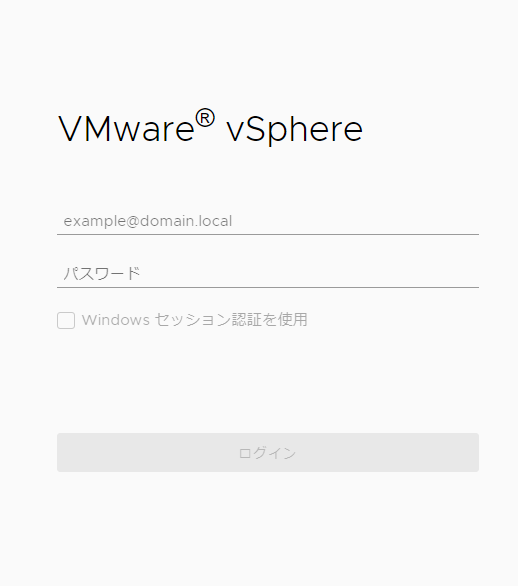
Log in to vCenter Server.
-
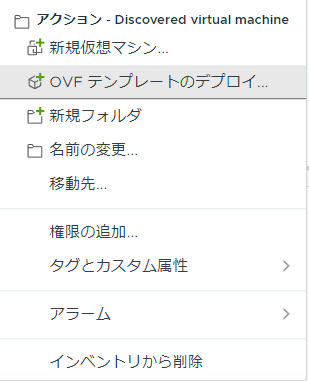
Right-click any datacenter, cluster, or folder and click Deploy OVF Template.
-
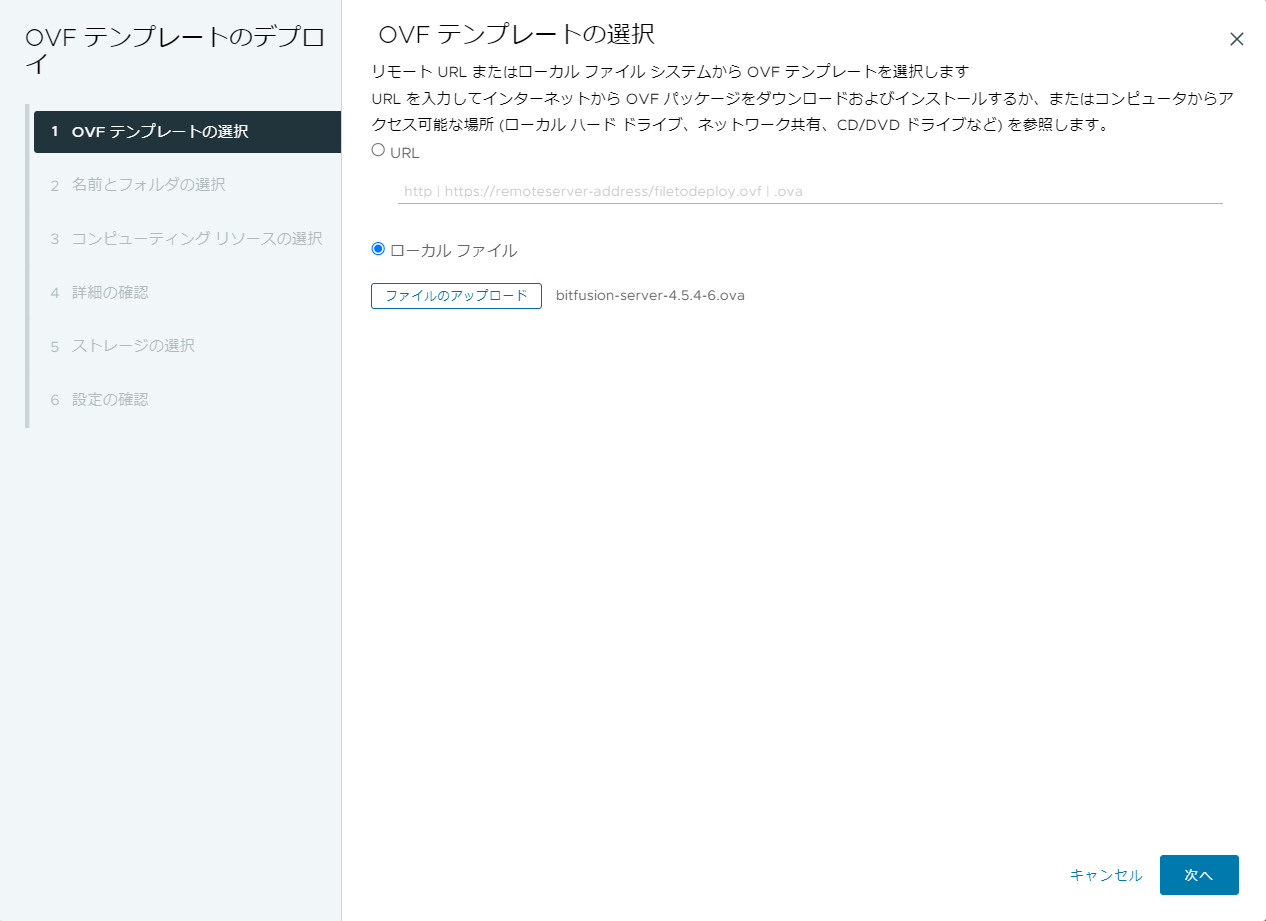
Check “Local file”, click “Upload file”, and specify the OVA file you downloaded earlier. (As of 2023-05-23, the file name is bitfusion-server-4.5.4-6.ova.) Then, click “Next”.
-
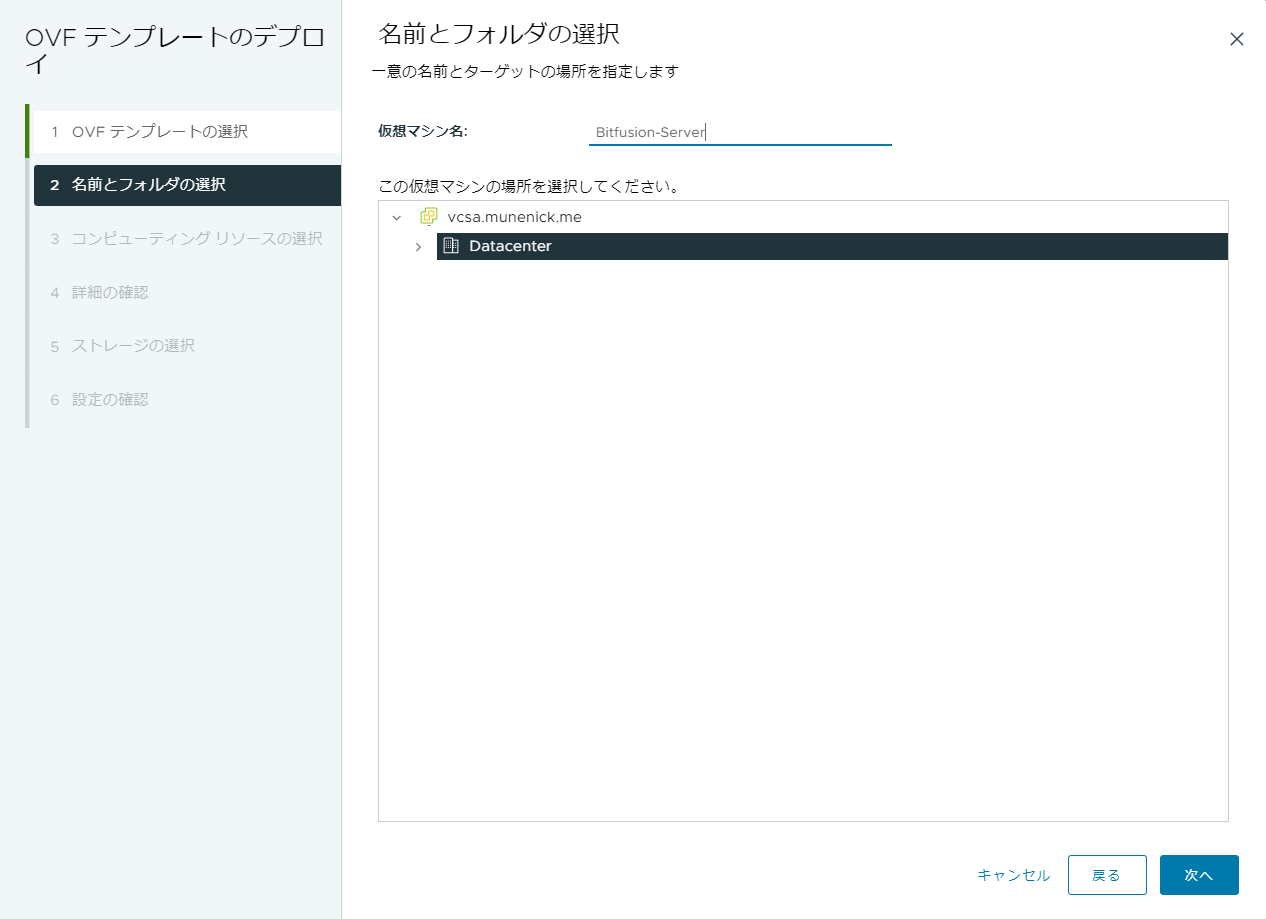
Enter any virtual machine name, specify any storage location, and click “Next”.
-
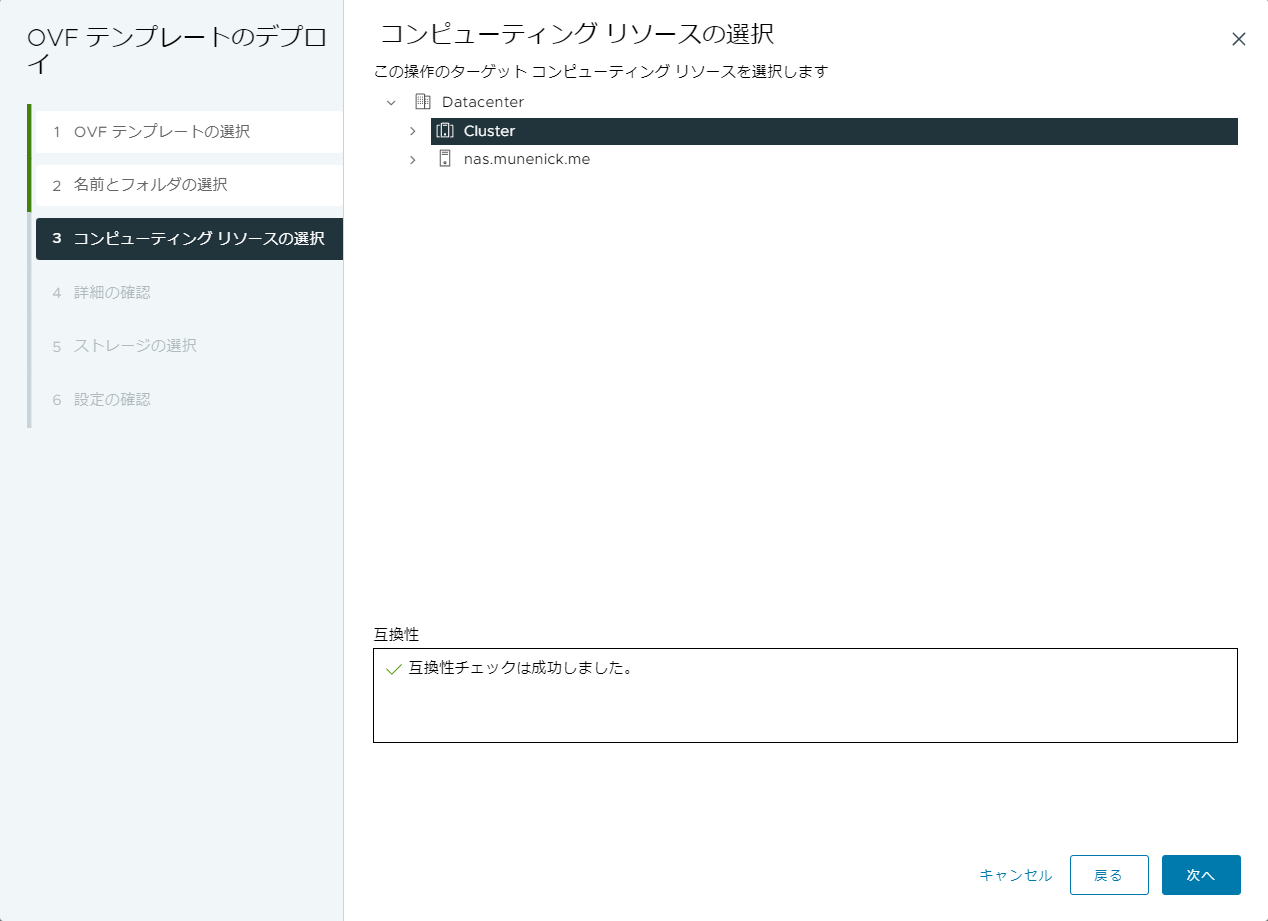
Select any resource and click Next.
-
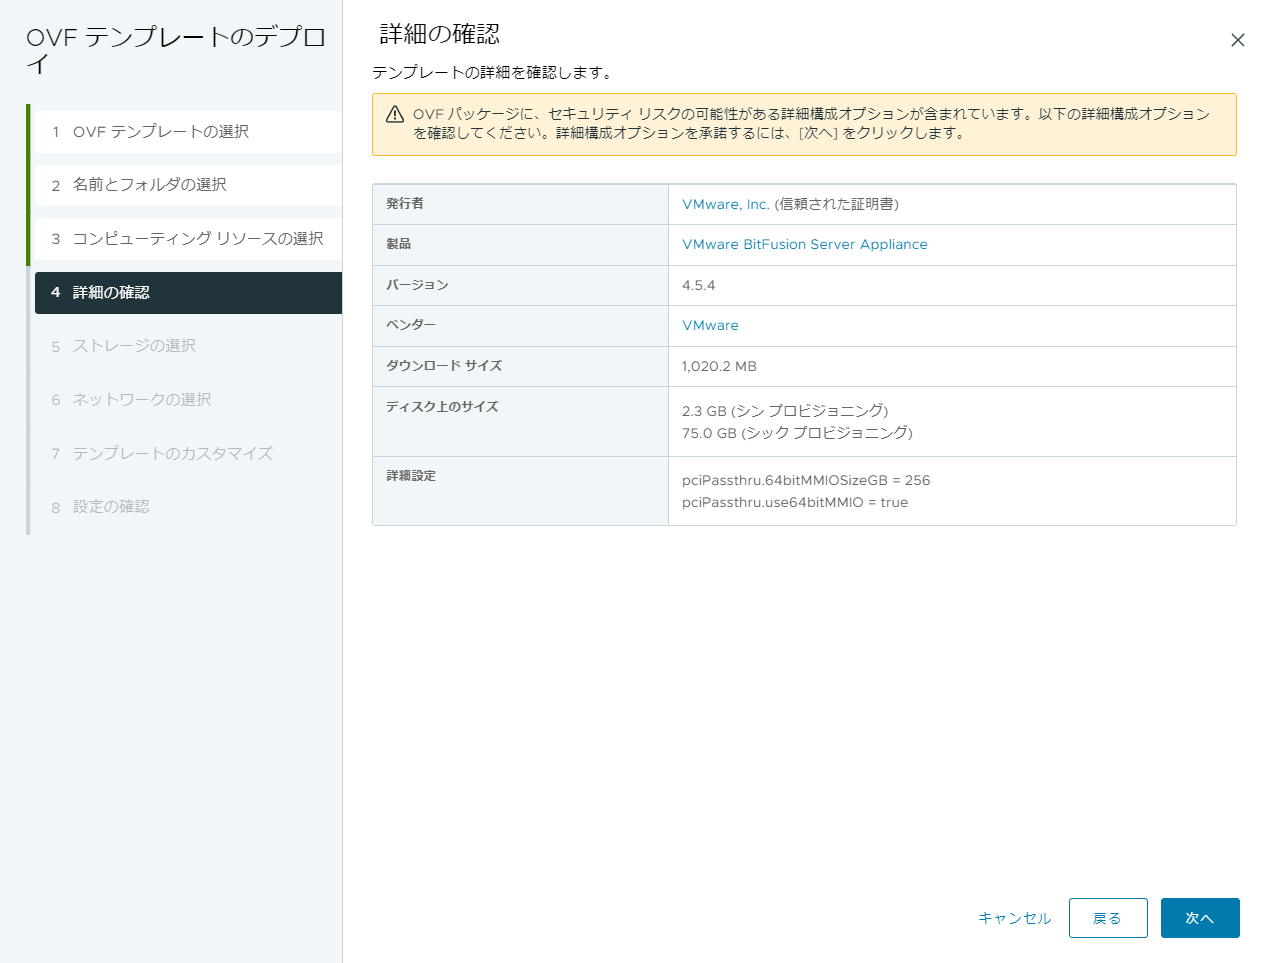
Once you have confirmed the details, click Next.
-
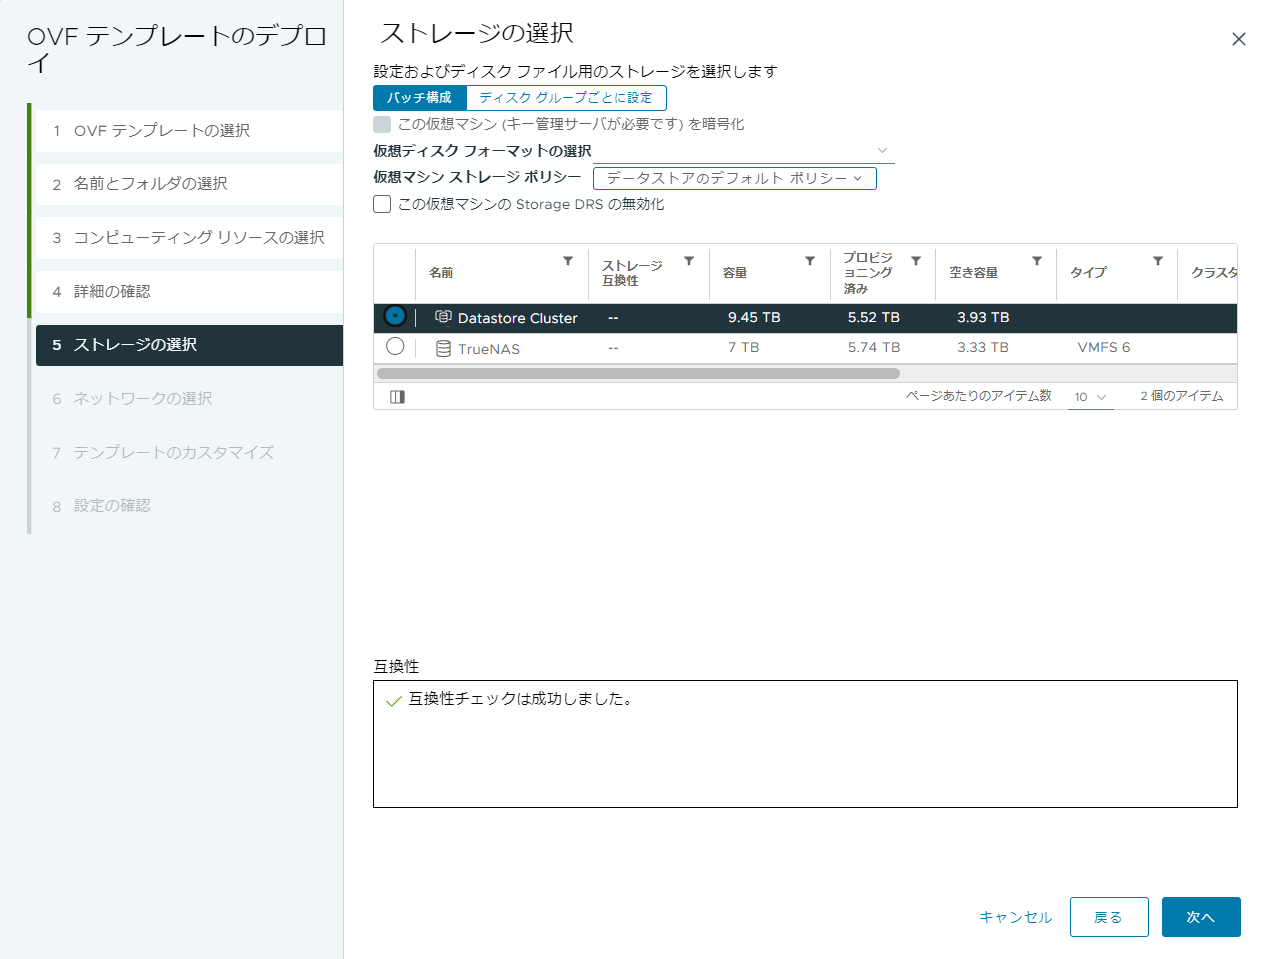
Select your desired storage and click “Next”.
-
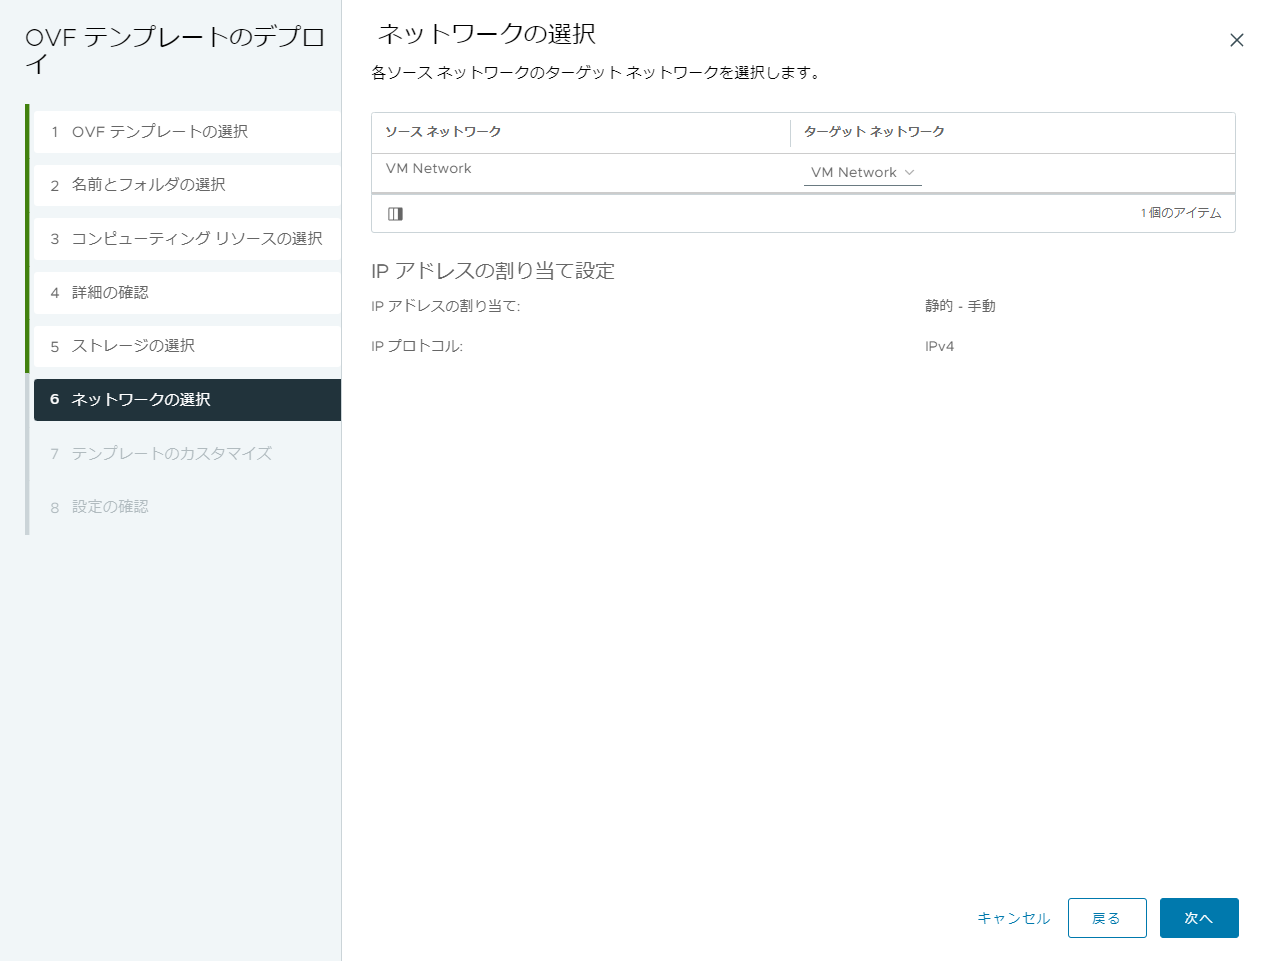
Select the desired network group and click “Next”.
-
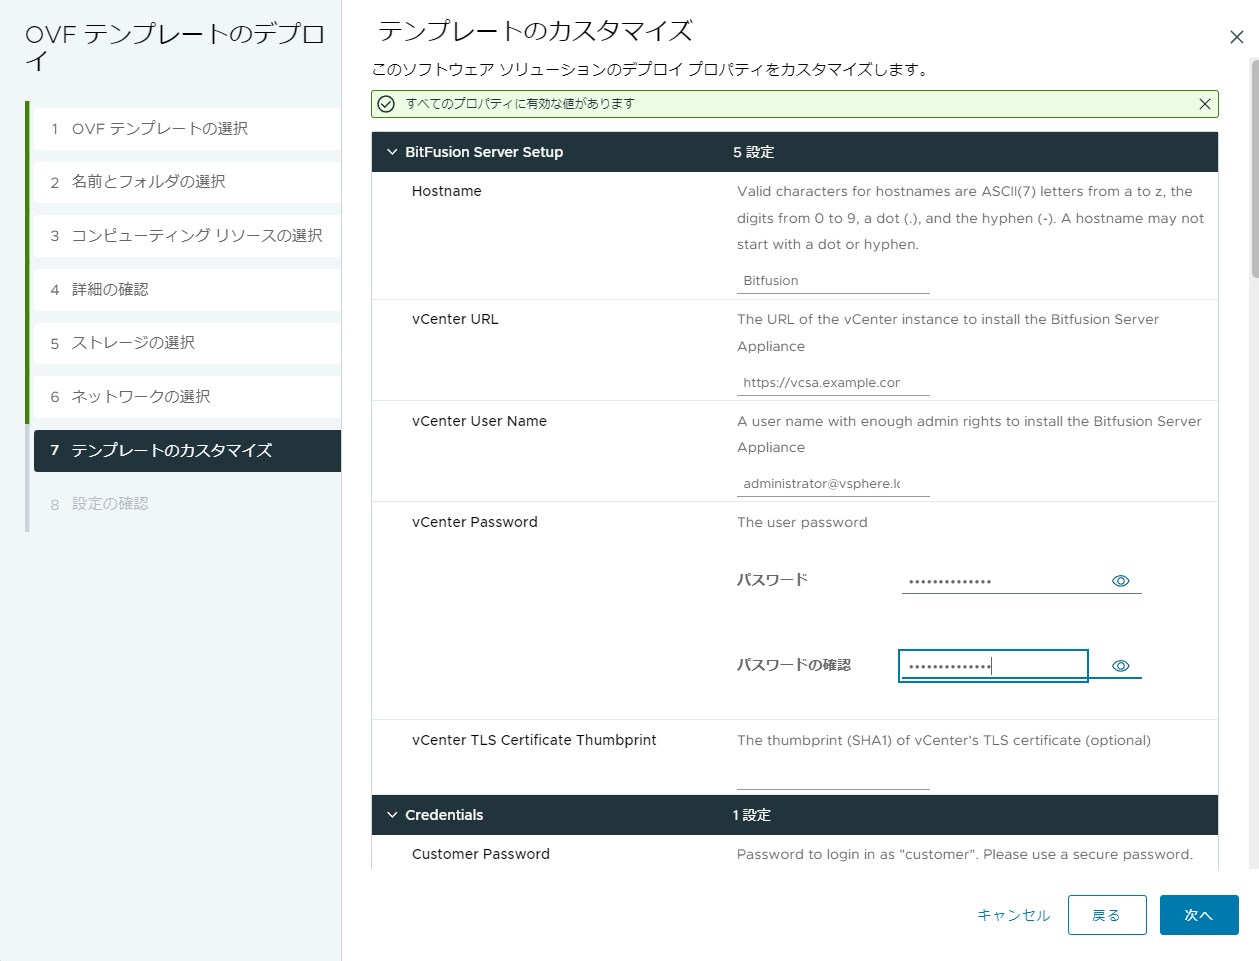
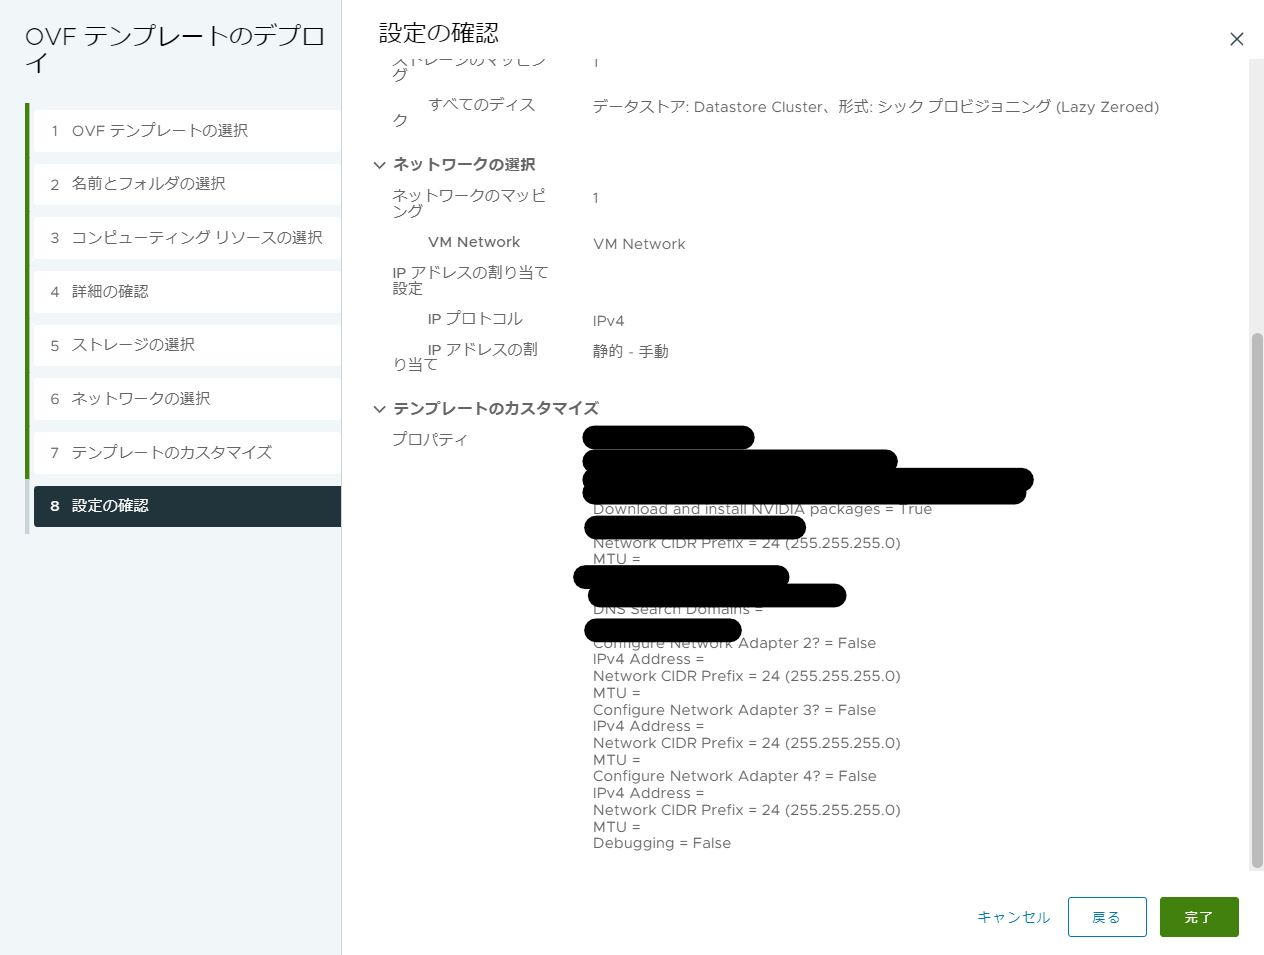
When customizing the template, enter the following items.
- Hostname: Enter any host name.
- vCenter URL: Enter the URL of vCenter Server.
- vCenter User Name: Enter the user name used to log in to vCenter Server.
- vCenter Password: Enter the password used to log in to vCenter Server.
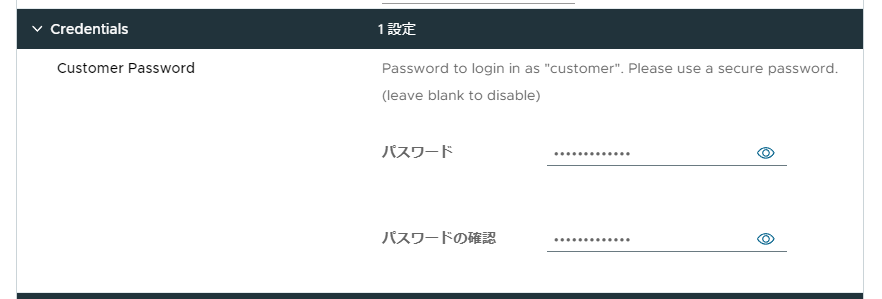
- Customer Password: Set the password required when logging in to Bitfusion.
- NVIDIA Packages (optional): If you select the checkbox, you accept the NVIDIA license. After you accept the NVIDIA license, vSphere Bitfusion downloads and installs NVIDIA drivers, CUDA libraries, and NVIDIA Fabric Manager the first time you start your virtual machine.

- Network Adapter 1 (Management/Data): Set the network information to be assigned to the server.
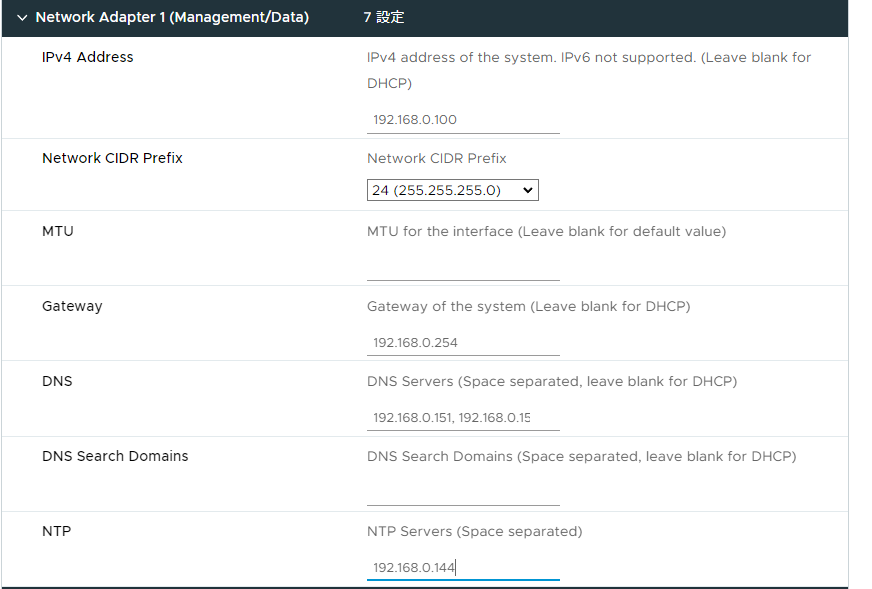 This setting is only an example, so adjust it for your environment. If multiple network adapters are required, configure them as well.
-
After confirming your settings, click Finish.
Enabling GPU devices on ESXi
-
Log in to the ESXi host with the GPU attached.
-
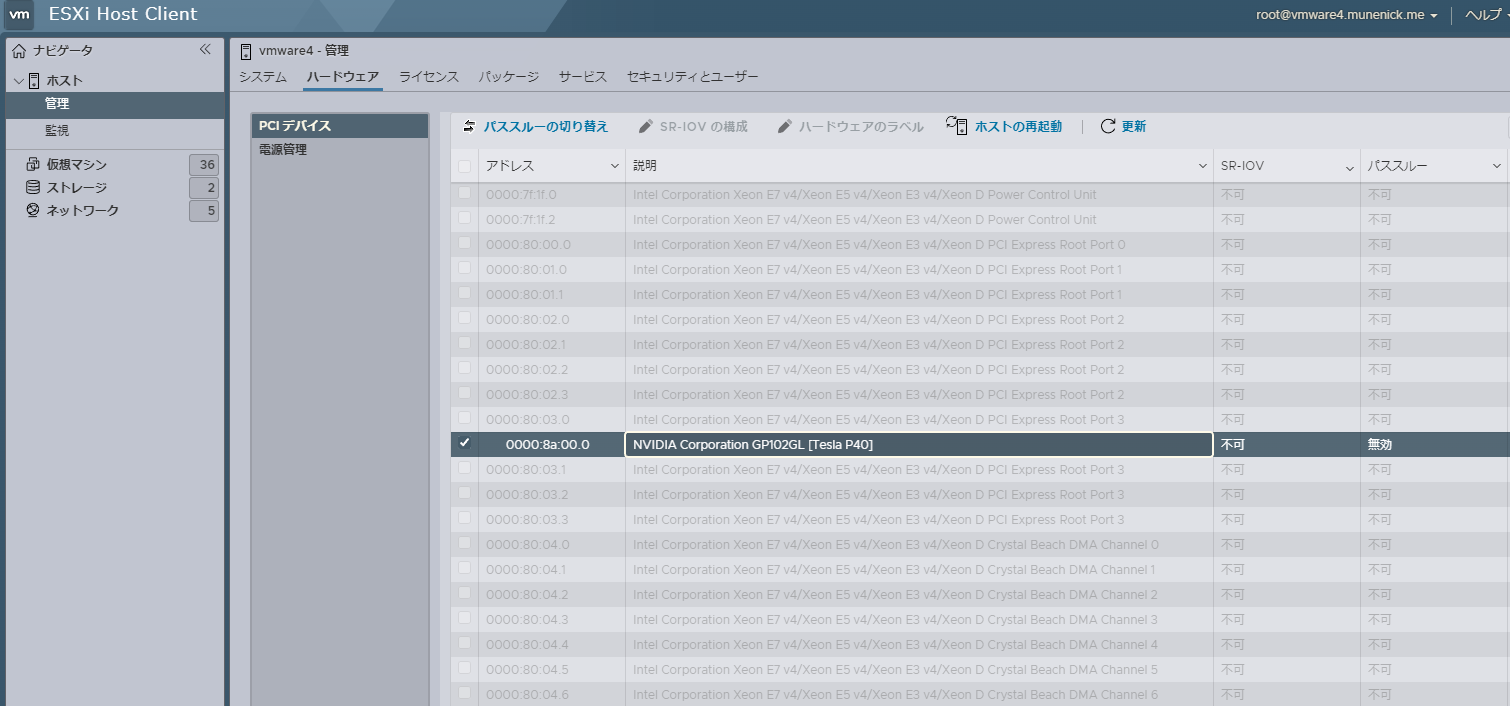
Go to “Management” → “Hardware” → “PCI Devices”, select the GPU, and click “Toggle Passthrough” in the top left.
-
Make sure passthrough changed from “disabled” to “active”.

Configuring Bitfusion Server
-
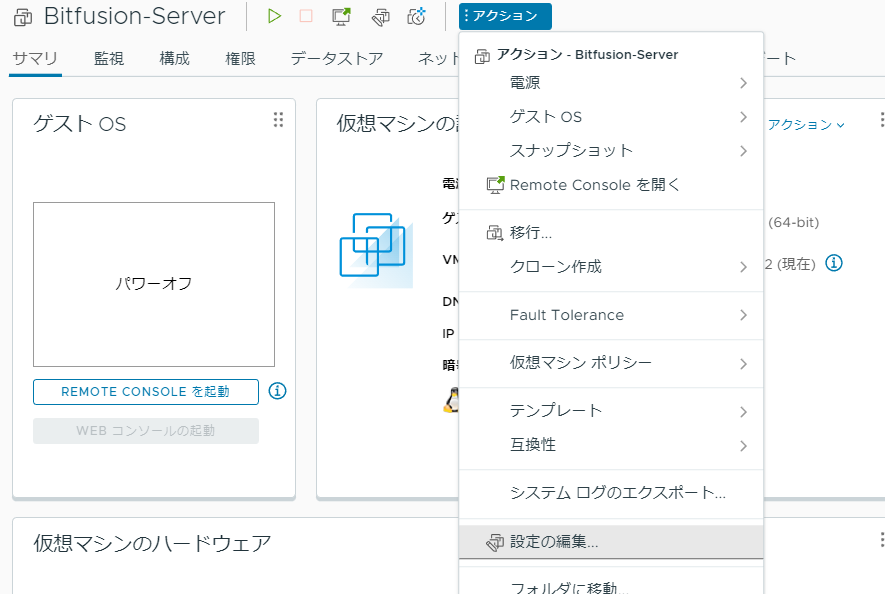
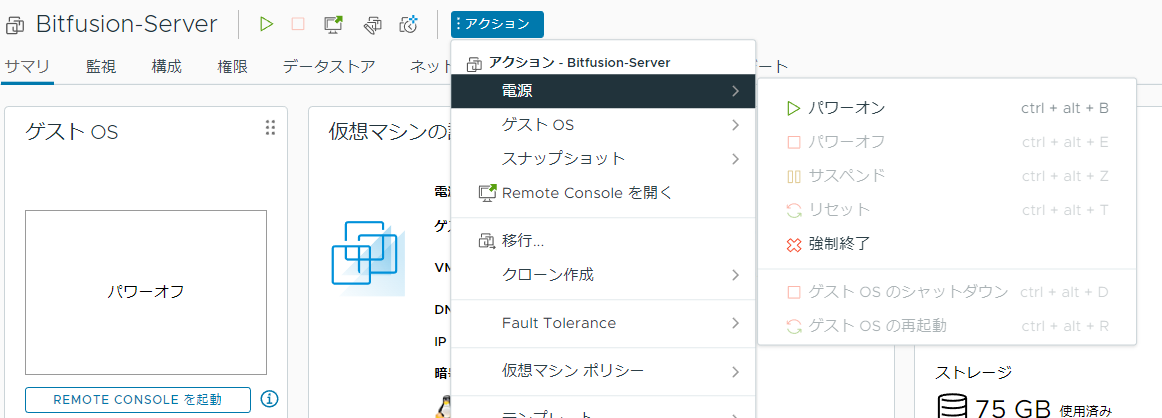
Open the Bitfusion Server you deployed and click Actions → Edit Settings.
-
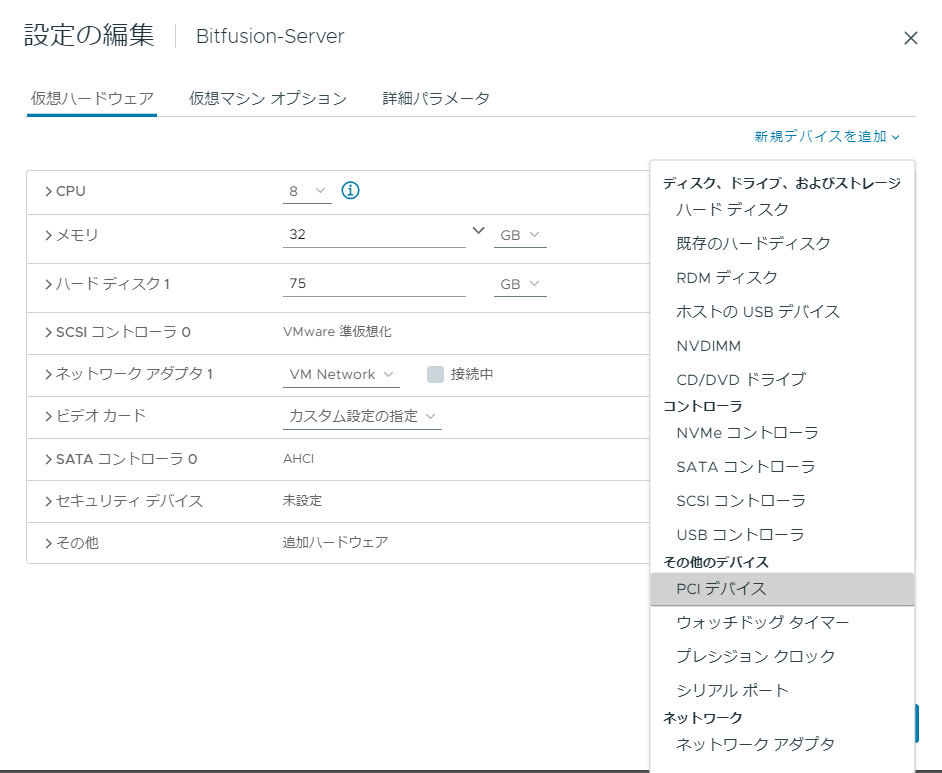
Click “New Device” → “PCI Device”.
-
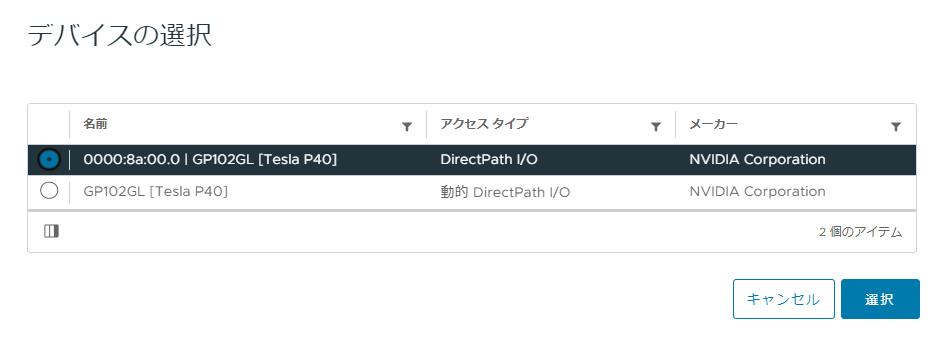
In “Device Selection”, select “DirectPath I/O” and click the “Select” button.
-
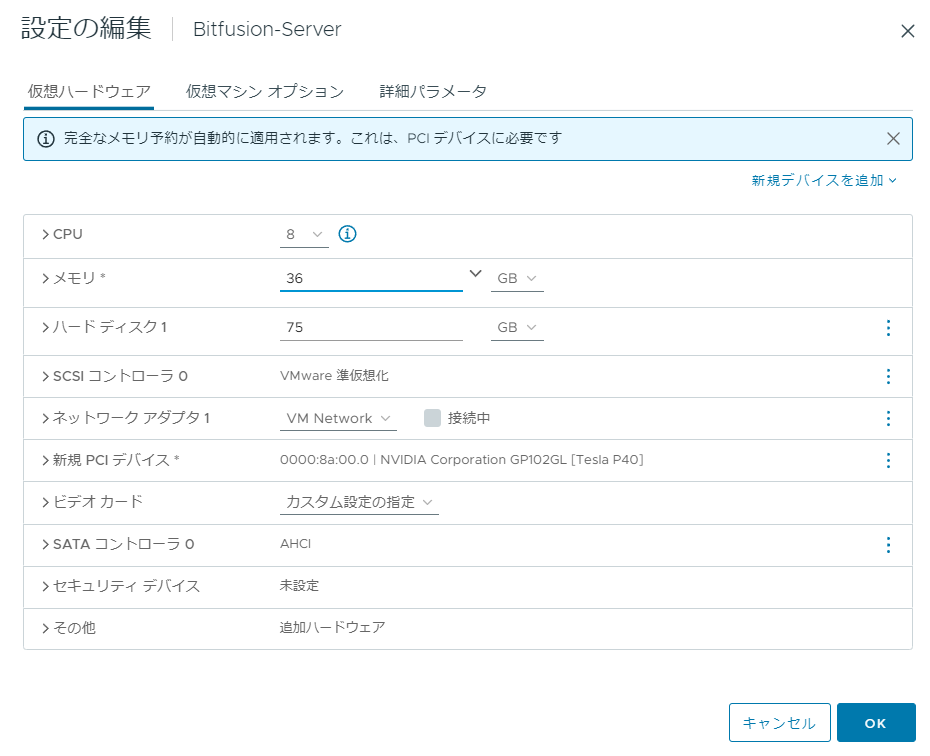
Change the CPU setting. The minimum value is the number of connected GPUs x 4.
-
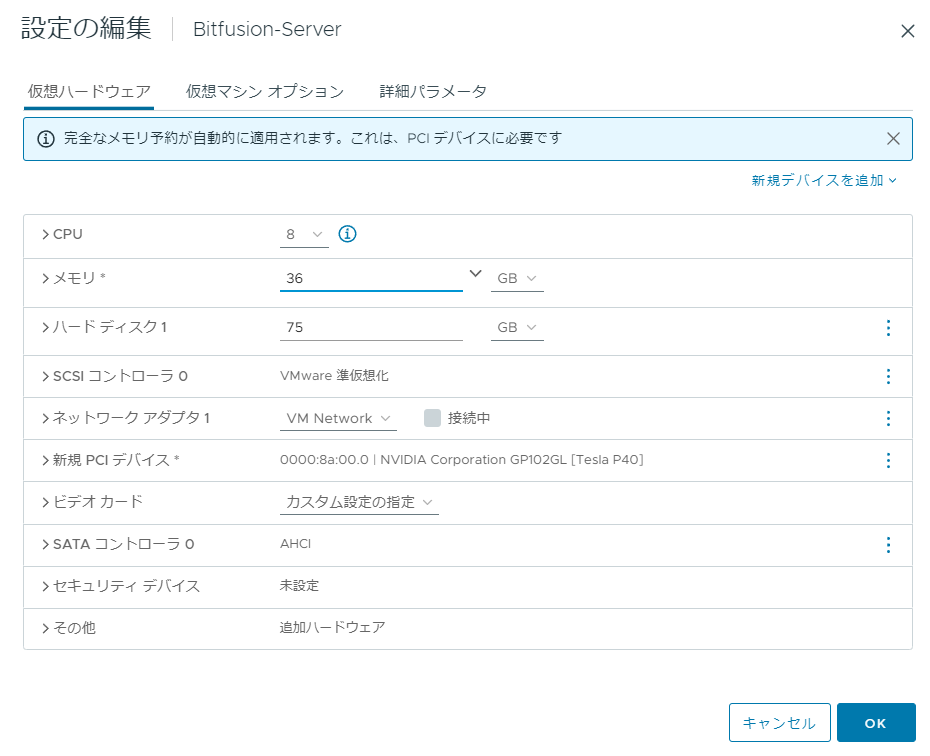
Change the memory setting. Use the larger value of “32GB” or “GPU VRAM x 1.5”. For example, if you have 24GB VRAM, allocate 36GB of memory.
-
After completing all settings, click “OK”. Then start Bitfusion Server.
Check the Bitfusion plugin
The plugin is installed automatically when Bitfusion Server starts for the first time.
-
When the Bitfusion plugin installation finishes, the following message appears at the top of the screen. Refresh your browser as instructed.

-
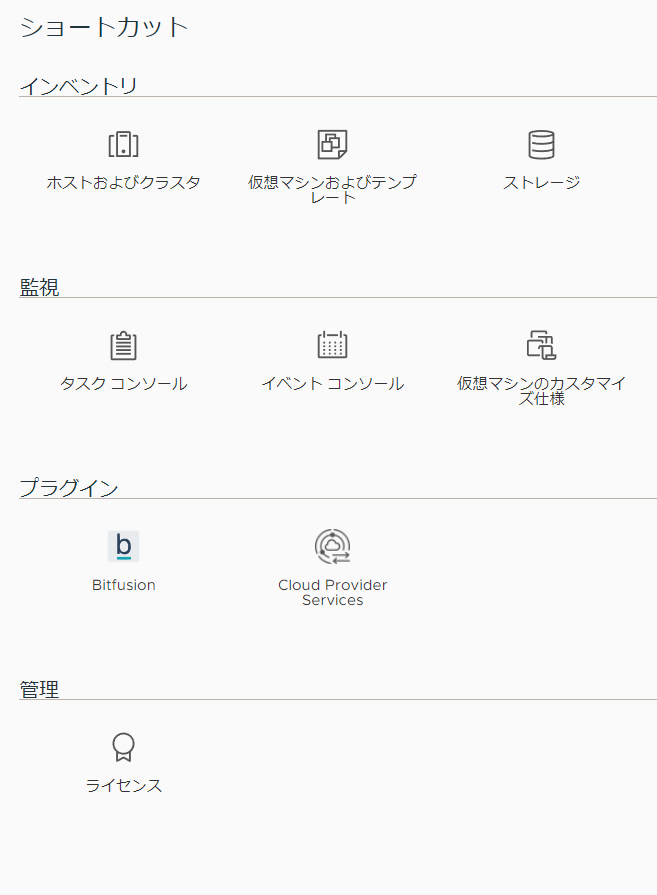
Make sure that “Bitfusion” is displayed in the shortcuts area.
-
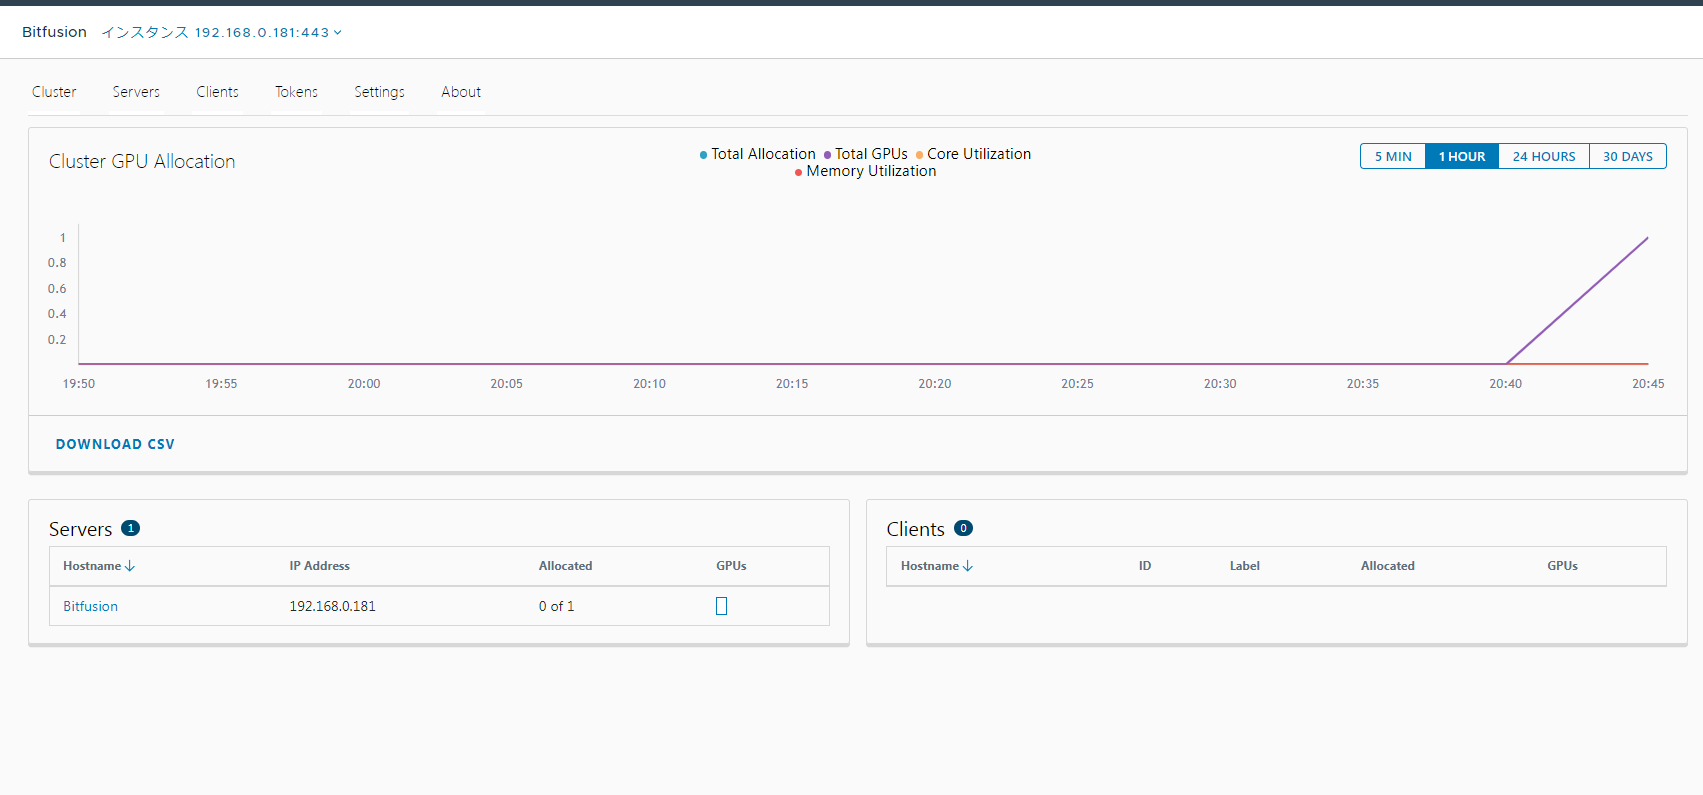
Click it to check GPU usage and related information.
Building the Bitfusion Client
At the time of writing (2023-05-23), Bitfusion supports only Linux. The following distributions are supported.
- CentOS 7
- Red Hat Linux 7.9
- Red Hat Linux 8.5
- Red Hat Linux 9.0
- Ubuntu Linux 18.04
- Ubuntu Linux 20.04
- Ubuntu Linux 22.04
- SUSE Linux 15.3
- Rocky Linux 8
- Rocky Linux 9
This article tests Ubuntu Linux 20.04.
Building a client machine
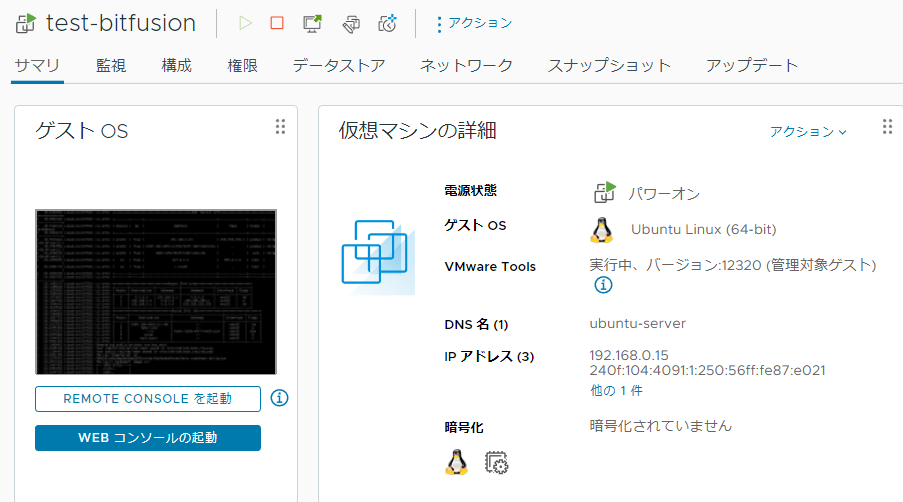
- Build a virtual machine with a supported distribution.
Download Bitfusion Client
-
Visit the site below. https://customerconnect.vmware.com/downloads/details?downloadGroup=BITFUSION-454&productId=1345&download=true&fileId=fe318e614fdc846b80232a3cf492db9c&uuId=4e783cc2-d1f9-4da5-bd99-89fe93bdd361
-
Log in with your VMware Customer Connect account.
-
Download the Bitfusion Client for the distribution you are using.

Installing Bitfusion Client
- Transfer the downloaded file to any directory on the client machine using FTP, SCP, or a similar method.
mune@test-bitfusion:~$ ls
bitfusion-client-ubuntu2204_4.5.4-6_amd64.deb-
Access the client machine via SSH.
-
Run the following command to install bitfusion-client. This varies by distribution.
mune@test-bitfusion:~$ sudo apt-get install -y ./bitfusion-client-ubuntu2004_4.5.4-6_amd64.deb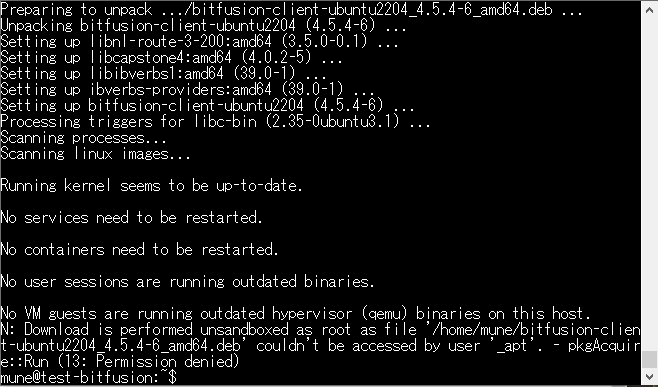
- Run the command below to confirm the installation.
mune@test-bitfusion:~$ bitfusion version
Bitfusion version 4.5.4 release
Enabling the client
You cannot use Bitfusion yet. Enable it from vCenter Server.
-
Log in to vCenter Server.
-
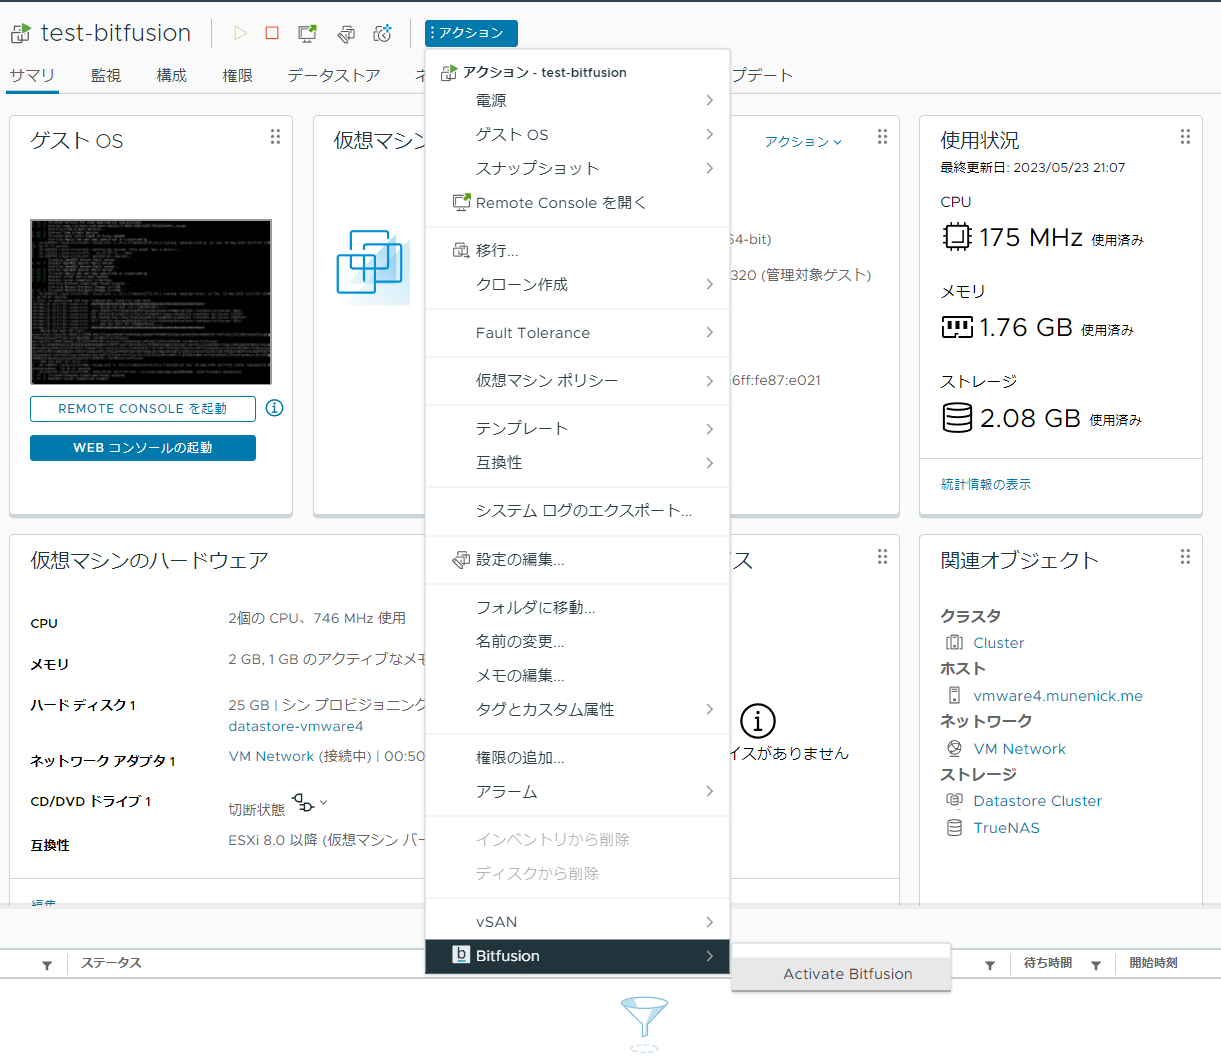
Go to your client machine and click Actions → Bitfusion → Activate Bitfusion.
-
Because this is a client, select “For a client, this will allow users to run Bitfusion workloads.” and click “ACTIVATE.”
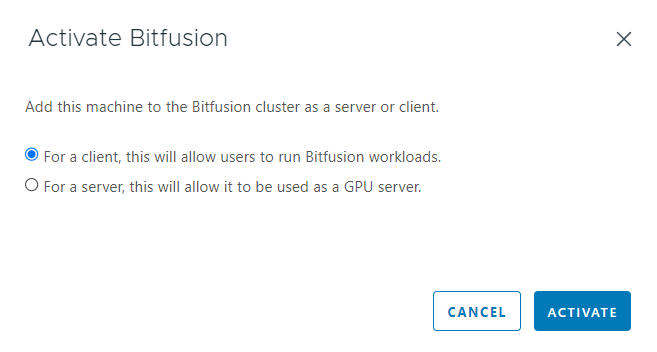
Confirm Bitfusion activation
Check from vCenter
- Access the “Shortcut” → “Bitfusion” plugin and check that the client machine is displayed in “Clients”.
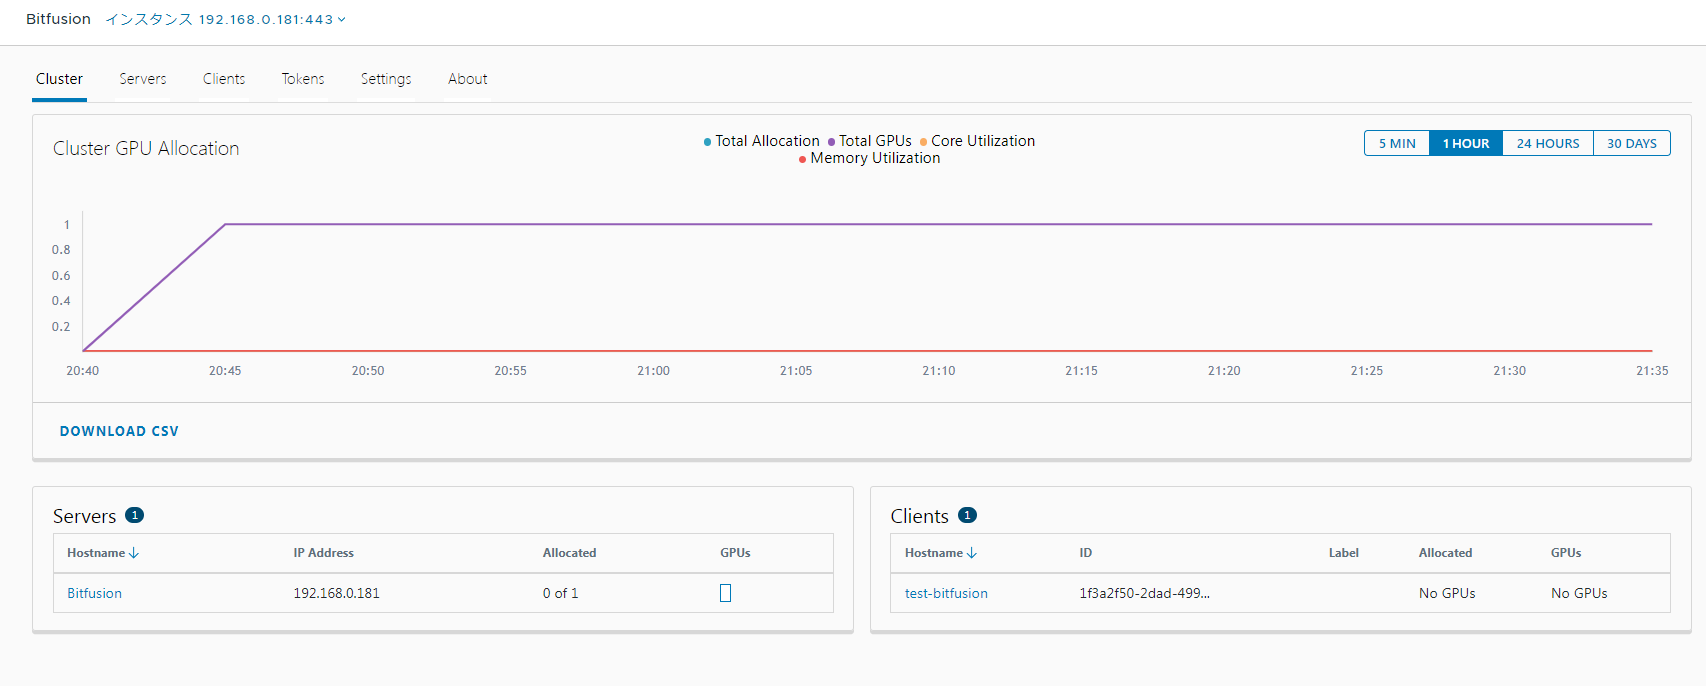
Check from the client machine
- Run the command below and make sure your GPU is listed.
mune@test-bitfusion:~$ sudo bitfusion list_gpus
 - server 0 (leader)  [192.168.0.181:56001]: running 0 tasks
   |- GPU [0]: free memory (24576 / 24576MiB) Tesla P40 (6.1)
Bitfusion operation test
This step supports only Ubuntu 20.04. The virtual machine disk must also have enough free space. In my case, 50 GB was enough. If you compare against CPU execution, you also need enough memory.
- Run the command below to create a directory.
mune@test-bitfusion:~$ mkdir ~/bitfusion- Run the command below and change to the directory.
une@test-bitfusion:~$ cd ~/bitfusion/
mune@test-bitfusion:~/bitfusion$- Run the command below to download the test script.
une@test-bitfusion:~/bitfusion$ sudo wget https://packages.vmware.com/bitfusion/scripts/client_vm_starter.sh
--2023-05-23 12:54:29-- https://packages.vmware.com/bitfusion/scripts/client_vm_starter.sh- Install the dependencies with the following command.
mune@test-bitfusion:~/bitfusion$ sudo bash ./client_vm_starter.sh -p install_cuda_deps- Run the following command to run the benchmark.
mune@test-bitfusion:~/bitfusion$ sudo bitfusion run -n 1 -- python3 ./benchmarks/scripts/tf_cnn_benchmarks/tf_cnn_benchmarks.py --batch_size=64 --model=resnet50 --num_gpus=1 --num_batches=100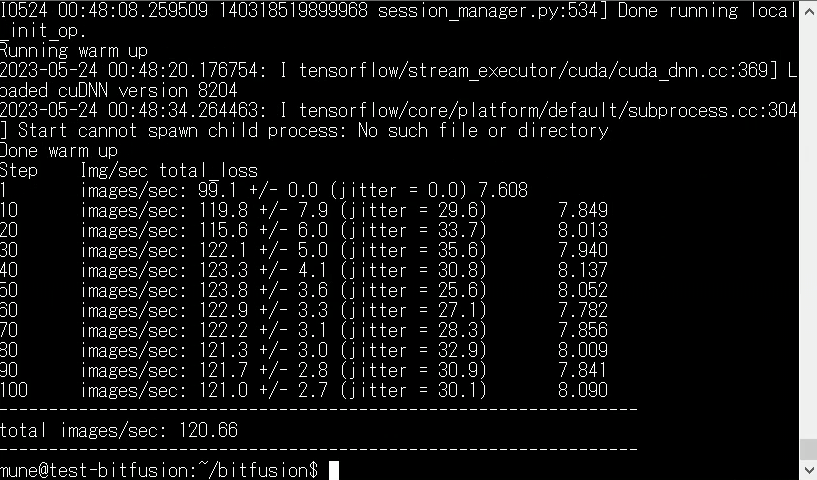
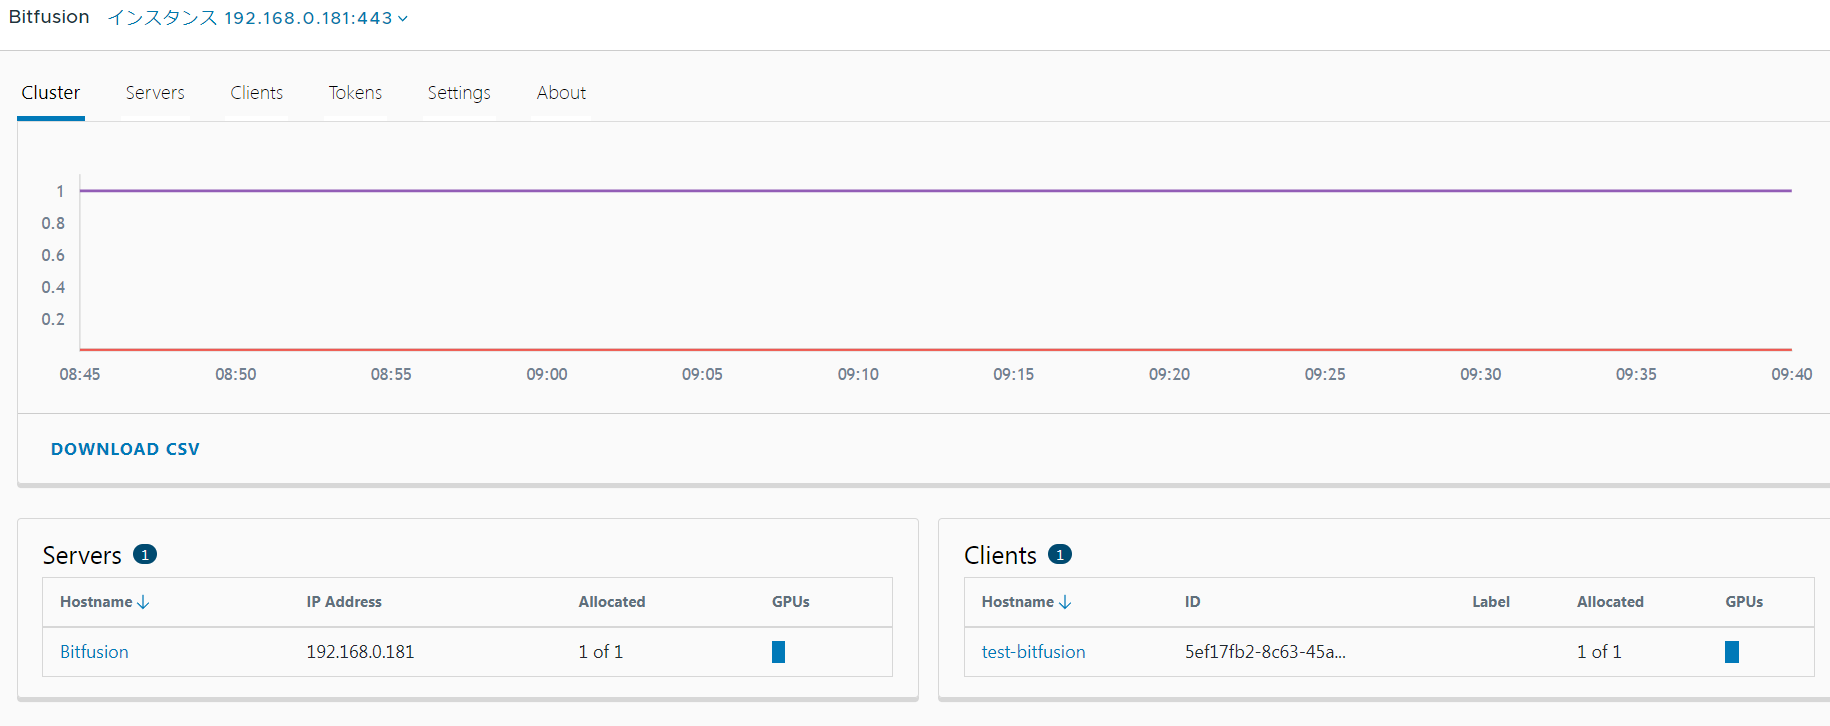
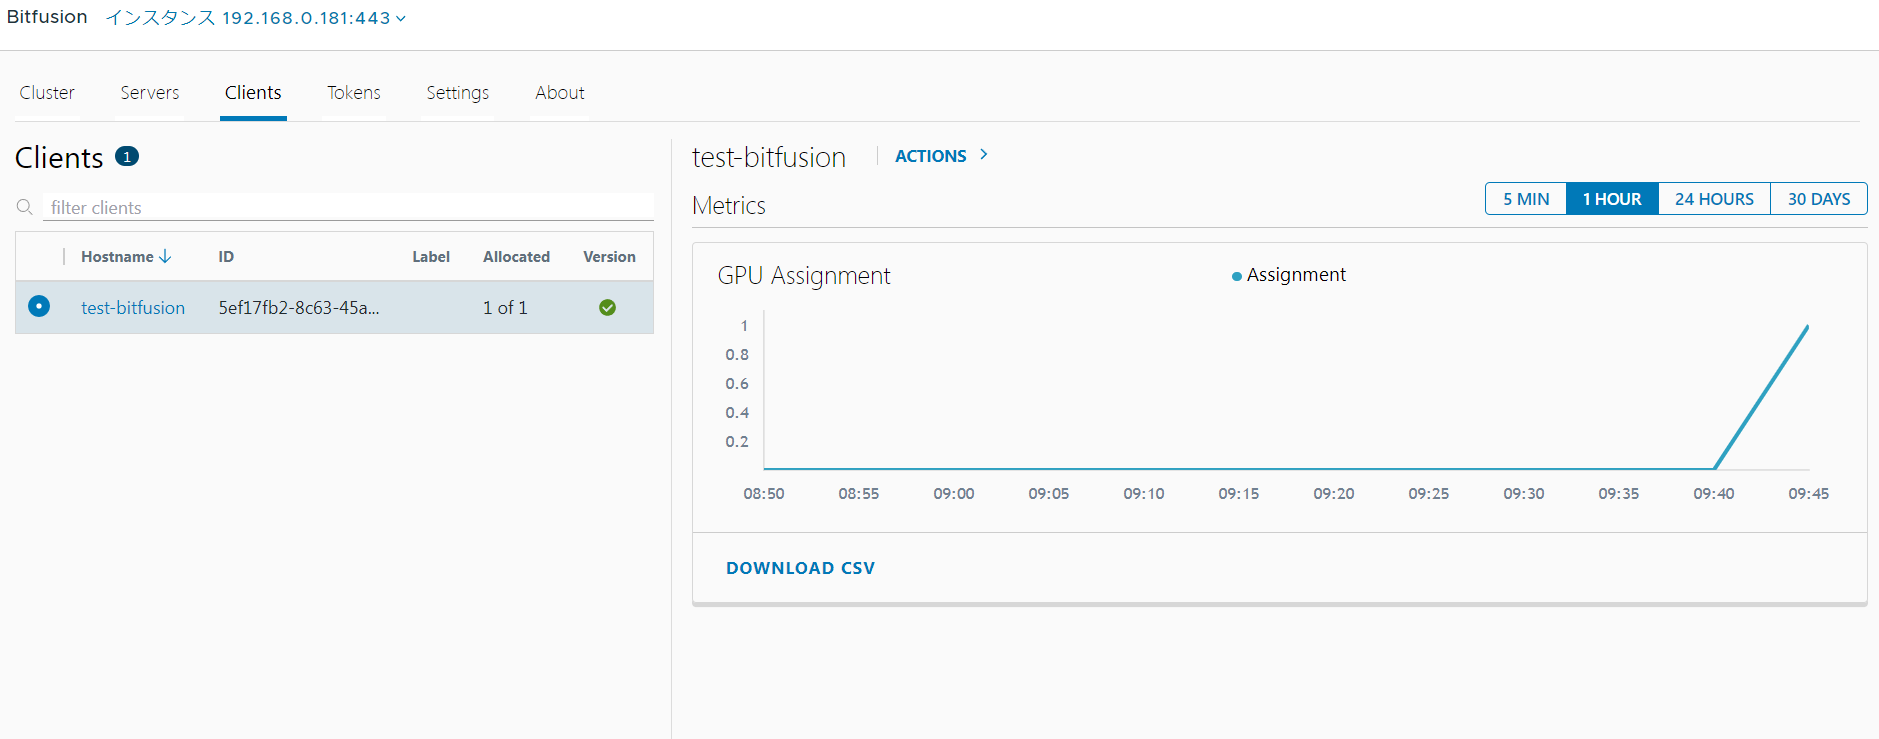
- You can monitor GPU resources by accessing the Bitfusion plugin for vCenter Server.
Bonus: CPU and Bitfusion (GPU) comparison
I compared Bitfusion with a machine using an Intel(R) Xeon(R) CPU E5-2630 v4 @ 2.20GHz, 8 CPUs, and 8GB RAM.
For CPU
I ran the following command and checked the result.
mune@test-bitfusion:~/bitfusion$ python3 ./benchmarks/scripts/tf_cnn_benchmarks/tf_cnn_benchmarks.py --data_format=NHWC --batch_size=64 --model=resnet50 --num_batches=100 --num_gpus=1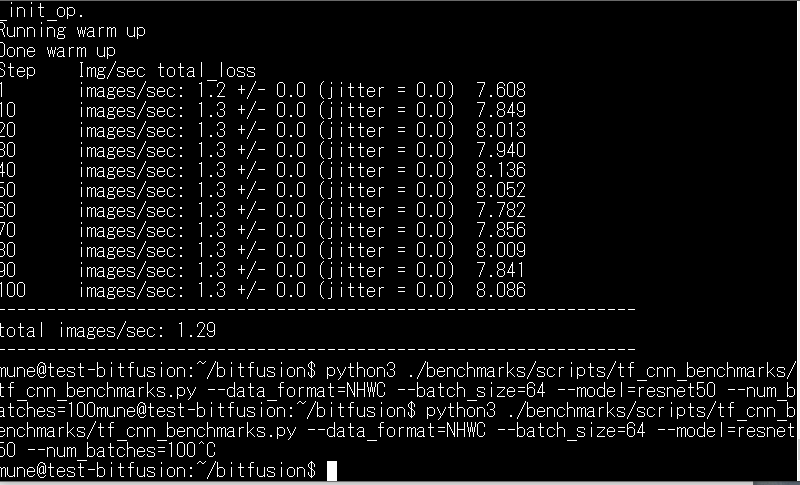
The result was 1.29 images per second.
For Bitfusion (GPU)
I ran the following command and checked the result.
mune@test-bitfusion:~/bitfusion$ sudo bitfusion run -n 1 -- python3 ./benchmarks/scripts/tf_cnn_benchmarks/tf_cnn_benchmarks.py --data_format=NHWC --batch_size=64 --model=resnet50 --num_batches=100 --num_gpus=1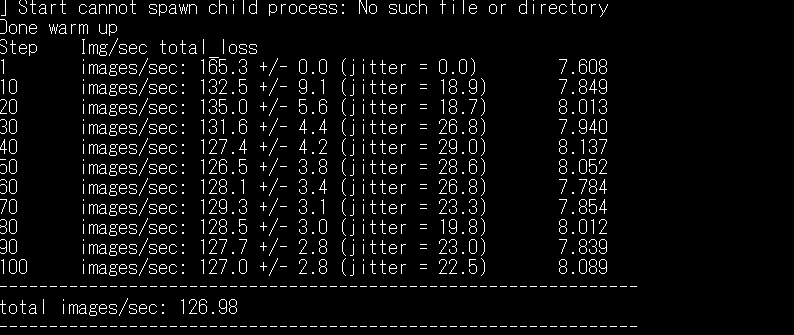
The result was 126.98 images per second.
Comparison
The table below compares the CPU and Bitfusion benchmark results. The image rate comes from the benchmark output, and the execution time is the measured elapsed time.
| Number of images generated [images/sec] | Execution time [m] | |
|---|---|---|
| CPU(Intel Xeon CPU E5-2630 v4) | 1.29 | 93 |
| Bitfusion(NVIDIA Tesla P40) | 126.98 | 1.5 |
Result
For image throughput, Bitfusion generated about 98 times more images per second than the CPU. The execution time was reduced to about 1.6% of the CPU run, saving more than 1 hour and 30 minutes.