
Introduction
In a VMware vSphere environment, Tanzu Kubernetes Grid (TKG) makes it easy to build a Kubernetes environment. This article uses the standalone, multi-cloud-compatible TKGm edition. NSX ALB continues to use the Essentials license. This article explains how to build L7 Ingress with DNS Provider and AKO, which are Enterprise Edition features.
Last time
This article is based on the environment built in the previous articles.
Environment
| Environment |
|---|
| VMware ESXi 8 |
| VMware vCenter 8 |
| Tanzu Kubernetes Grid 2.1.1 |
| NSX Advanced Load Balancer 22.1.3 |
Prerequisites
- Ability to build VMware ESXi and manage the datacenter with vCenter
- Two or more VLAN networks are available.
- In this environment, I prepared a management network, VM Network (VLAN0), and a Kubernetes network, VLAN100 (VLAN100).
- Servers and storage with sufficient resources
- NSX ALB uses CPU: 8, RAM: 24GB, ROM: 128GB.
- Depending on the requirements, 4 to 12 virtual machines with CPU: 2, RAM: 8GB, and ROM: 40GB are deployed as Kubernetes nodes.
Switch to Enterprise Edition
The DNS Provider and AKO Ingress introduced in this article cannot be built with the Essentials license, so first switch from the Essentials license to the Enterprise license.
-
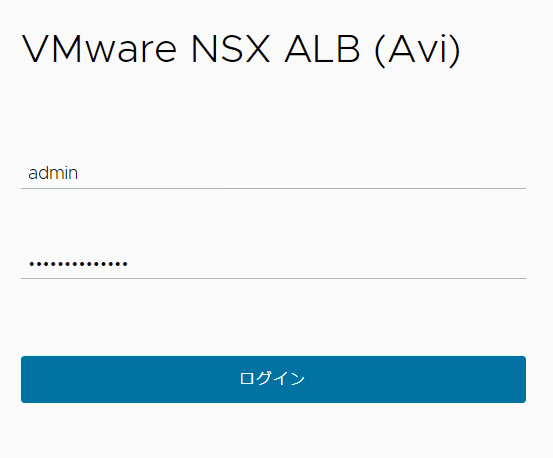
Log in to NSX ALB as an admin user.
-
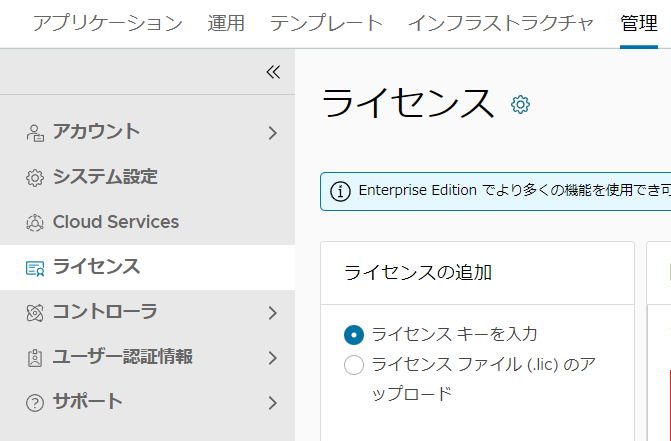
Click the settings button (gear icon) in “Management” → “License” on the top tab.
-
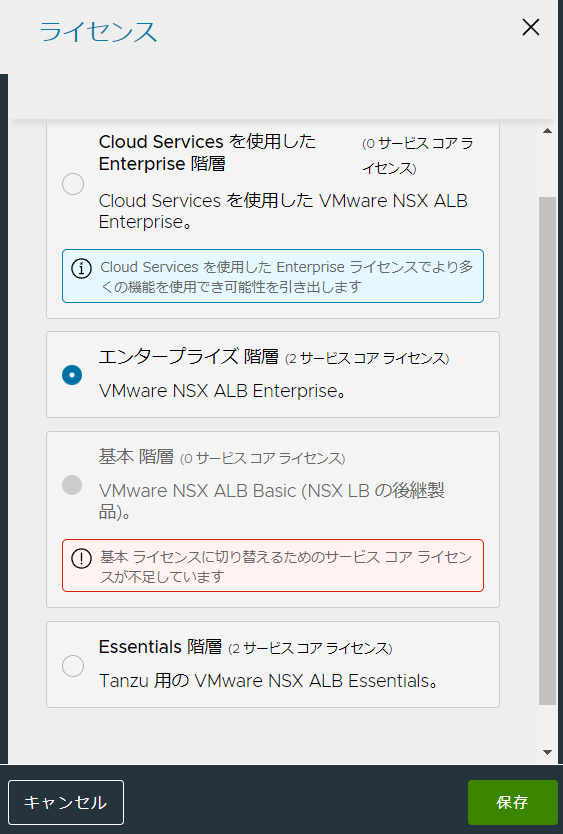
Select “Enterprise Hierarchy” and click the “Save” button at the bottom right.
Building AKO Ingress
Kubernetes has a feature called Ingress, and common implementations include the NGINX Ingress Controller and VMware-managed Contour Ingress Controller. These can be used with the NSX ALB L4 load balancer. NSX ALB also provides L7 Ingress, which lets you build high-performance Ingress without those Ingress Controllers. This article shows how to build L7 Ingress.
Configuration on the Management cluster
-
Connect to the cluster management machine.
-
Run the following command and select the Management cluster context.
MuNeNiCK [ ~ ]$ kubectl config use-context tkg21mc01-admin@tkg21mc01
Switched to context "tkg21mc01-admin@tkg21mc01".- Run the command below and make sure the Management cluster context is selected.
MuNeNiCK [ ~ ]$ kubectl config current-context
tkg21mc01-admin@tkg21mc01- Create the following YAML file in any location, and update the following sections for your environment.
- spec.controlPlaneNetwork: Specify the network address that the Kubernetes control-plane node connects to in “cidr” and the network group in “name”.
- spec.controller: Specify the IP address of the NSX ALB Controller.
- spec.dataNetwork: Specify the Kubernetes data plane network. This is often the same as “spec.controlPlaneNetwork”.
- spec.extraConfigs.ingress.nodeNetworkList: Specify the network used for Ingress. This is often the same as “spec.controlPlaneNetwork”.
- shardVSSize: Choose from LARGE, MEDIUM, SMALL, or DEDICATED. If SMALL is specified, one virtual service is created and one VIP address is assigned. In this case, you do not necessarily need to create a DNS Provider.
apiVersion: networking.tkg.tanzu.vmware.com/v1alpha1
kind: AKODeploymentConfig
metadata:
  name: ako-deploy
spec:
  adminCredentialRef:
    name: avi-controller-credentials
    namespace: tkg-system-networking
  certificateAuthorityRef:
    name: avi-controller-ca
    namespace: tkg-system-networking
  cloudName: Default-Cloud
  clusterSelector:
    matchLabels:
      ako-deploy: "true"
  controlPlaneNetwork:
    cidr: 192.168.100.0/24
    name: VLAN100
  controller: 192.168.0.241
  dataNetwork:
    cidr: 192.168.100.0/24
    name: VLAN100
  extraConfigs:
    cniPlugin: antrea
    disableStaticRouteSync: false
    ingress:
      disableIngressClass: false
      nodeNetworkList:
        - cidrs:
          - 192.168.100.0/24
          networkName: VLAN100
      serviceType: NodePortLocal
      shardVSSize: SMALL
serviceEngineGroup: Default-Group- Run the command below to apply the YAML file.
MuNeNiCK [ ~/kubernetes/management/ako ]$ kubectl apply -f ako-deploy.yaml
akodeploymentconfig.networking.tkg.tanzu.vmware.com/ako-deploy created- Run the following command to assign a label to the Workload cluster.
uNeNiCK [ ~/kubernetes/management/ako ]$ kubectl label cluster tkg21wc01 ako-deploy="true"
cluster.cluster.x-k8s.io/tkg21wc01 labeled
Configuration on the Workload cluster
- Run the command below to switch to the Workload context.
MuNeNiCK [ ~/kubernetes/management/ako ]$ kubectl config use-context tkg21wc01-admin@tkg21wc01
Switched to context "tkg21wc01-admin@tkg21wc01".- Run the command below and make sure the Workload context is selected.
MuNeNiCK [ ~/kubernetes/management/ako ]$ kubectl config current-context
tkg21wc01-admin@tkg21wc01- Run the following command to restart the AKO Pod.
MuNeNiCK [ ~/kubernetes/management/ako ]$ kubectl delete pod ako-0 -n avi-system
pod "ako-0" deleted- Verify that the IngressClass has been created by running the command below.
MuNeNiCK [ ~/kubernetes/workload/caddy-ingress ]$ kubectl get ingressclass
NAME     CONTROLLER              PARAMETERS   AGE
avi-lb   ako.vmware.com/avi-lb   <none>       42m
Creating test resources
This article runs nginx to test Ingress.
- Create the following YAML file in any location. Replace
hostwith your own FQDN.
apiVersion: apps/v1
kind: Deployment
metadata:
  name: test-ingress-deployment
spec:
  replicas: 1
  selector:
    matchLabels:
      app: nginx
  template:
    metadata:
      labels:
        app: nginx
    spec:
      containers:
      - name: nginx
        image: nginx:1.21.1
        ports:
        - containerPort: 80

---
apiVersion: v1
kind: Service
metadata:
  name: test-ingress-service
spec:
  selector:
    app: nginx
  ports:
    - protocol: TCP
      port: 80
      targetPort: 80
  type: ClusterIP

---
apiVersion: networking.k8s.io/v1
kind: Ingress
metadata:
  name: test-ingress
spec:
  ingressClassName: avi-lb
  rules:
  - host: test-ingress.example.com
    http:
      paths:
      - path: /
        pathType: Prefix
        backend:
          service:
            name: test-ingress-service
            port:
number: 80- Run the command below to apply the YAML.
MuNeNiCK [ ~/kubernetes/workload/test-ako-ingress ]$ kubectl apply -f test-ingress.yaml
deployment.apps/test-ingress-deployment created
service/test-ingress-service created
ingress.networking.k8s.io/test-ingress created- Run the command below to confirm the creation of the Ingress resource. You can check the IP address assigned to the Ingress controller here.
MuNeNiCK [ ~/kubernetes/workload ]$ kubectl get ingress
NAME           CLASS    HOSTS                      ADDRESS           PORTS   AGE
test-ingress   avi-lb   test-ingress.example.com   192.168.100.108   80      2m22s
Registering DNS records
Register the VIP address assigned to the Ingress controller as a DNS record. This step is not necessary when building the DNS Provider described later. This article registers records in Windows Server DNS.
-
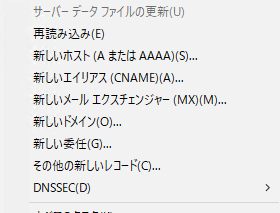
Start DNS Manager and right-click the zone you want to add DNS records to. Then click “New host (A or AAAA)”.
-
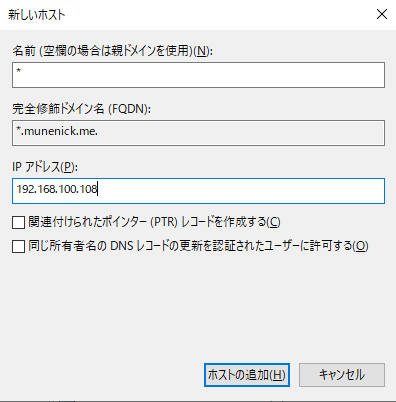
Enter any name and specify the IP address of the Ingress controller. In this example, I specify a wildcard. This forwards records that cannot be resolved by Windows Server DNS to the Ingress controller.
Checking Ingress
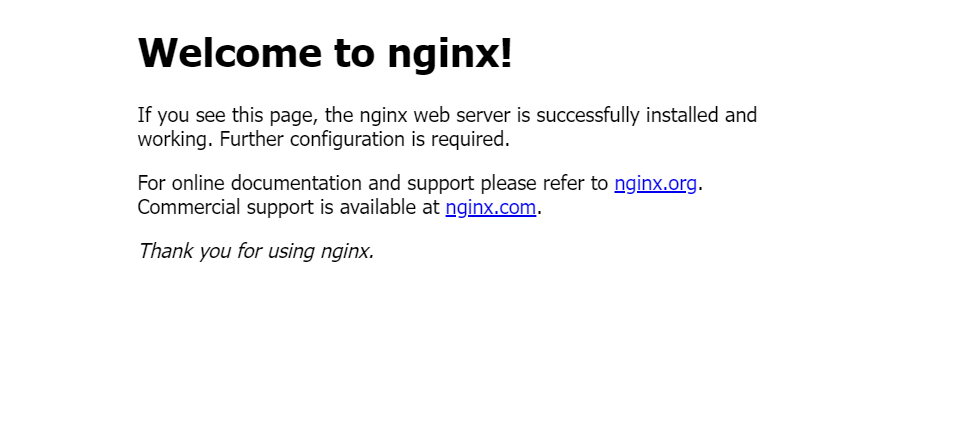
- The configuration is successful if you can access the specified FQDN from your browser.
Building a DNS Provider (optional)
When using AKO Ingress, setting “shardVSSize” to a value other than “SMALL” creates multiple virtual services. Clients then access the address assigned to each virtual service, which is the VIP address. With a regular DNS server, resolving hostnames across multiple addresses is not easy. By using the NSX ALB DNS Provider, you can dynamically update records and resolve hostnames from multiple IP addresses.
DNS Profile settings
-
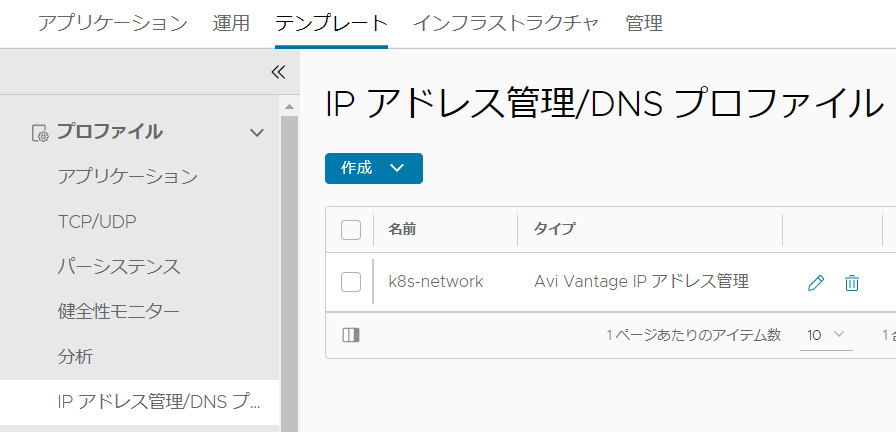
Click the “Create” button in “Template” → “Profile” → “IP address management/DNS profile” and click “DNS profile”.
-
Set the following items.
- Name: Set any name. This article uses “k8s-dns”.
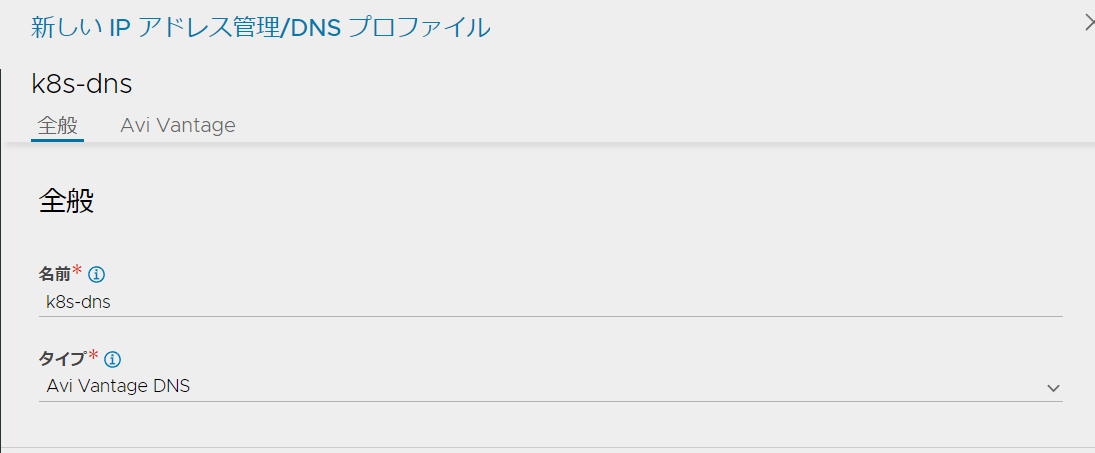
- DNS Service Domain: Click the Add button and enter your domain name.
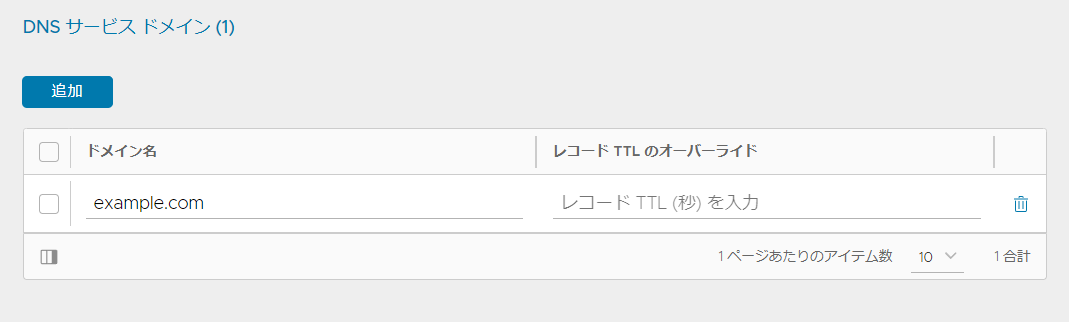
- Name: Set any name. This article uses “k8s-dns”.
When you have finished entering this information, click the “Save” button at the bottom right.
Apply to Default-Cloud
-
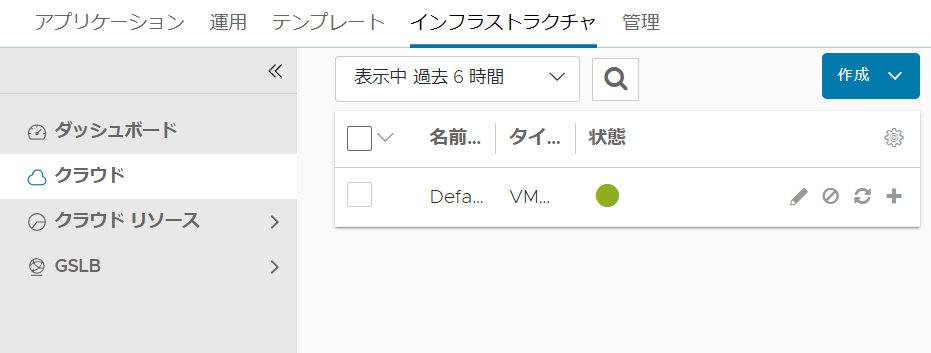
Click the edit button (pencil icon) for “Infrastructure” → “Cloud” → “Default-Cloud”.
-
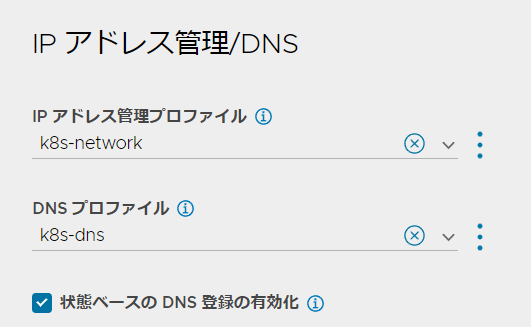
In “IP Address Management/DNS”, specify the DNS profile you created earlier for “DNS Profile”.
Creating a virtual service for DNS
-
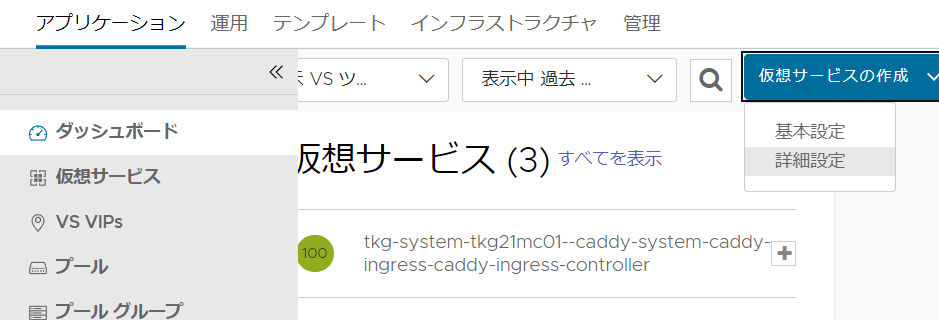
Click “Dashboard” → “Create Virtual Service” and click “Advanced Settings”.
-
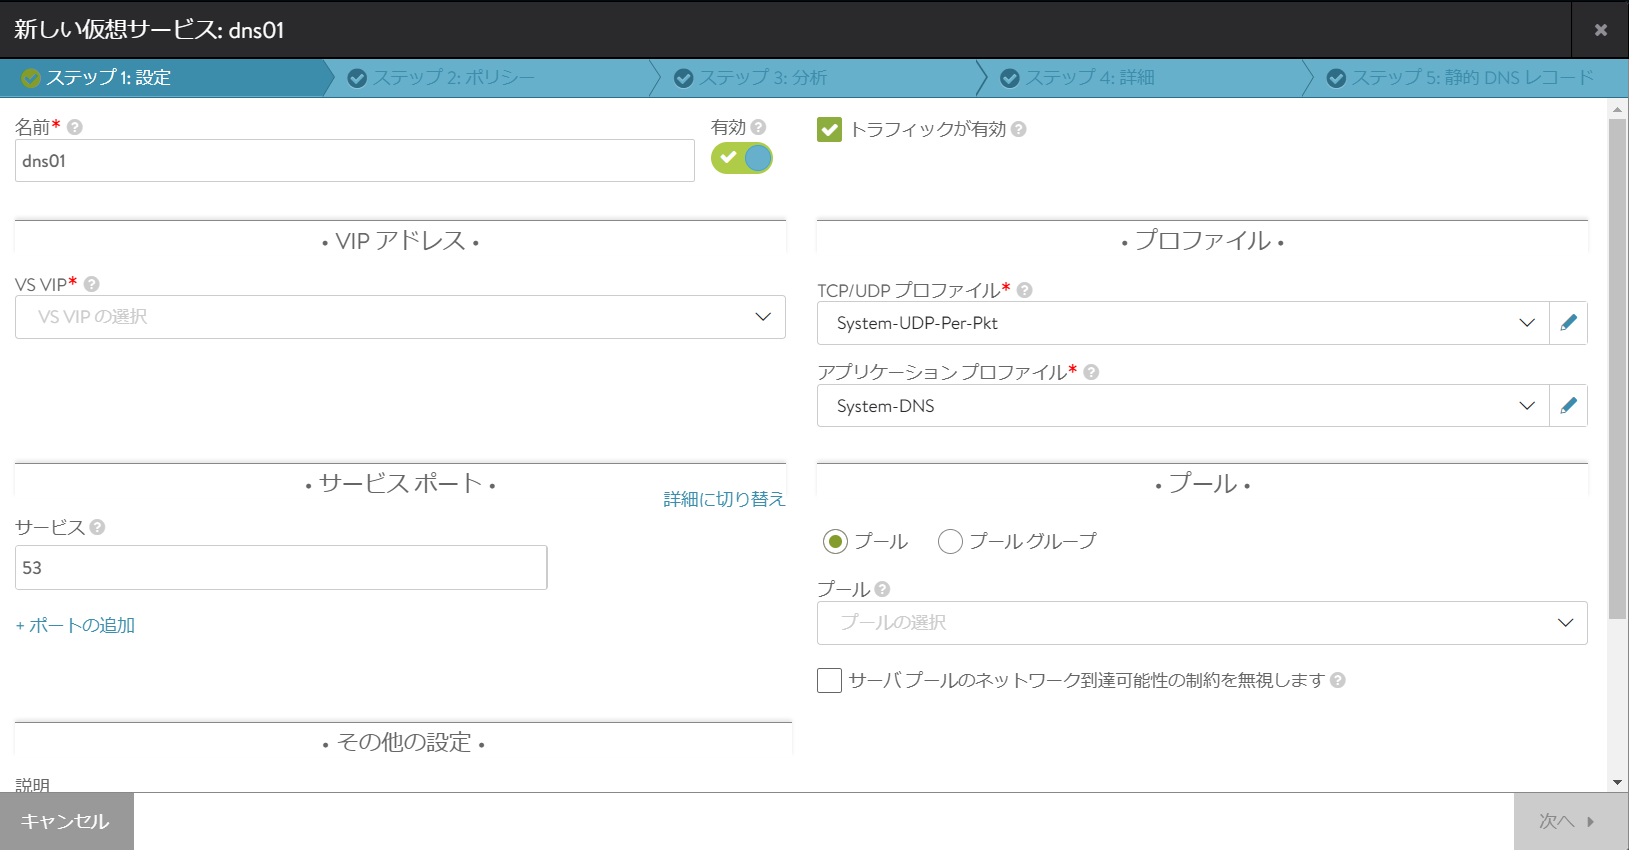
First, set the following items.
- Name: Set any name. This article uses “dns01”.
- Application profile: Specify “System-DNS” from the pull-down menu.
-
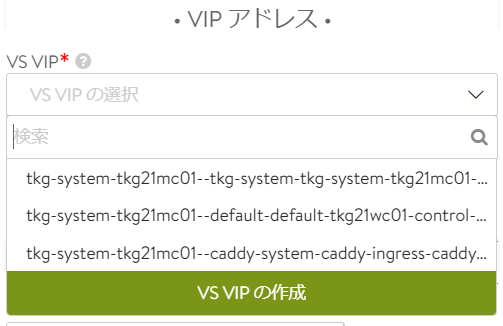
Next, set the VIP address. Click “Create VS VIP” from the “VS VIP” pull-down menu.
-
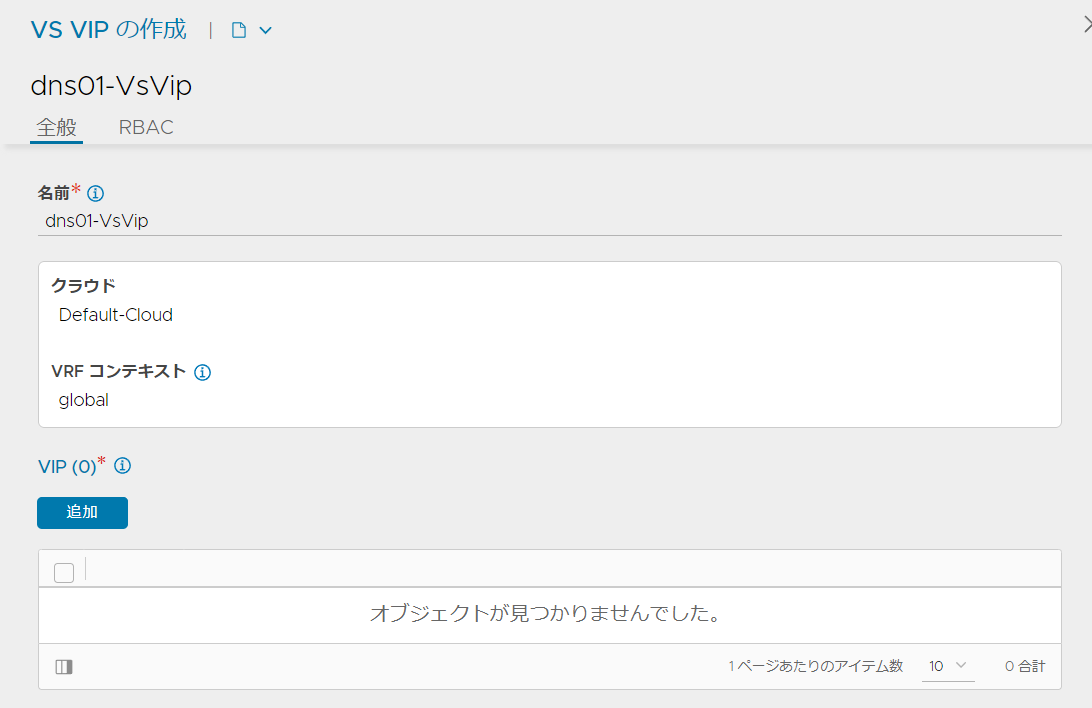
When “Create VS VIP” opens, click the “Add” button in the “VIP” item.
-
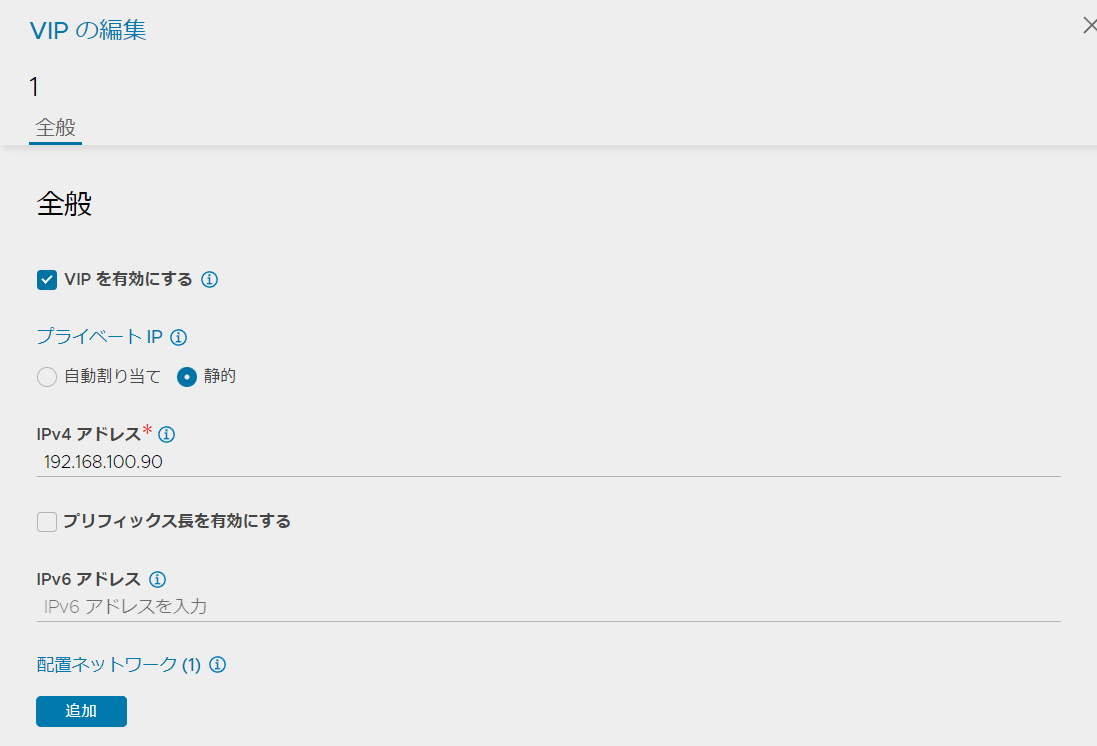
In “Edit VIP”, set the private IP according to your requirements. This article selects “Static” to set a static address and assigns an IP address to “IPv4 address”. The IP address set here becomes the DNS server address. However, the IP address set here should be outside the address range specified in NSX ALB network settings.
-
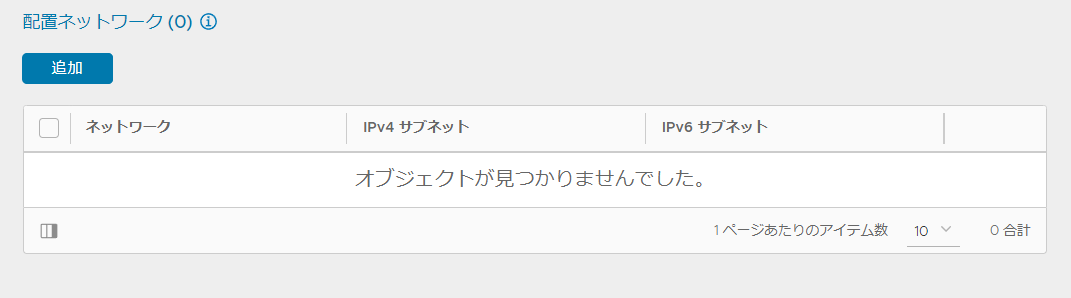
In “Edit VIP”, click the “Add” button for “Deployment Network”.
-
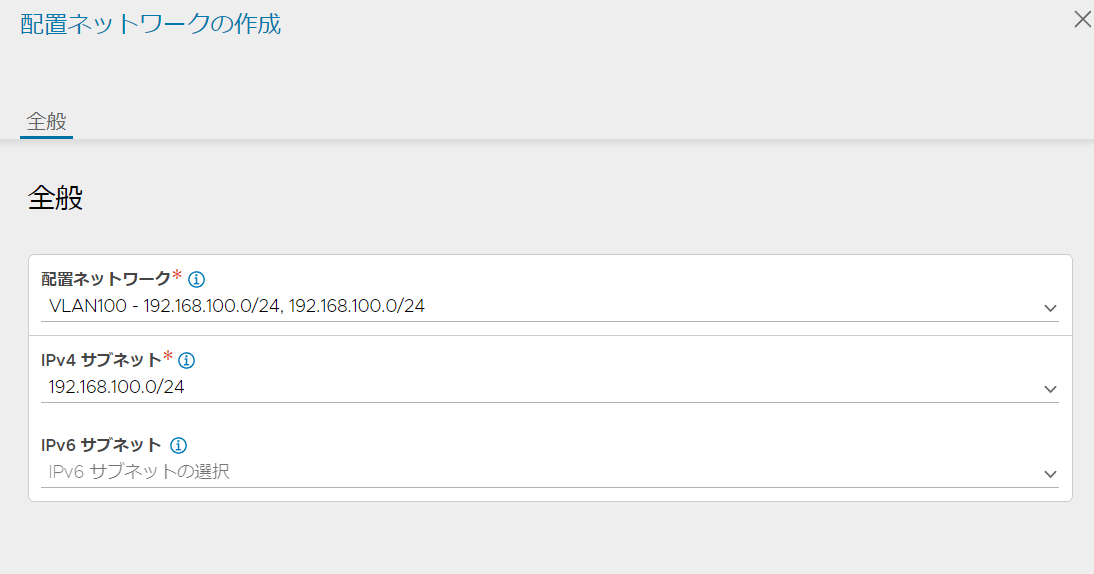
In “Create a deployment network”, specify the deployment network in “Deployment network” and the network address in “IPv4 subnet”. This article specifies the Kubernetes network.
-
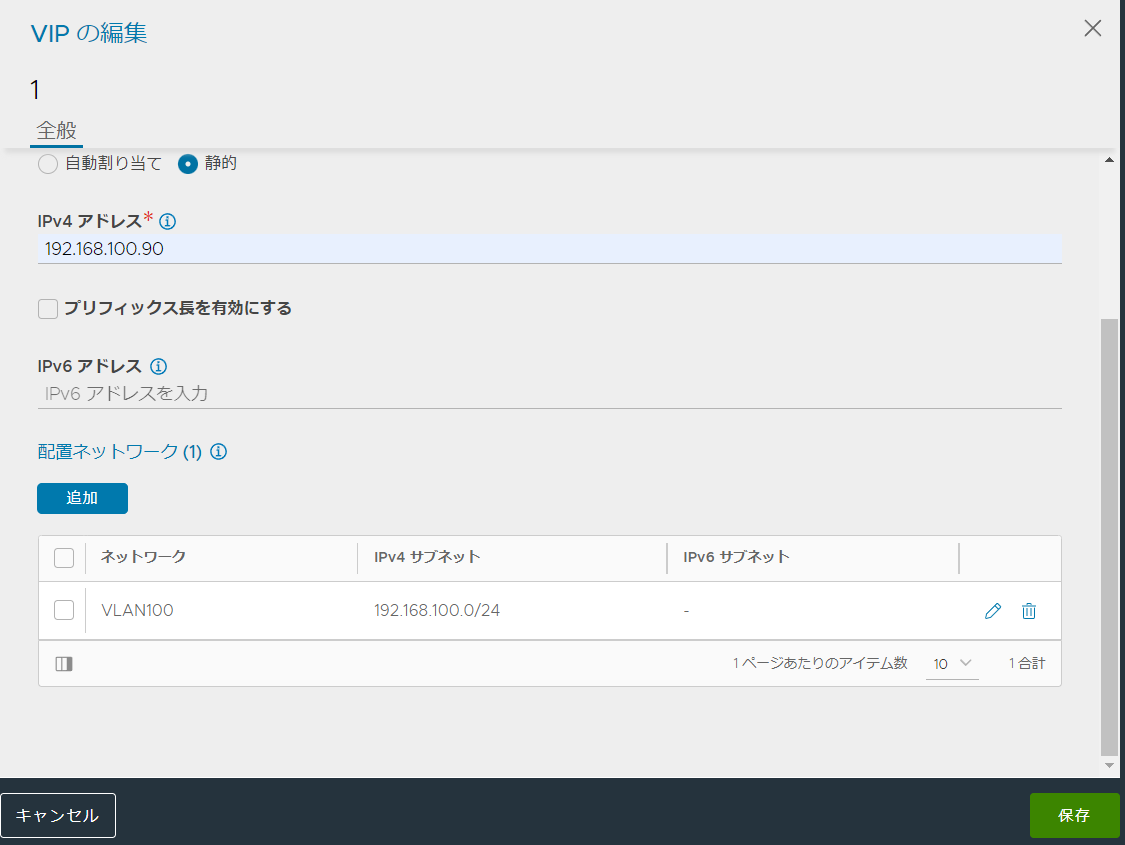
After completing these settings, click “Save” at the bottom right of “Edit VIP”.
-
Click “Add” in the “DNS” column of “Create VS VIP”.
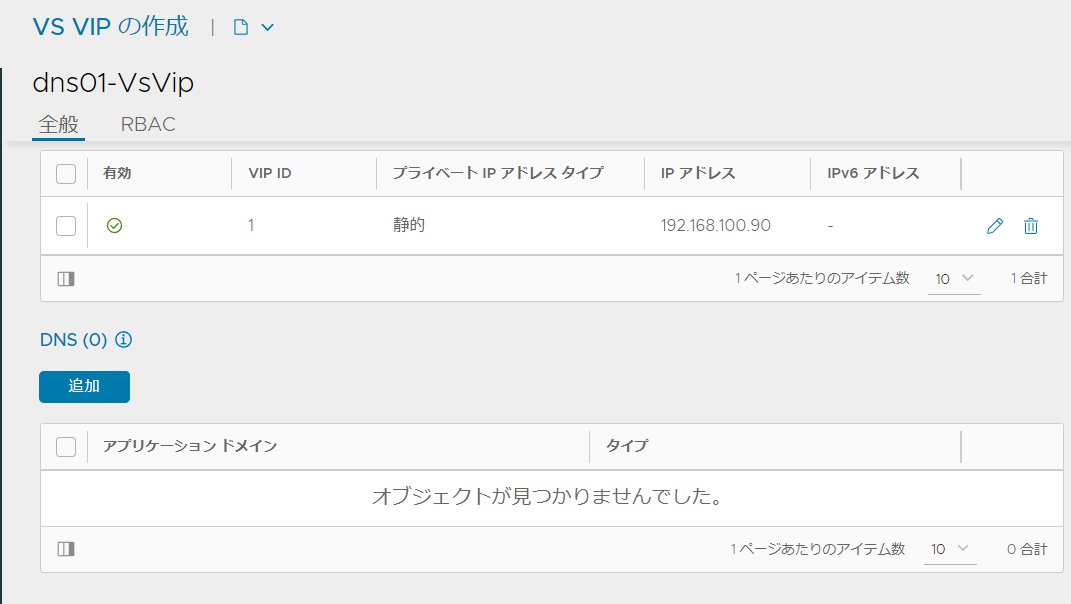
-
Set the following items in “Create DNS”.
- Application domain name: This is the domain name of the name server. This article uses “dns01”.
- TTL: Set the TTL. This article uses 300.
-
After completing the settings up to this point, click “Save” at the bottom right of “Edit VS VIP”.
-
If you have an existing DNS server, you can configure it as a forwarder. If you do not have an existing DNS, you can skip this step. Open the “Select Pool” pull-down menu under “Pools” and click “Create Pool”.
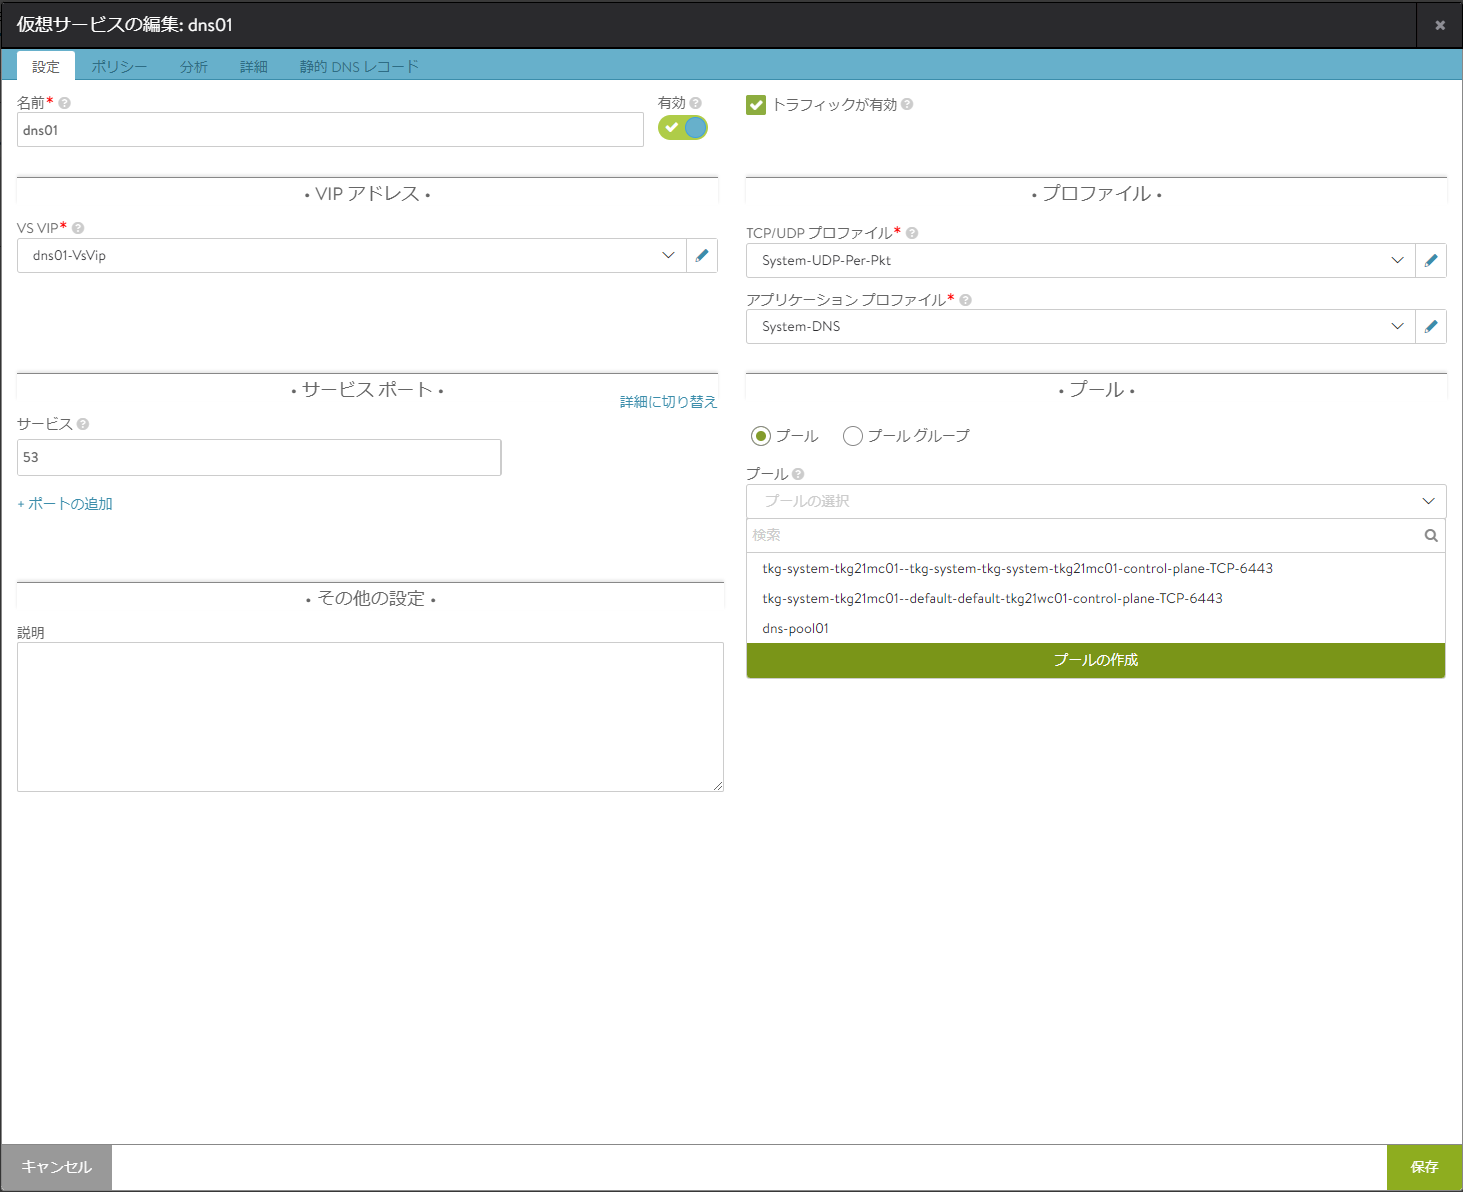
-
Enter the following items here and click “Save” at the bottom right.
-
Name: Enter any pool name.
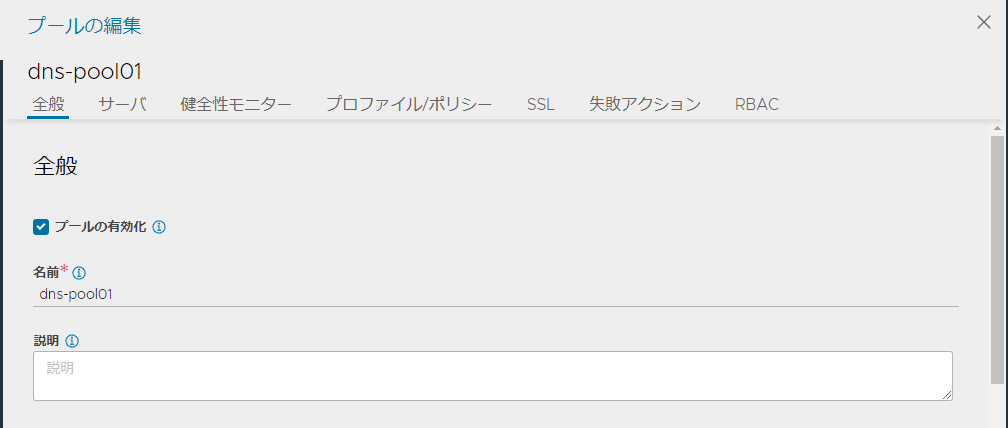
-
Server: Enter the IP address of your existing DNS server and click the Add button.
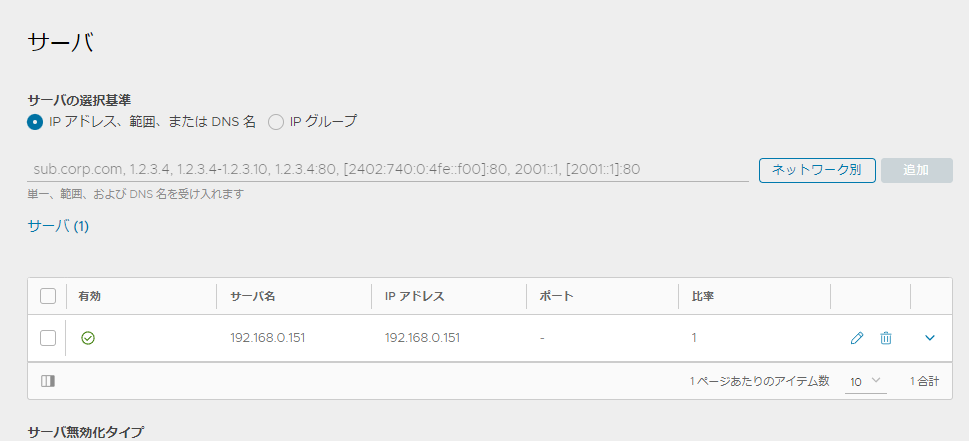
-
-
When you return to “New Virtual Service”, click “Next” at the bottom right.
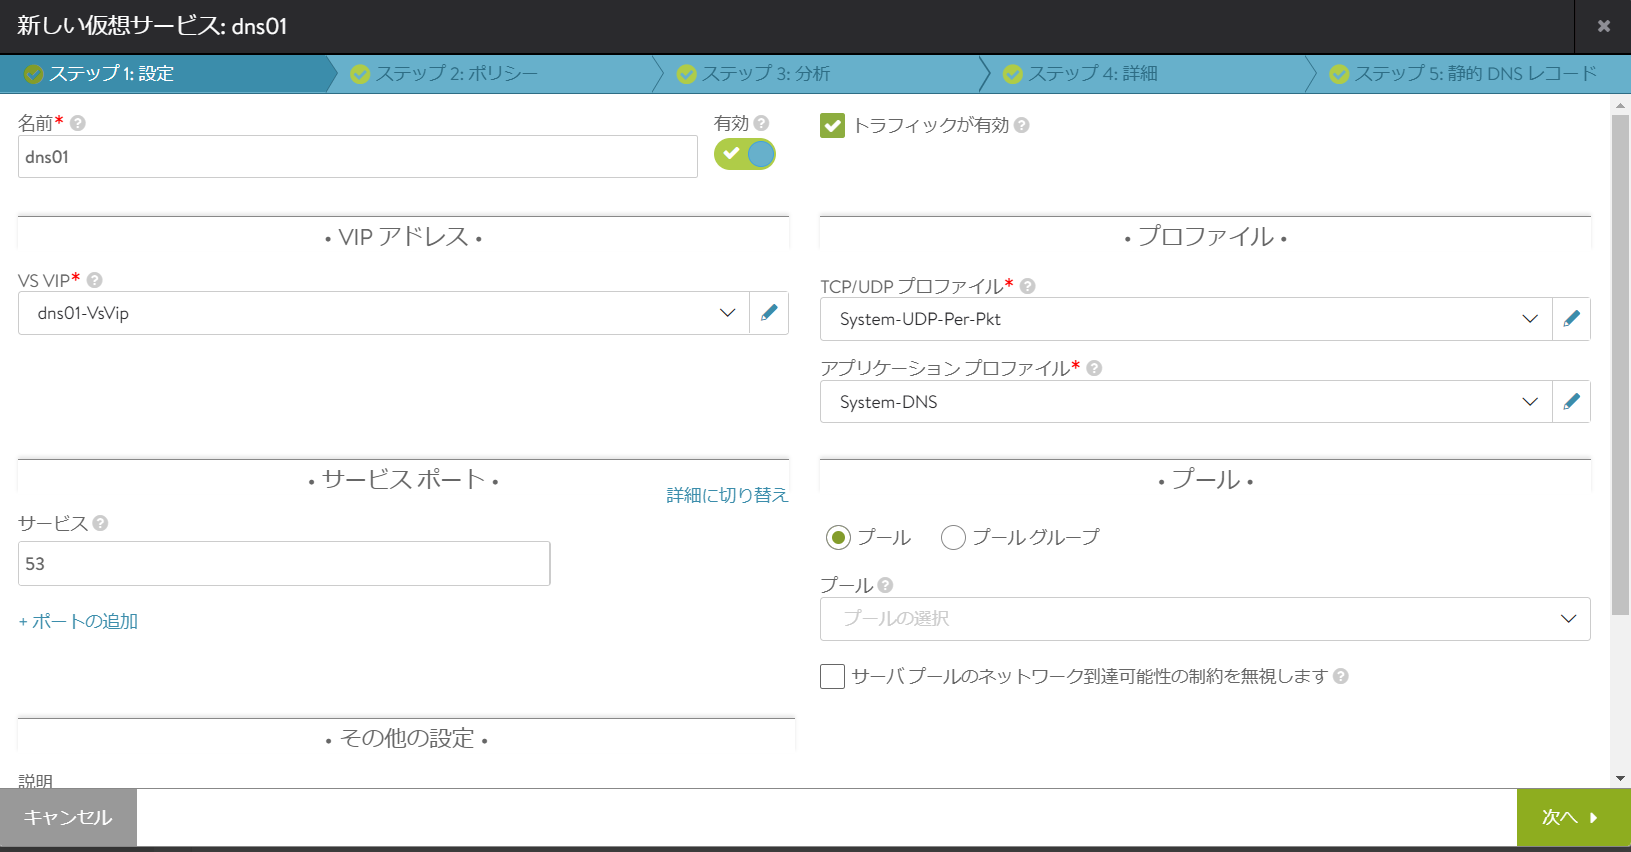
-
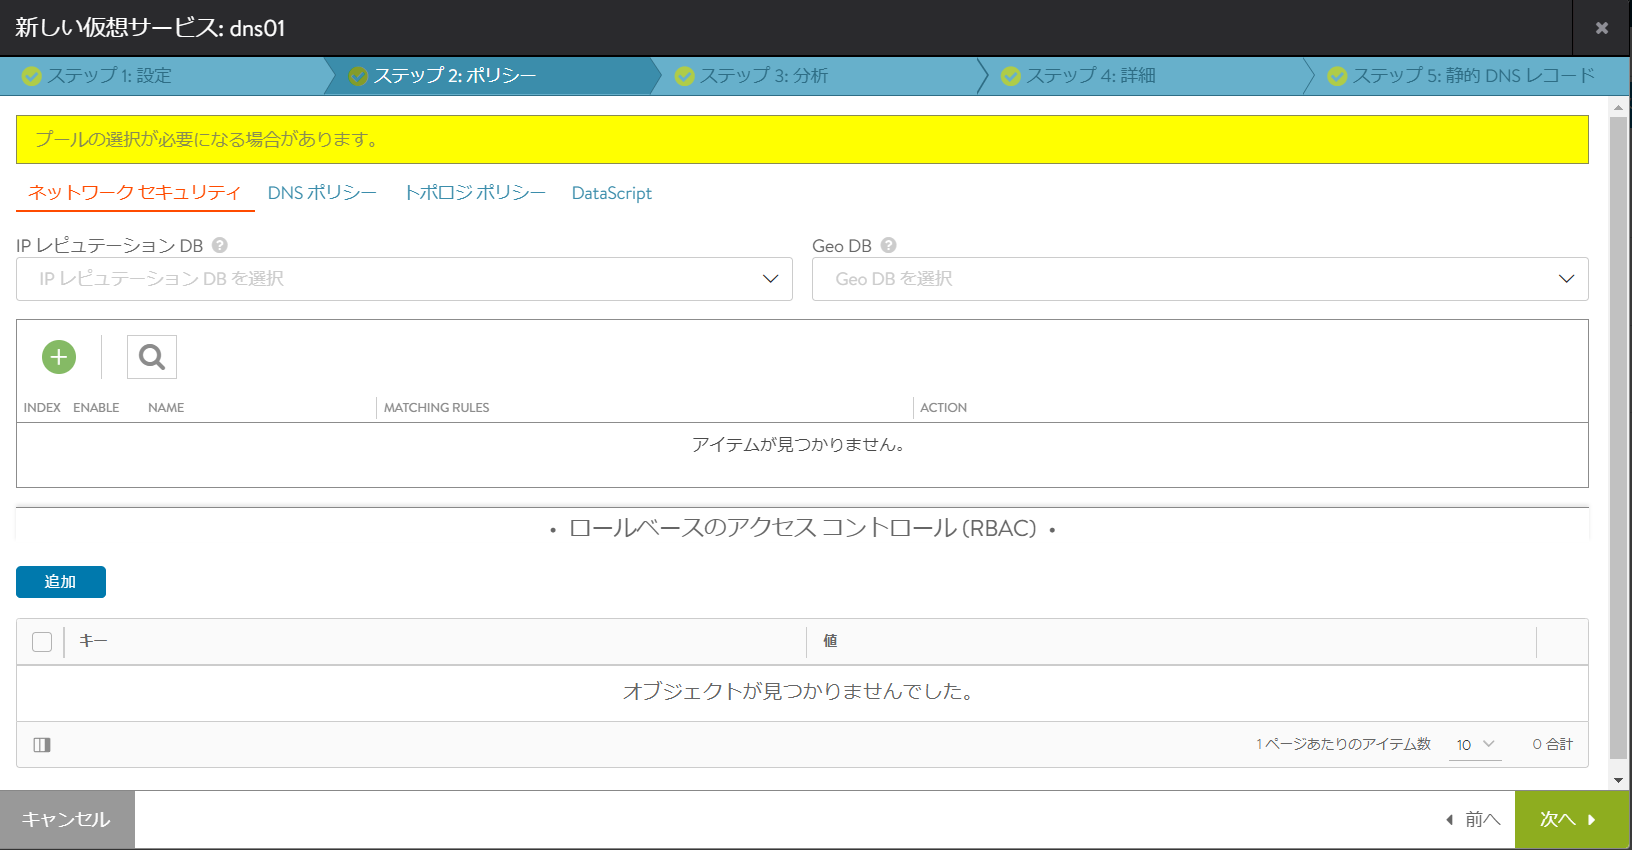
In “Step 2: Policy”, you can specify the policy. This article uses the default. After completing the settings, click “Next” at the bottom right.
-
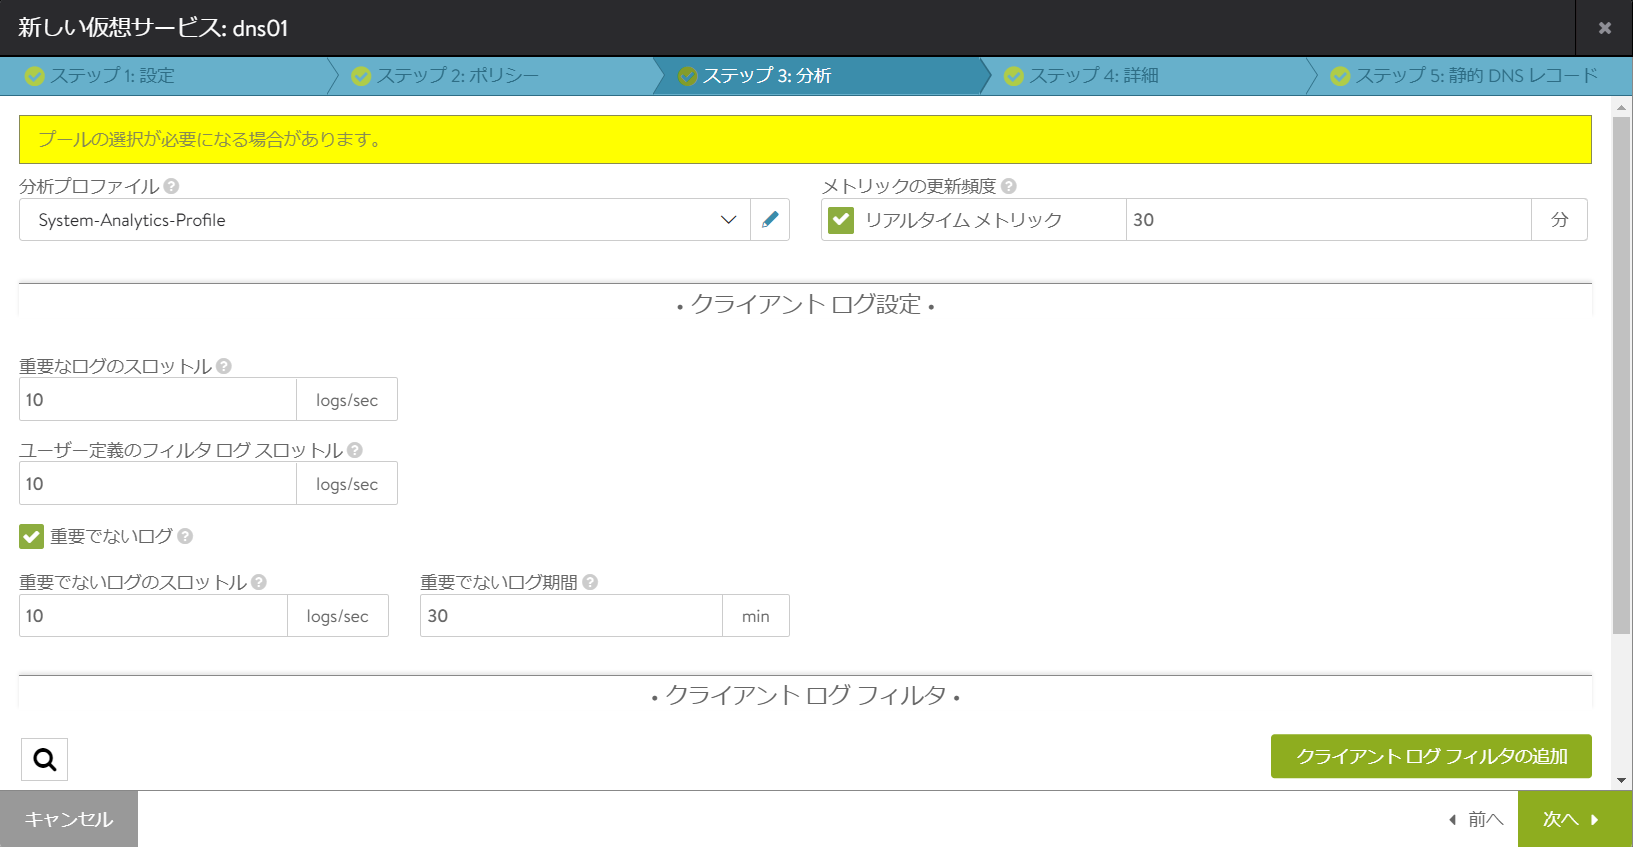
“Step 3: Analysis” lets you configure analysis settings for this virtual service. This article uses the default. After completing the settings, click “Next” at the bottom right.
-
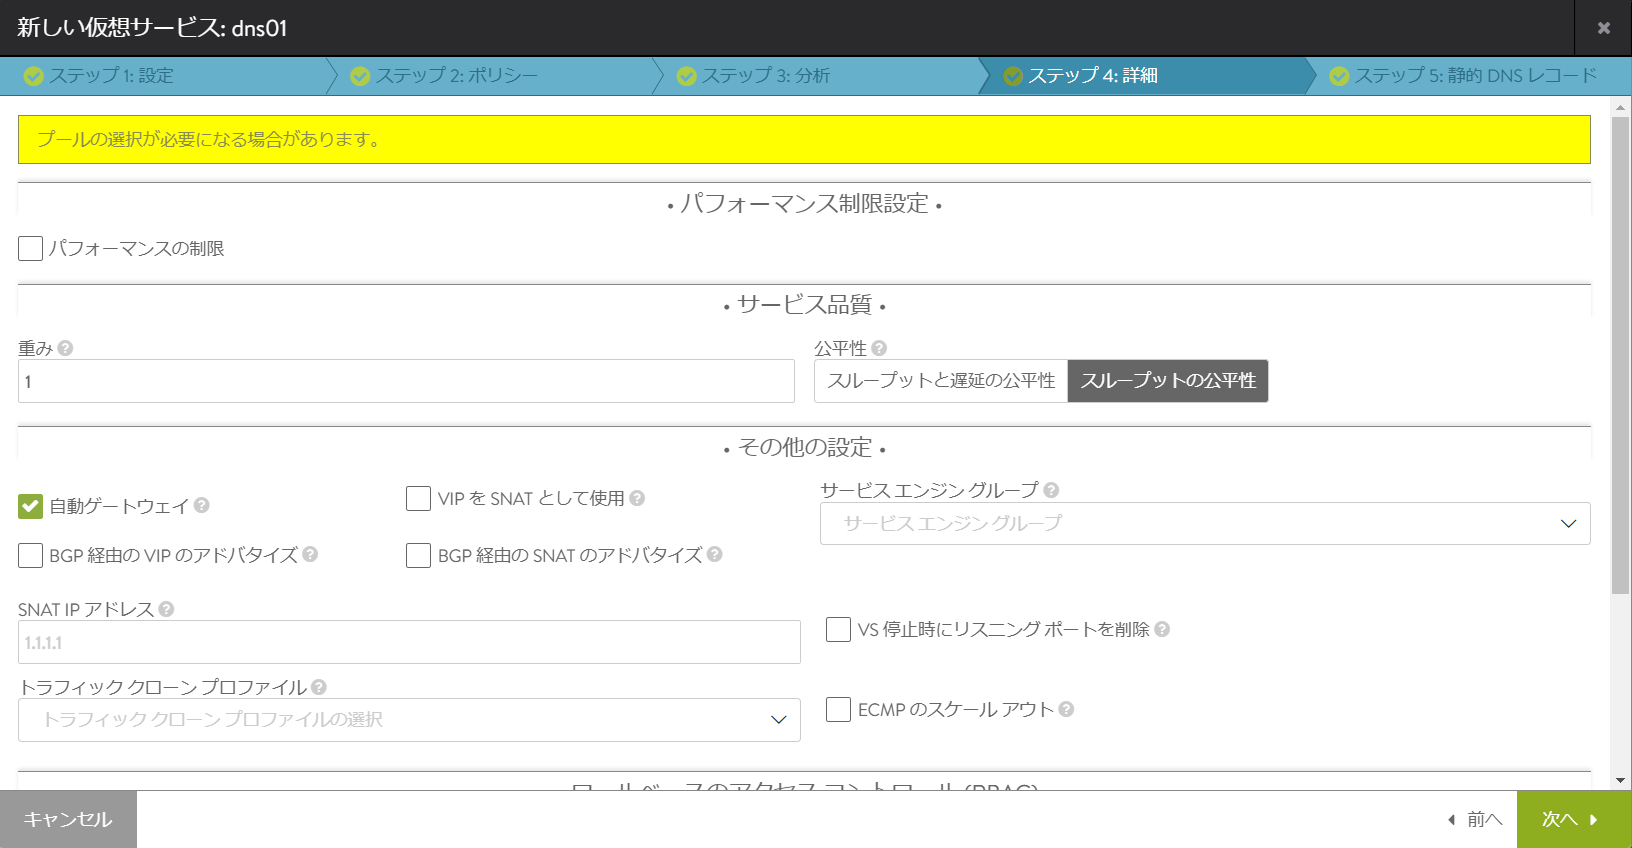
In “Step 4: Details”, you can set performance limits and related settings for the virtual service. This article leaves “Advertise via BGP” unchecked. After completing the settings, click “Next” at the bottom right.
-
“Step 5: Static DNS Records” allows you to manually set up DNS records.
Applying the DNS virtual service to the system
-
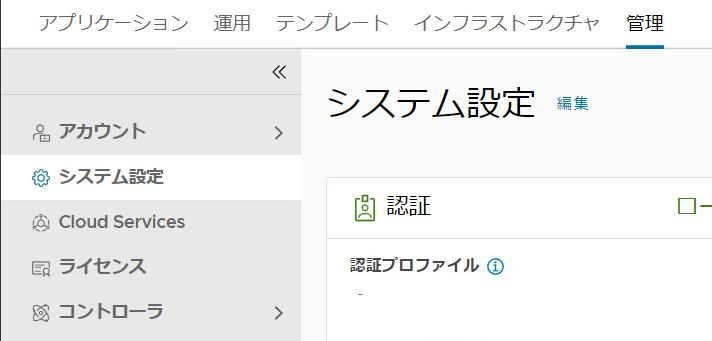
Go to “Administration” → “System Settings” and click “Edit”.
-
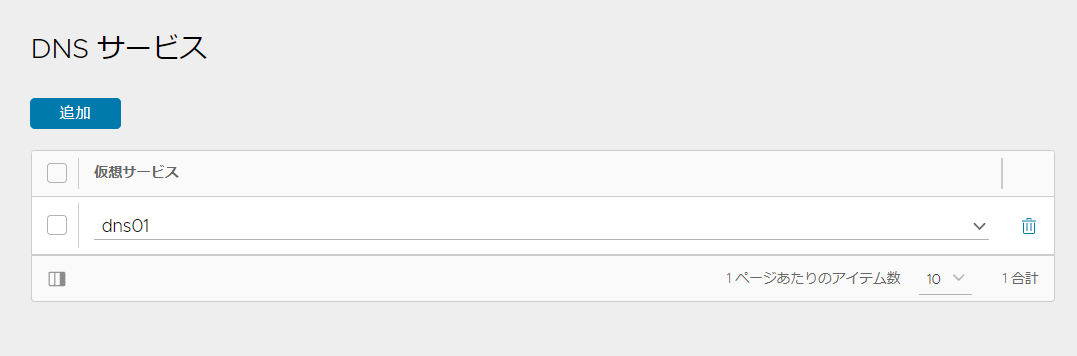
Click the “Add” button for “DNS Service” at the bottom and select the DNS virtual service you created earlier. Then click the “Save” button at the bottom right.
DNS settings
Set the client’s DNS server to the NSX ALB DNS virtual service. This article uses Windows settings as an example.
-
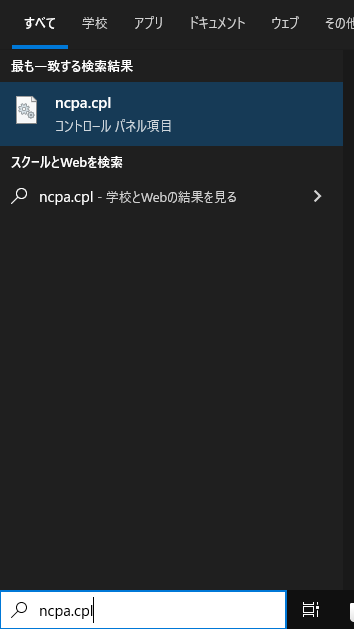
Search for “ncpa.cpl” in the search field.
-
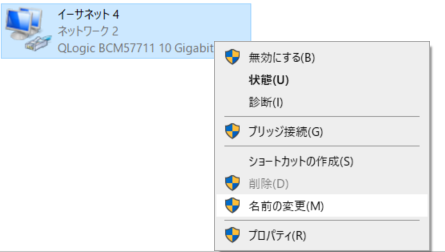
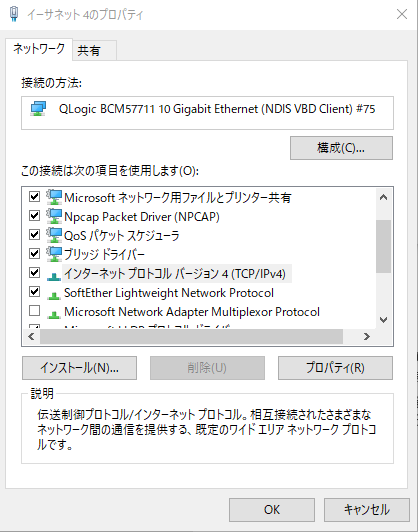
Right-click your Ethernet and click Properties.
-
Click “Properties” for “Internet Protocol Version 4”.
-
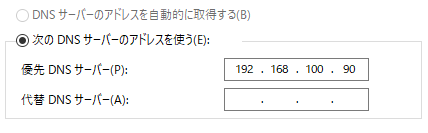
Specify the VIP address of the NSX ALB’s DNS Provider in “Preferred DNS Server”.
DNS validation
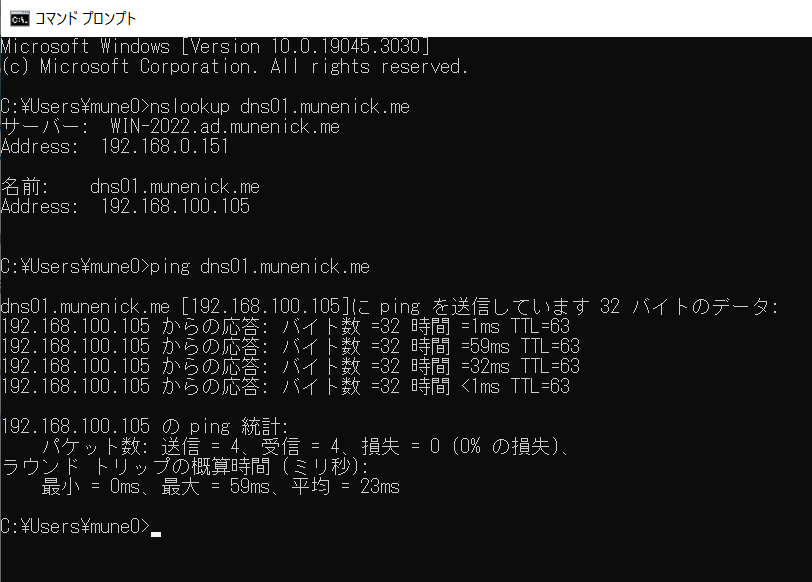
Use the “nslookup” or “ping” command on the client PC to verify DNS. You can confirm that the A record set as a static DNS record can be resolved.
Next time
Undecided