Introduction
In a VMware vSphere environment, Tanzu Kubernetes Grid (TKG) makes it easy to build a Kubernetes environment. This article uses the standalone, multi-cloud-compatible TKGm edition. NSX ALB continues to use the Essentials license. This article covers the preparation steps and how to build the Bootstrap machine.
Last time
This article assumes that NSX ALB has already been built. If you have not built NSX ALB yet, refer to the article below first.
Environment
| Environment |
|---|
| VMware ESXi 8 |
| VMware vCenter 8 |
| Tanzu Kubernetes Grid 2.1.1 |
| NSX Advanced Load Balancer 22.1.3 |
Prerequisites
- Ability to build VMware ESXi and manage the datacenter with vCenter
- Two or more VLAN networks are available.
- In this environment, I prepared a management network, VM Network (VLAN0), and a Kubernetes network, VLAN100 (VLAN100).
- Servers and storage with sufficient resources
- NSX ALB uses CPU: 8, RAM: 24GB, ROM: 128GB.
- Depending on the requirements, 4 to 12 virtual machines with CPU: 2, RAM: 8GB, and ROM: 40GB are deployed as Kubernetes nodes.
Preparing the required files
Several files are required when building TKG. Prepare them first.
-
Visit the site below. https://customerconnect.vmware.com/downloads/details?downloadGroup=TKG-211&productId=1400&rPId=100663
-
Log in with your VMware Customer Connect account.
-
Download the files for the following items. *Two OVA files are available: Photon v3 and Ubuntu 2004. Choose the one that matches your requirements. This article uses Photon OS because it is lighter than Ubuntu.
| Item name | File name |
|---|---|
| VMware Tanzu CLI for Linux | tanzu-cli-bundle-linux-amd64.tar.gz |
| Photon v3 Kubernetes v1.24.10 OVA or Ubuntu 2004 Kubernetes v1.24.10 OVA | photon-3-kube-v1.24.10+vmware.1-tkg.1-fbb49de6d1bf1f05a1c3711dea8b9330.ova or ubuntu-2004-kube-v1.24.10+vmware.1-tkg.1-765d418b72c247c2310384e640ee075e.ova |
| kubectl cli v1.24.10 for Linux | kubectl-linux-v1.24.10+vmware.1.gz |
Preparing vCenter
Complete a few preparation steps in vCenter before building TKG.
Create folders
-
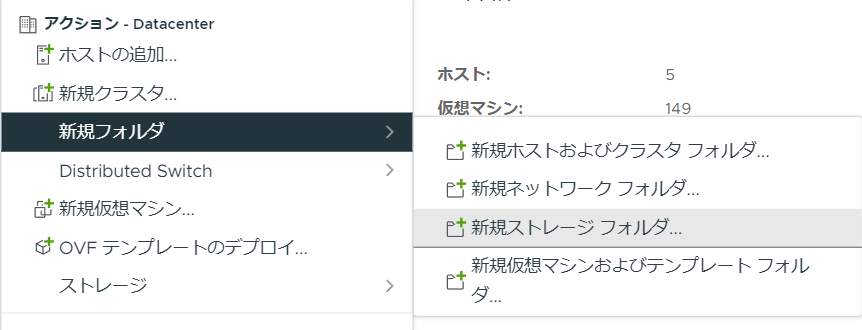
Right-click Datacenter, click New Folder, then New Virtual Machine and Template Folder.
-
Enter any folder name. This article uses “TKG”.

-
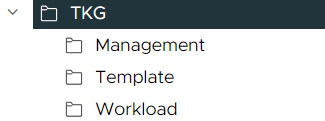
Create the following folders in the TKG folder using the same procedure. These names are only examples, so change them as needed.
- Management
- Workload
- Template
Creating a TKR template
In TKG, you deploy the OVA downloaded earlier and convert it to a template. TKG uses this template as the node image for the TKR.
Deploying the OVA
-
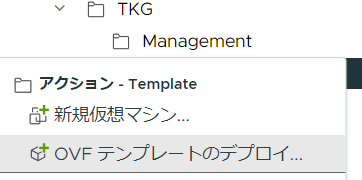
Right-click the “Template” folder in the TKG folder you created earlier and click “Deploy OVF Template”.
-
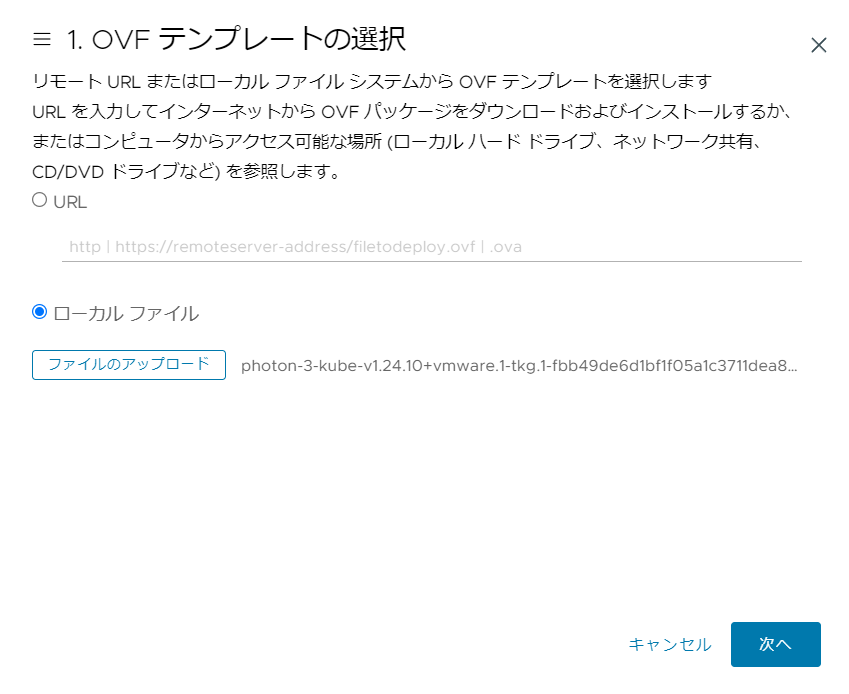
Select Local Files and select the OVA file you downloaded earlier (Photon v3 Kubernetes v1.24.10 OVA or Ubuntu 2004 Kubernetes v1.24.10 OVA).
-
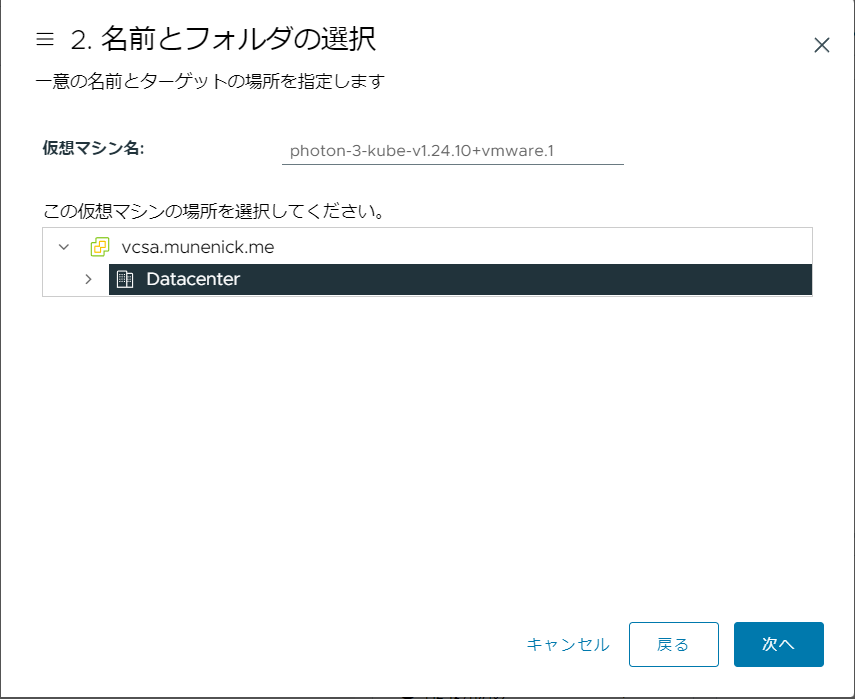
Do not change the virtual machine name in the name and folder selection. Make sure the virtual machine location is “TKG” → “Template”.
-
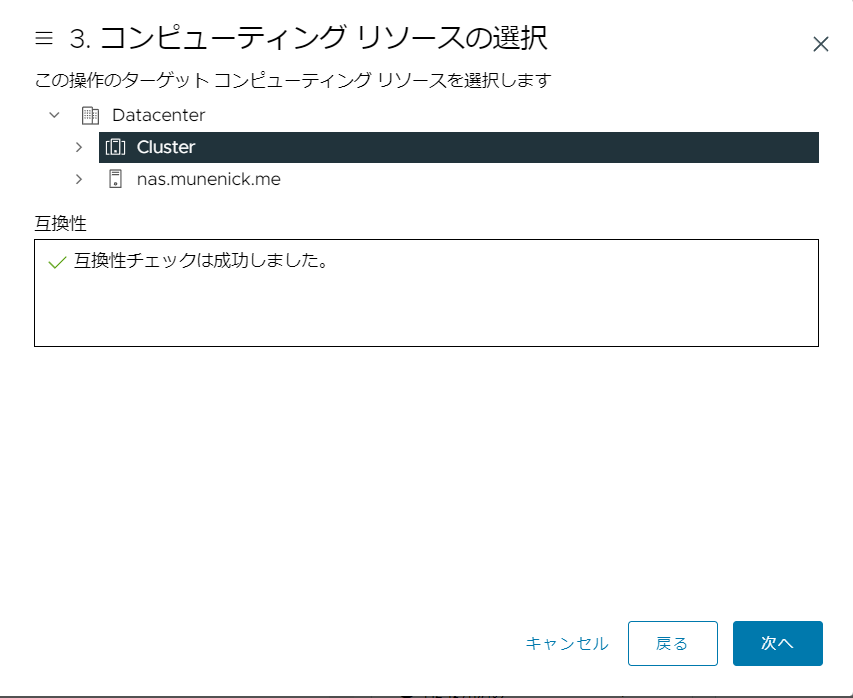
When selecting compute resources, specify the datacenter, cluster, or host that is appropriate for your environment.
-
After verifying the details, click Next.
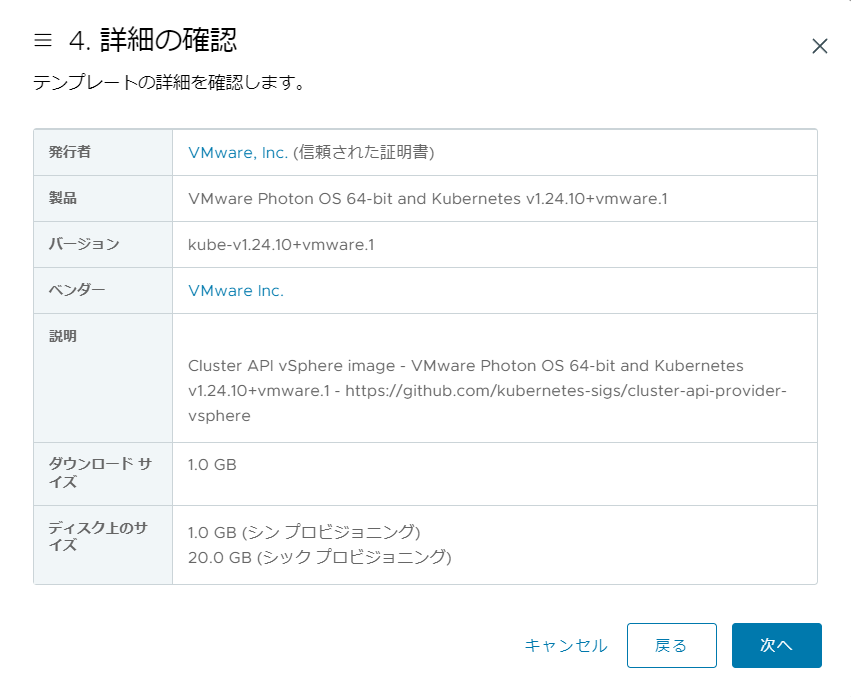
-
In the license agreement, check “I agree to all license terms” and click “Next”.
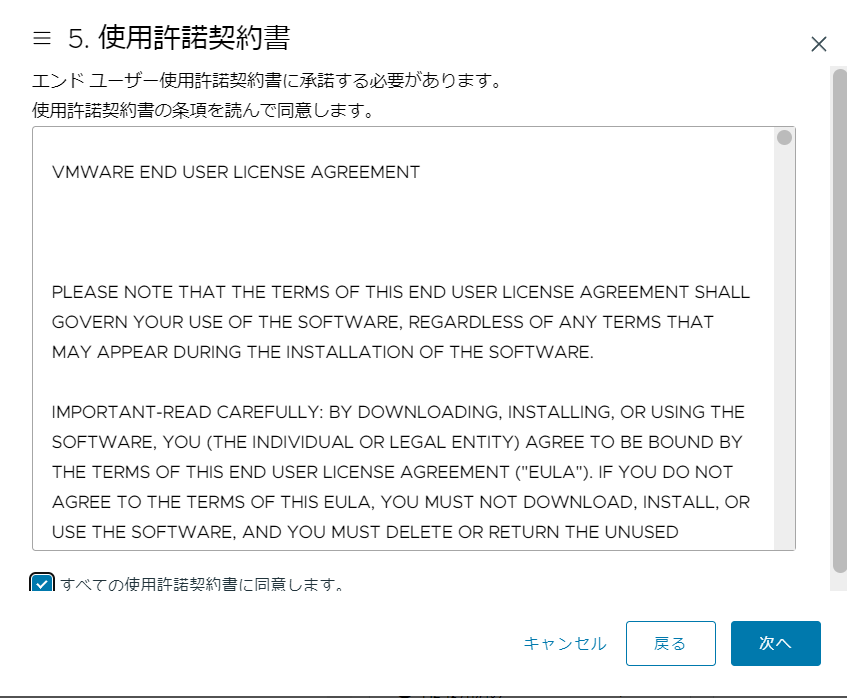
-
When selecting storage, choose the storage that suits your environment.
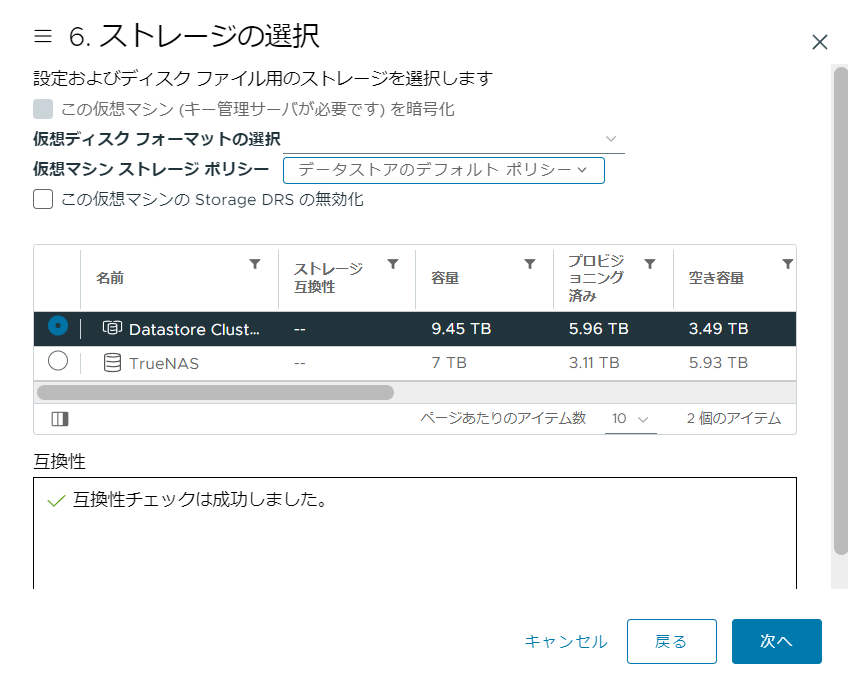
-
When selecting the network, the default is fine because the network interface will be overwritten when building TKG.
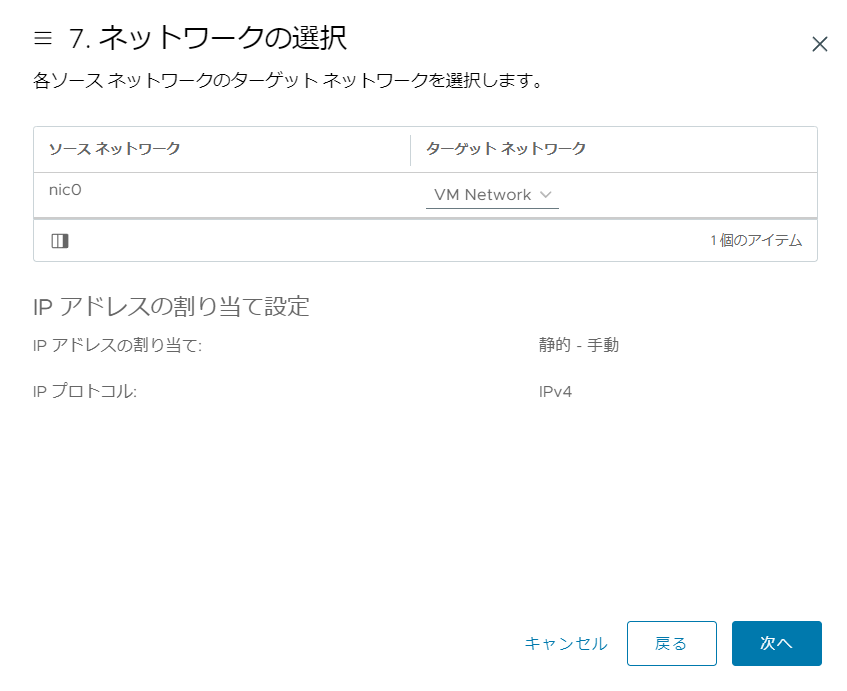
-
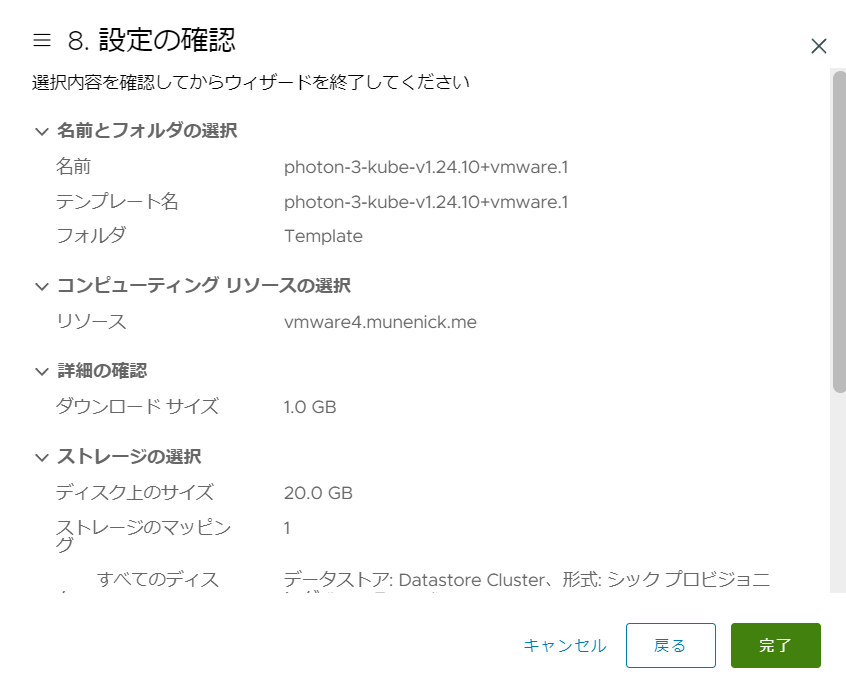
After confirming the settings, click “Finish” to deploy the OVA.
Convert to template
-
Right-click Photon v3 or Ubuntu 2004 in the “TKG” → “Template” folder and click “Template” → “Convert to Template”.

-
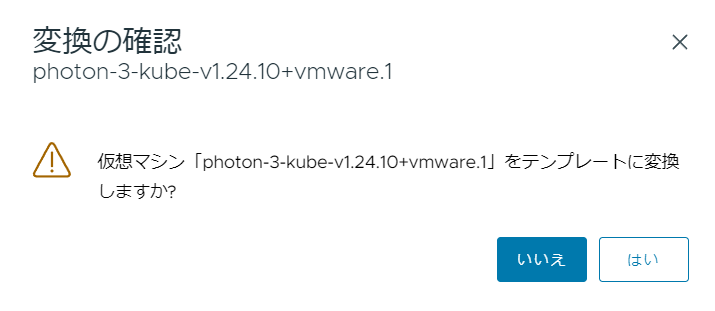
Click “Yes” to confirm the conversion.
-
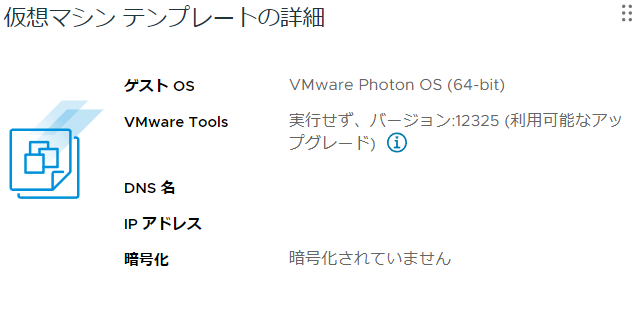
Open the virtual machine. If you see “Virtual Machine Template Details”, the template is ready.
Creating a Bootstrap machine
Tanzu Kubernetes Grid first uses a Bootstrap machine to build the Management Cluster. The Bootstrap machine runs Docker, starts Cluster API on a Kubernetes cluster called kind, and creates Kubernetes nodes on vSphere.
Creating a virtual machine for Bootstrap
Any machine running Docker can act as the Bootstrap machine. This article creates one by deploying Photon OS from an OVA.
-
Access the site below. https://github.com/vmware/photon/wiki/Downloading-Photon-OS
-
Copy the link for “OVA with virtual hardware v15 (Supports both BIOS and UEFI boot, default is UEFI)” in the Downloading Photon OS 5.0 GA column. You can also copy the URL below. https://packages.vmware.com/photon/5.0/GA/ova/photon-hw15-5.0-dde71ec57.x86_64.ova
-
Log in to vCenter.
-
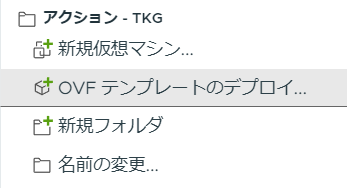
Right-click the “TKG” folder and click “Deploy OVF Template”.
-
When selecting an OVF template, paste the URL you copied earlier.
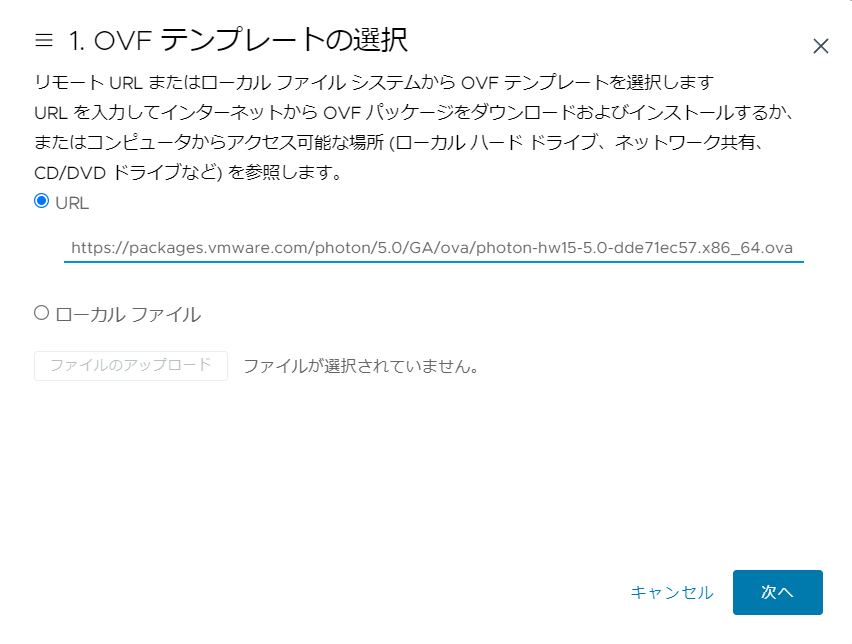
-
When verifying the source, you will receive a warning; click “Yes” to continue.
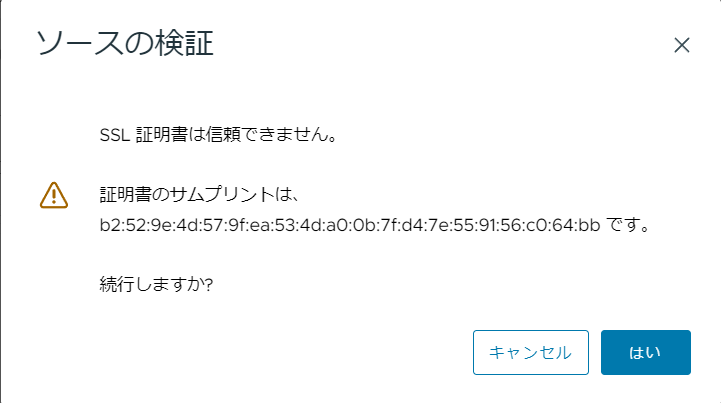
-
When selecting the name and folder, specify any name and make sure the “TKG” folder is selected.
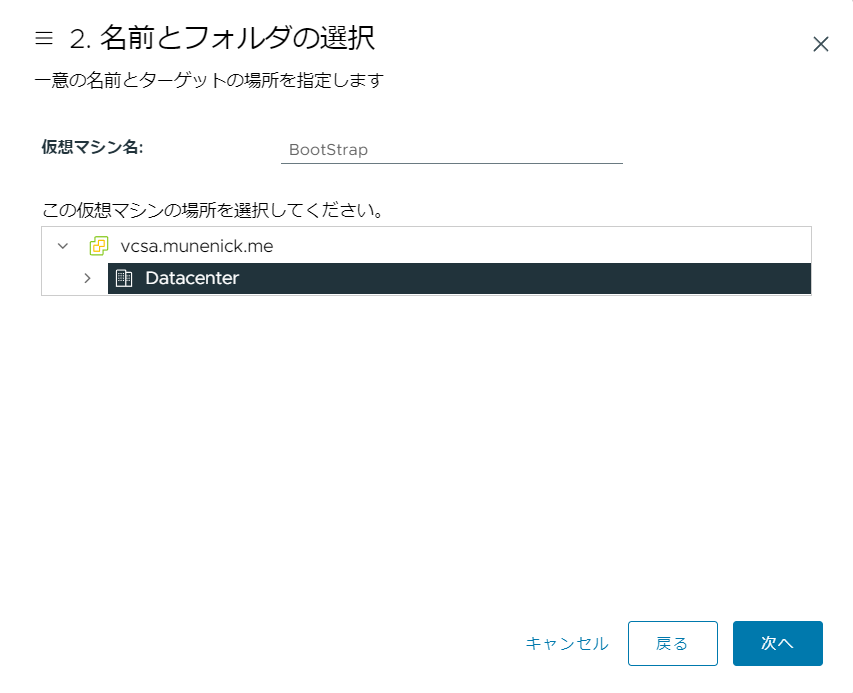
-
When selecting compute resources, choose resources that match your environment.
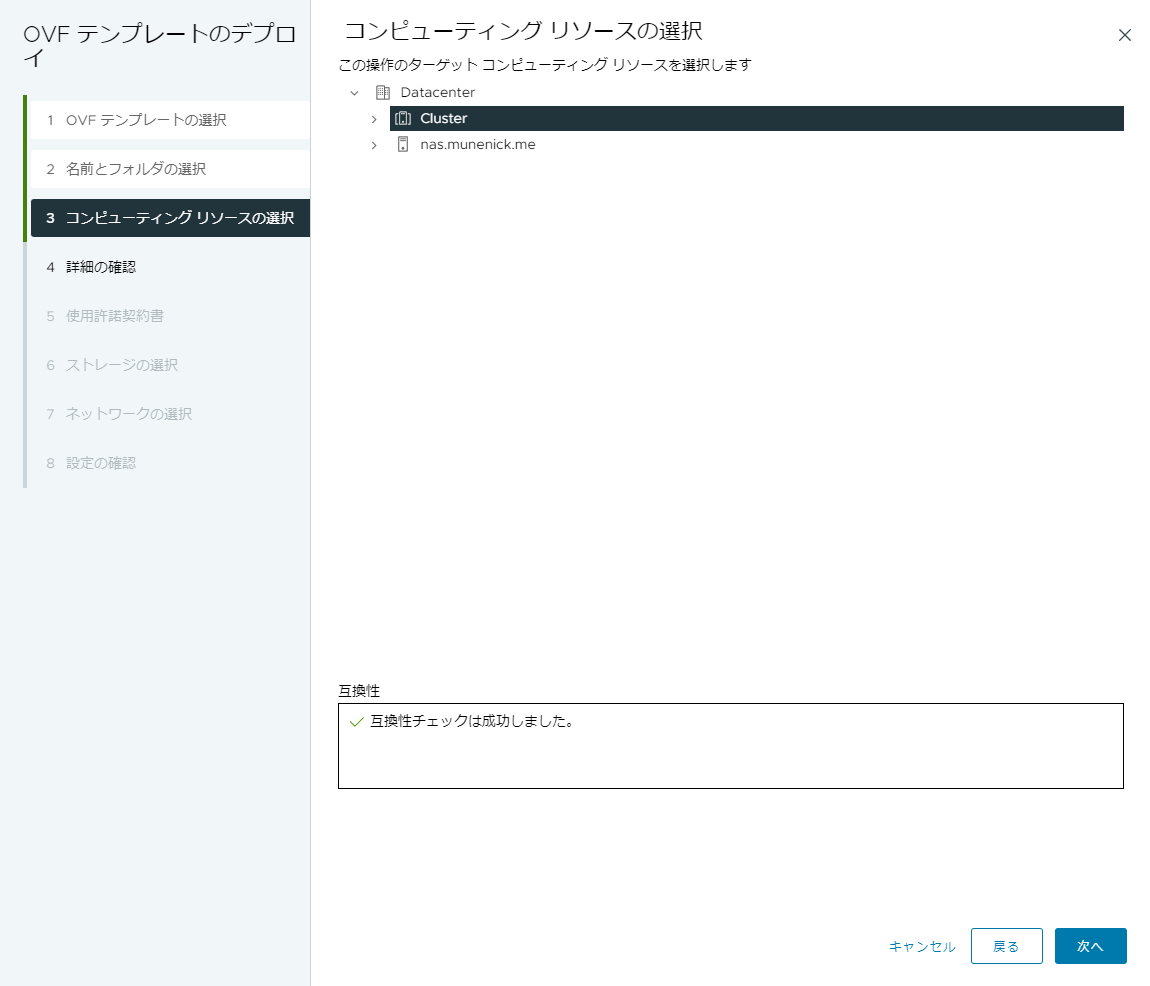
-
After confirming the details, click “Next”.
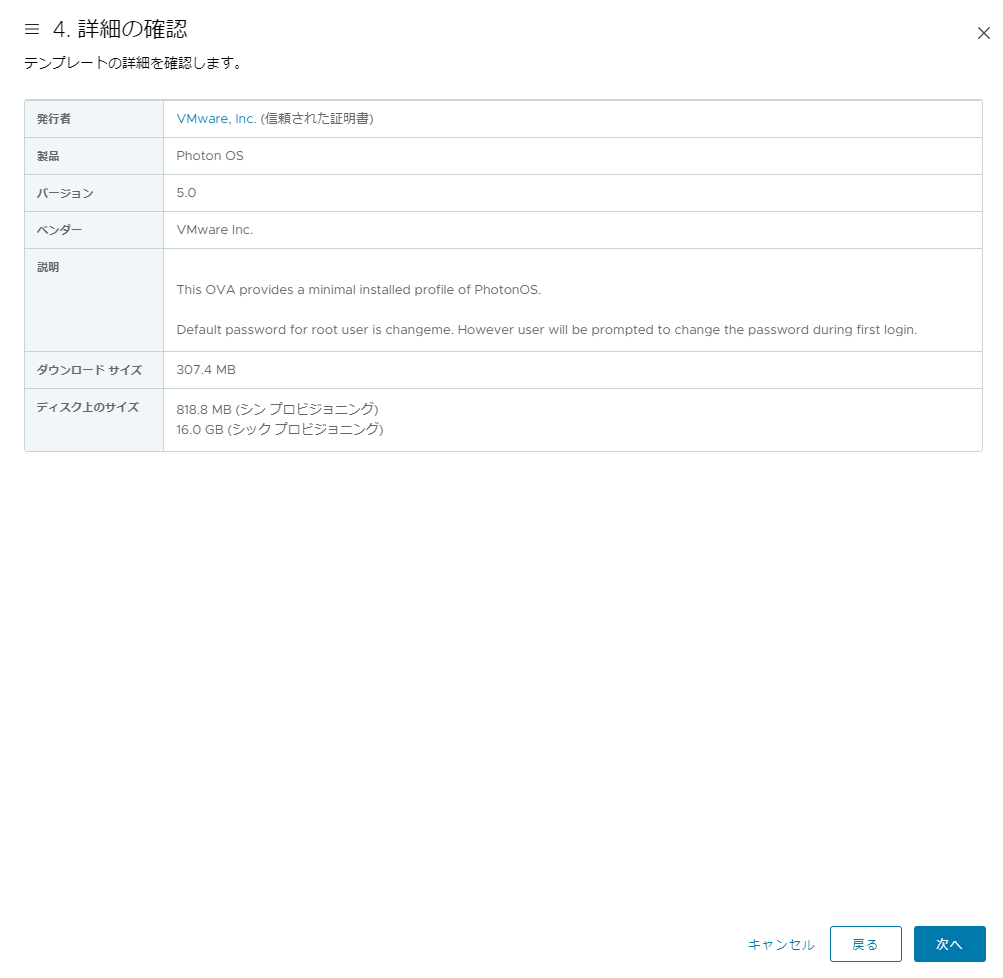
-
To confirm the license agreement, check “Agree” and click “Next”.
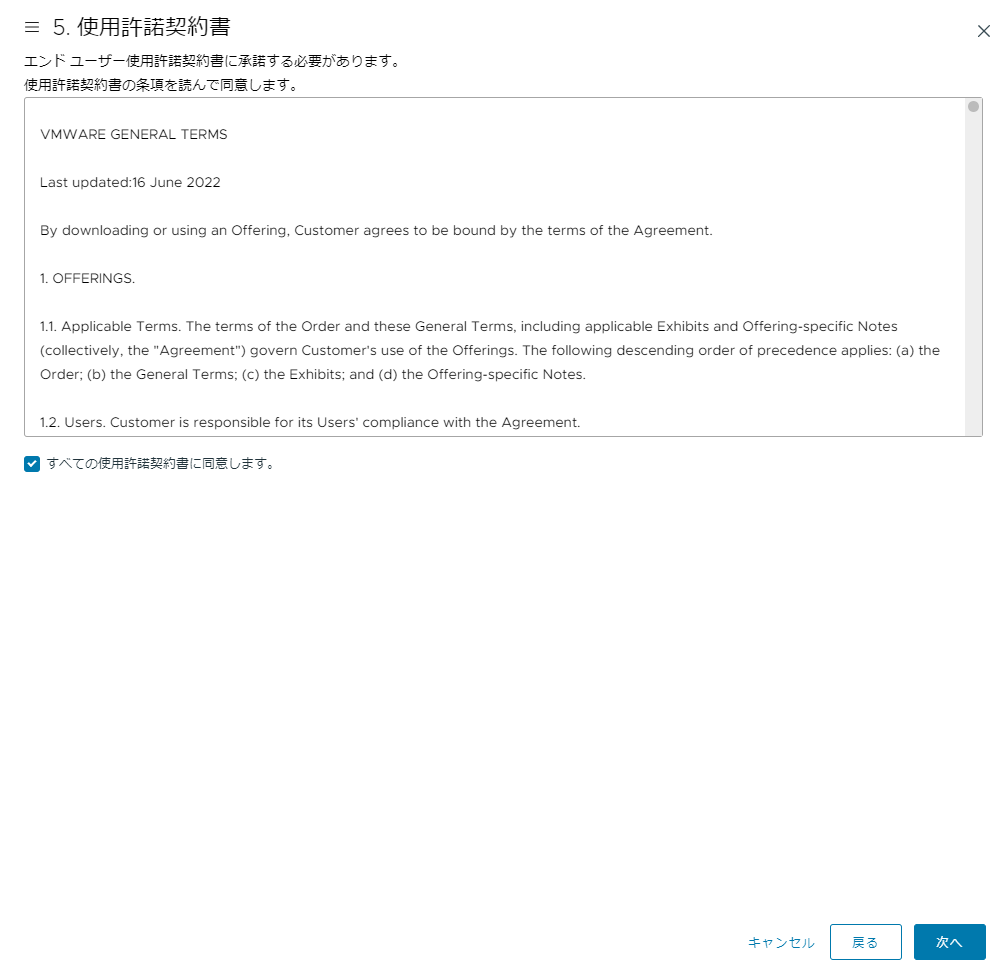
-
When selecting storage, choose the storage that best suits your environment.
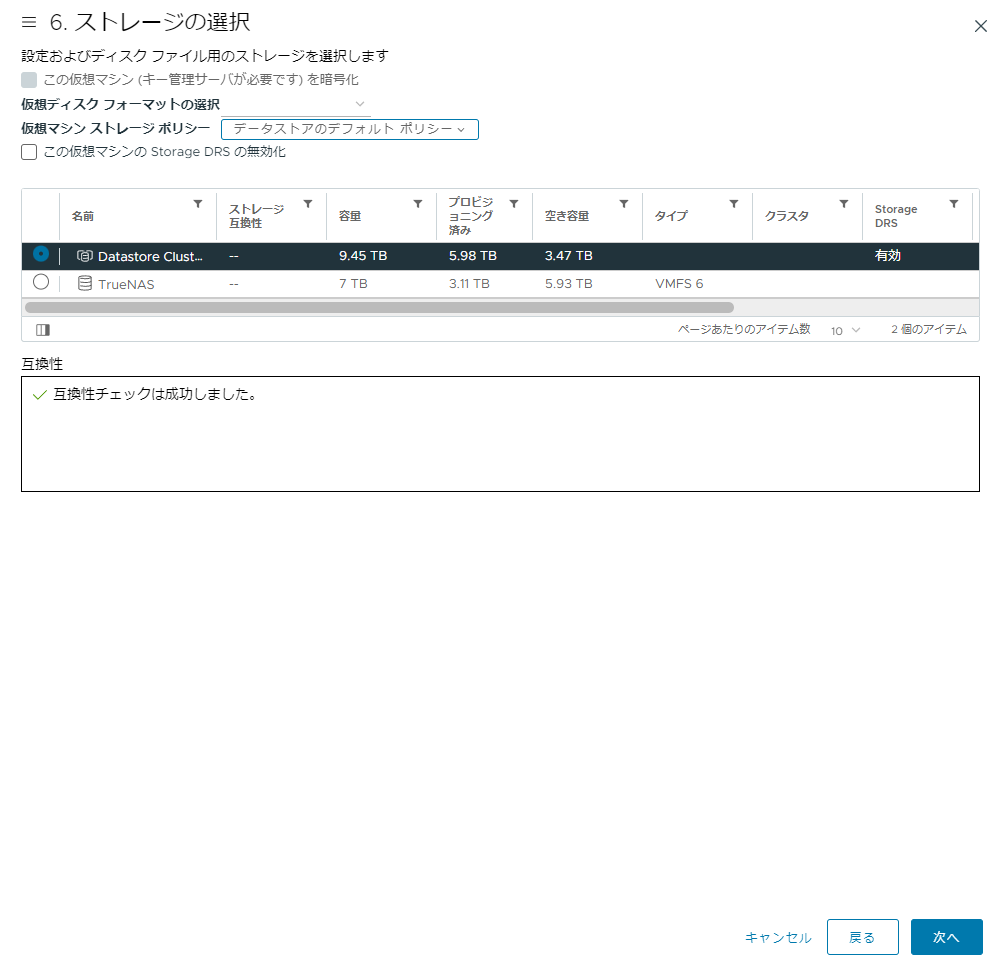
-
When selecting a network, select the management network.
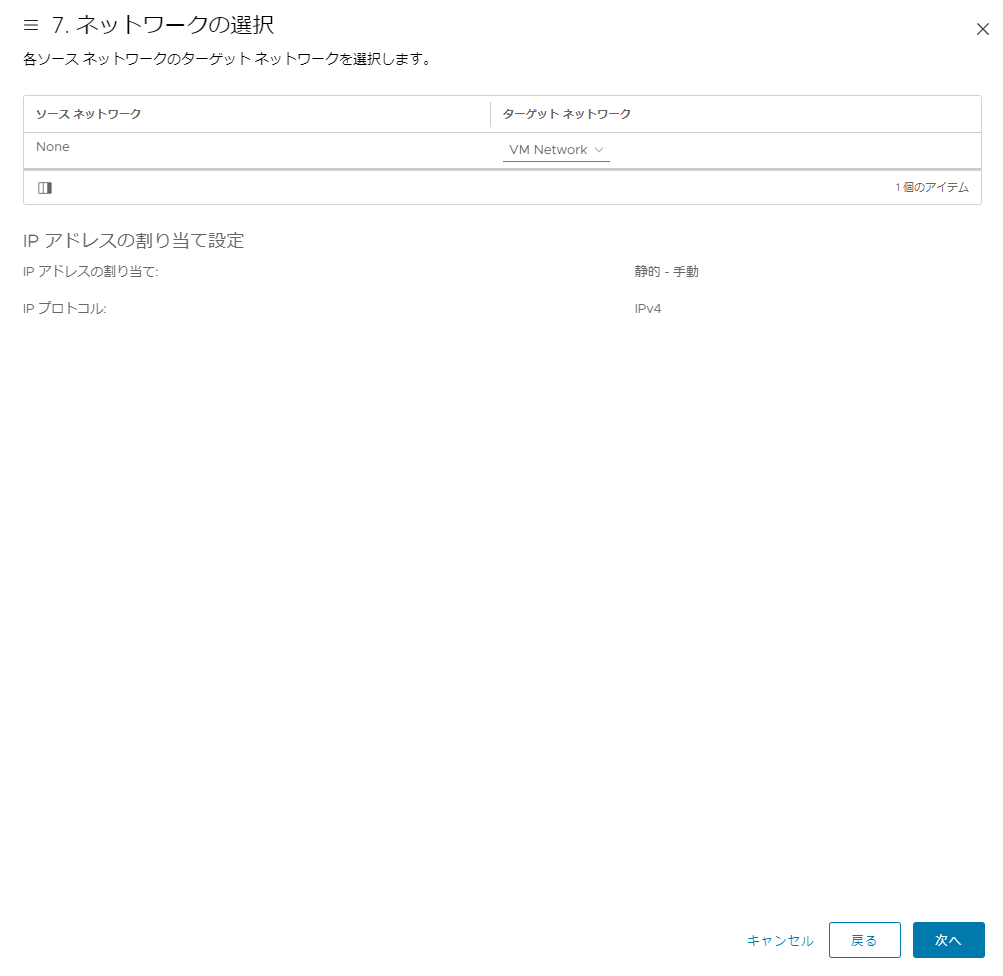
-
After confirming the settings, click “Finish” to deploy the OVA.
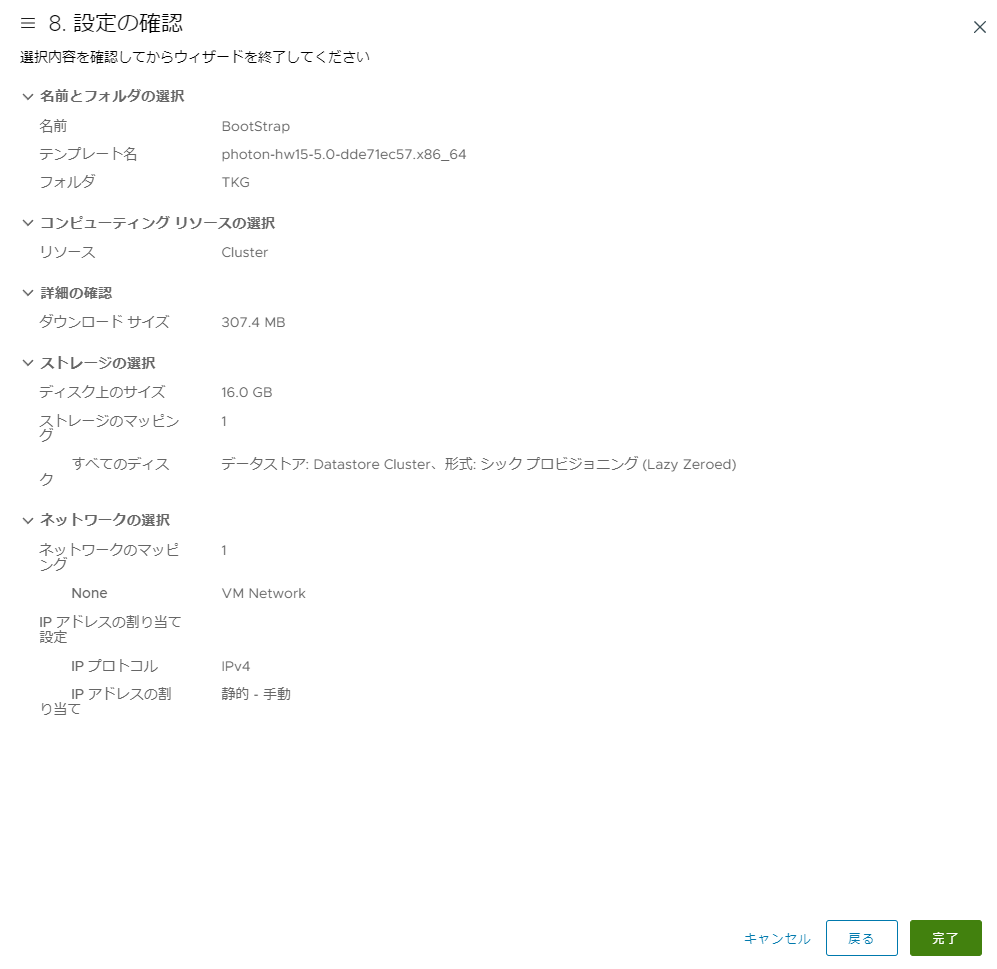
While the OVA deploys, continue with the next section.
Creating a virtual machine customization specification
Create a customization specification to set the IP address and host name on the Bootstrap machine.
-
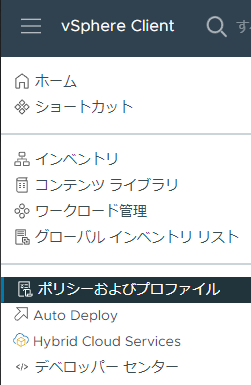
Click “Policies and Profiles” in the vSphere Client menu.
-
Click “Virtual Machine Customization Specification” and click “New.”

-
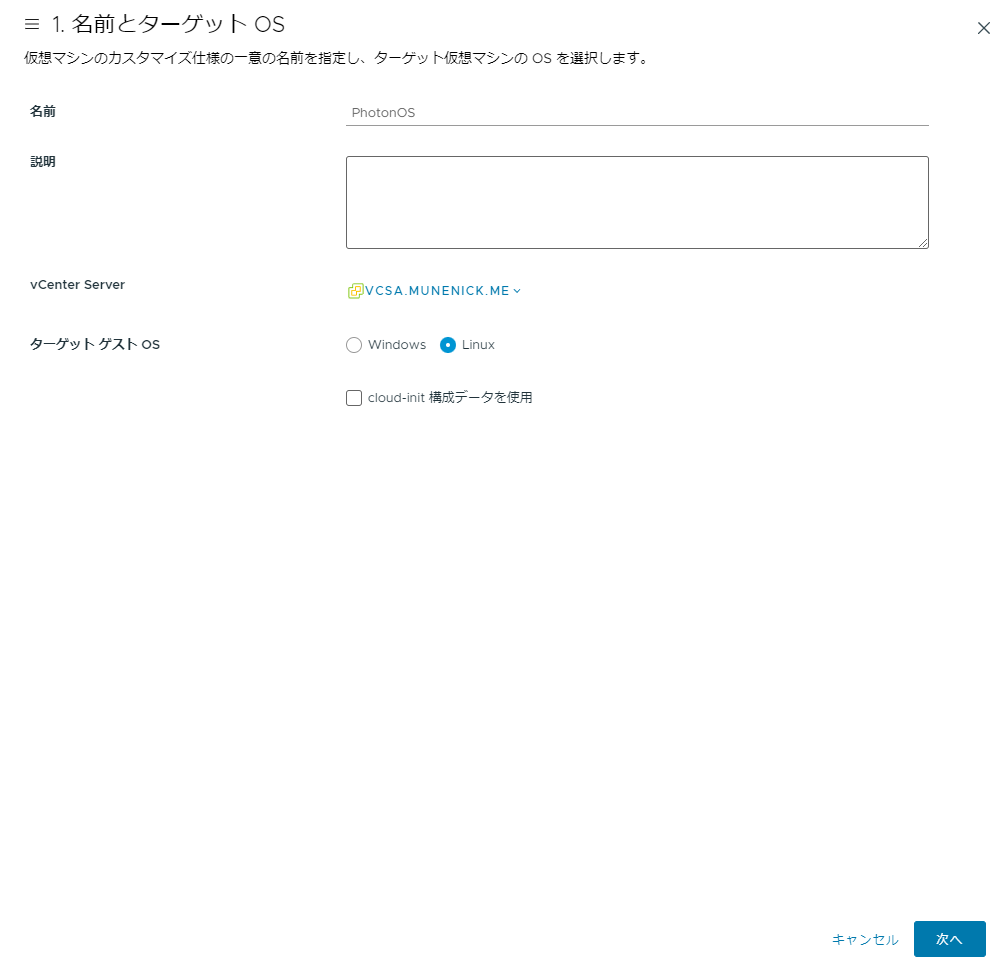
Specify any name, and select “Linux” for the target guest OS.
-
For Computer Name, select “Enter name in Clone/Deploy Wizard” so you can specify the computer name later. For the domain name, specify your domain or use “localhost.localdomain”.

-
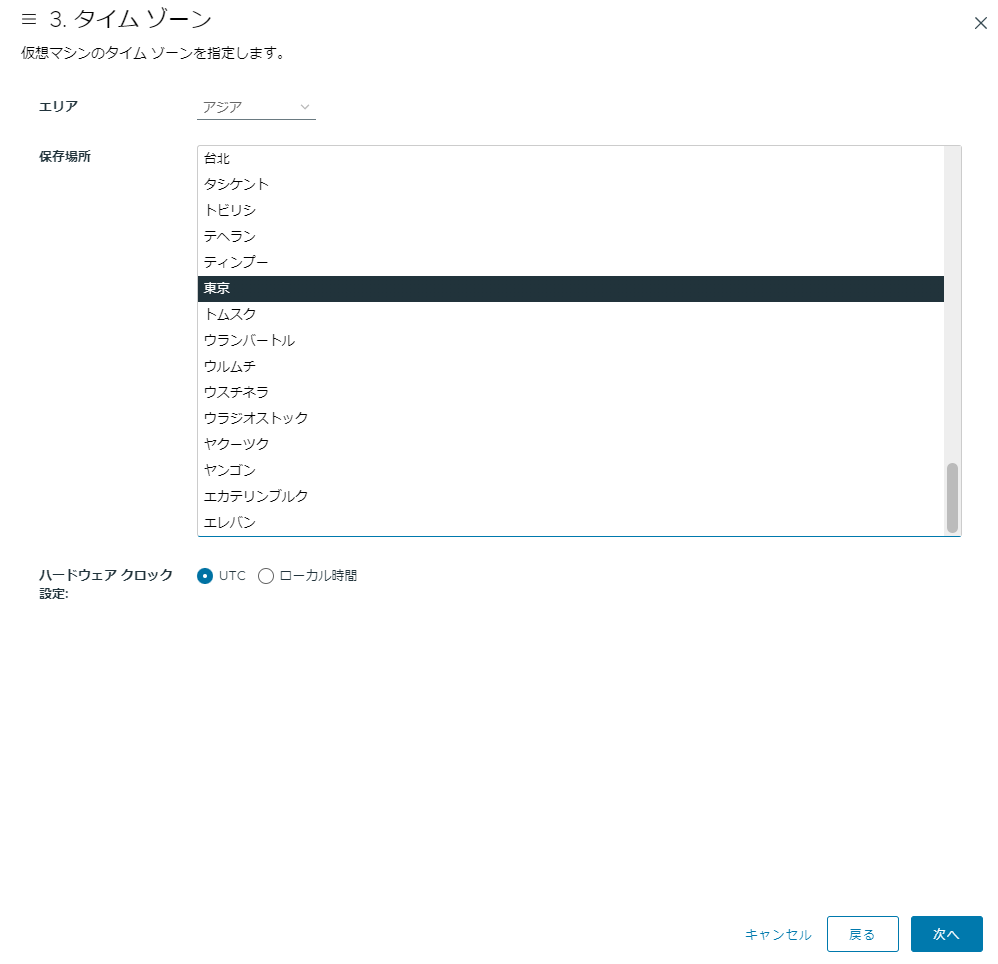
In the time zone settings, set the area to “Asia” and the location to “Tokyo”.
-
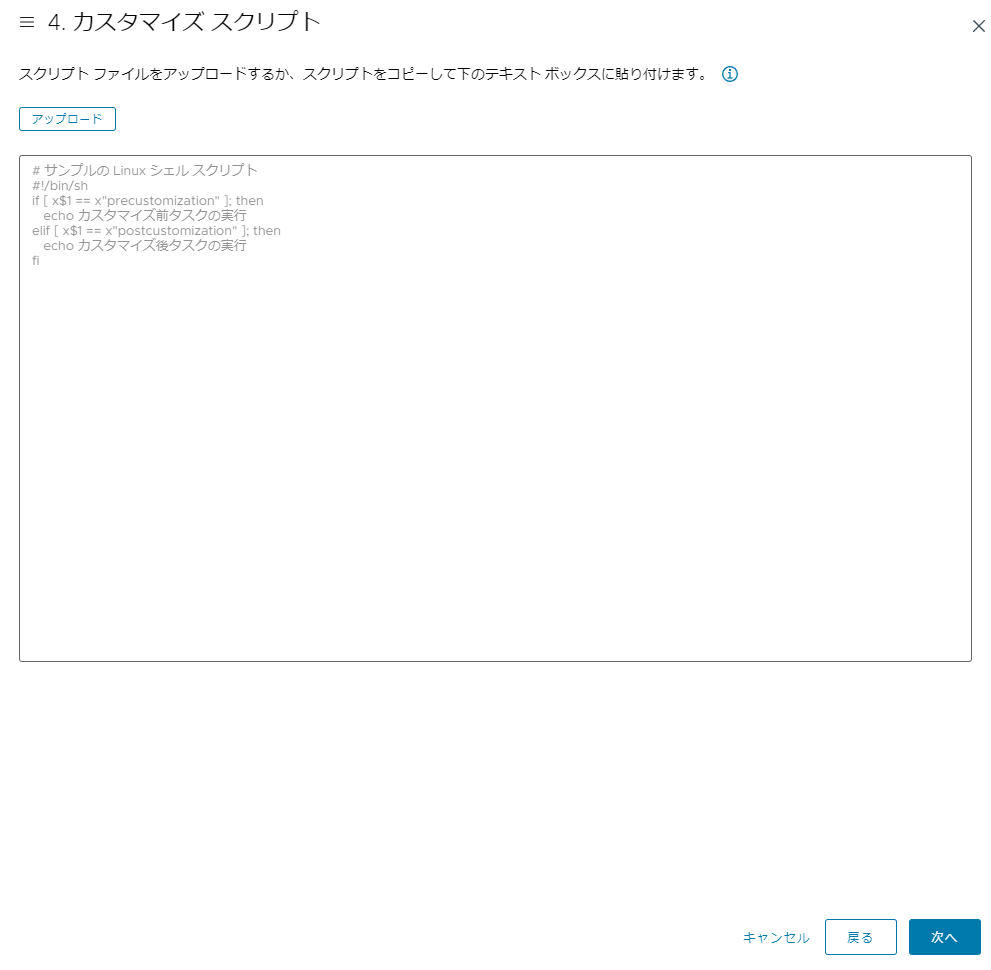
No customization script is needed, so leave the defaults and click “Next”.
-
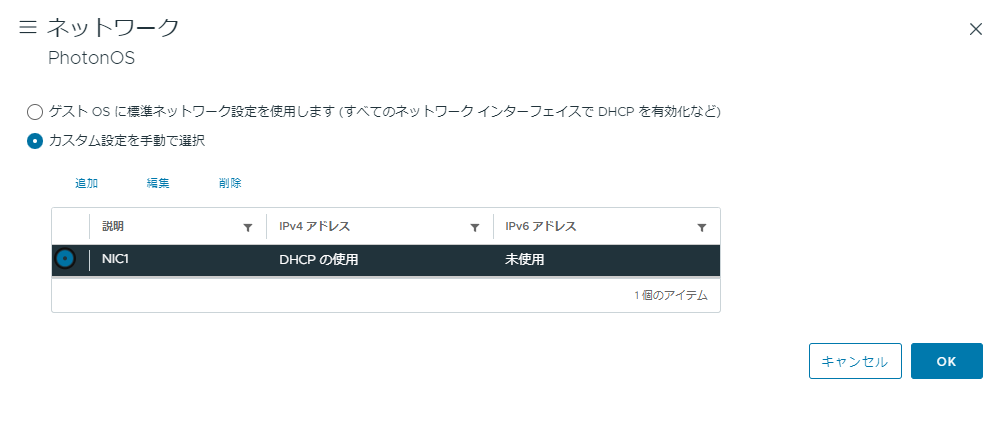
Under Network, select “Manually select custom settings.” Then select “NIC1” and click “Edit”.
-
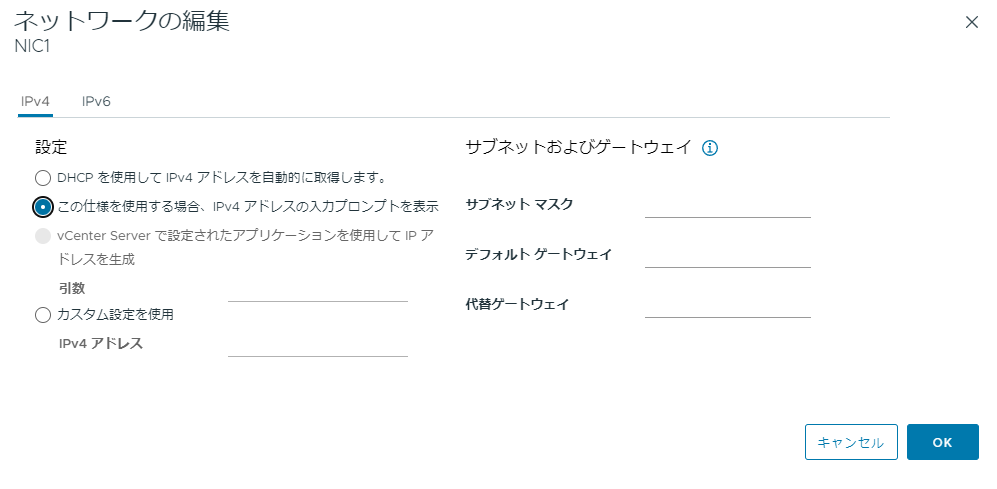
Select “Prompt for IPv4 address when using this option” when editing the network, and click “OK”.
-
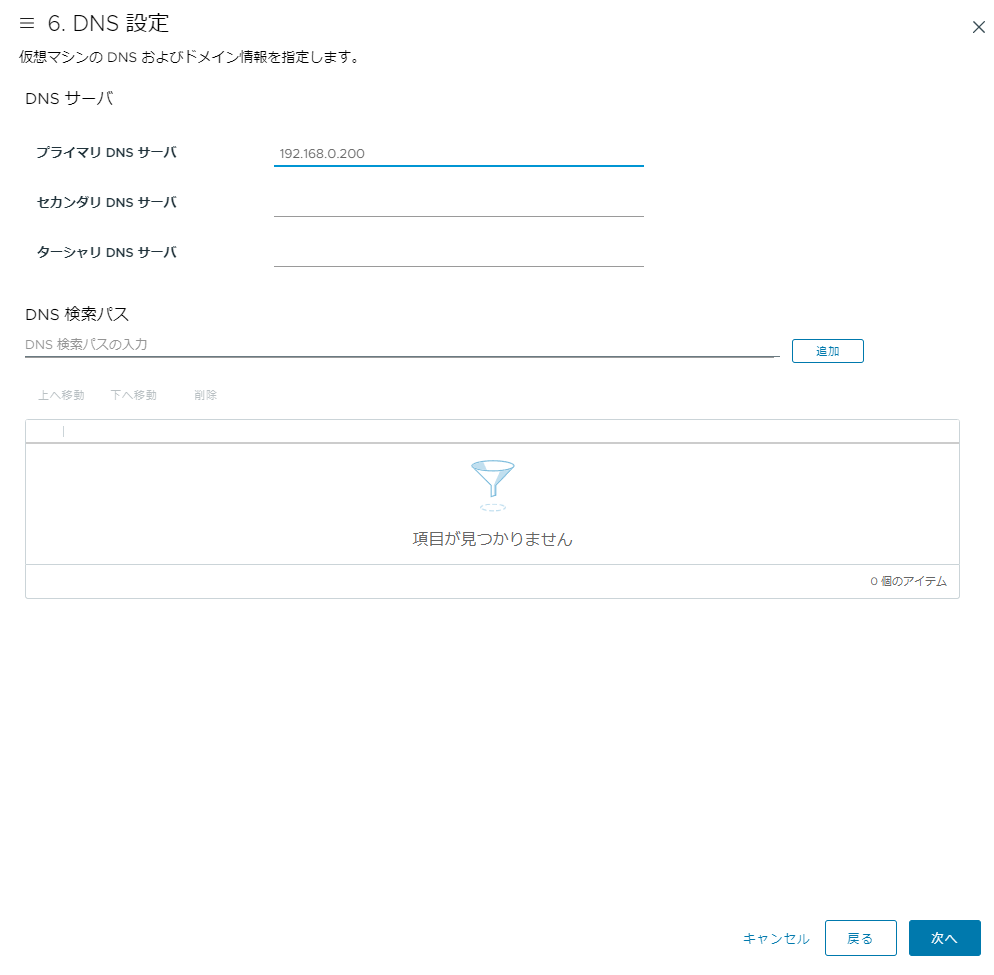
Configure the DNS settings for your environment.
-
After confirming your settings, click Finish.
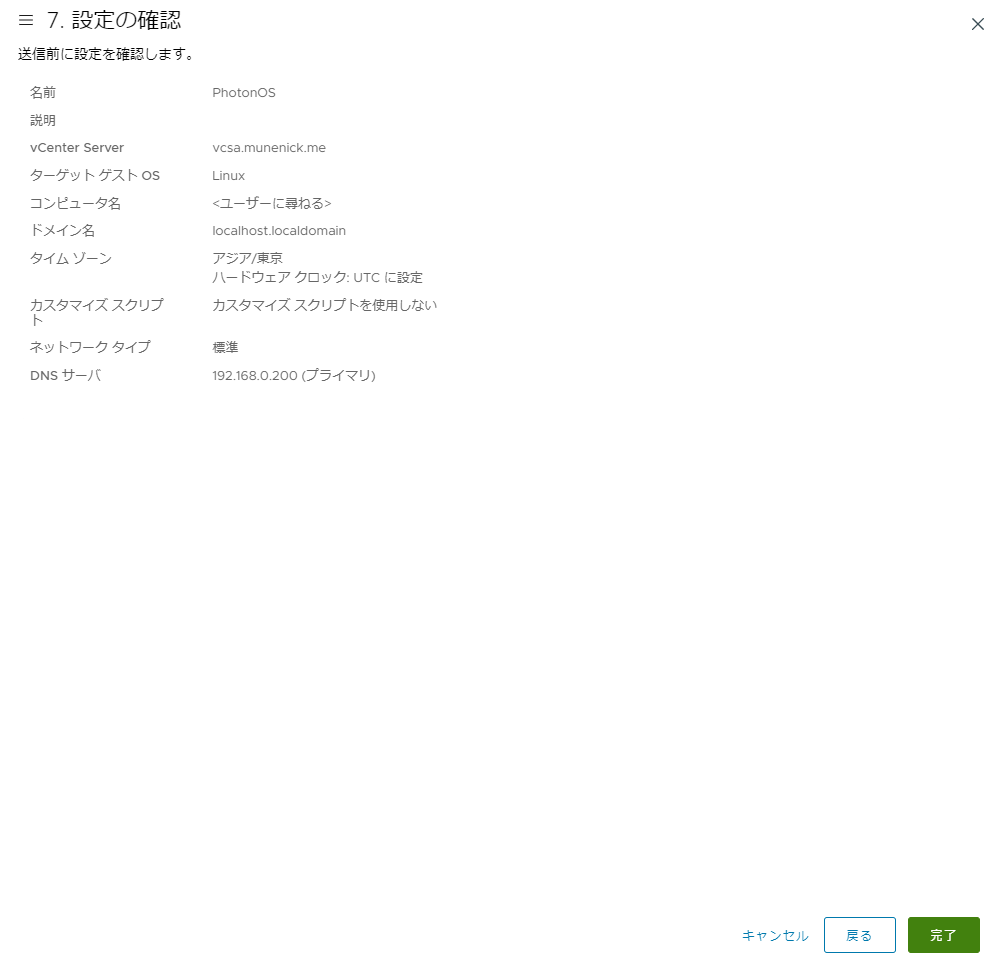
Bootstrap machine pre-boot settings
After deploying the OVA, configure a few settings before starting it.
Customizing the guest OS
-
Open the virtual machine and click “Actions” → “Guest OS” → “Customize Guest OS”.
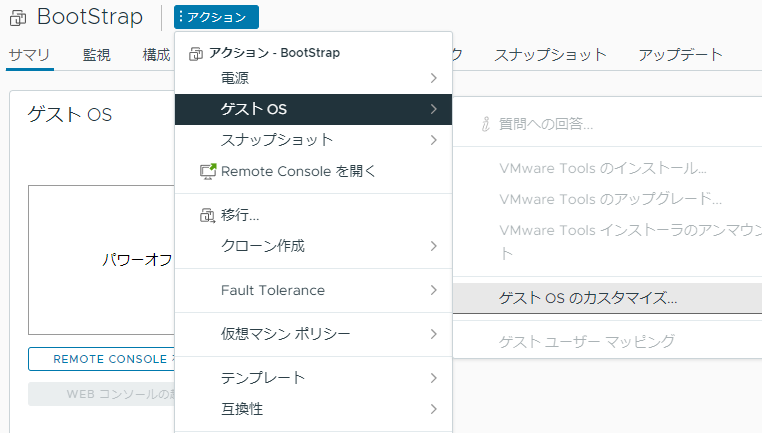
-
To customize the guest OS, select the customization specification you created earlier.
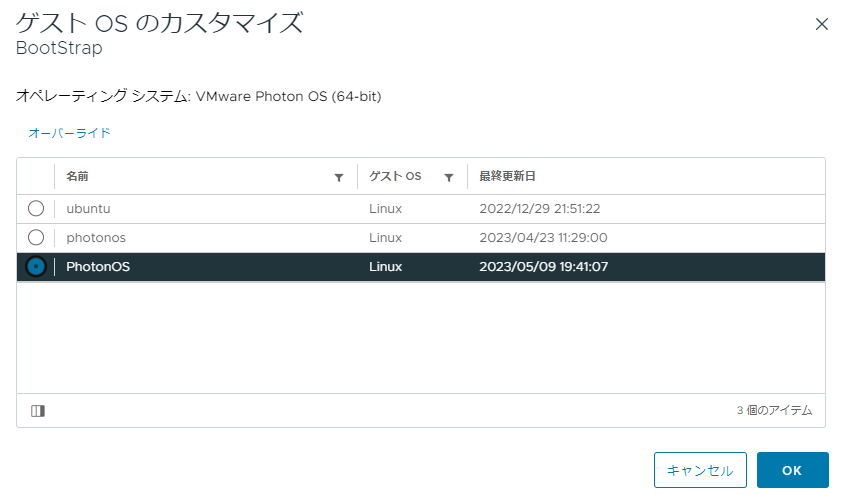
-
You will see a warning about additional required actions. Click Yes.

-
When customizing the guest OS, enter a computer name and network settings that match your environment, then click “Save.”
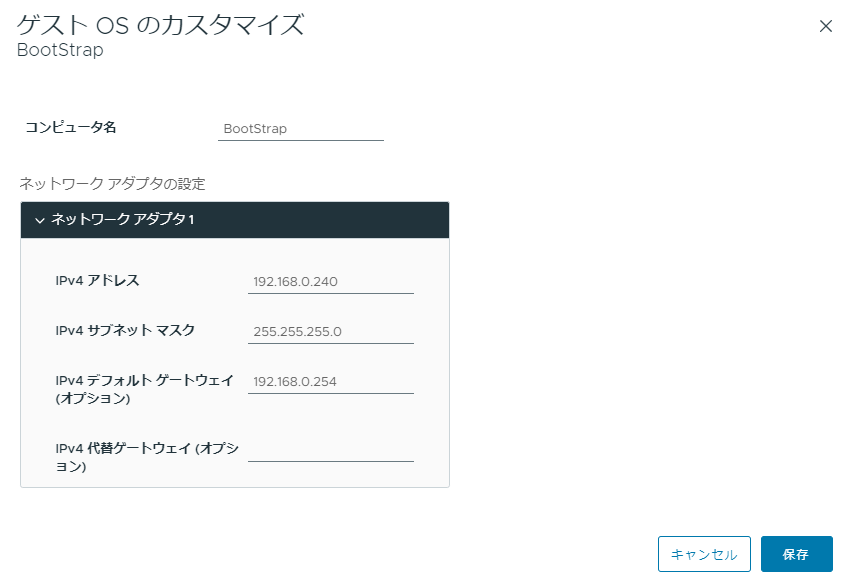
Changing virtual machine resources
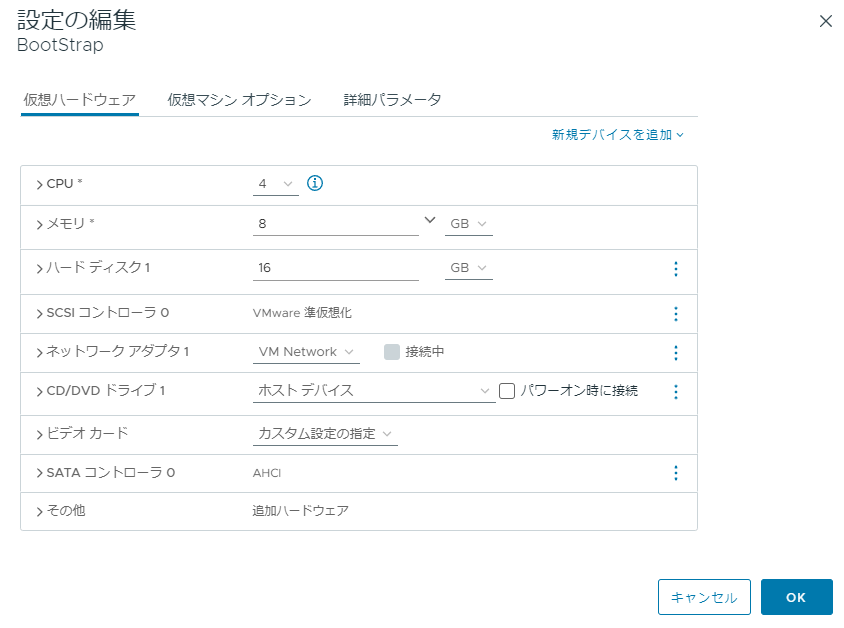
If the CPU or RAM allocated to the Bootstrap server is too low, deployment may fail.
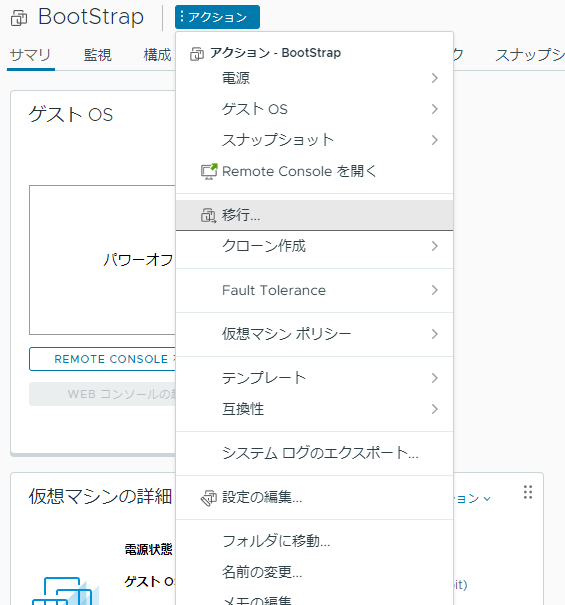
-
Click “Actions” → “Edit Settings” for the virtual machine.
-
Change the CPU and memory according to your environment. In this article, I specified CPU: 4 and memory: 8GB.
-
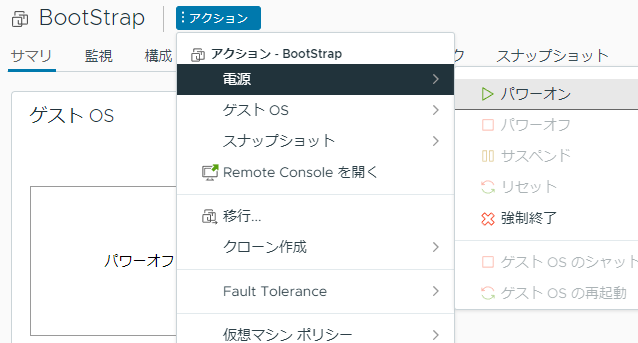
After completing the settings up to this point, start the virtual machine.
Setting up the Bootstrap machine
Basic configuration of the Bootstrap machine
- Connect to the Bootstrap machine by SSH using Tera Term or a similar tool. The initial username and password are as follows.
| Username | Password |
|---|---|
| root | changeme |
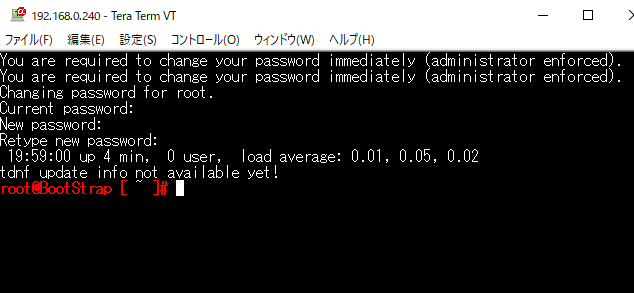
- On first login, you will be asked to change the password. Enter “changeme” for “Current password” and your new password for “New password” and “Retype new password”.
- Run the following command to update the packages, then reboot after the update completes.
root@BootStrap [ ~ ]# tdnf update -y
root@BootStrap [ ~ ]# shutdown -r now-
Access the Bootstrap machine by SSH again. Use “root” and the password you set.
-
Install the required packages using the following command.
root@BootStrap [ ~ ]# tdnf install -y tar diffutils- To access the web UI externally, disable the firewall with the following command.
root@BootStrap [ ~ ]# systemctl stop iptables
root@BootStrap [ ~ ]# systemctl disable iptables- The Bootstrap machine requires Docker, so check the installation with the command below. If you use Ubuntu, prepare a Docker environment separately.
root@BootStrap [ ~ ]# rpm -q docker
docker-23.0.2-1.ph5.x86_64
root@BootStrap [ ~ ]# docker -v
Docker version 23.0.2, build 569dd73- Run the following command to enable Docker services.
root@BootStrap [ ~ ]# systemctl enable docker
root@BootStrap [ ~ ]# systemctl start docker- Confirm that the Docker service is running with the command below.
root@BootStrap [ ~ ]# systemctl status docker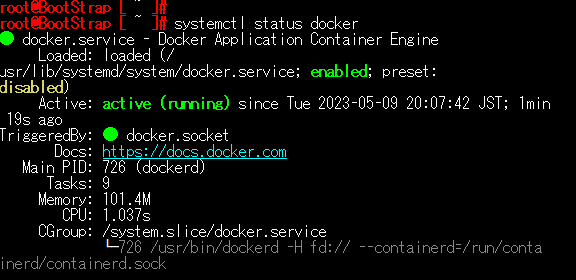
- To run Tanzu CLI as a non-root user, create a standard user with the following command. Replace “MuNeNiCK” with the username you want to use.
root@BootStrap [ ~ ]# useradd -m MuNeNiCK
root@BootStrap [ ~ ]# passwd MuNeNiCK- Run the following command to allow the standard user to run Docker.
root@BootStrap [ ~ ]# usermod -aG docker MuNeNiCK-
Transfer the following two files to the home directory of the user you created, such as /home/MuNeNiCK, using FTP or SCP. In this article, I use Tera Term’s SCP function.
- tanzu-cli-bundle-linux-amd64.tar.gz
- kubectl-linux-v1.24.10+vmware.1.gz
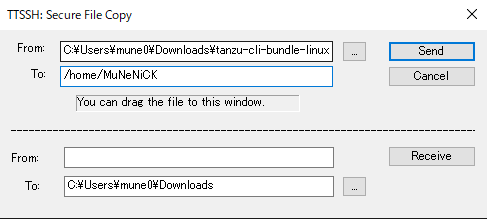
-
Confirm that the files were transferred with the command below.
root@BootStrap [ ~ ]# ls -al /home/MuNeNiCK/
total 282364
drwxr-xr-x 2 MuNeNiCK users      4096 May  9 20:15 .
drwxr-xr-x 3 root     root       4096 May  9 20:10 ..
-rw-r--r-- 1 MuNeNiCK users       178 Apr 25 03:27 .bash_logout
-rw-r--r-- 1 MuNeNiCK users       643 Apr 25 03:27 .bash_profile
-rw-r--r-- 1 MuNeNiCK users       451 Apr 25 03:27 .bashrc
-rw-r----- 1 root     root   14062013 Apr 23 20:34 kubectl-linux-v1.24.10+vmware.1.gz
-rw-r----- 1 root root 275052656 Apr 23 20:34 tanzu-cli-bundle-linux-amd64.tar.gz- Run the following command to grant permissions to the transferred files.
root@BootStrap [ ~ ]# chmod 777 /home/MuNeNiCK/tanzu-cli-bundle-linux-amd64.tar.gz
root@BootStrap [ ~ ]# chmod 777 /home/MuNeNiCK/kubectl-linux-v1.24.10+vmware.1.gz- From here on, use the account you created. Switch users with the following command.
root@BootStrap [ ~ ]# su - MuNeNiCK
MuNeNiCK [ ~ ]$ ls
kubectl-linux-v1.24.10+vmware.1.gz  tanzu-cli-bundle-linux-amd64.tar.gz
MuNeNiCK [ ~ ]$- Confirm that Docker commands can be used with the following command.
MuNeNiCK [ ~ ]$ docker ps
CONTAINER ID   IMAGE     COMMAND   CREATED   STATUS    PORTS     NAMES
MuNeNiCK [ ~ ]$
Creating an SSH key pair
- Create an SSH key pair to use when deploying TKG.
MuNeNiCK [ ~ ]$ ssh-keygen -P '' -f $HOME/.ssh/id_rsa- Display the public key with the command below and save it somewhere, because it will be used in a later deployment step.
MuNeNiCK [ ~ ]$ cat $HOME/.ssh/id_rsa.pubInstalling Tanzu CLI
- Create a directory for installing Tanzu CLI files and set the environment variables.
MuNeNiCK [ ~ ]$ mkdir $HOME/bin
MuNeNiCK [ ~ ]$ echo 'PATH=$HOME/bin:$PATH' >> $HOME/.bash_profile
MuNeNiCK [ ~ ]$ source $HOME/.bash_profile- Extract and install Tanzu CLI with the command below.
MuNeNiCK [ ~ ]$ tar zxf tanzu-cli-bundle-linux-amd64.tar.gz
MuNeNiCK [ ~ ]$ install ./cli/core/v*/tanzu-core-linux_amd64 $HOME/bin/tanzu- Confirm that Tanzu CLI was installed successfully.
MuNeNiCK [ ~ ]$ tanzu version
version: v0.28.1
buildDate: 2023-03-07
sha: 0e6704777-dirty- Perform the initial setup of Tanzu CLI with the following command.
MuNeNiCK [ ~ ]$ tanzu init- To use Tanzu CLI shell completion, run the following command.
MuNeNiCK [ ~ ]$ echo 'source <(tanzu completion bash)' >> $HOME/.bash_profileInstalling kubectl
- Extract and install kubectl with the following command.
MuNeNiCK [ ~ ]$ gunzip kubectl-linux-*.gz
MuNeNiCK [ ~ ]$ install kubectl-linux-* $HOME/bin/kubectl- Confirm that kubectl was installed successfully.
MuNeNiCK [ ~ ]$ kubectl version --short --client
Flag --short has been deprecated, and will be removed in the future. The --short output will become the default.
Client Version: v1.24.10+vmware.1
Kustomize Version: v4.5.4- Enable shell completion with the following command.
MuNeNiCK [ ~ ]$ echo 'source <(kubectl completion bash)' >> $HOME/.bash_profileThis completes the preparation work and Bootstrap server setup.
Next time
Next, build a Management cluster and a Workload cluster as part of the Tanzu Kubernetes Grid deployment.