Introduction
This article shows how to build Windows Hello for Business (WHfB) on-premises with the key trust model. WHfB requires MFA, but this article uses an open-source project called adfsmfa so the environment can be built entirely on-premises without cloud services such as Entra ID. In this article, AD DS, AD CS, and AD FS are built on a single Windows Server. This is a PoC-oriented configuration, so evaluate it carefully before introducing it into a production environment.
Build flow
The WHfB build proceeds as follows:
-
Building Active Directory Domain Services (AD DS)
- Domain controller settings
- DNS server configuration
-
Building Active Directory Certificate Services (AD CS)
- Certification Authority installation and configuration
- Create certificate templates for Kerberos authentication and the internal web server
- Certificate auto-enrollment settings
-
Building Active Directory Federation Services (AD FS)
- AD FS installation and basic configuration
- Issue the service certificate
- Configuring Device Registration Service (DRS)
-
Building an MFA environment
- Installing adfsmfa
- Configuring MFA schema
- Configure user authentication settings
-
Windows Hello for Business settings
- WHfB settings through Group Policy
- Client device configuration
After these settings are complete, Windows Hello for Business can be used in the on-premises environment.
Preparation
Build Active Directory and Active Directory Certificate Services, which provide the foundation for WHfB.
Configuring AD DS
First, you need to build an Active Directory environment. The following is the domain controller deployment procedure. If you already have an environment, skip this section.
Installing AD DS
Click “Add Roles and Features” in Server Manager.
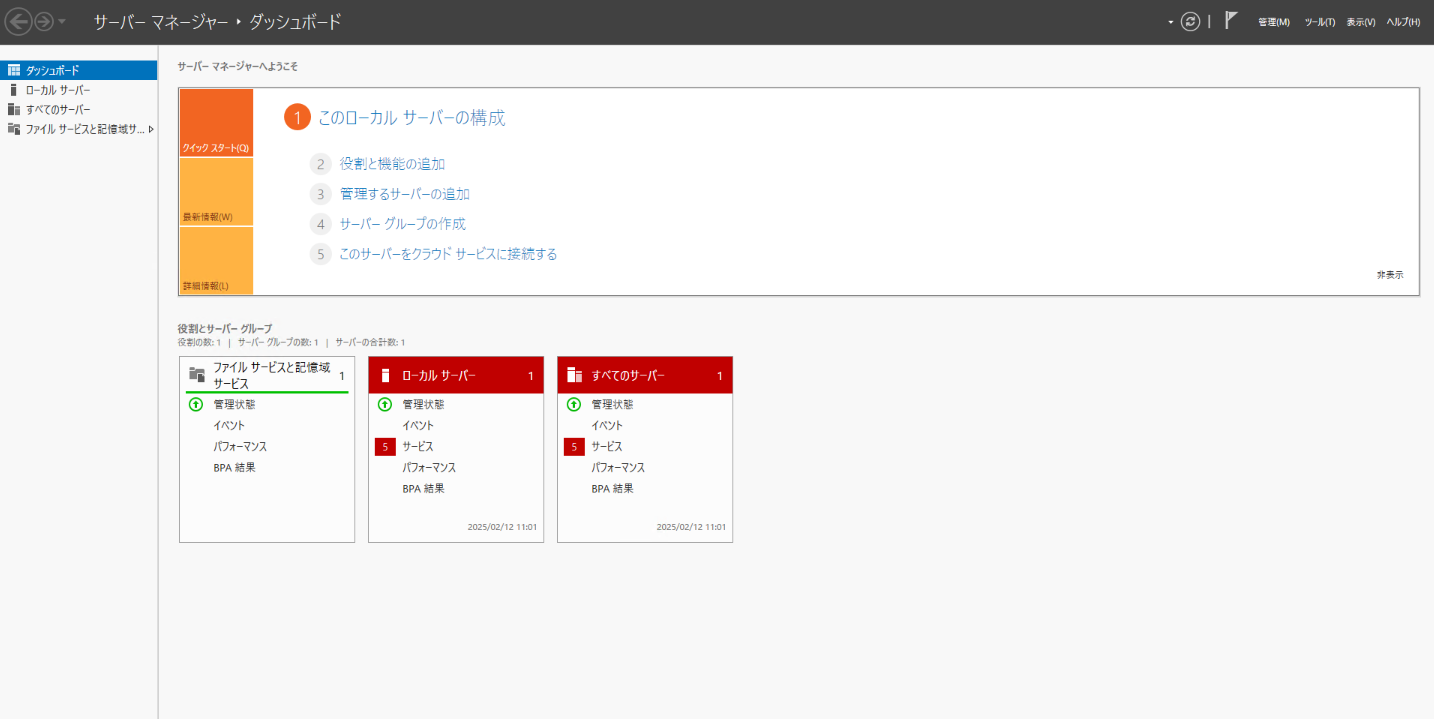
In “Before you begin,” click Next.
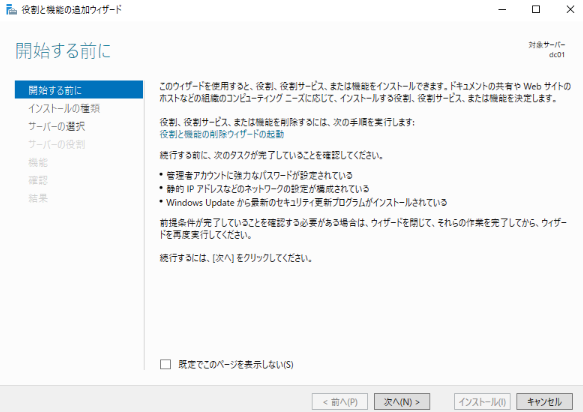
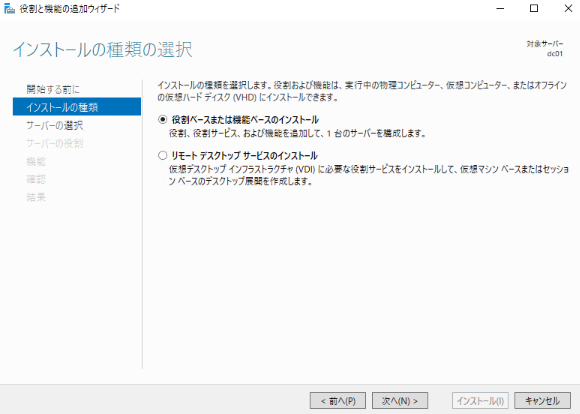
Click Next for “Installation type and selection”.
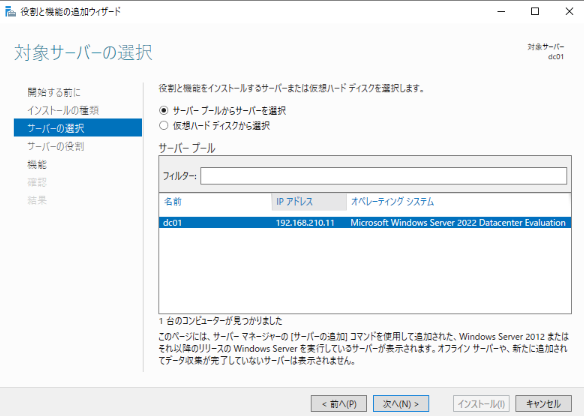
In “Select target server”, click Next.
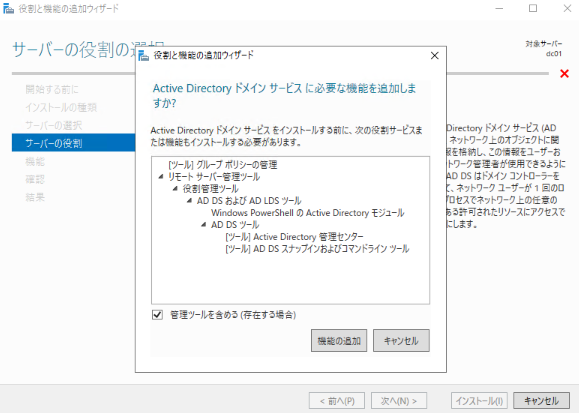
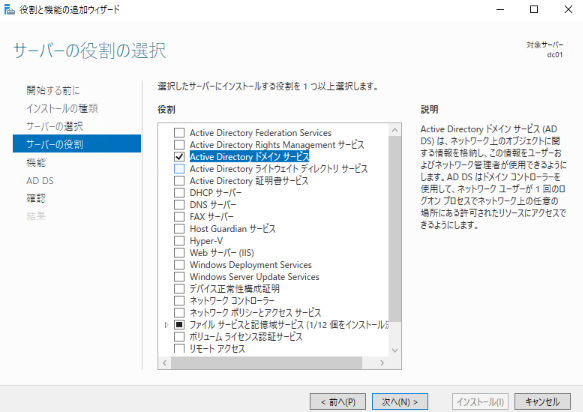
In “Add Roles and Features”, select “Active Directory Domain Services”.
When the “Add Roles and Features Wizard” appears, click “Add Features”.
Also select “DNS Server”.
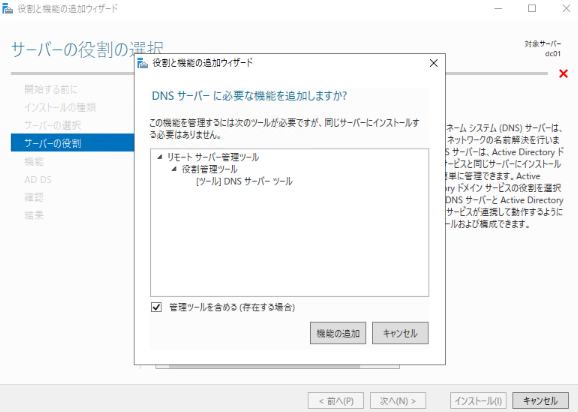
The Add Roles and Features Wizard appears again, so click Add Features.
Make sure “Active Directory Domain Services” and “DNS Server” are selected, then click Next.
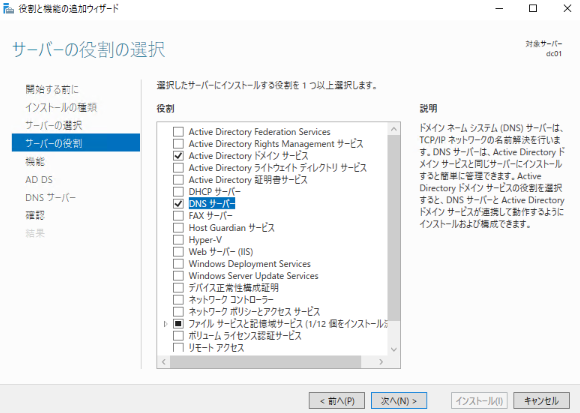
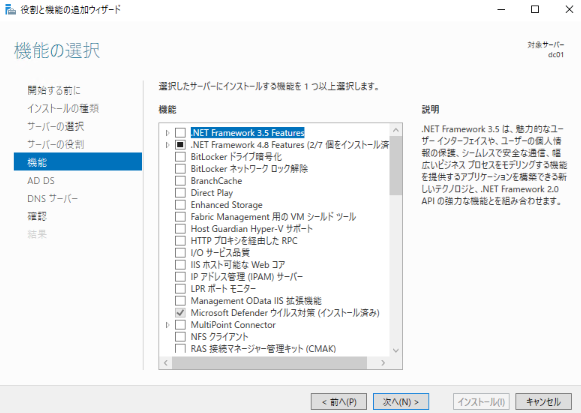
In “Select Features”, leave the defaults and click Next.
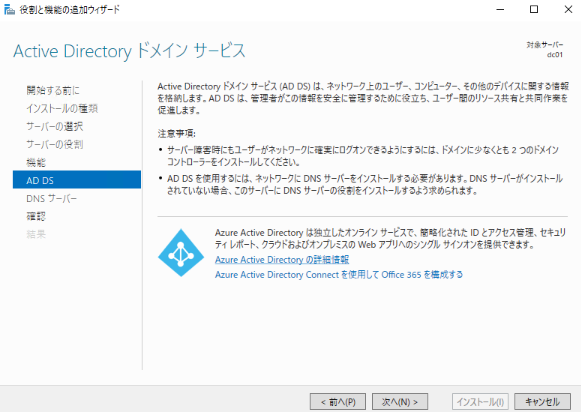
Click Next for Active Directory Domain Services.
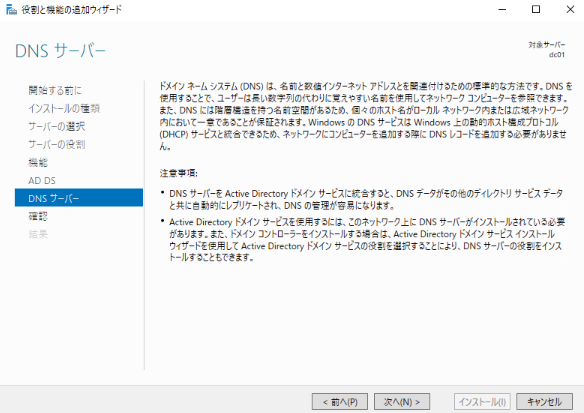
Click Next for DNS Server.
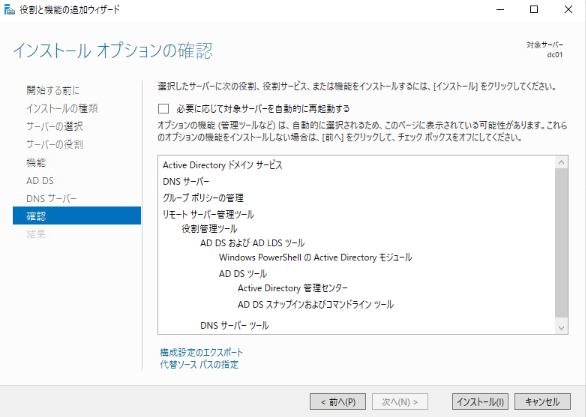
Confirm the contents in “Confirm installation options” and click Install.
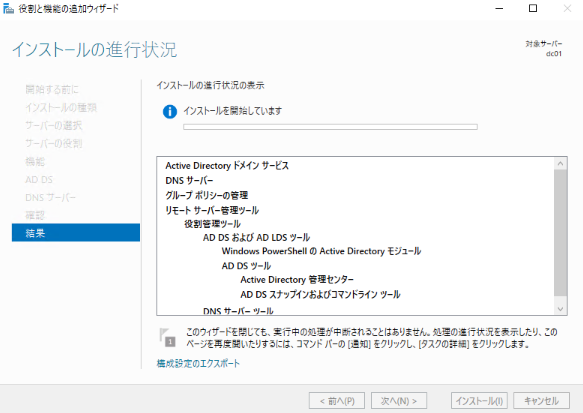
Verify that the installation begins.
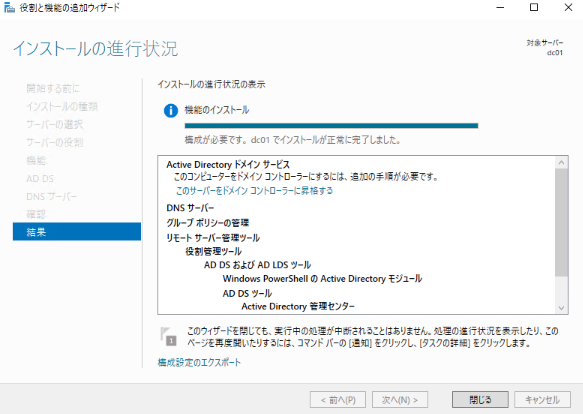
Click Close when the installation completes successfully.
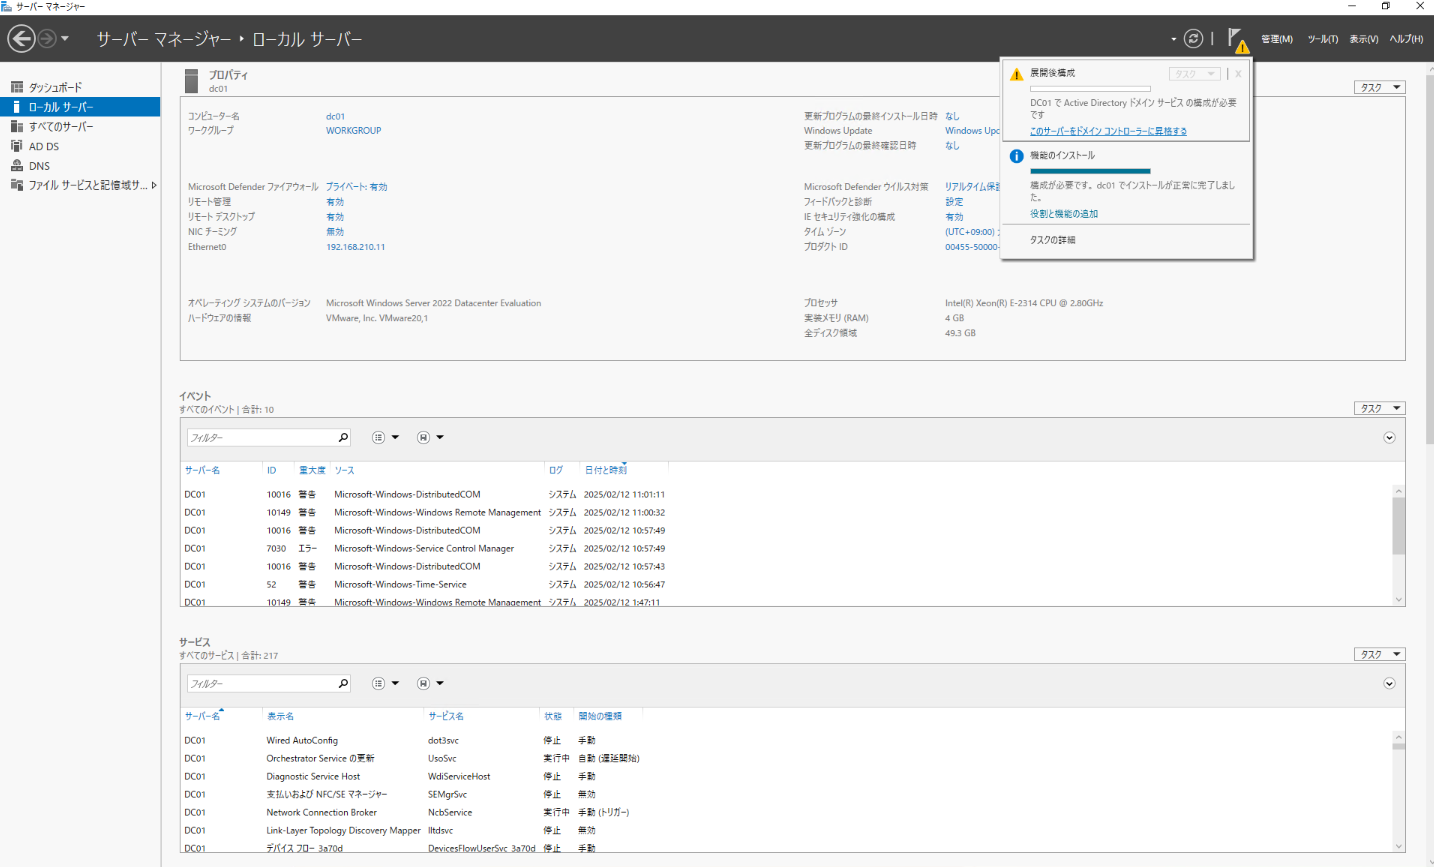
Configuring AD DS
Open the Server Manager notification and click Promote this server to a domain controller.
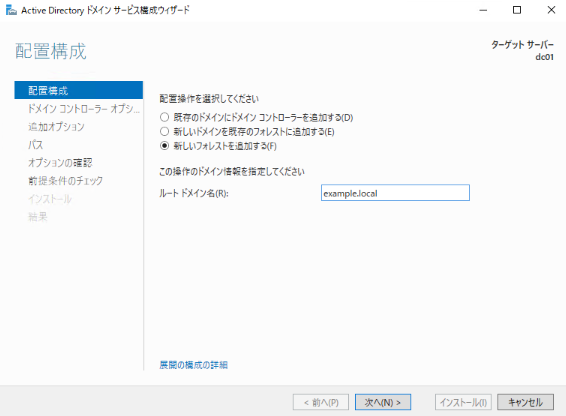
For Deployment Configuration, select Add a new forest, enter the Root Domain Name, and click Next.
This article uses “example.local” as an example.
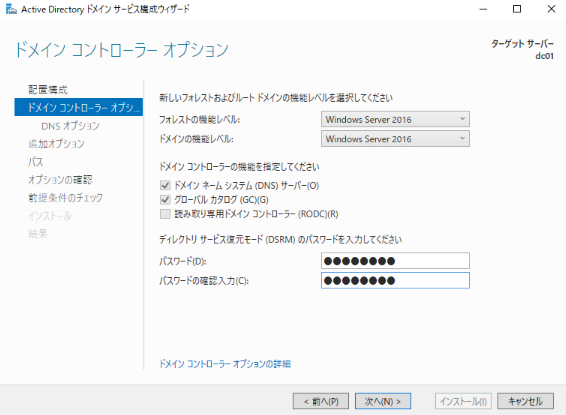
In “Domain Controller Options”, enter any password in “Password” and click Next.
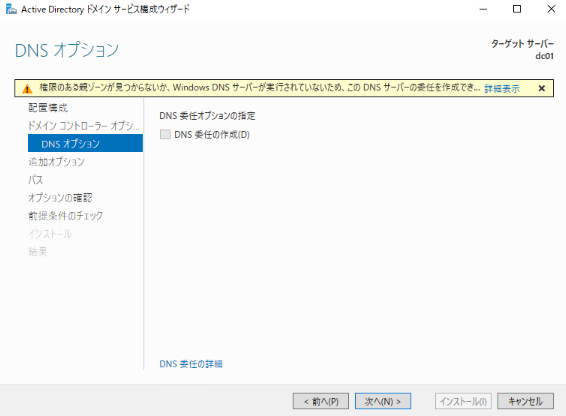
For DNS Options, leave the defaults and click Next.
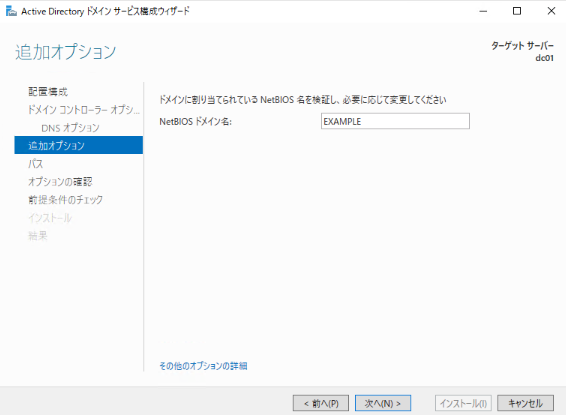
For “NetBIOS Domain Name”, specify the default or any domain name, and click Next.
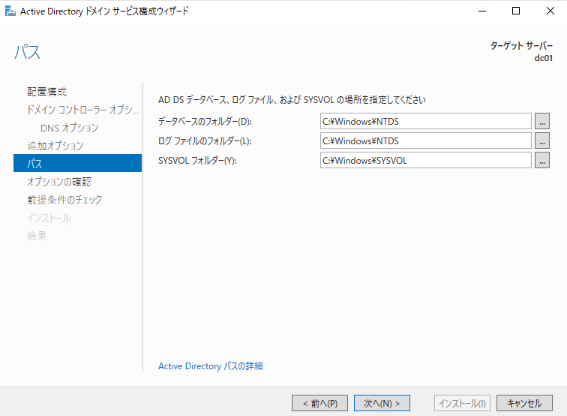
For Path, leave the default and click Next.
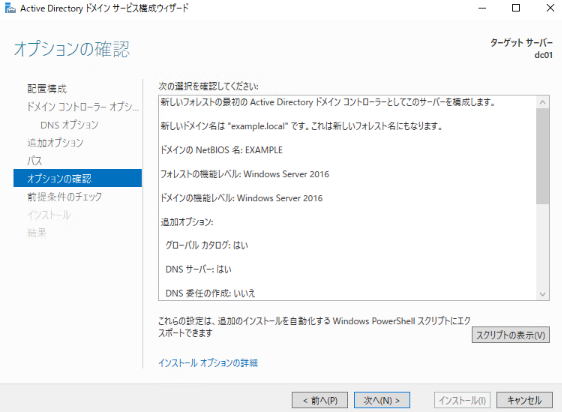
Confirm options and click Next.
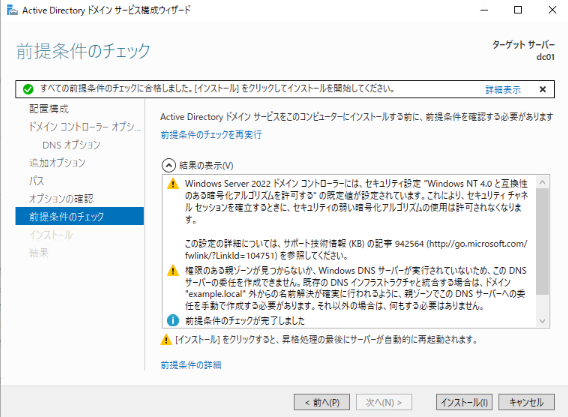
In “Check Prerequisites”, confirm that the prerequisites are cleared, and then click Install.
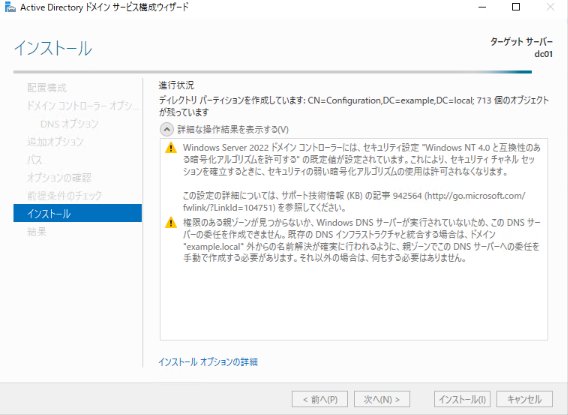
Confirm that the installation has started.
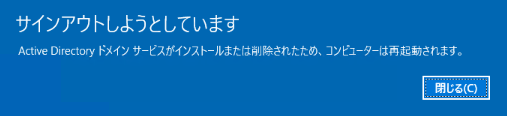
When the installation is finished, a sign-out pop-up will appear, click Close.
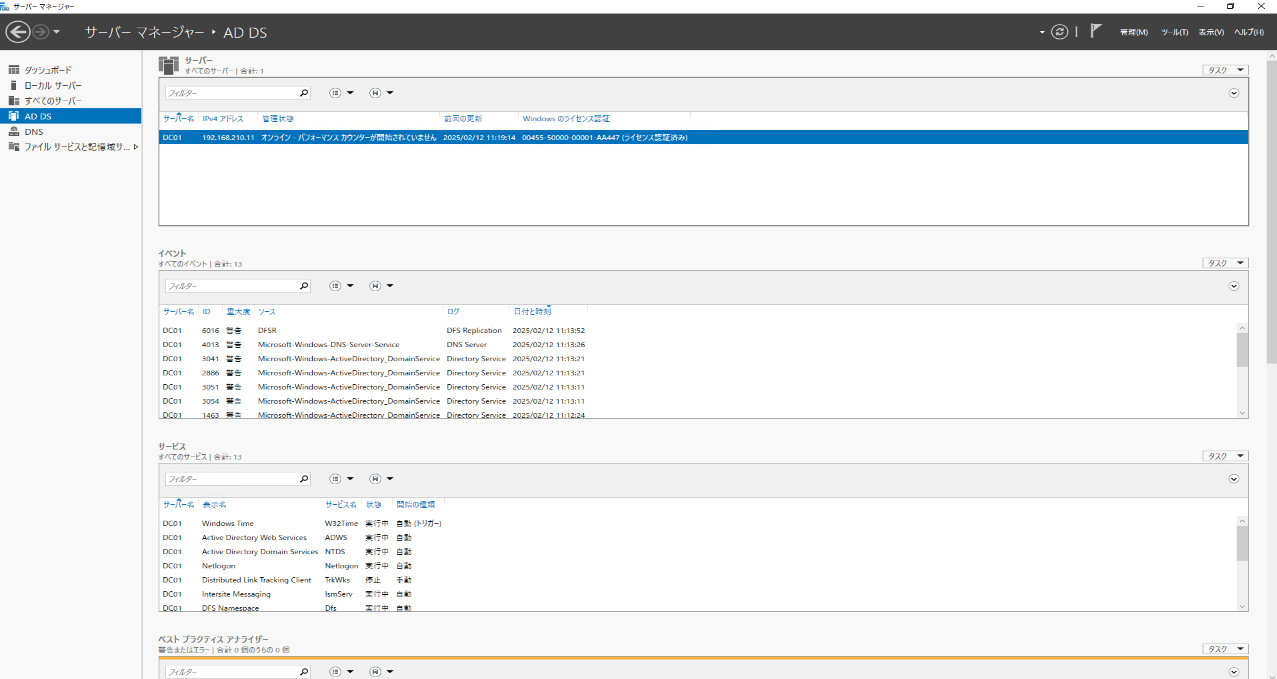
After restarting, confirm that “AD DS” is displayed in the left pane of Server Manager.
AD CS configuration
For on-premises AD FS, you need to build Active Directory Certificate Services (AD CS) and issue certificates. The following is the AD CS deployment procedure. If AD CS is already configured in your environment, skip this section.
Installing AD CS
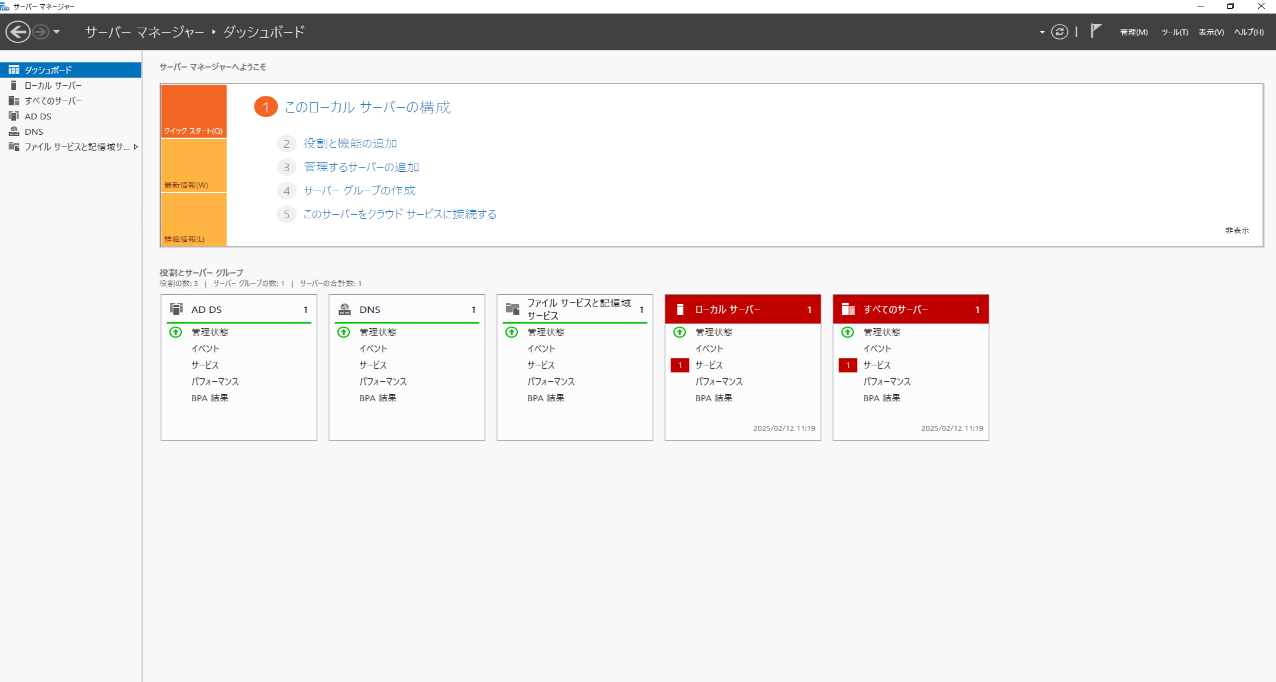
Click “Add Roles and Features” in Server Manager.
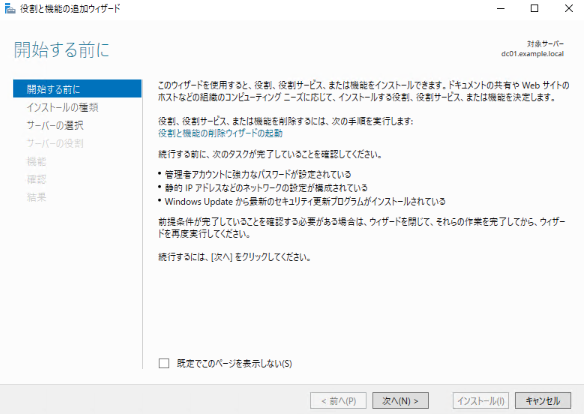
In “Before you begin,” click Next.
Click Next for “Installation type and selection”.
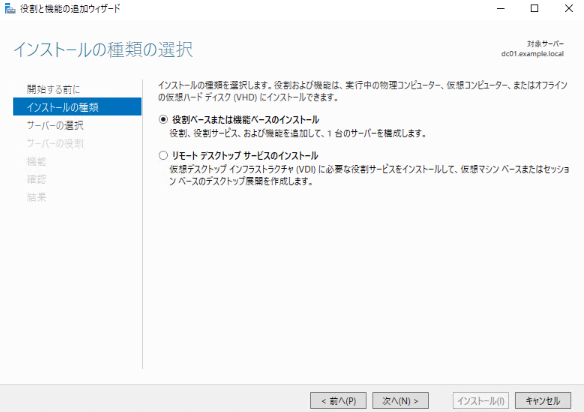
In “Select target server”, click Next.
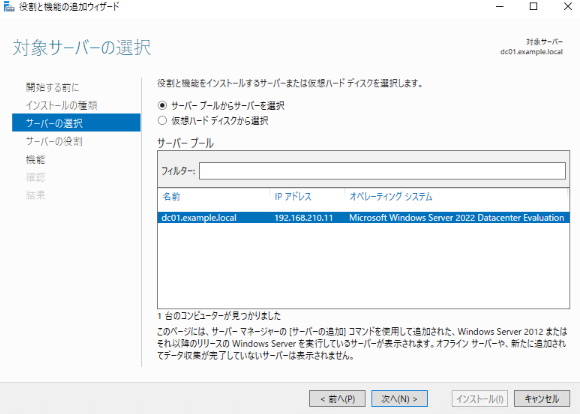
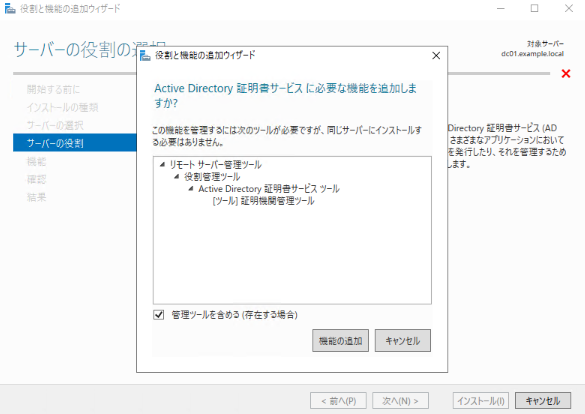
Select “Active Directory Certificate Services” in “Add Roles and Features”.
When the “Add Roles and Features Wizard” appears, click “Add Features”.
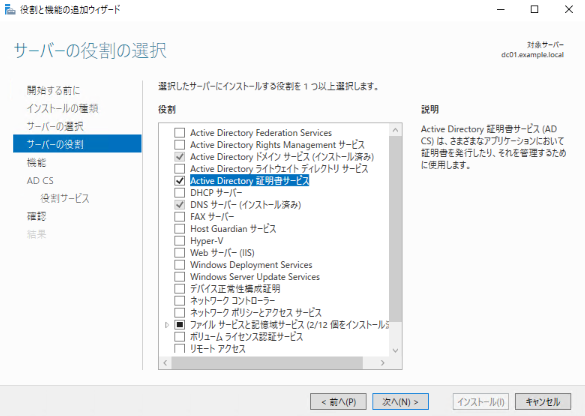
Make sure Active Directory Certificate Services is selected and click Next.
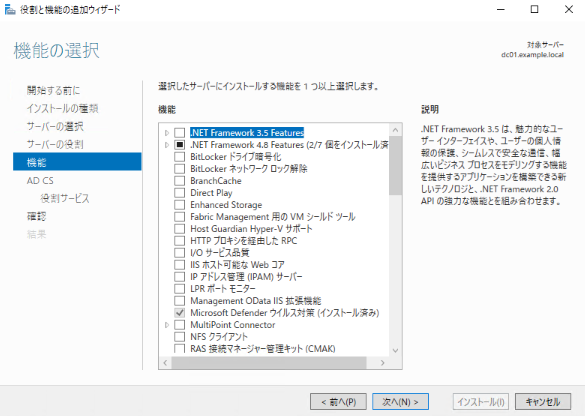
In “Select Features”, leave the defaults and click Next.
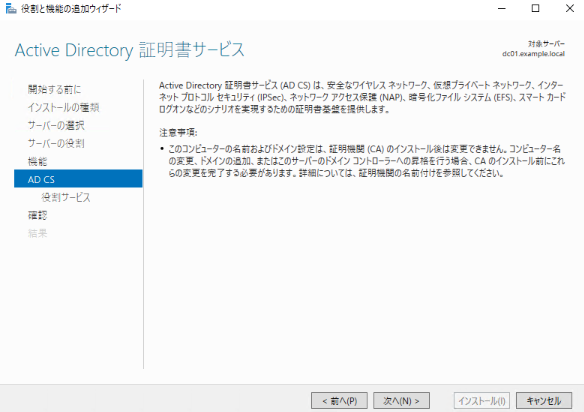
Click Next for Active Directory Certificate Services.
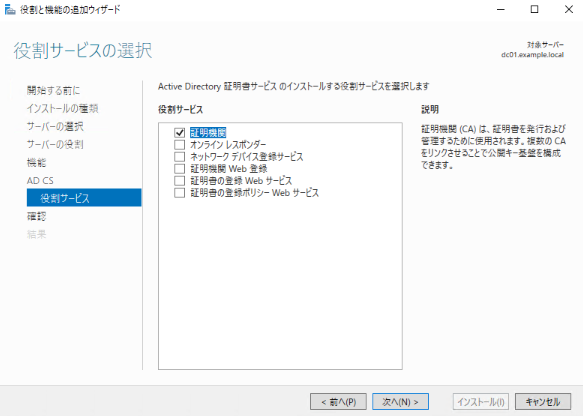
For Select Role Service, select Certification Authority and click Next.
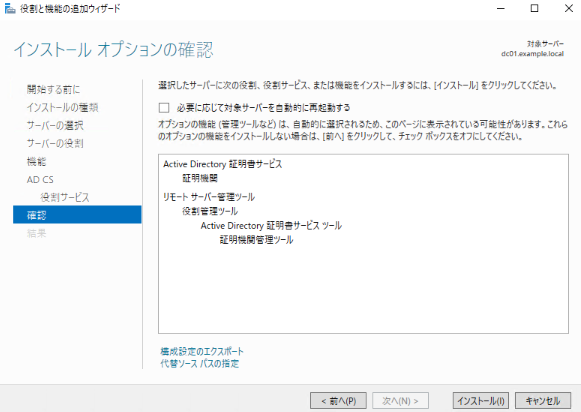
Confirm the contents in “Confirm installation options” and click Install.
Verify that the installation begins.
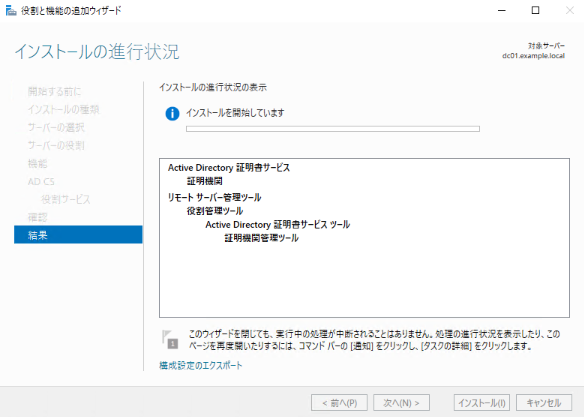
Click Close when the installation completes successfully.
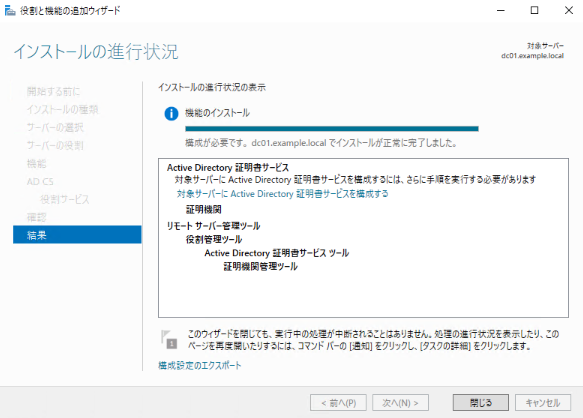
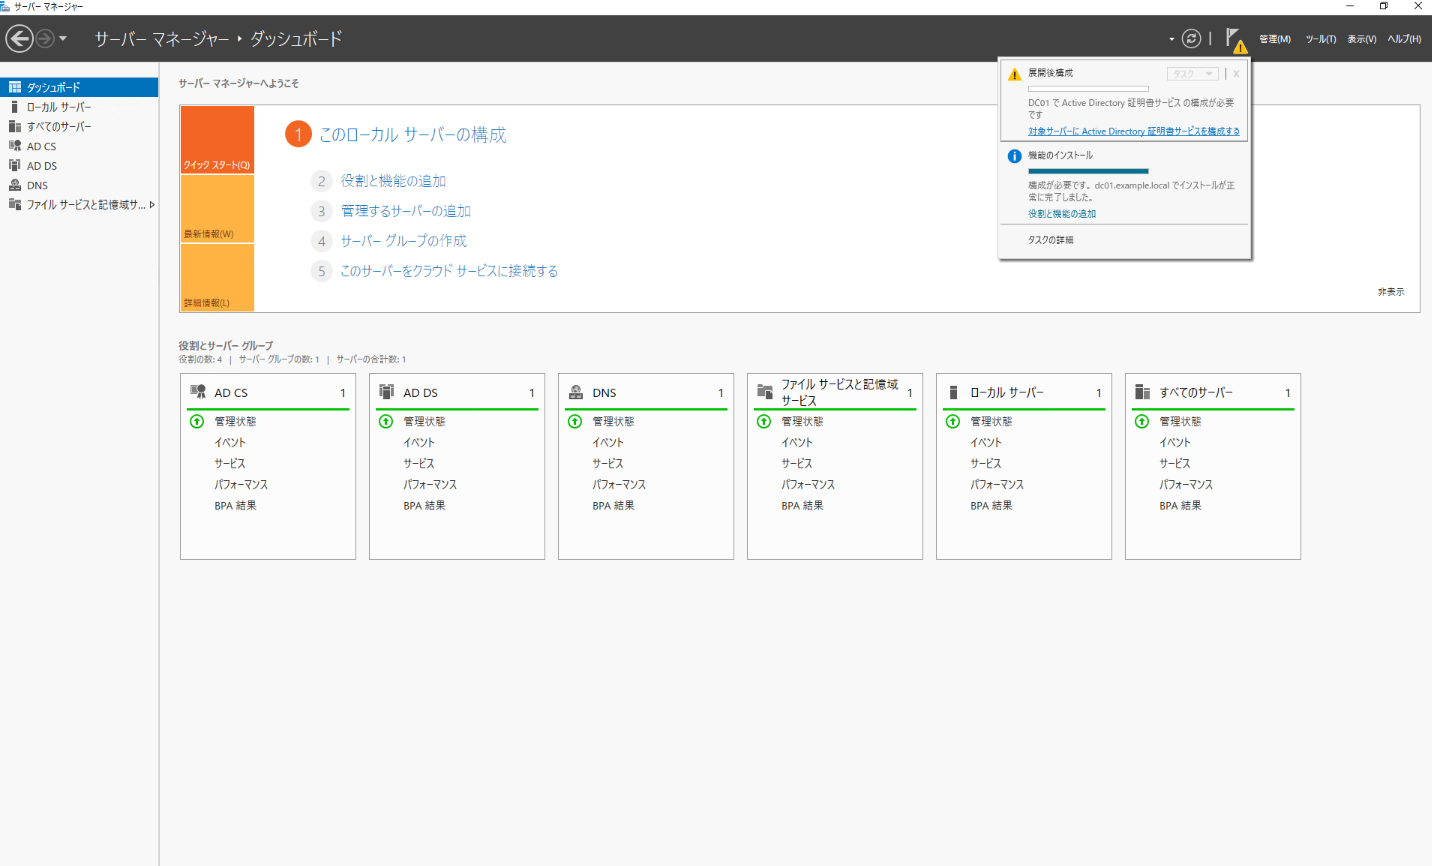
AD CS configuration
Open the Server Manager notification and click Configure Active Directory Certificate Services on the target server.
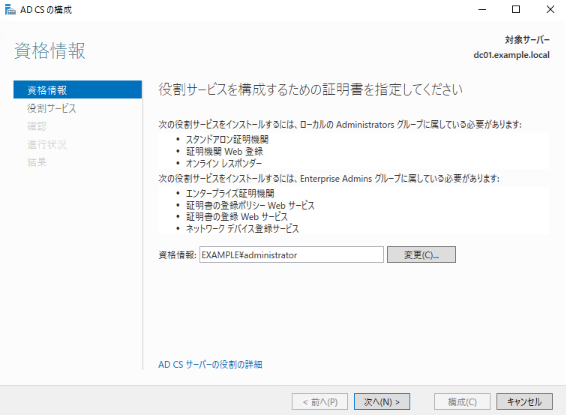
For Credentials, leave the defaults and click Next.
For Role Services, select Certification Authority and click Next.
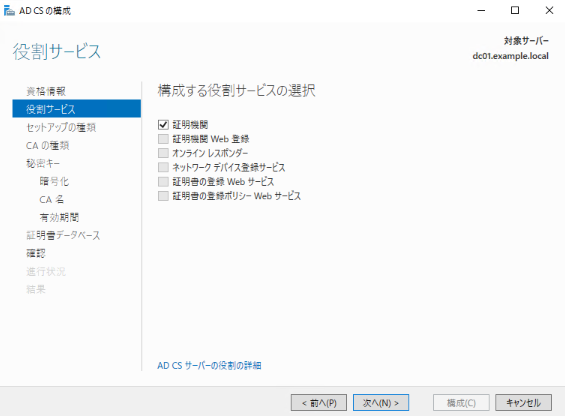
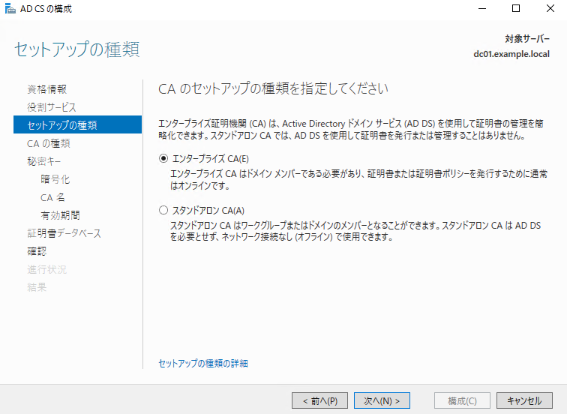
Select “Enterprise” for “Setup Type” and click Next.
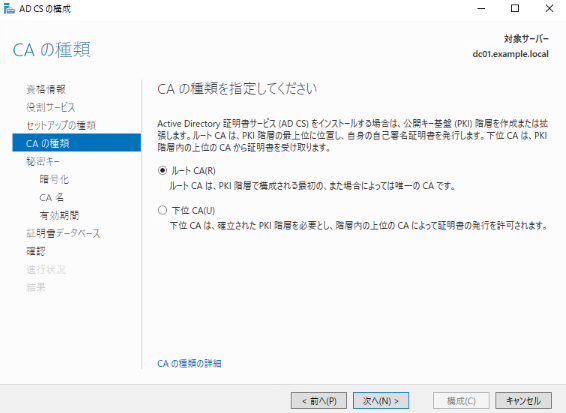
Select “Root CA” for “CA Type” and click Next.
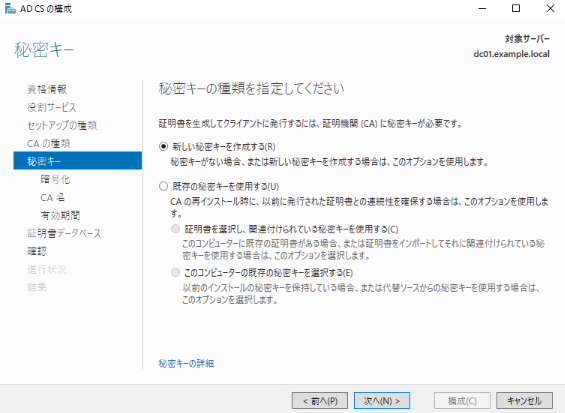
For “Private Key”, select “Create a new private key” and click Next.
For CA Encryption, leave the default and click Next.
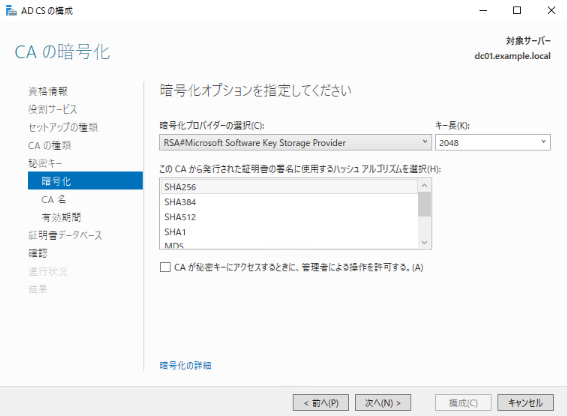
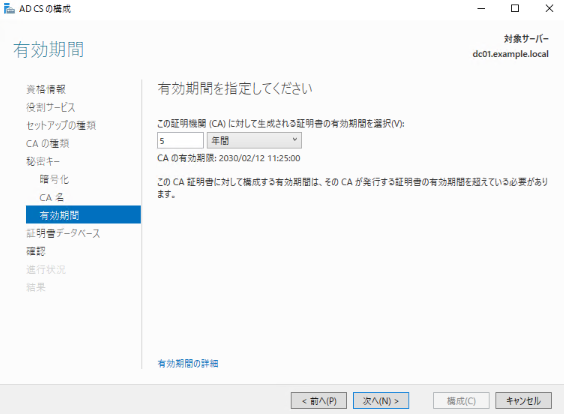
Specify the desired validity period in “Validity period” and click Next.
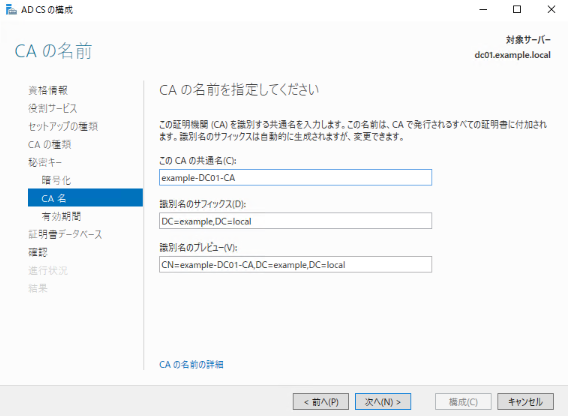
For CA Encryption, leave the default and click Next.
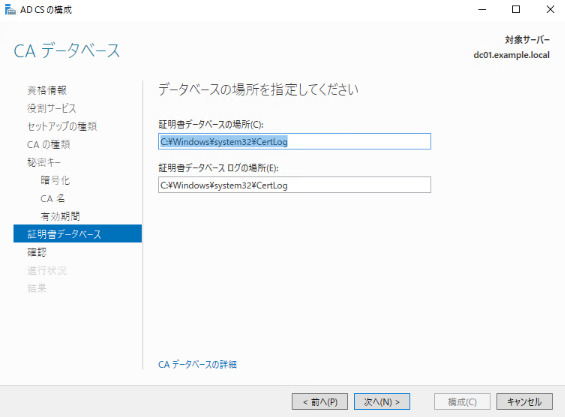
For CA Database, leave the default and click Next.
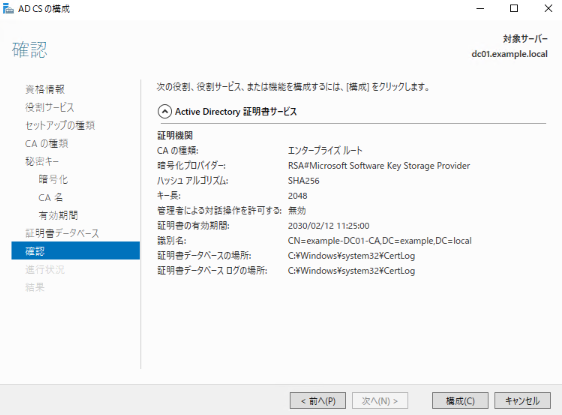
Confirm the contents in “Confirm” and click Configure.
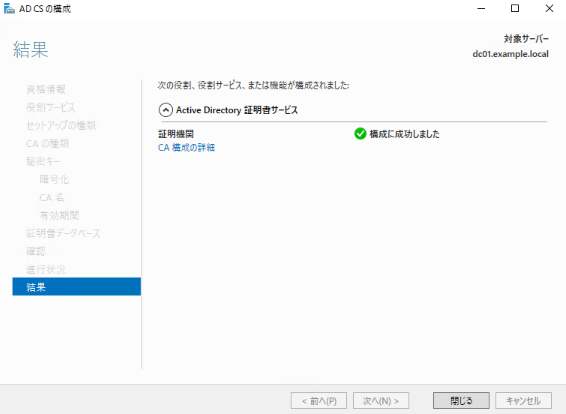
Check the “Results” to confirm that the configuration was successful.
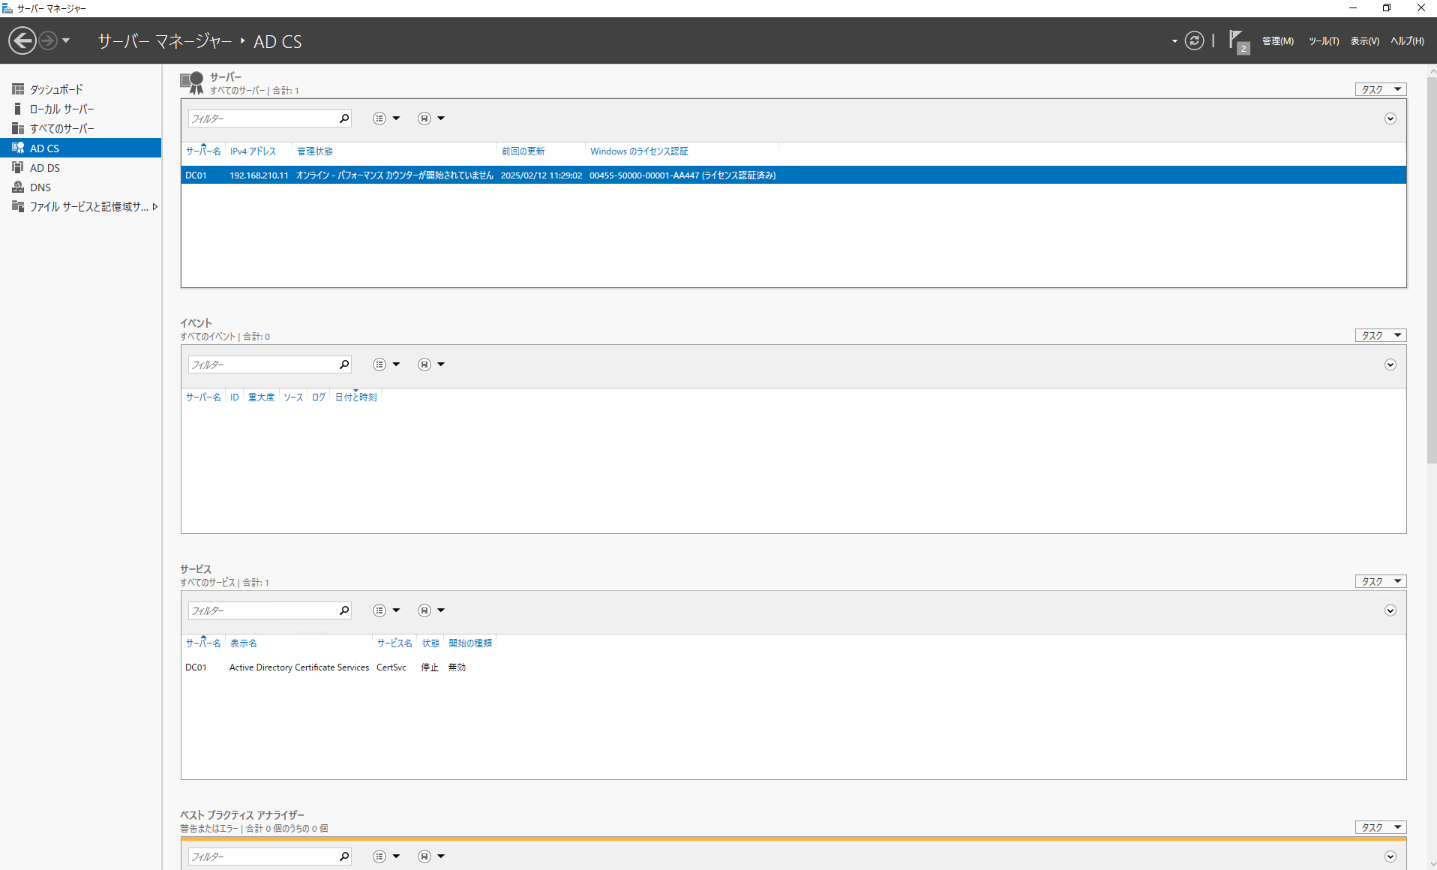
After restarting, confirm that “AD CS” is displayed in the left pane of Server Manager.
Creating a certificate template
Configuring a certificate template for Kerberos authentication
WHfB requires a Kerberos authentication certificate to authenticate client devices. Here, duplicate the “Kerberos Authentication” template and create a template that meets the authentication requirements.
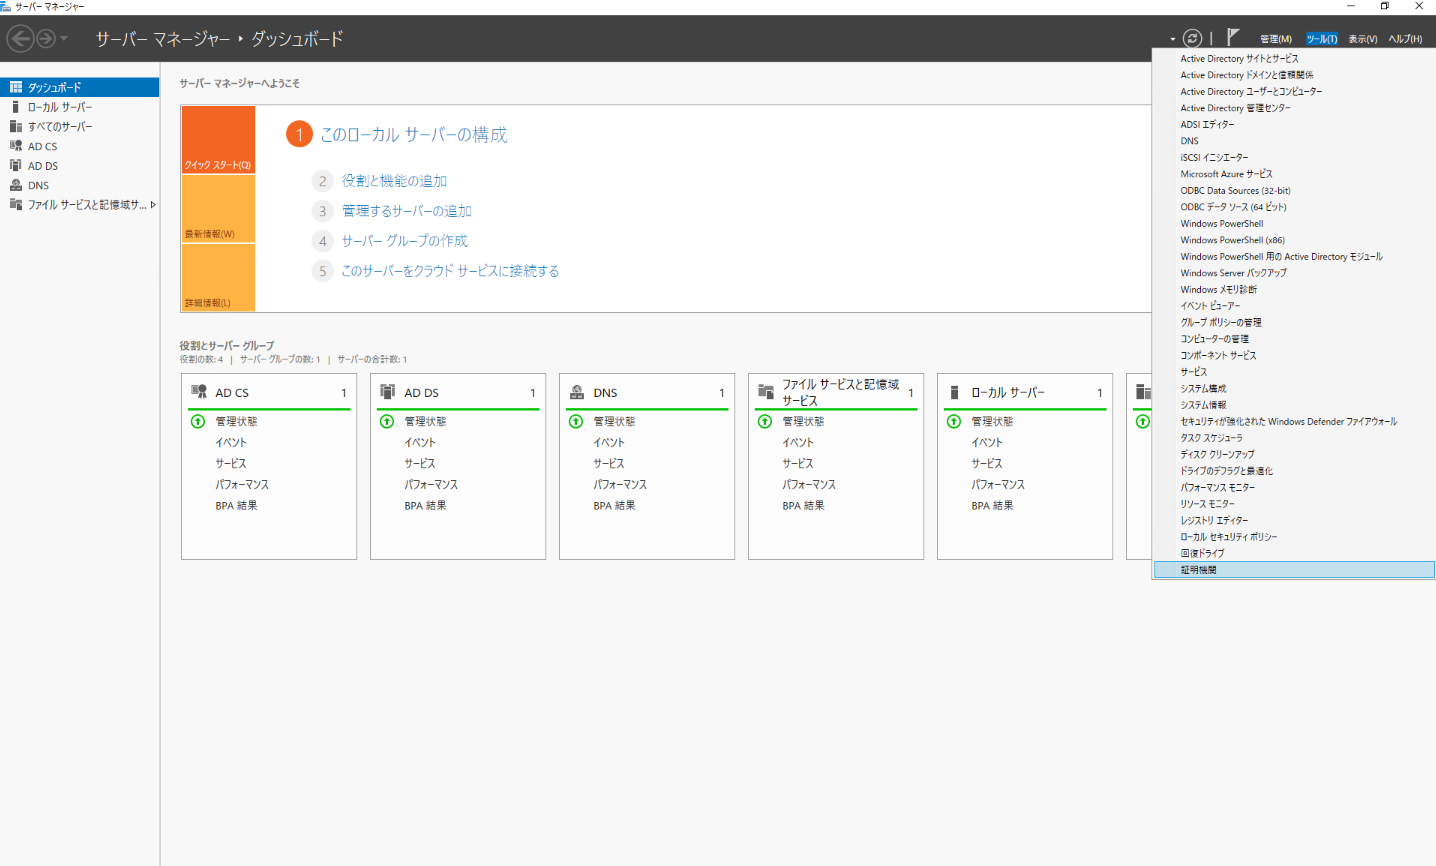
In Server Manager, click “Certification Authority” from the tools at the top.
Right-click “Certification Authority (Local)” → “{Name of Certification Authority}” → “Certificate Template” and click “Manage”.
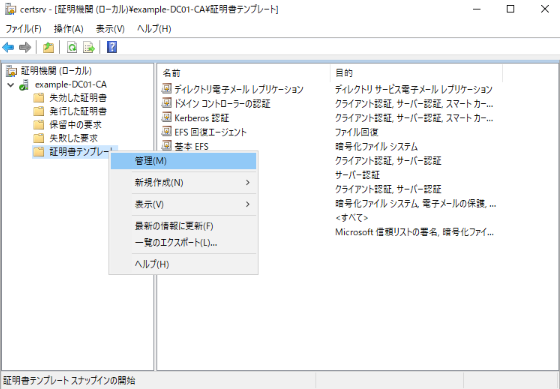
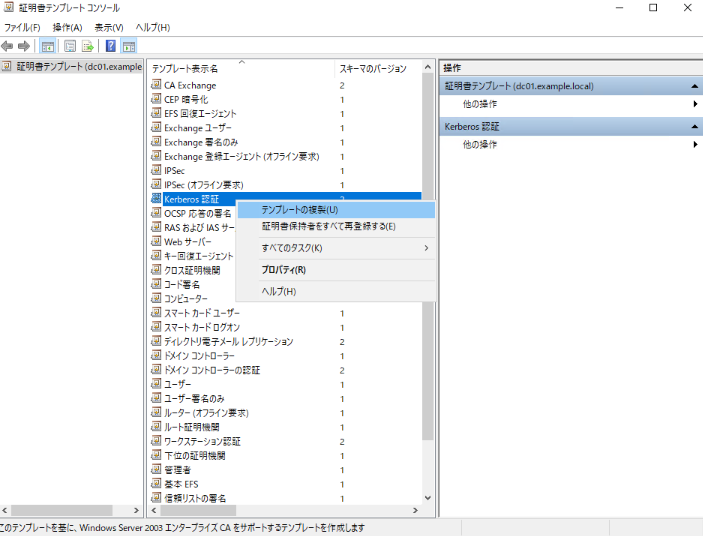
Right-click Kerberos Authentication and click Duplicate Template.
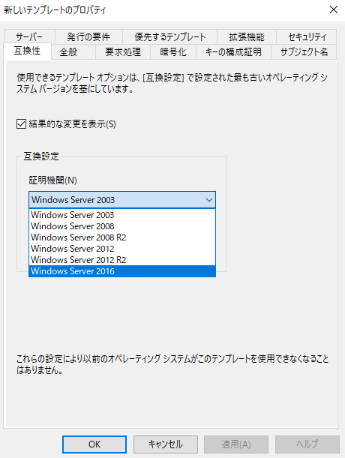
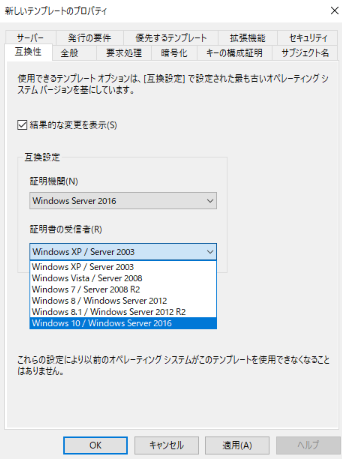
For Compatibility, select Windows Server 2016.
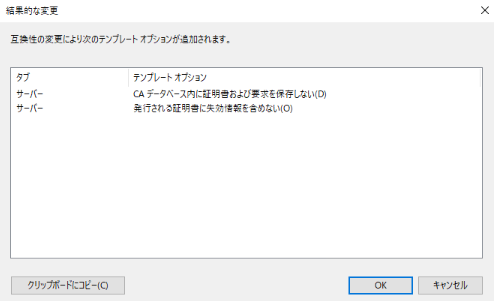
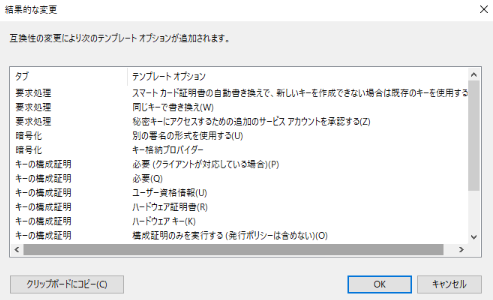
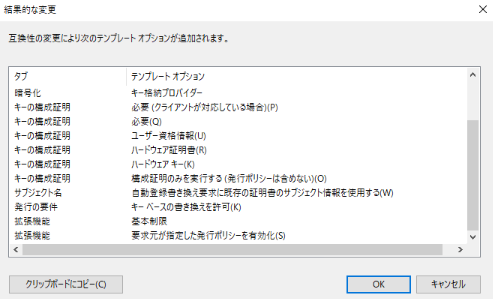
Click OK when the Consequential Changes window opens.
Similarly, select “Windows 10/Windows Server 2016” for “Certificate Recipient”.
Click OK when the Consequential Changes window opens.
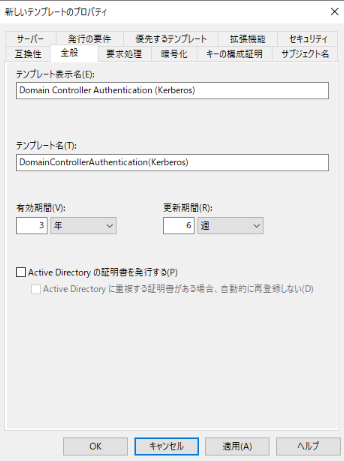
In “General”, enter any name in “Template display name”. Also specify any values for “Validity period” and “Update period”.
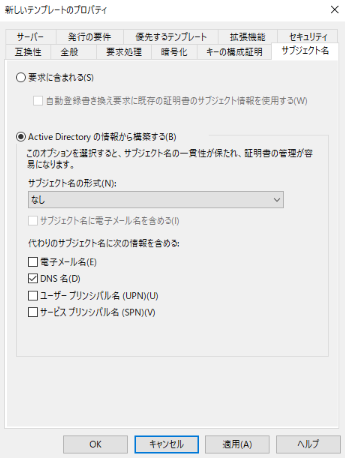
For “Subject Name”, check “Build from Active Directory information” and make sure “DNS Name” is selected.
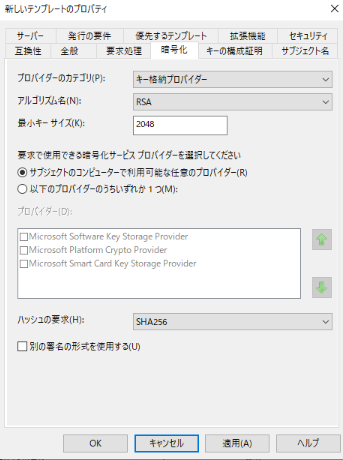
Configure “Encryption” as follows. Then click OK.
Provider Category: Key Storage Provider
Algorithm name: RSA
Request hash: SHA256
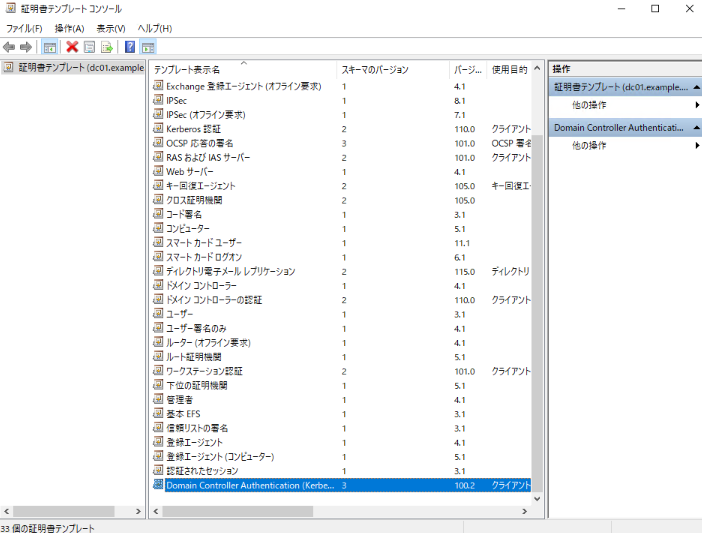
Verify that the certificate template was created.
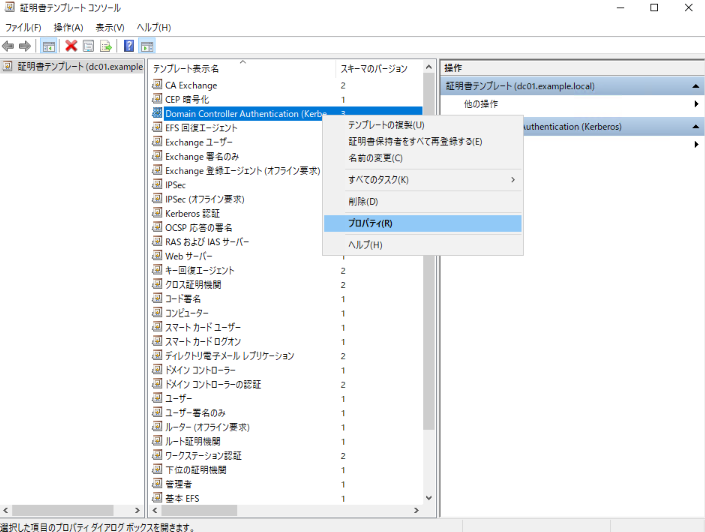
Right-click the certificate template you created and click Properties.
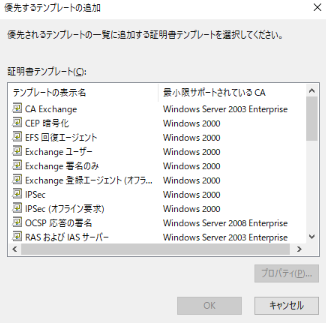
Click “Add” under “Superseded Templates”.
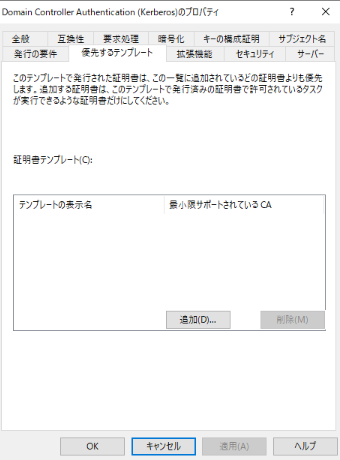
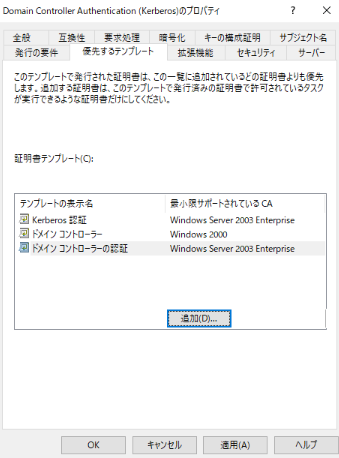
A list of certificate templates will be displayed, so add the following three.
- Kerberos authentication
- Domain controller
- Domain controller authentication
Click OK.
Configuring the certificate template for the internal web server
Create a template for issuing an SSL/TLS certificate for use with the AD FS service. Duplicate the “Web Server” template, configure the subject name request, and grant security permissions. The certificate issued from this template is used for AD FS service communication and Device Registration Service (DRS) communication.
In Server Manager, click “Certification Authority” from the tools at the top.
Right-click “Certification Authority (Local)” → “{Name of Certification Authority}” → “Certificate Template” and click “Manage”.
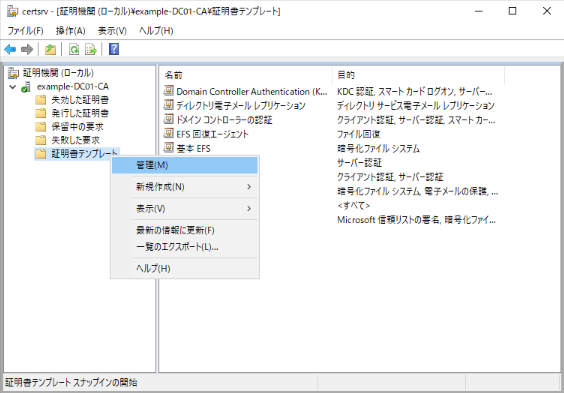
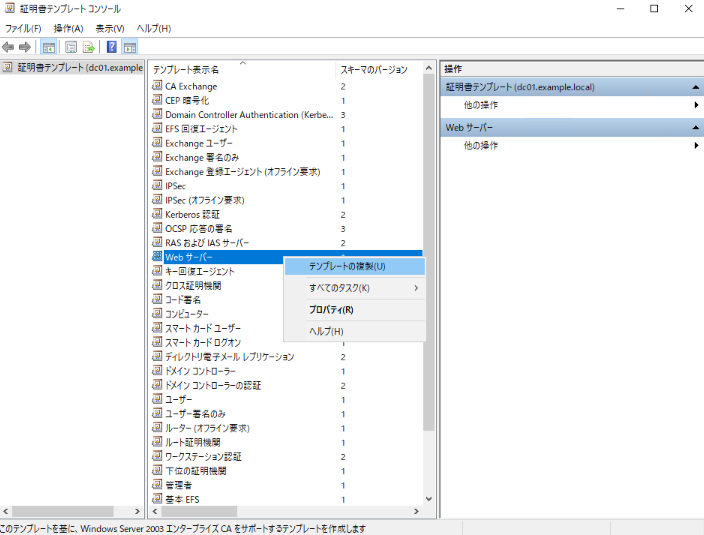
Right-click Web Server and click Duplicate Template.
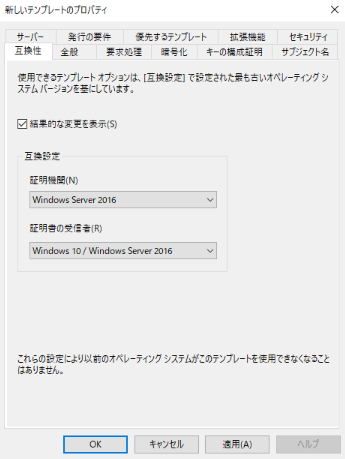
For Compatibility, select Windows Server 2016.
Click OK when the Consequential Changes window opens.
Similarly, select “Windows 10/Windows Server 2016” for “Certificate Recipient”.
Click OK when the Consequential Changes window opens.
Check compatibility settings.
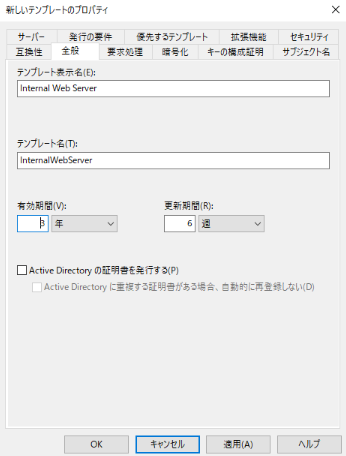
In “General”, enter any name in “Template display name”. Also specify any values for “Validity period” and “Update period”.
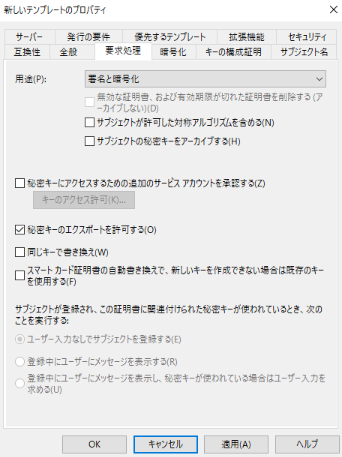
In “Request Processing”, check “Allow private key export”.
For “Subject Name”, select “Included in Request”.
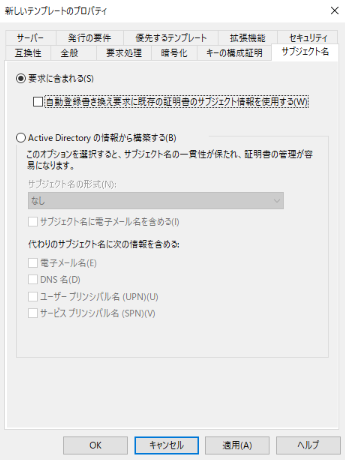
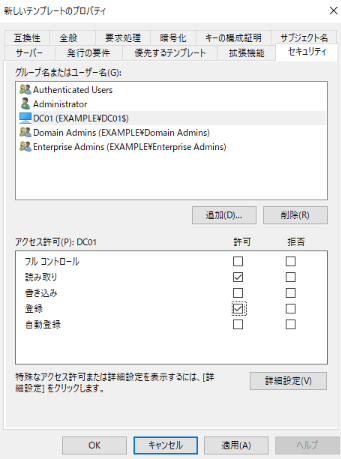
Under Security, click Add.
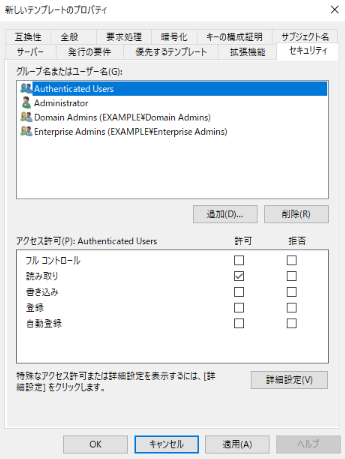
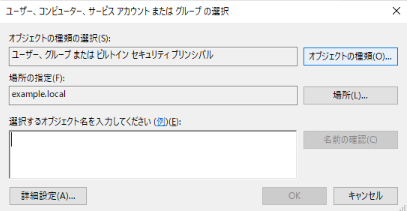
Click Object Type.
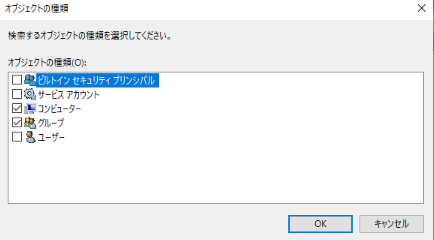
For “Object type”, select “Computer” and “Group”.
Enter the name of the computer or group allowed to enroll certificates in the object name field.
In this example, it is DC01.example.local.
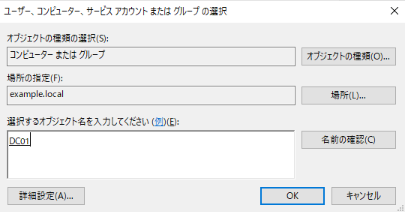
Confirm that the added computer is displayed in the list, and select “Enroll” under Permissions below.
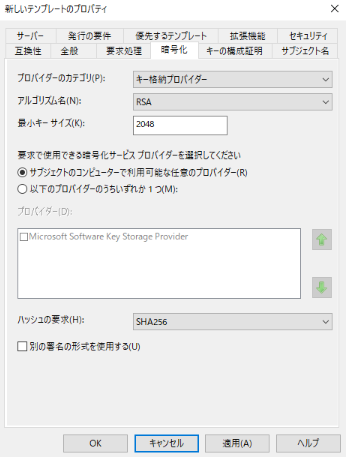
Configure “Encryption” as follows. Then click OK.
Provider Category: Key Storage Provider
Algorithm name: RSA
Request hash: SHA256
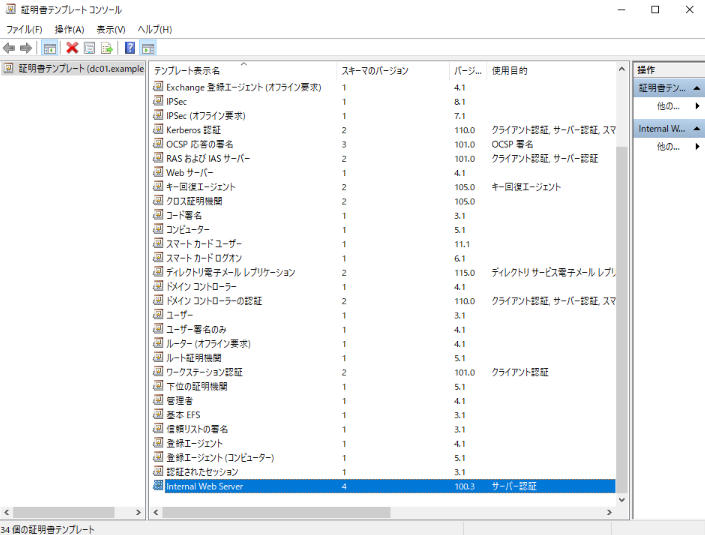
Verify that the certificate template was created.
Delete old certificate templates
If you want to fully migrate to the newly created certificate template, delete the existing certificate templates.
In Server Manager, click “Certification Authority” from the tools at the top.
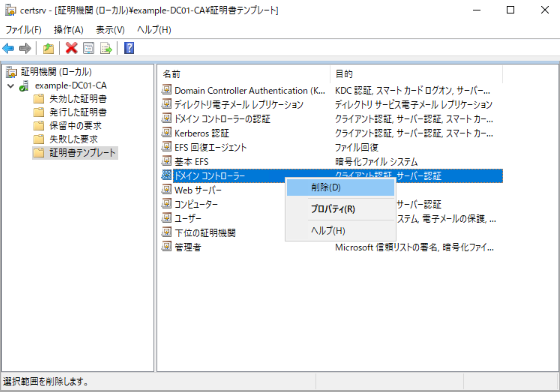
Go to “Certification Authority (Local)” → “{Name of Certification Authority}” → “Certificate Template”, right-click “Domain Controller”, and click “Delete”.
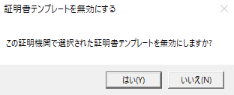
A confirmation will be displayed, so click “Yes”.
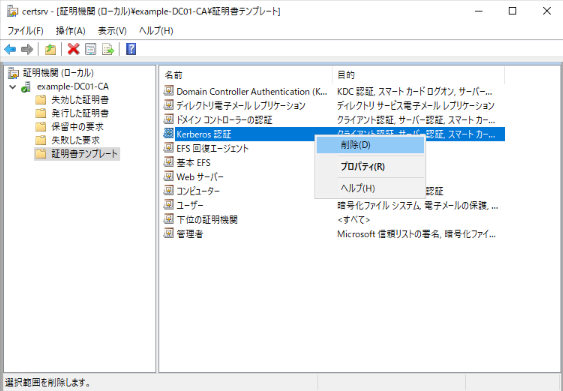
Similarly, delete “Kerberos Authentication”.
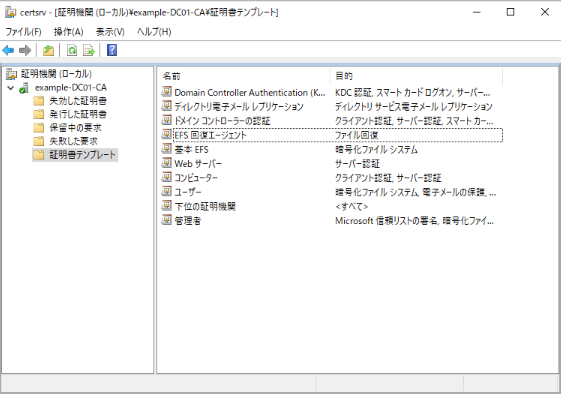
Confirm that “Domain Controller” and “Kerberos Authentication” no longer appear in the list.
Publishing a certificate template
Publishing Kerberos authentication certificate template
Publish the created certificate template for Kerberos authentication. This step enables domain controllers to request certificates using the new template.
In Server Manager, click “Certification Authority” from the tools at the top.
Right-click “Certification Authority (Local)” → “{Name of Certification Authority}” → “Certificate Template” and click “Create New” → “Certificate Template to Issue”.
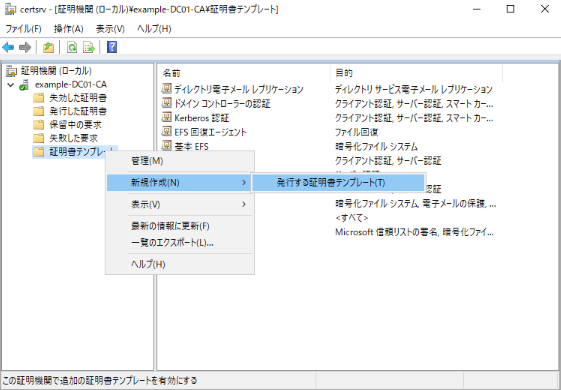
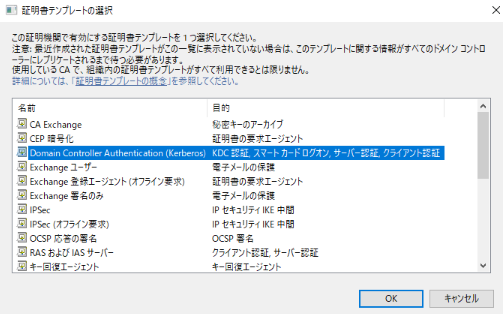
Select the Kerberos authentication certificate template you created earlier and click OK.
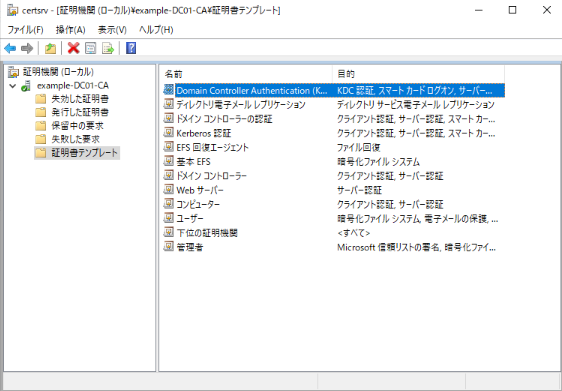
Confirm that it has been added to the certificate template list.
Publishing certificate template for internal web server
Publish the certificate template you created for the internal web server. This step enables the AD FS server to use the new template to request certificates.
Right-click “Certification Authority (Local)” → “{Name of Certification Authority}” → “Certificate Template” and click “Create New” → “Certificate Template to Issue”.
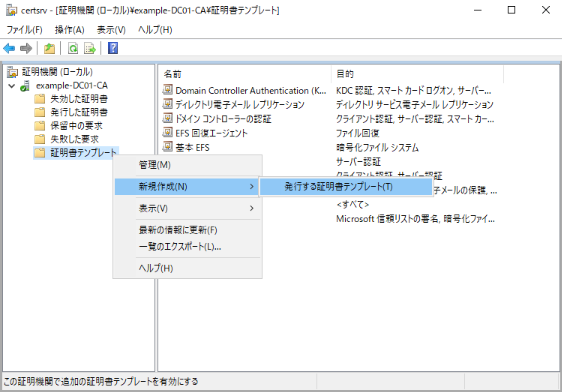
Select the internal web server certificate template you created earlier and click OK.
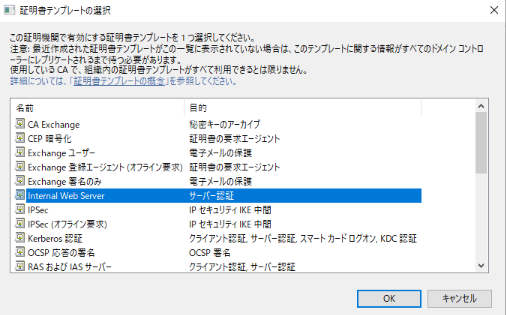
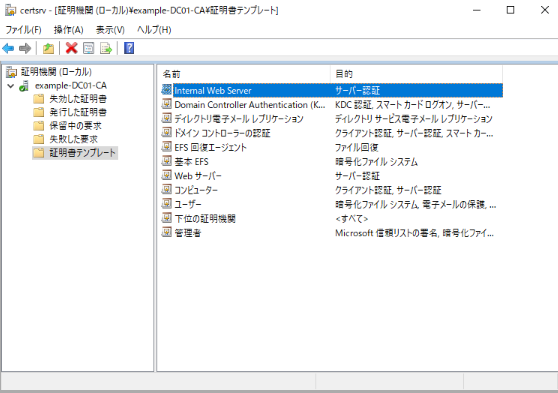
Confirm that it has been added to the certificate template list.
Certificate auto-enrollment
Configure certificate auto-enrollment using Group Policy. This automatically deploys Kerberos certificates to domain controllers.
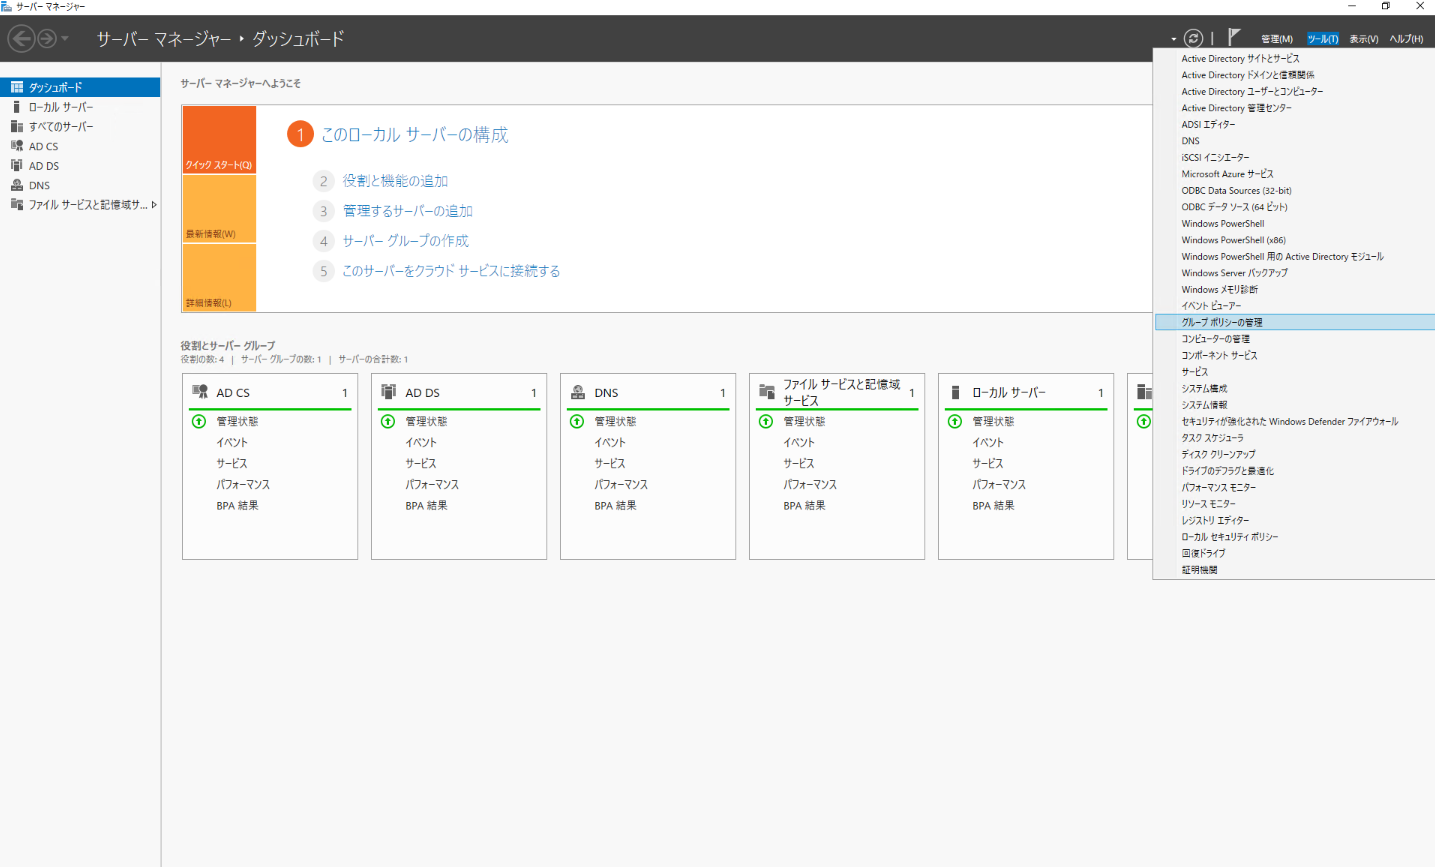
In Server Manager, click “Group Policy Management” from the tools at the top.
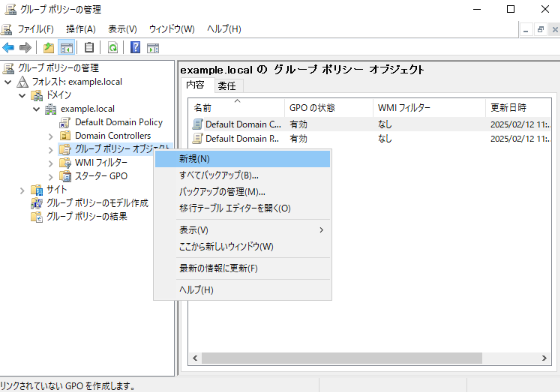
Right-click “Group Policy Management” → “Forest” → “Domains” → “{domain name}” → “Group Policy Object” and click “New”.
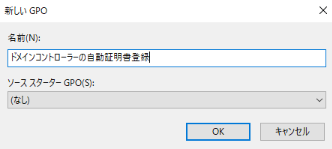
Enter “Domain Controller Automatic Certificate Enrollment” in “Name” and click “OK”.
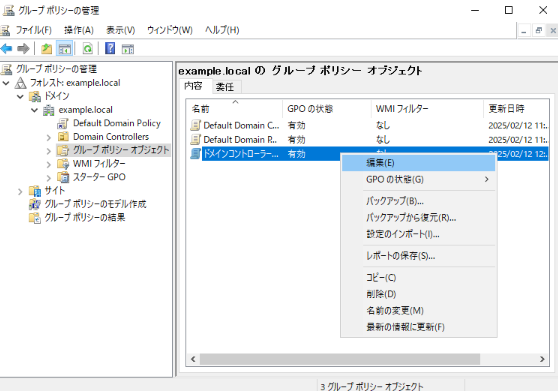
The GPO is created under “Group Policy Object”. Right-click it and click “Edit”.
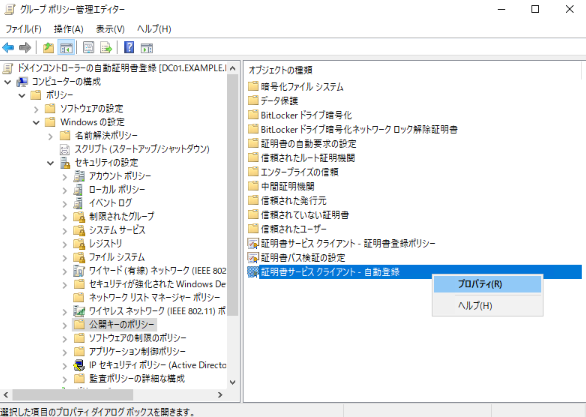
Right-click “Certificate Services Client - Automatic Enrollment” in “Computer Configuration” → “Policies” → “Windows Settings” → “Security Settings” → “Public Key Policy” and click “Properties”.
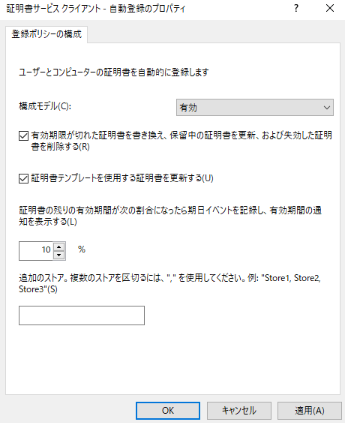
Enable “Configuration Model” and check the following items. Then click OK.
- Renew expired certificates, renew pending certificates, and delete revoked certificates
- Renew certificates using certificate templates
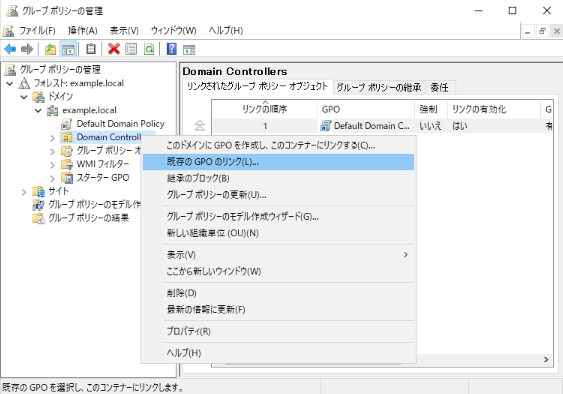
“Group Policy Management” → “Forest” → “Domains” → “{domain name}” → Right-click “Domain Controllers” and click “Link existing GPO”.
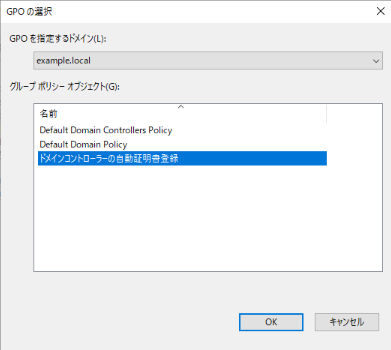
Select “Automatic certificate enrollment for domain controllers” and click “OK”.
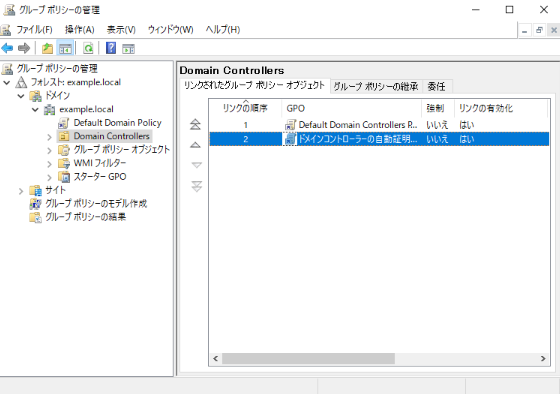
Make sure it is linked.
Confirm certificate deployment
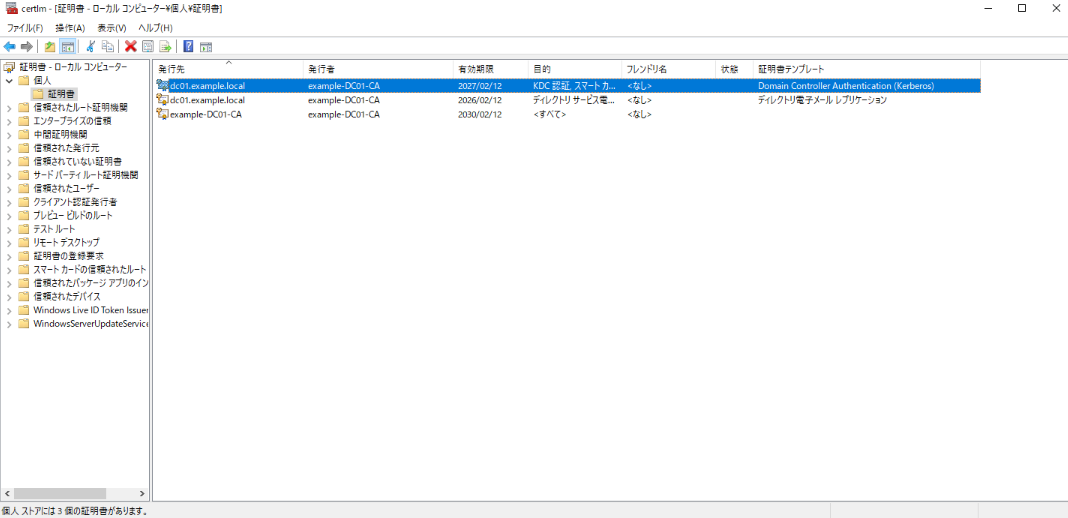
Confirm that the certificate has been replaced with the Kerberos authentication certificate.
Confirm certificate replacement using Event Viewer
Verify that certificate auto-enrollment is working properly by checking the Event Viewer logs.
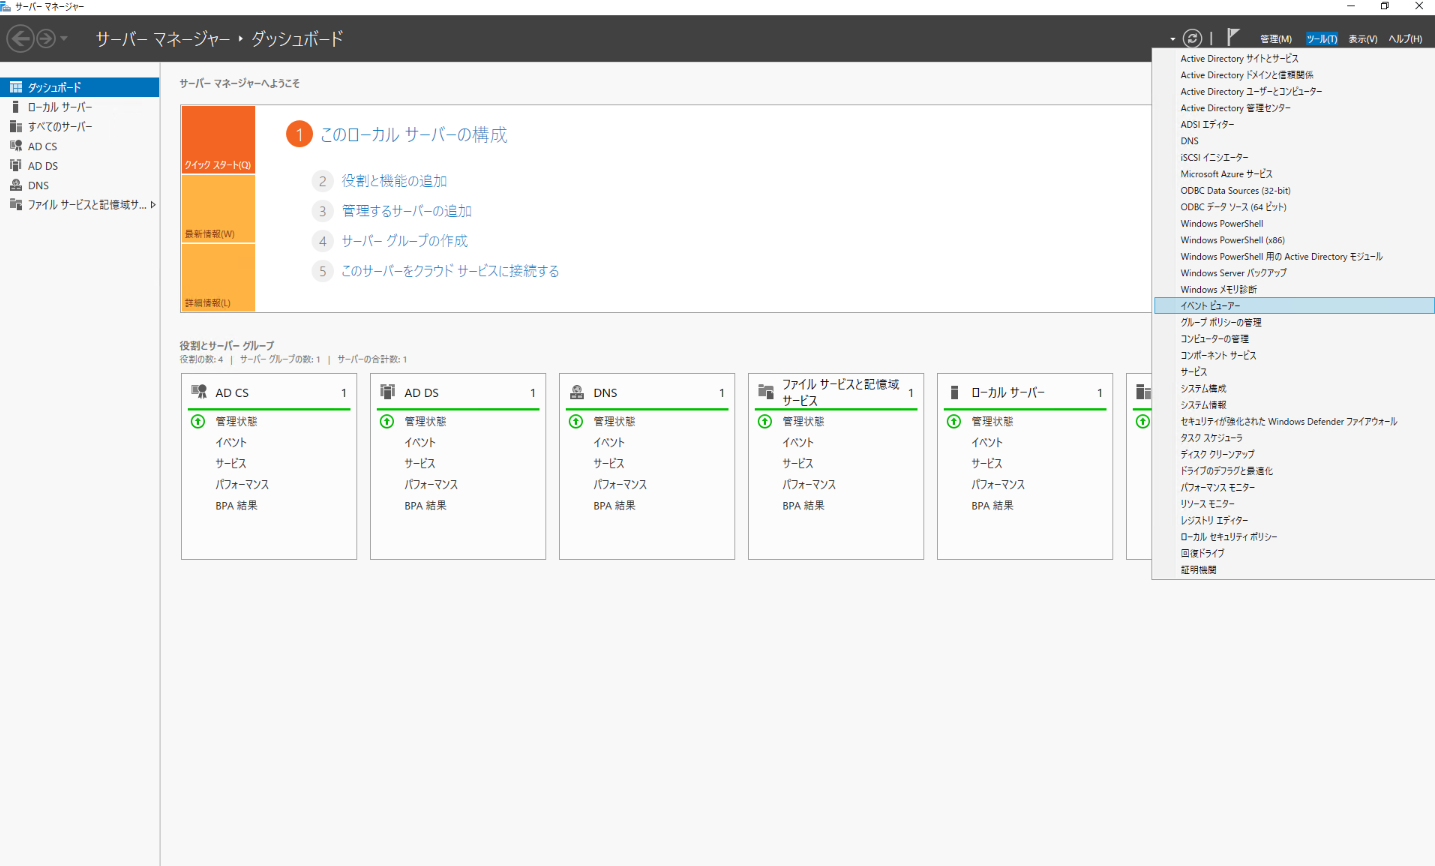
In Server Manager, click “Event Viewer” from the tools at the top.
Select Operational under Applications and Services → Microsoft → Windows → CertificateServices-Lifecycles-System.
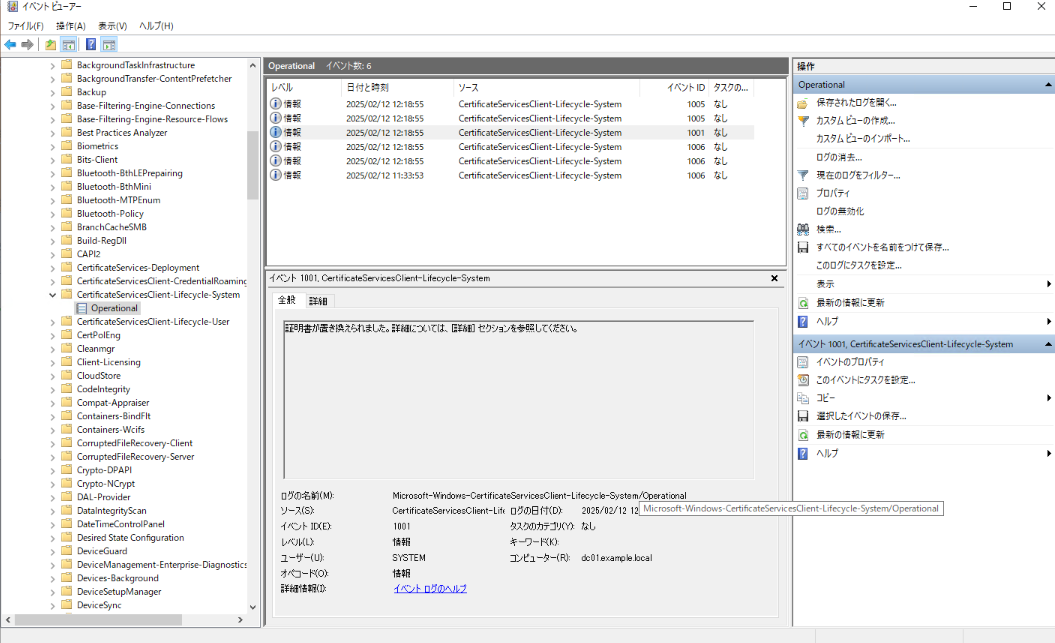
By checking the event details, you can confirm the enrollment details and template information.
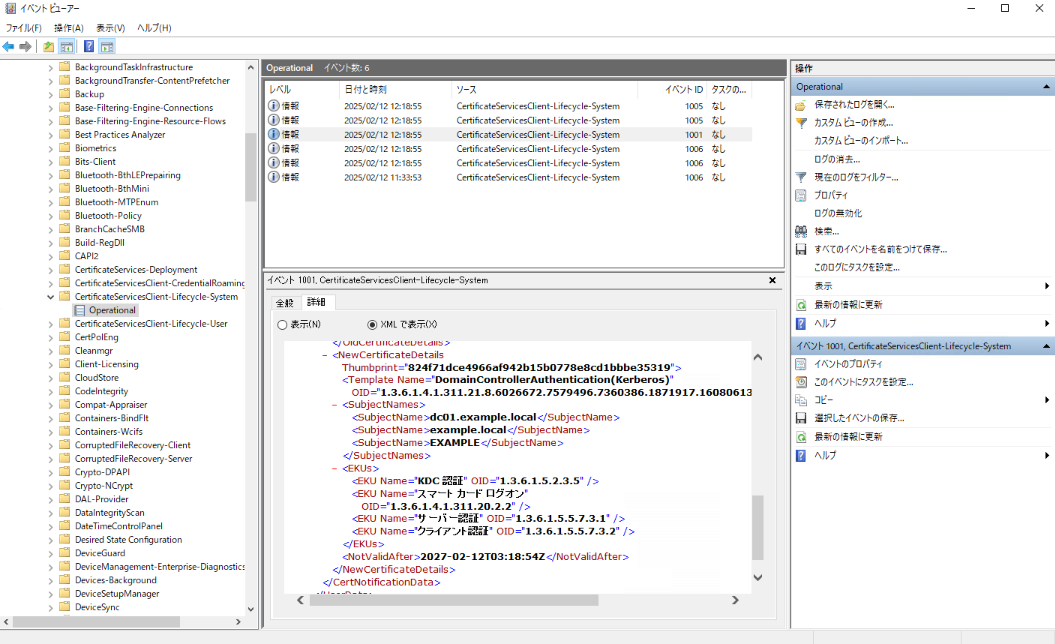
- <Event xmlns="http://schemas.microsoft.com/win/2004/08/events/event">
- <System>
  <Provider Name="Microsoft-Windows-CertificateServicesClient-Lifecycle-System" Guid="{bc0669e1-a10d-4a78-834e-1ca3c806c93b}" />
  <EventID>1001</EventID>
  <Version>0</Version>
  <Level>4</Level>
  <Task>0</Task>
  <Opcode>0</Opcode>
  <Keywords>0x8000000000000000</Keywords>
  <TimeCreated SystemTime="2025-02-12T03:18:55.1429988Z" />
  <EventRecordID>4</EventRecordID>
  <Correlation />
  <Execution ProcessID="1472" ThreadID="6520" />
  <Channel>Microsoft-Windows-CertificateServicesClient-Lifecycle-System/Operational</Channel>
  <Computer>dc01.example.local</Computer>
  <Security UserID="S-1-5-18" />
  </System>
- <UserData>
- <CertNotificationData ProcessName="taskhostw.exe" AccountName="EXAMPLE\DC01$" Context="Machine">
  <Action>Supersede</Action>
- <OldCertificateDetails Thumbprint="f72d2aecc004d6b6b6b709c91c1c2ada96920151">
  <Template Name="DomainController" />
- <SubjectNames>
  <SubjectName>CN=dc01.example.local</SubjectName>
  <SubjectName>fad77302-8a95-4e00-8005-0d312d9bc6f3</SubjectName>
  <SubjectName>dc01.example.local</SubjectName>
  </SubjectNames>
- <EKUs>
  <EKU Name="client authentication" OID="1.3.6.1.5.5.7.3.2" />
  <EKU Name="server authentication" OID="1.3.6.1.5.5.7.3.1" />
  </EKUs>
  <NotValidAfter>2026-02-12T02:23:53Z</NotValidAfter>
  </OldCertificateDetails>
- <NewCertificateDetails Thumbprint="824f71dce4966af942b15b0778e8cd1bbbe35319">
  <Template Name="DomainControllerAuthentication(Kerberos)" OID="1.3.6.1.4.1.311.21.8.6026672.7579496.7360386.1871917.16080613.5.10546164.5032938" />
- <SubjectNames>
  <SubjectName>dc01.example.local</SubjectName>
  <SubjectName>example.local</SubjectName>
  <SubjectName>EXAMPLE</SubjectName>
  </SubjectNames>
- <EKUs>
  <EKU Name="KDC certification" OID="1.3.6.1.5.2.3.5" />
  <EKU Name="Smart card logon" OID="1.3.6.1.4.1.311.20.2.2" />
  <EKU Name="server authentication" OID="1.3.6.1.5.5.7.3.1" />
  <EKU Name="client authentication" OID="1.3.6.1.5.5.7.3.2" />
  </EKUs>
  <NotValidAfter>2027-02-12T03:18:54Z</NotValidAfter>
  </NewCertificateDetails>
  </CertNotificationData>
  </UserData>
  </Event>
Check from certificate management
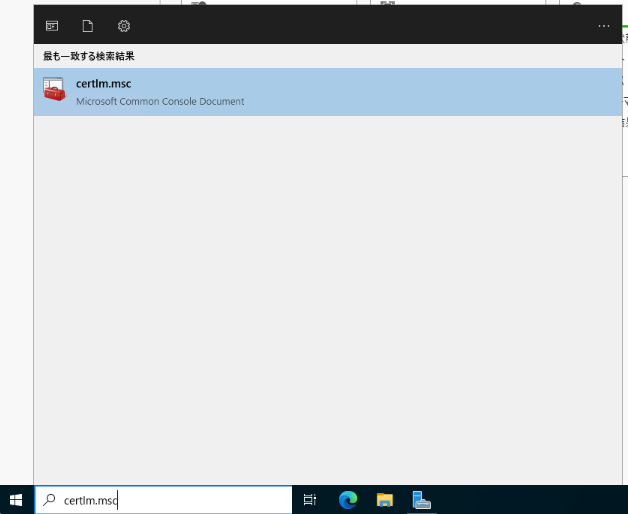
Use Certificate Manager (certlm.msc) to check the actual issued certificate.
Search for “certlm.msc” in the search field and open Certificate Manager.
Confirm that the certificate has been issued in “Personal” → “Certificate”.
Configuring AD FS
Installing AD FS
Add the Active Directory Federation Services role. AD FS is used as the basis for MFA authentication, so it plays an essential role when building WHfB in an on-premises environment.
Click “Add Roles and Features” in Server Manager.
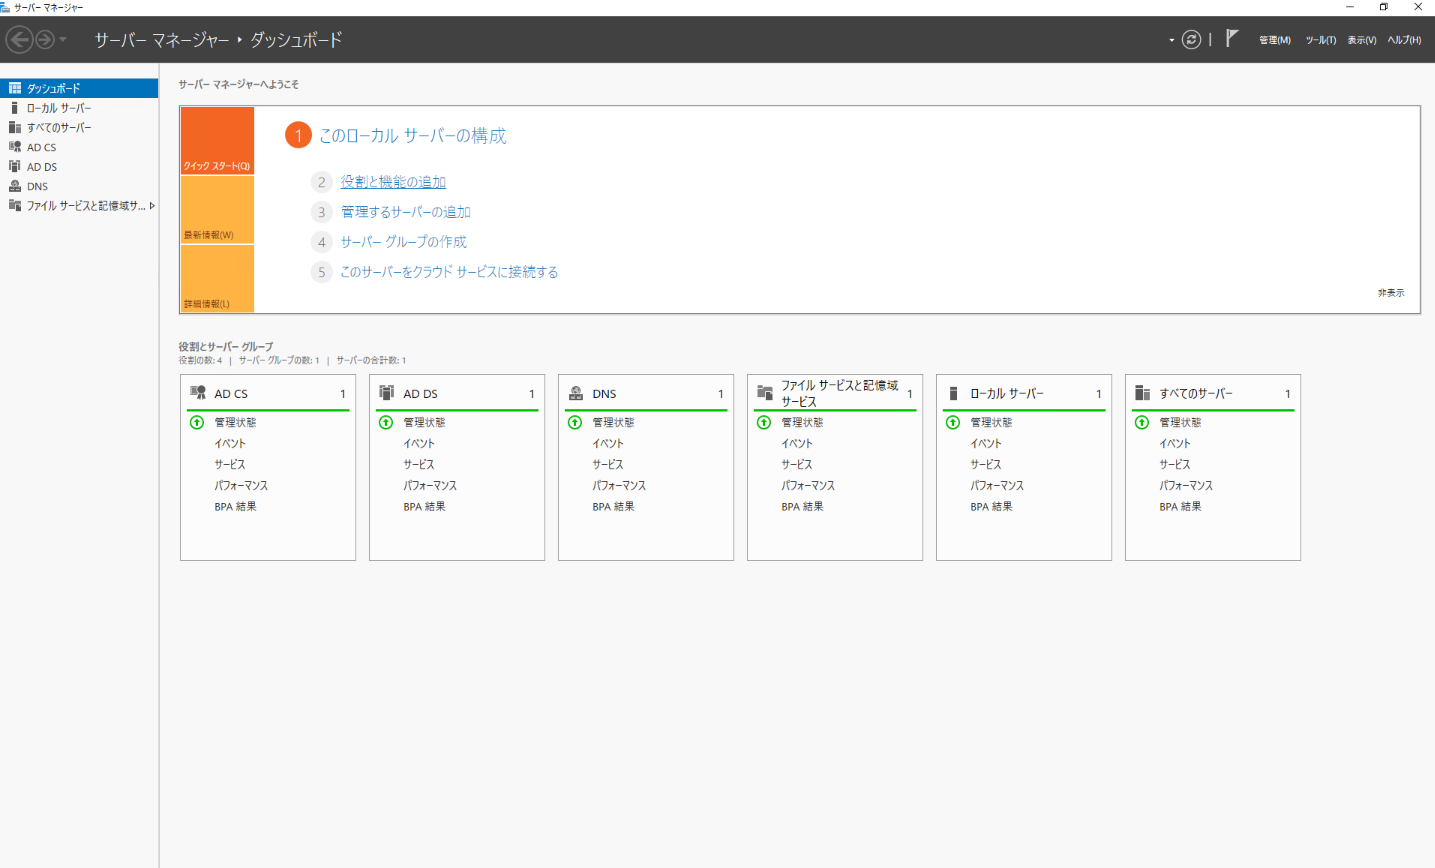
In “Before you begin,” click Next.
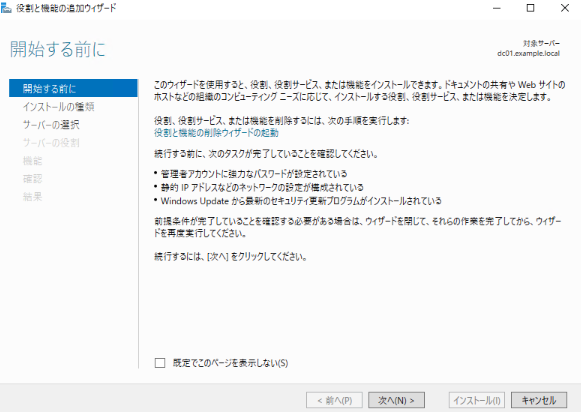
Click Next for “Installation type and selection”.
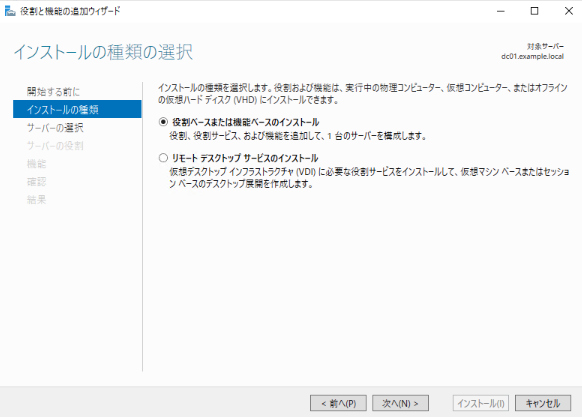
In “Select target server”, click Next.
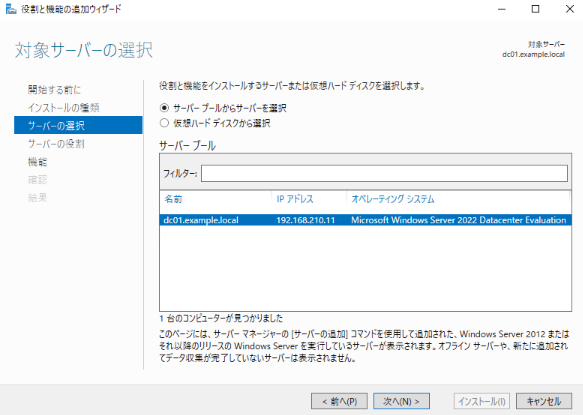
For Add Roles and Features, select Active Directory Federation Services.
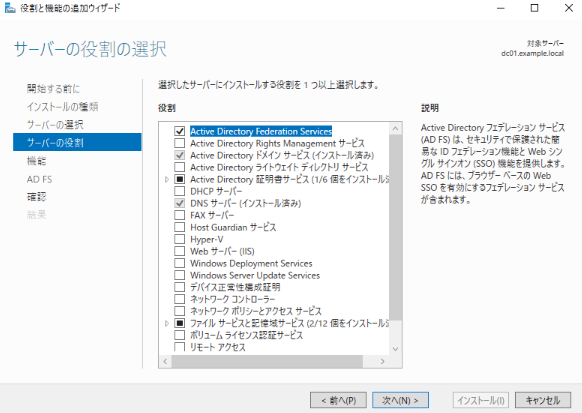
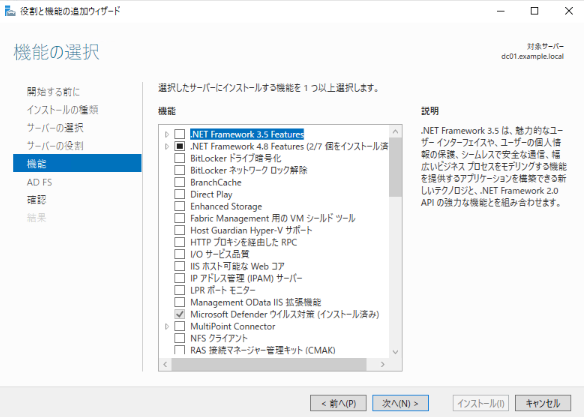
In “Select Features”, leave the defaults and click Next.
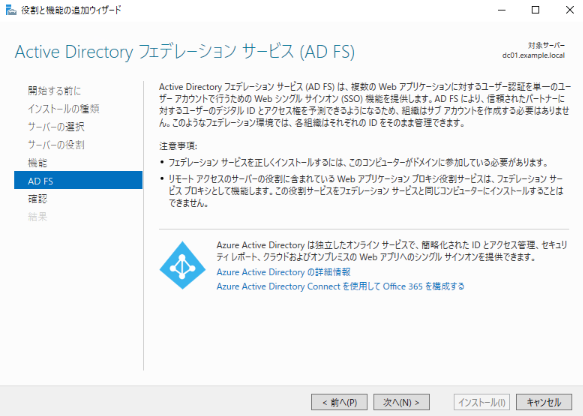
Click Next for Active Directory Federation Services (AD FS).
Confirm the contents in “Confirm installation options” and click Install.
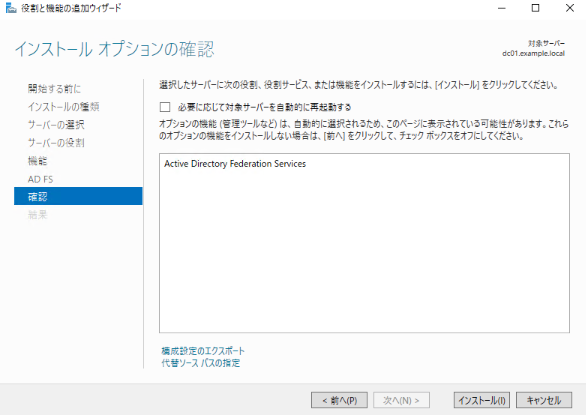
Verify that the installation begins.
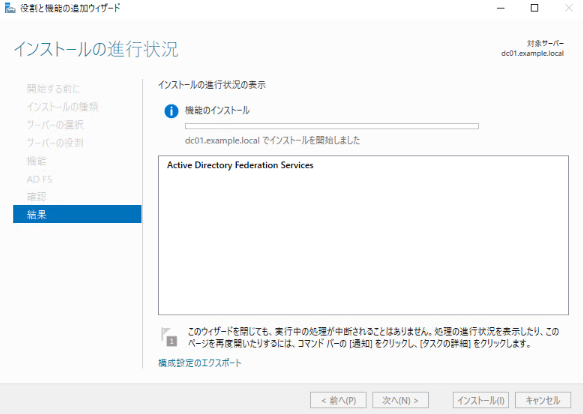
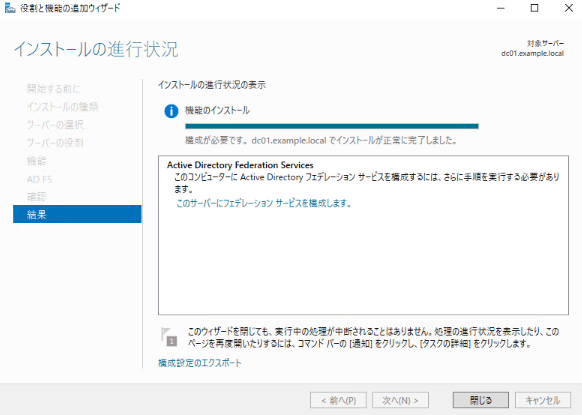
Click Close when the installation completes successfully.
Issuing a certificate for AD FS
Issue an SSL/TLS certificate for use with the AD FS service. This certificate is issued using the internal web server template created earlier and is used to encrypt AD FS communication.
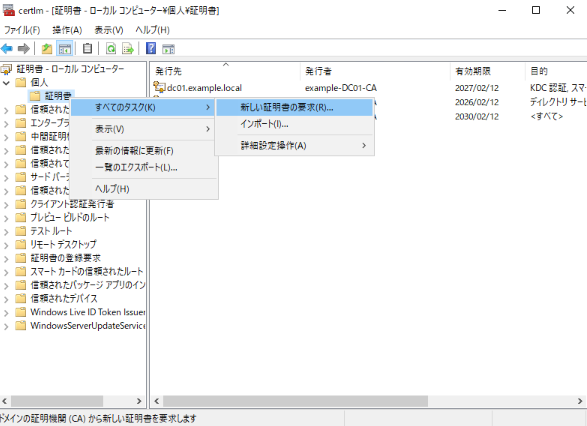
Search for “certlm.msc” in the search field and open Certificate Manager.
Right-click Personal → Certificates, then click All Tasks → Request a new certificate.
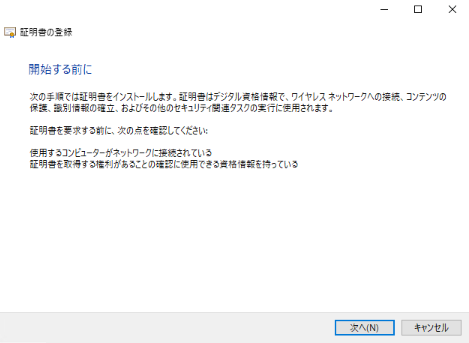
In “Before you begin,” click Next.
Click Next on “Select Certificate Enrollment Policy”.
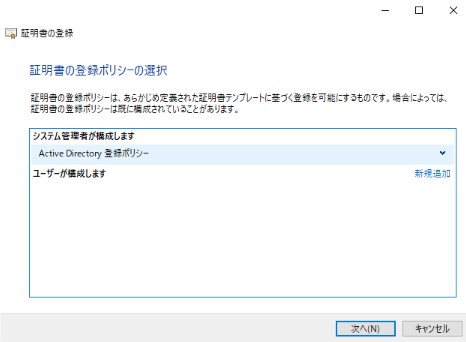
In “Request a certificate”, check the internal server certificate template and click “You do not have enough credentials to register this certificate. Click here to configure settings.”
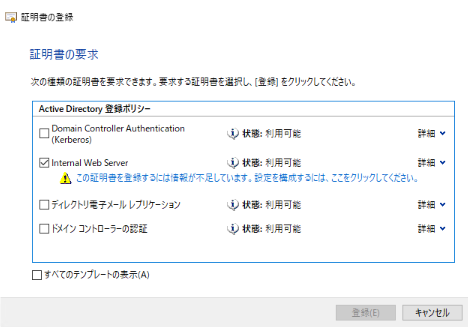
Enter “Common Name” as the type of “Subject Name” and the FQDN of AD FS as the value, then click Add.
Enter “DNS” as the type of “Alias” and the optional FQDN used by the AD FS service as the value, then click Add.
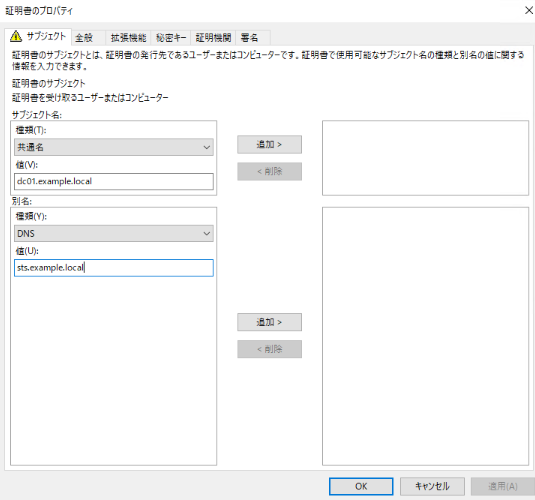
Verify that the value was added.
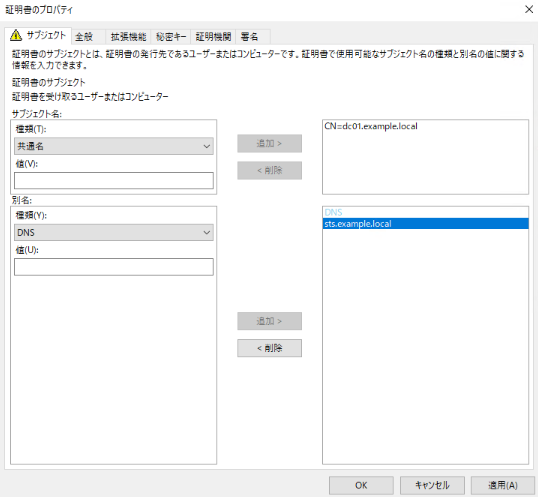
Make sure that the internal web server certificate template is checked and click “Enroll”.
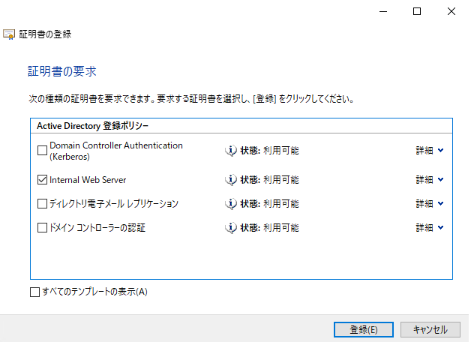
Check the contents and click “Finish”.
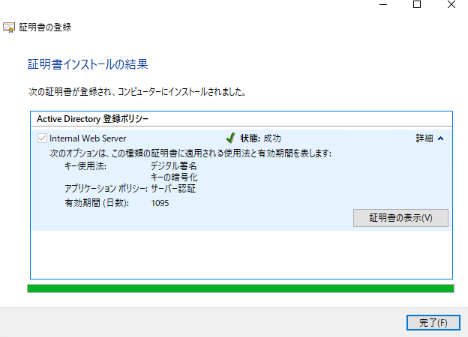
Confirm that the created certificate exists in “Personal” → “Certificates”.
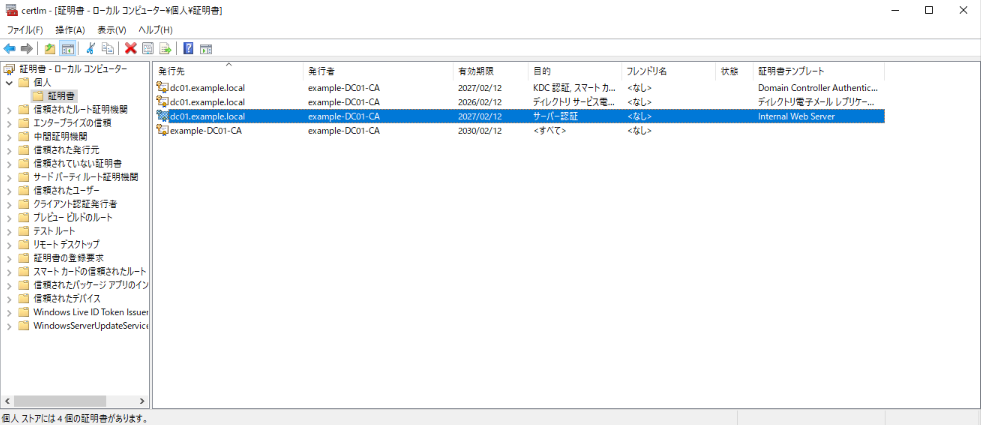
Configuring the KDS root key
Set the KDS root key to use with the gMSA account (Group Managed Service Account). This key is used for password management of AD FS service accounts.
Start PowerShell.
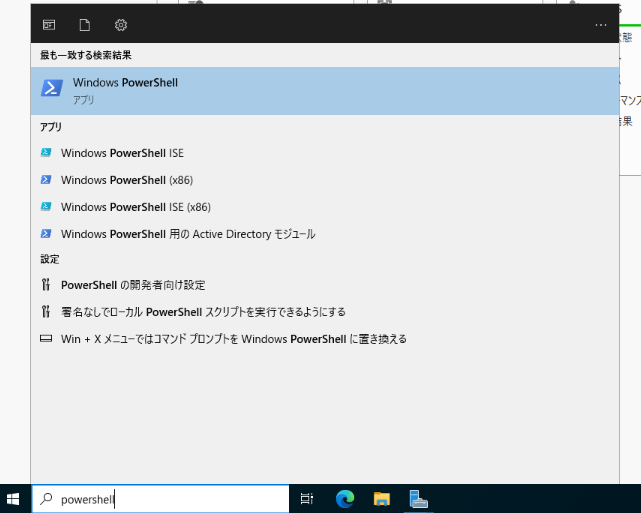
Enter the following command to set the KDS root key.
Add-KdsRootKey -EffectiveTime (Get-Date).AddHours(-10)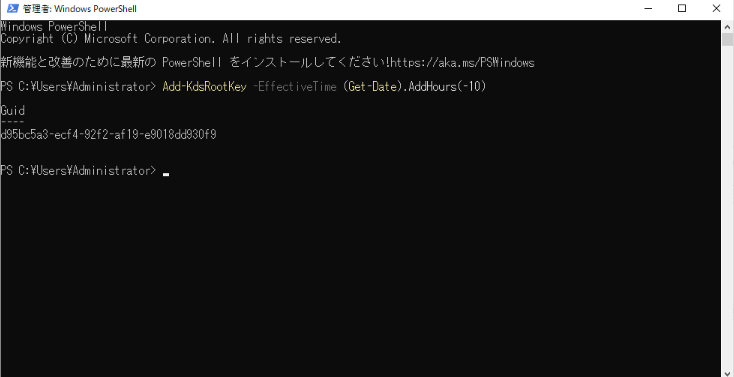
Configuring AD FS
Open the Server Manager notification and click Configure Federation Services on this server.
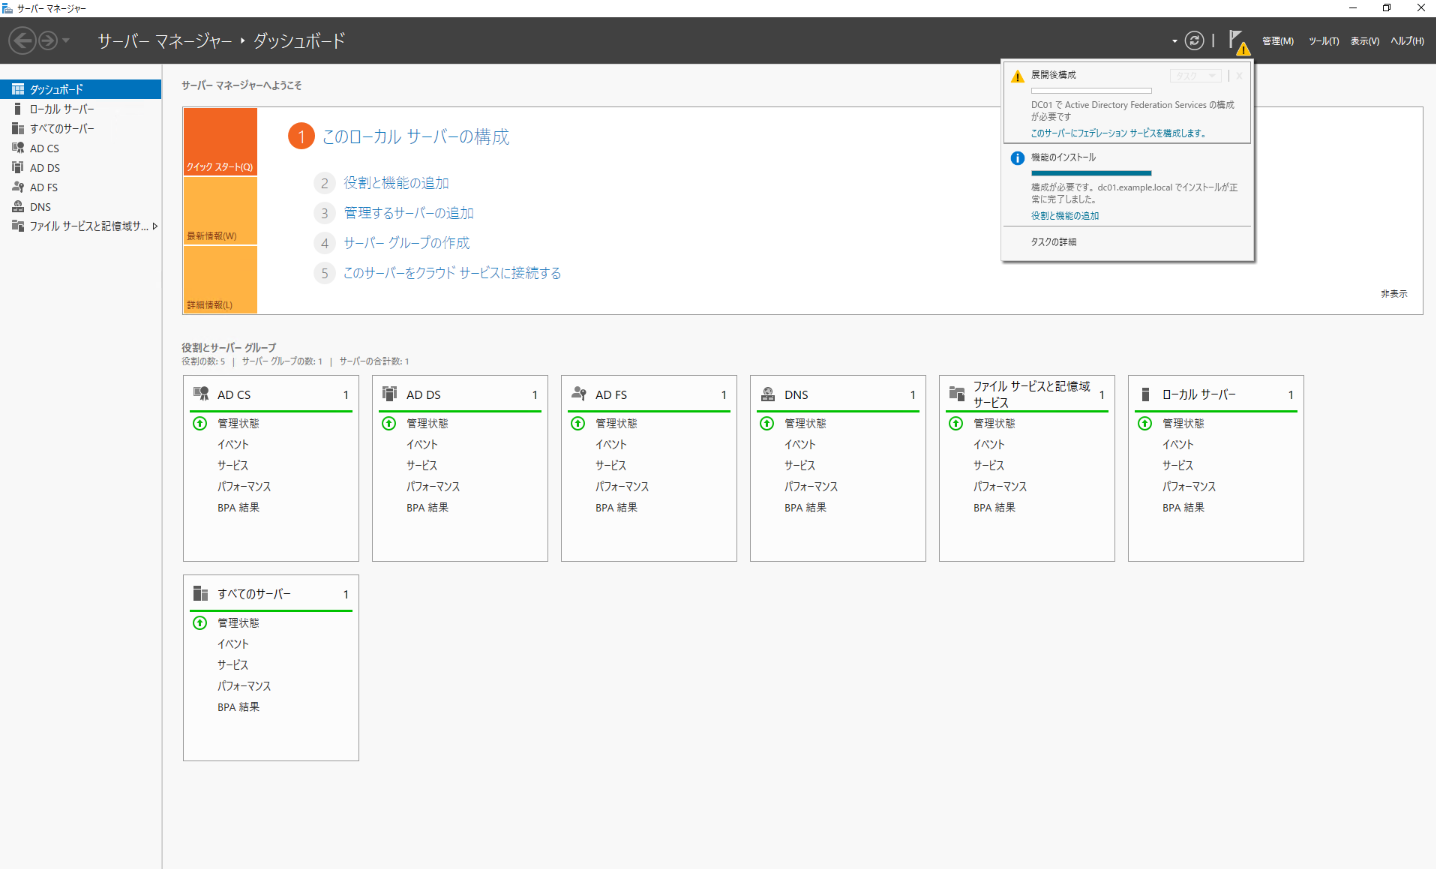
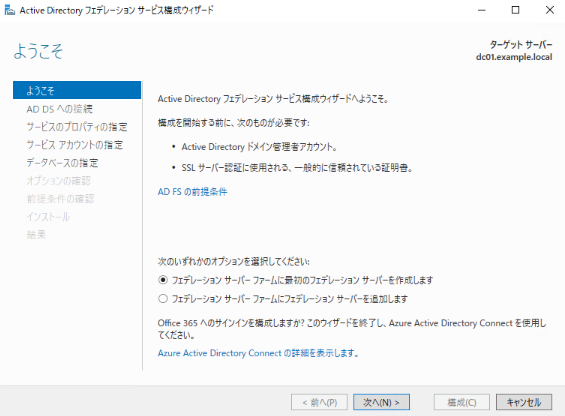
On Welcome, click Next.
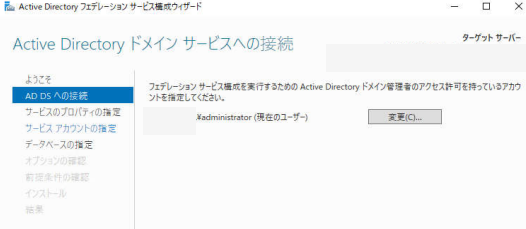
Click Next for Connect to Active Directory Domain Services.
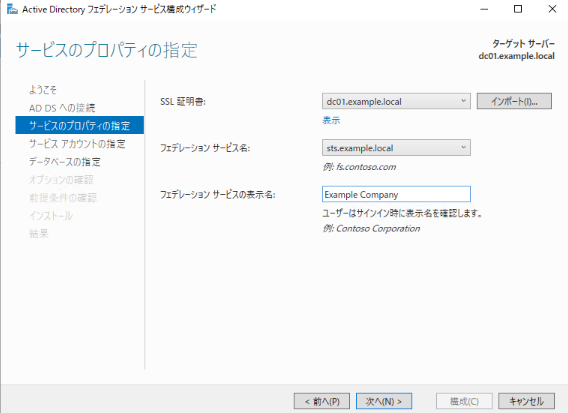
Configure the following settings in “Service Properties”. Then click Next.
- SSL certificate: select the certificate you created for AD FS
- Federation service name: Specify the name specified for the DNS name in the certificate properties.
- Federation service display name: Enter any service name.
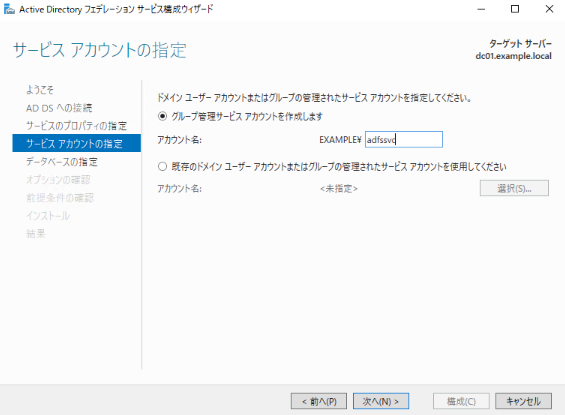
In “Specify service account”, check “Create a group managed service account” and specify “adfssvc” as the account name. Then click Next.
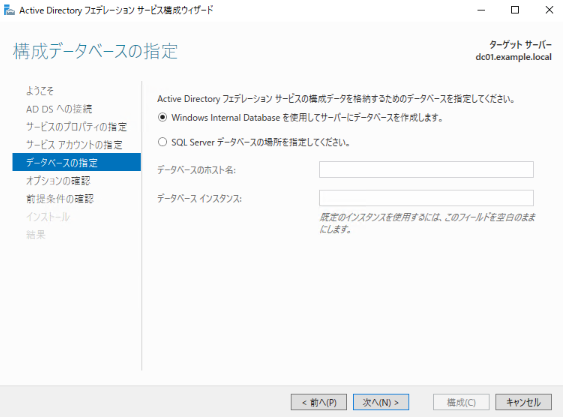
For Specify Configuration Database, leave the default and click Next.
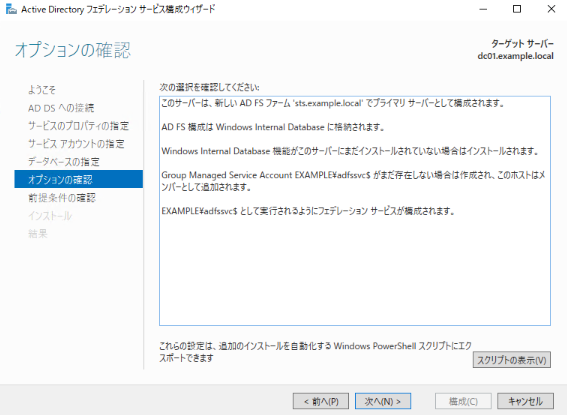
In “Confirm options”, check the contents and click Next.
Verify that there are no issues with Check Prerequisites, then click Configure.
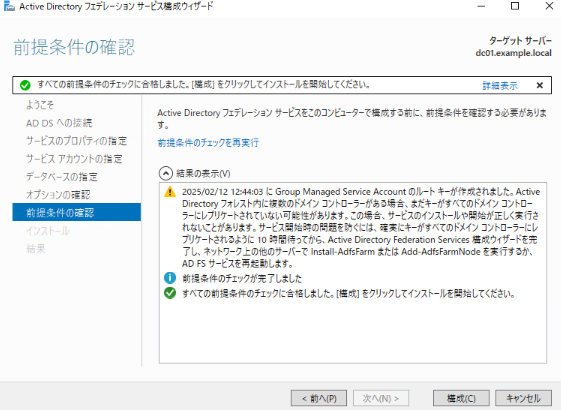
Verify that the installation begins.
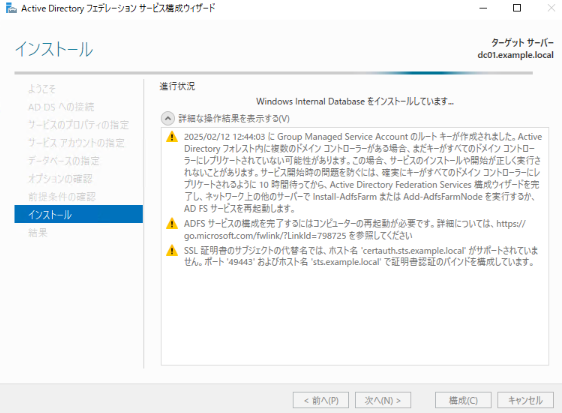
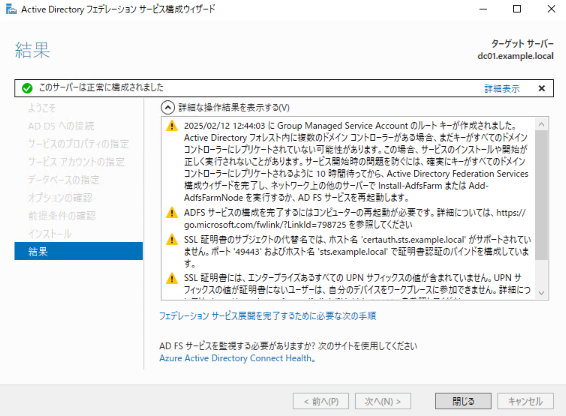
Verify that the installation completes successfully and click Close.
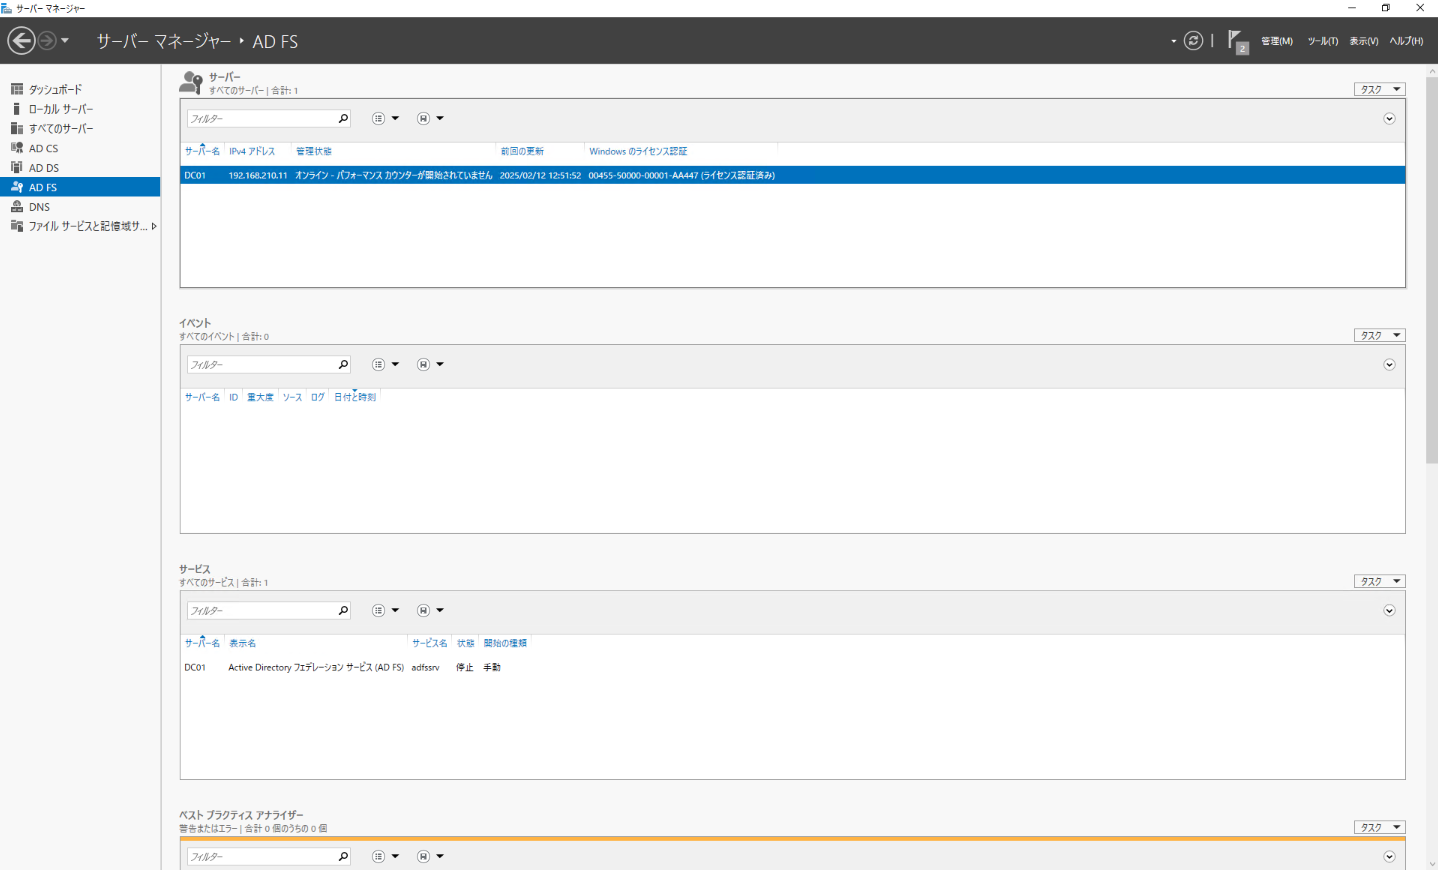
Make sure that “AD FS” is displayed in the left pane of Server Manager.
Add the AD FS service account to the Key Admins group
Grant Key Admins privileges to the AD FS service account. This privilege is required to manage encryption keys used by WHfB.
In Server Manager, click “Active Directory Users and Computers” from the tools at the top.
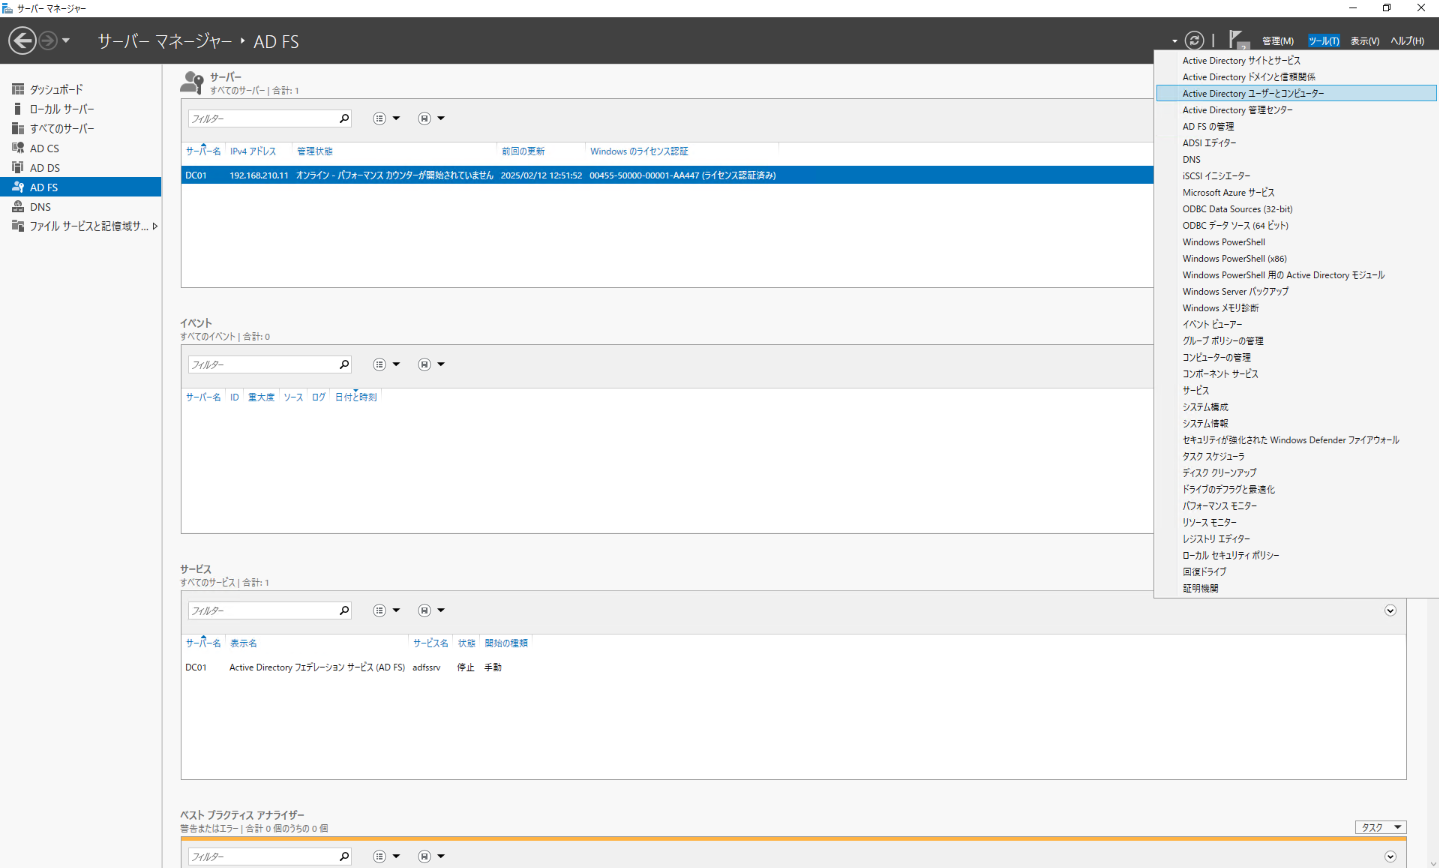
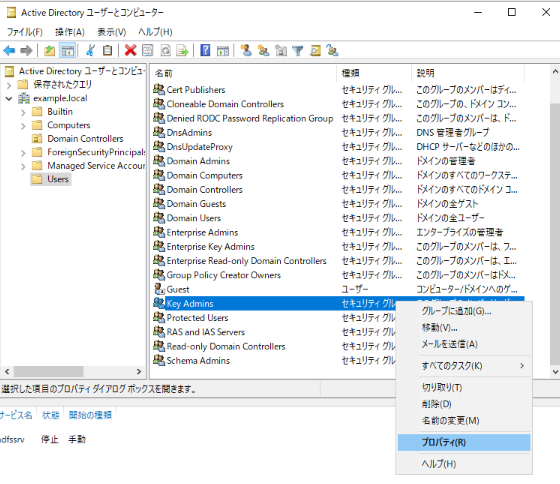
Right-click “Key Admins” in “{Domain Name}” → “Users” and click “Properties”.
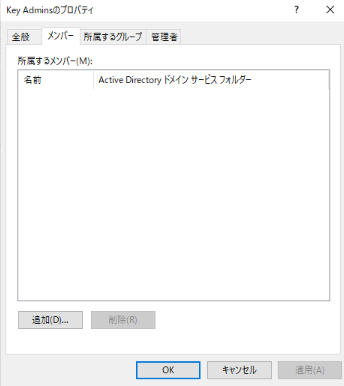
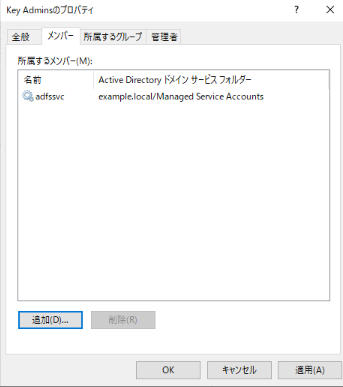
Go to the Members tab and click Add.
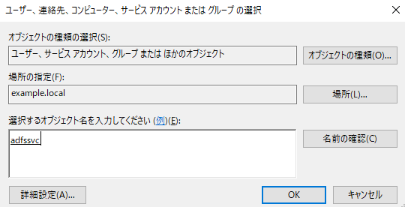
Search for “adfssvc” and click OK.
Confirm that the account was added as a member.
Configure Device Registration Service in AD FS
Configuring the DRS service
Enable Device Registration Service. This service is used to register and manage WHfB devices.
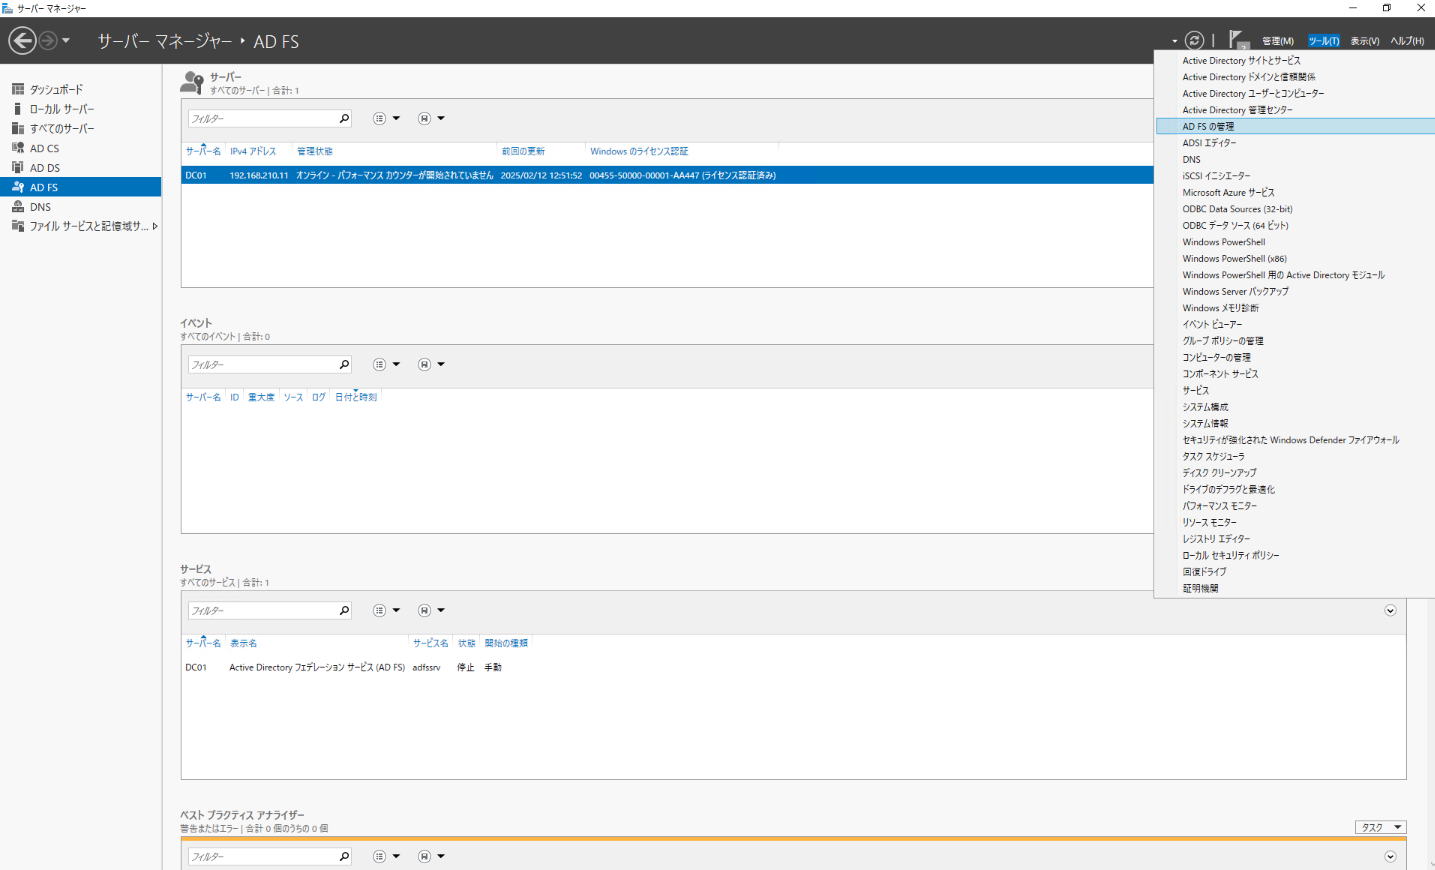
In Server Manager, click “Manage AD FS” from the tools at the top.
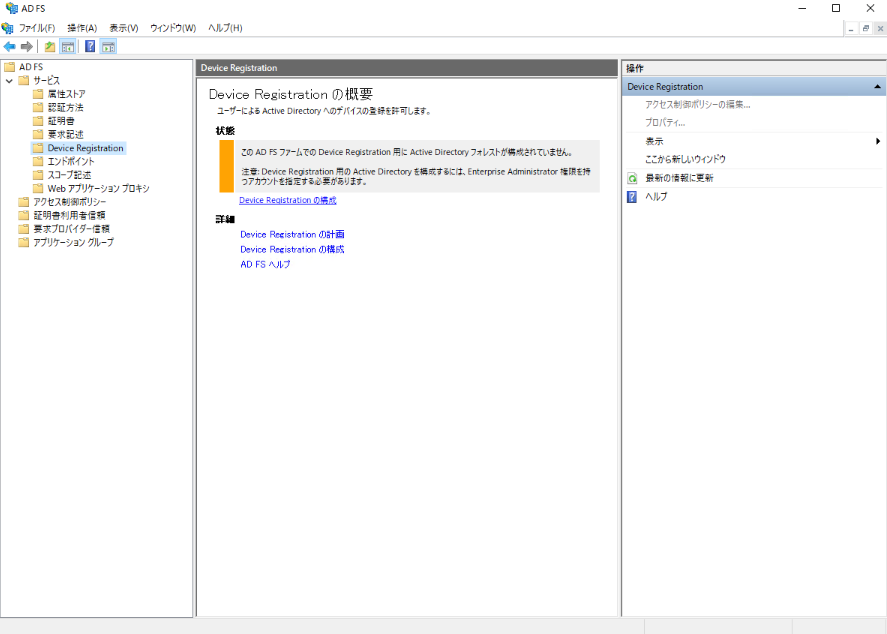
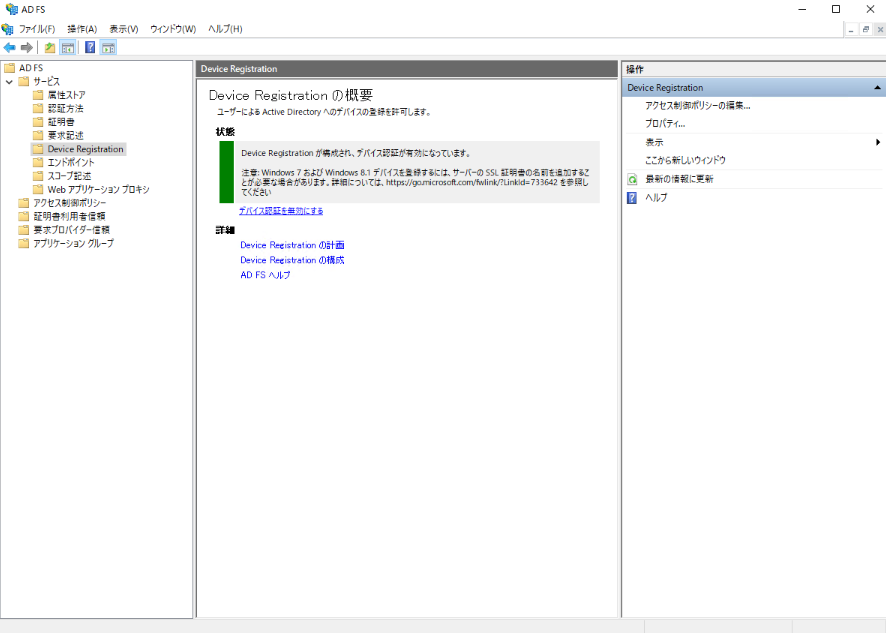
Go to AD FS → Services → Device Registration and click Configure Device Registration.
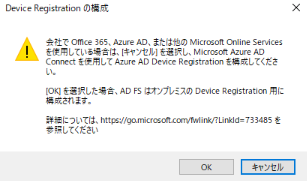
A warning will appear; click OK.
Verify that the service is enabled.
Add authentication method
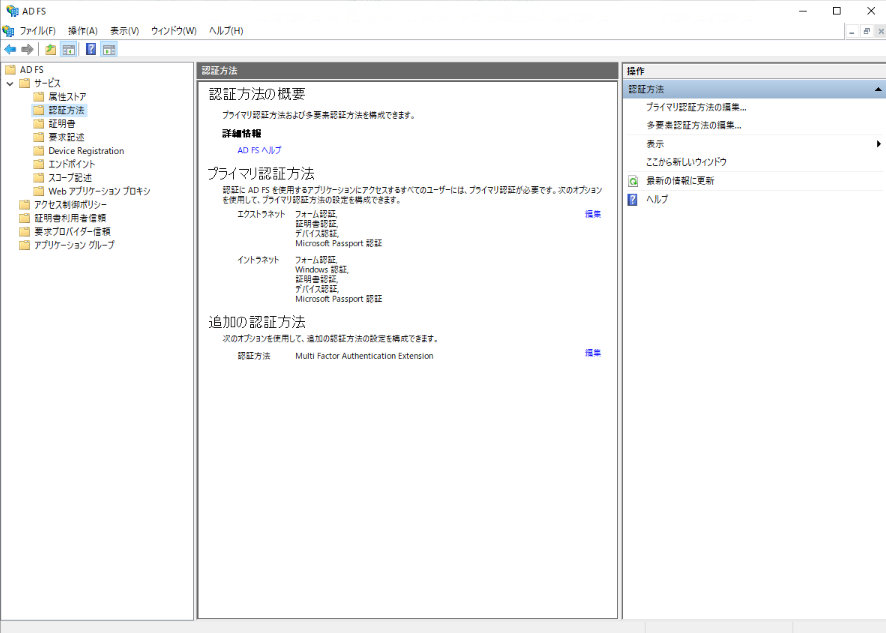
Configure the authentication method to use with AD FS. Configure the authentication method for both intranet and extranet.
Go to AD FS → Services → Authentication Methods and click Edit for Primary Authentication Method.
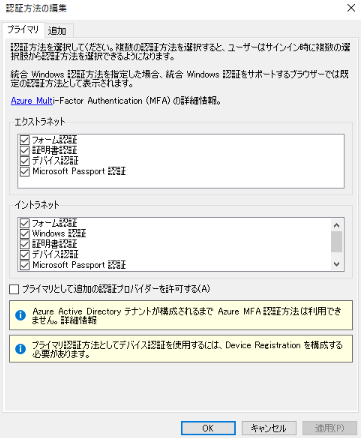
Enable the required authentication for “Extranet” and “Intranet”.
Enabling the firewall
Enable firewall rules for the communication ports (HTTP/HTTPS) used by the AD FS service. This allows clients to access the AD FS service.
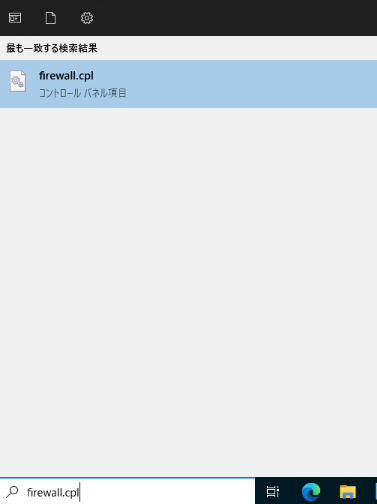
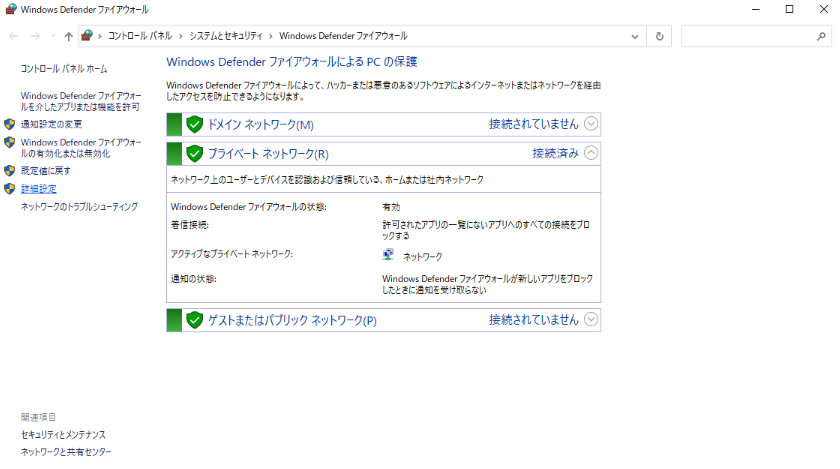
Enter “firewall.cpl” in the search field and start it.
Click “Advanced Settings”.
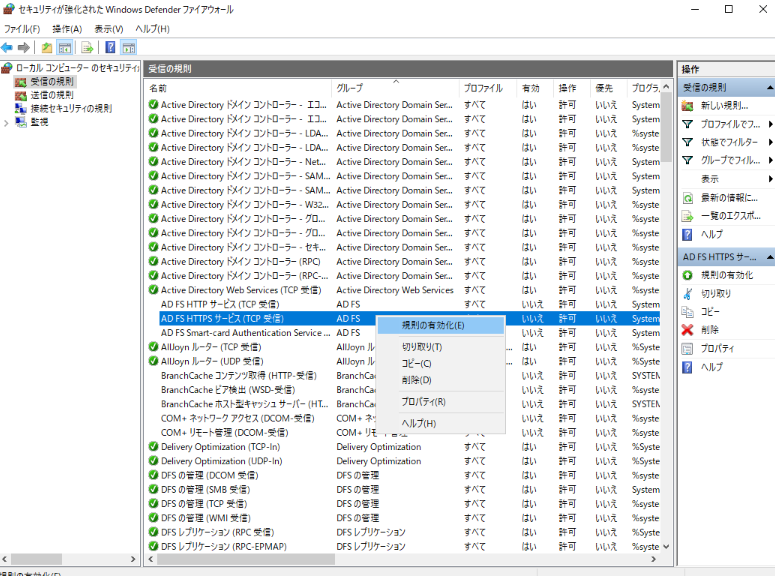
Right-click “ADFS HTTPS Service (TCP-In)” in “Inbound Rules” and click “Enable Rule”.
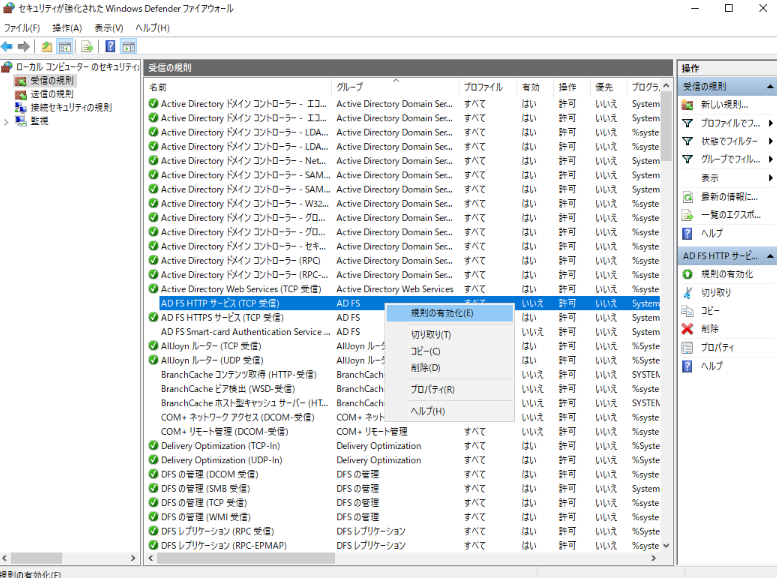
Similarly, under “Inbound Rules”, right-click “ADFS HTTP Service (TCP-In)” and click “Enable Rule”.
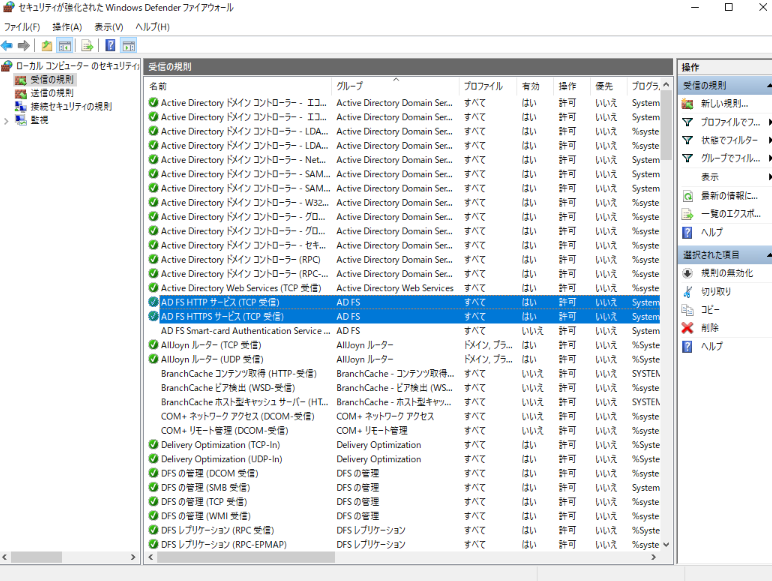
Make sure the rule is enabled.
DNS settings for device registration
Create a DNS record (enterpriseregistration) for use with the device registration service. This record is required for automatic registration of WHfB devices.
Start PowerShell.
Enter the following command to check the FQDN of the federation service.
(Get-AdfsProperties).Hostname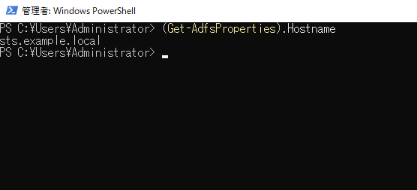
In Server Manager, click “DNS” from the tools at the top.
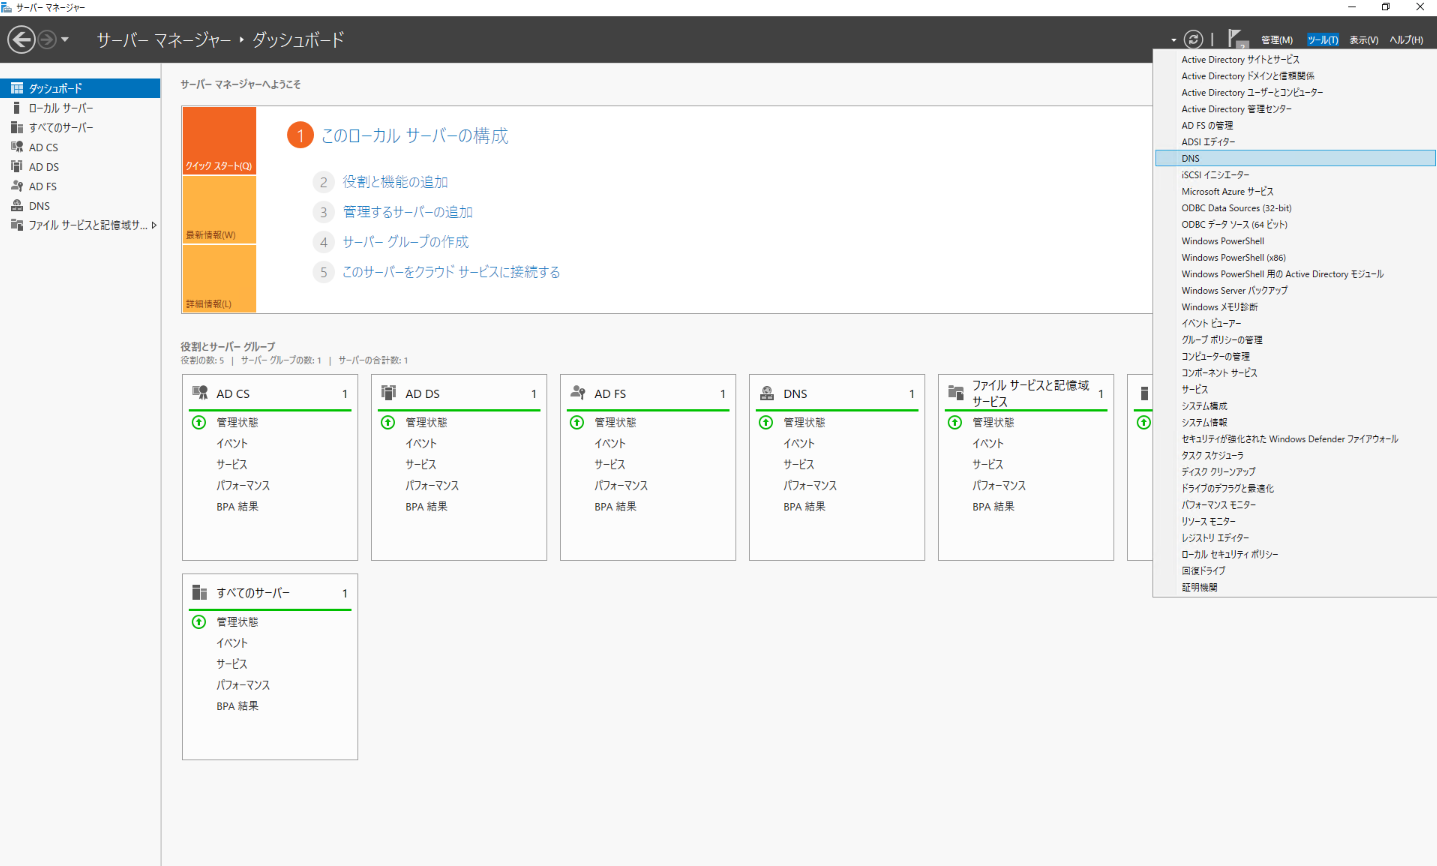
Go to DNS → Forward Lookup Zones → example.local.
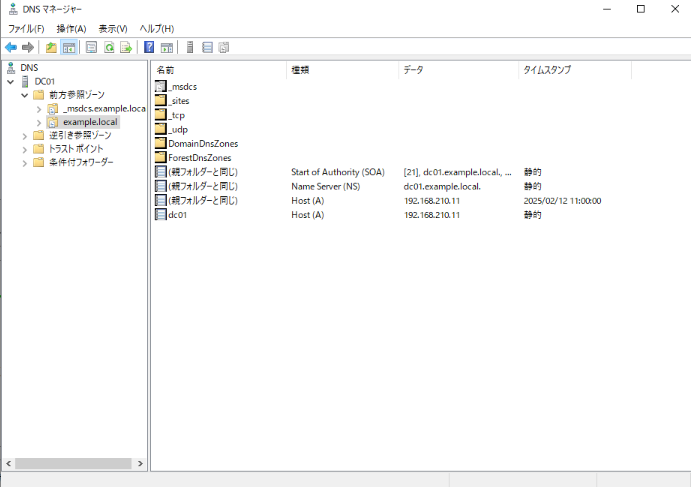
Right-click the blank field and click New Host (A or AAAA).
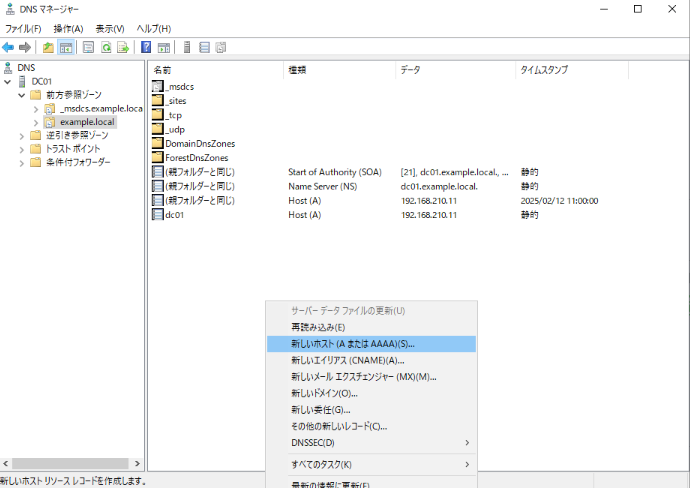
Enter the domain name of the federation service in “Name” and the IP address of the AD FS server in “IP address”. Then click Add Host.
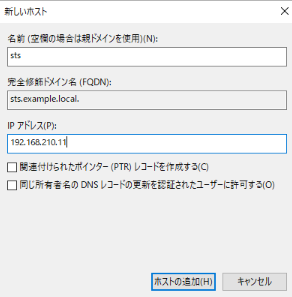
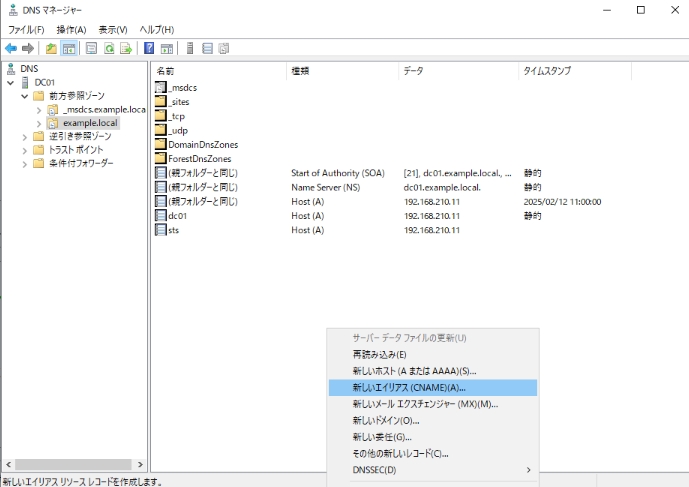
Right-click the blank field and click New Alias (CNAME).
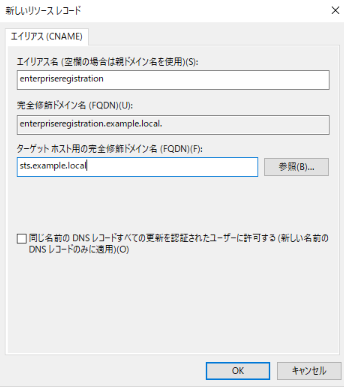
Enter “enterpriseregistration” in Alias Name and the FQDN of the Federation Service in Fully Qualified Domain Name for Target Host. Then click OK.
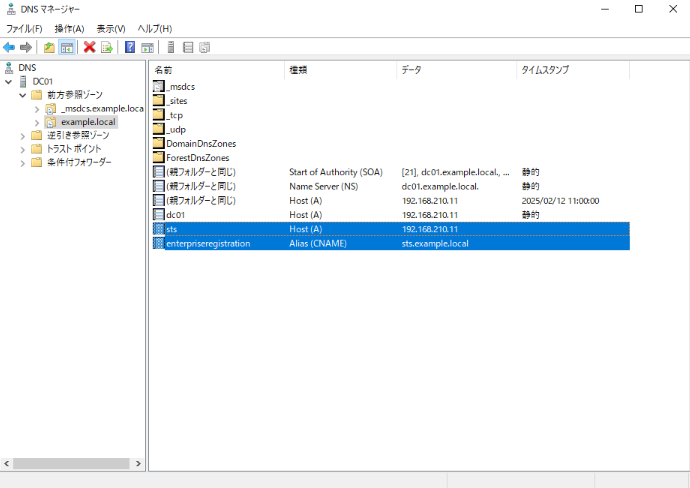
Verify that the record has been added.
Configure intranet zone to include federation services
Configure a group policy to add the AD FS service URL to the intranet zone. This ensures that integrated authentication works correctly.
In Server Manager, click “Group Policy Management” from the tools at the top.
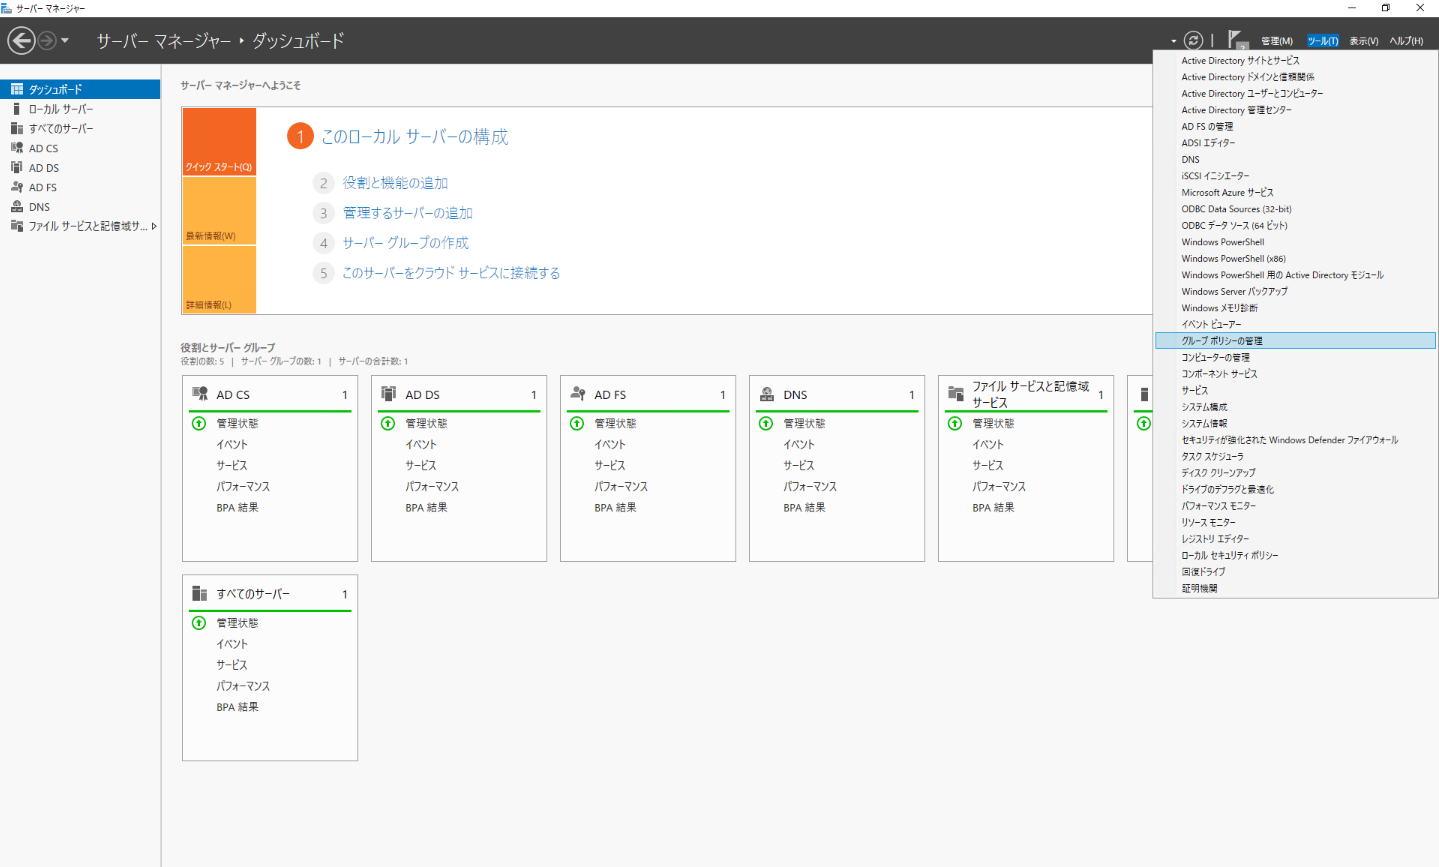
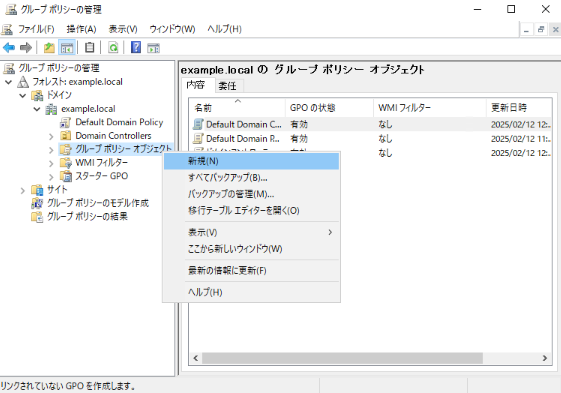
Right-click “Group Policy Management” → “Forest” → “Domains” → “{domain name}” → “Group Policy Object” and click “New”.
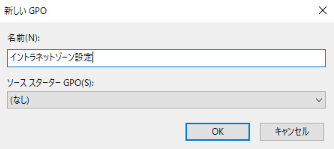
Enter “Intranet Zone Settings” in “Name” and click “OK”.
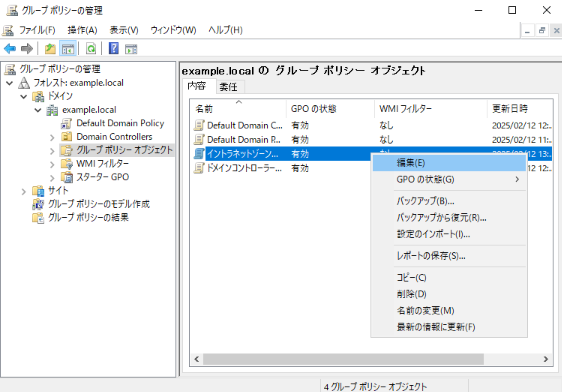
Right-click the GPO you created and click Edit.
Double-click “Site and Zone Assignment List” in “Computer Configuration” → “Policies” → “Administrative Templates” → “Windows Components” → “Internet Explorer” → “Internet Control Panel” → “Security Page”.
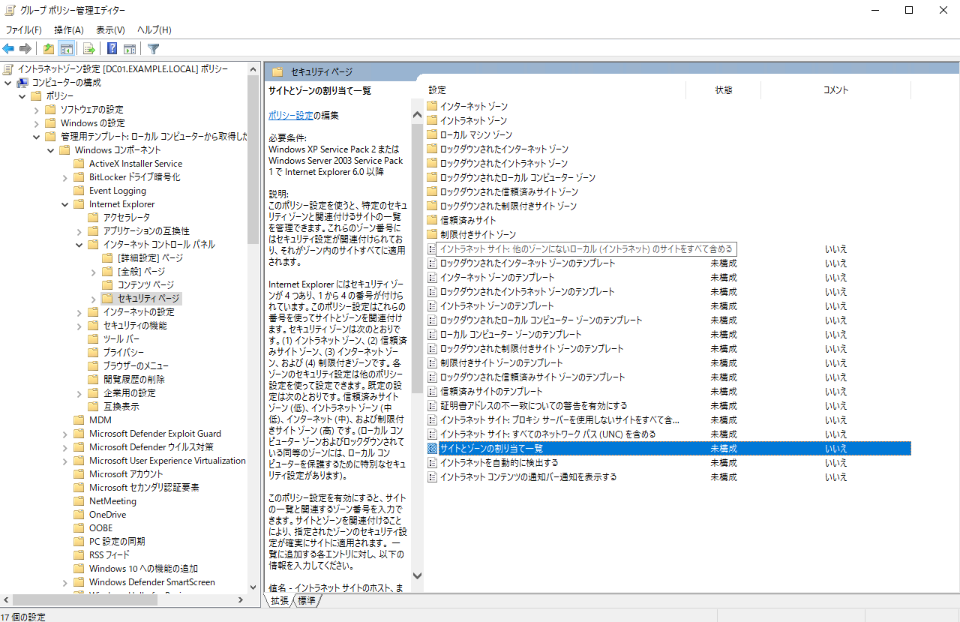
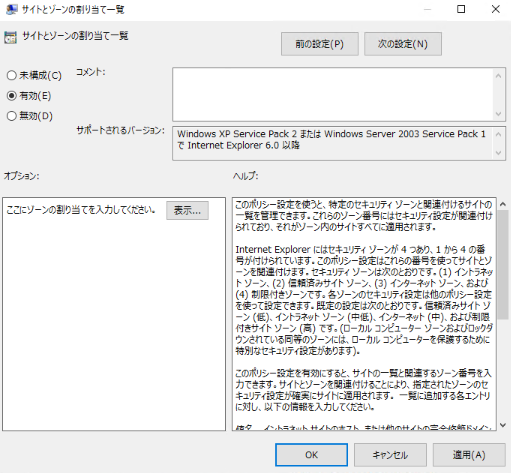
Check “Enabled” and click “Display”.
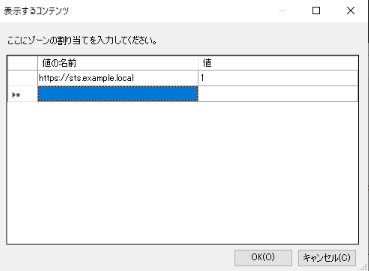
Enter “https://{Federation Service FQDN}” in “Value Name” and 1 in “Value”.
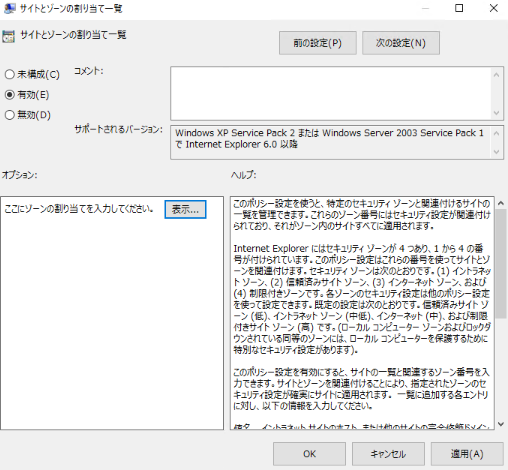
Then click OK.
Return to “Group Policy Management” and select “Group Policy Management” → “Forest” → “Domains” → Right-click “{Domain Name}” and click “Link Existing GPO”.
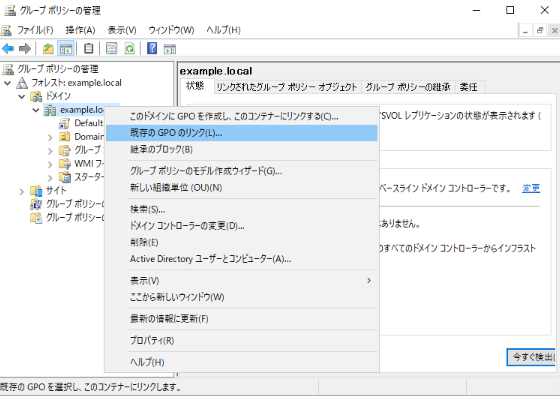
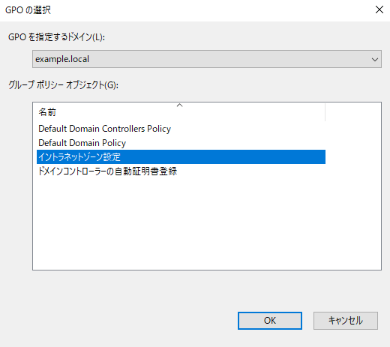
Select Intranet Zone Settings and click OK.
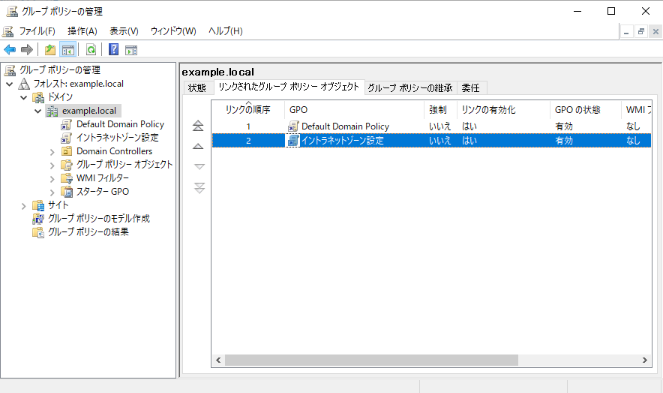
Make sure the GPO is set.
Restart AD FS
Restart the AD FS service to apply the configuration changes.
Go to AD FS from the left pane of Server Manager.
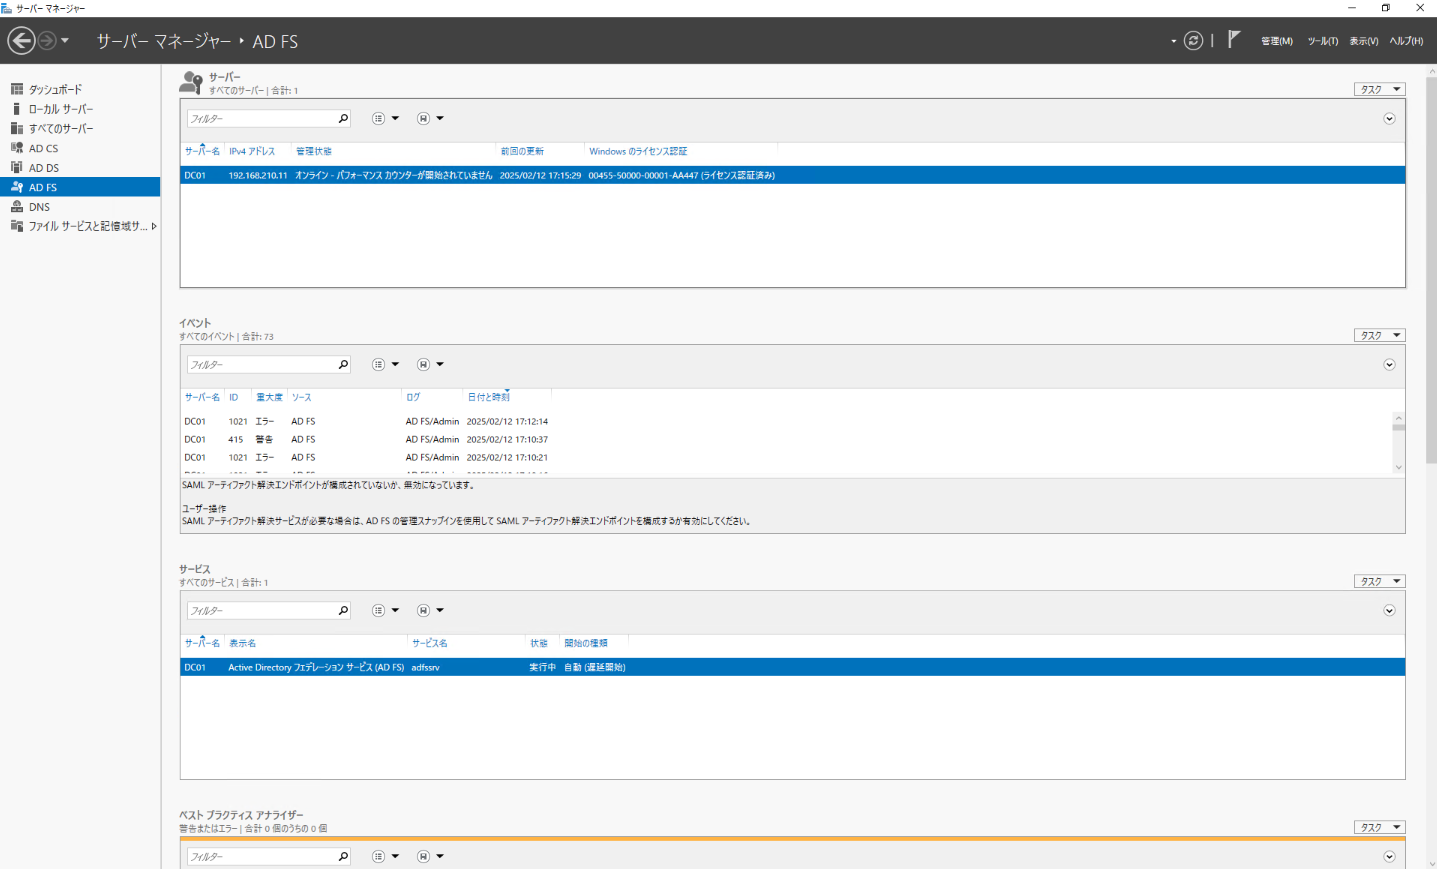
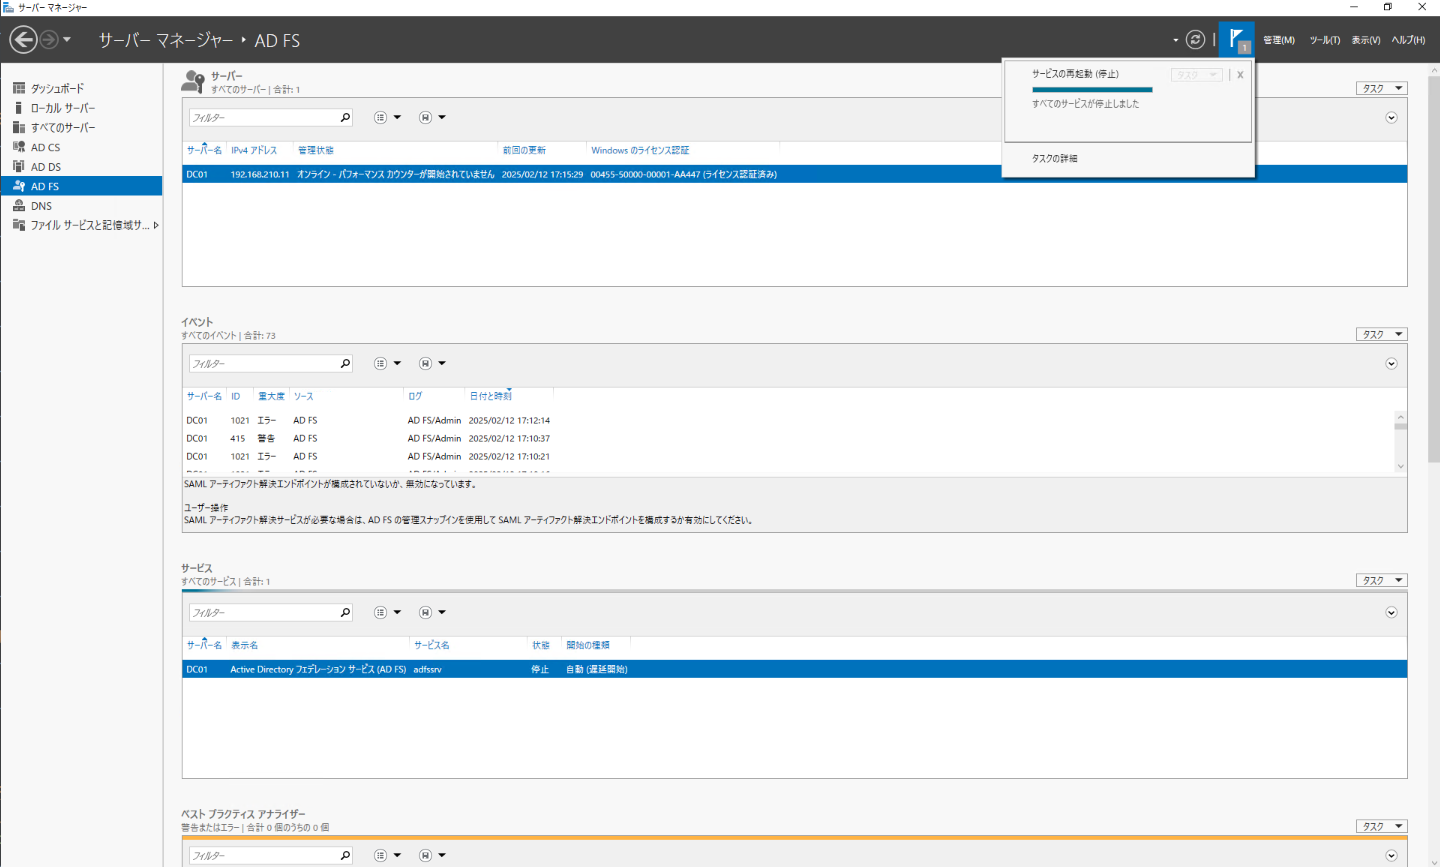
Right-click “Active Directory Federation Service” under “Services” and click “Restart”.
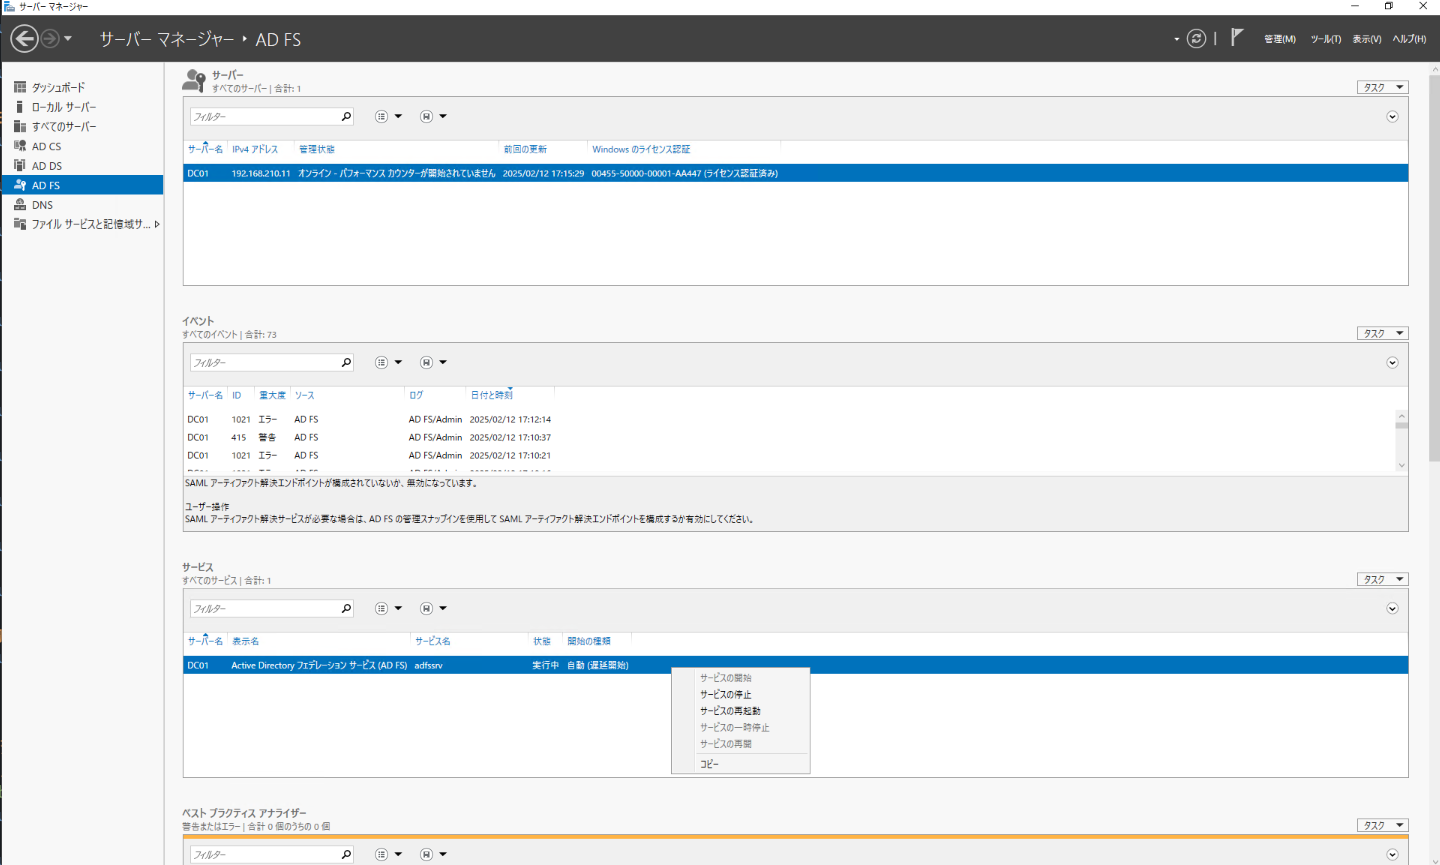
Wait for the restart to complete.
Preparing users and OUs
Create test user
Create a user account to use for testing WHfB. Use this user to test WHfB registration and authentication.
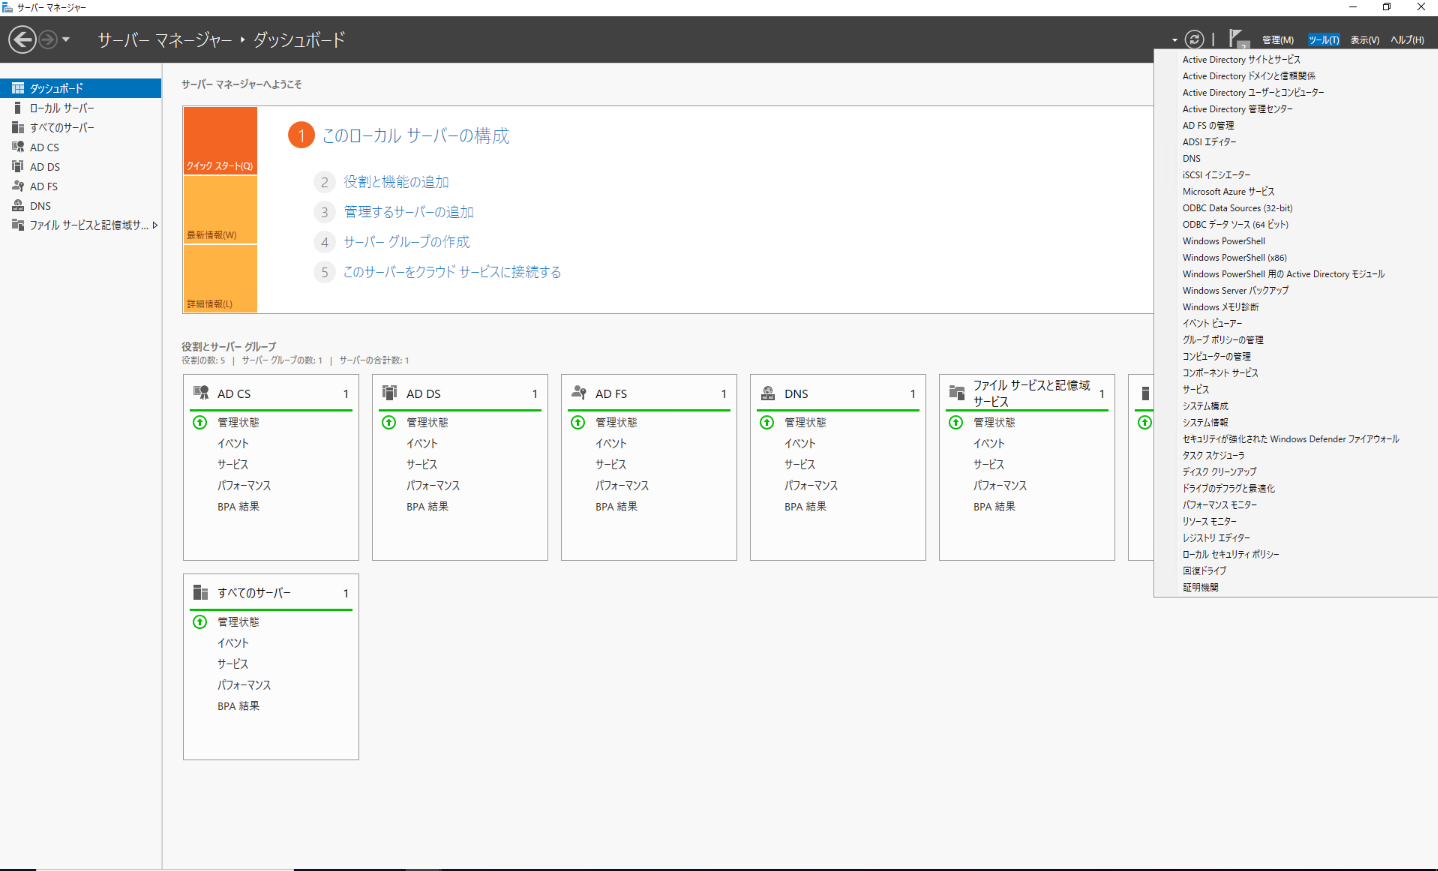
In Server Manager, click “Active Directory Users and Computers” from the tools at the top.
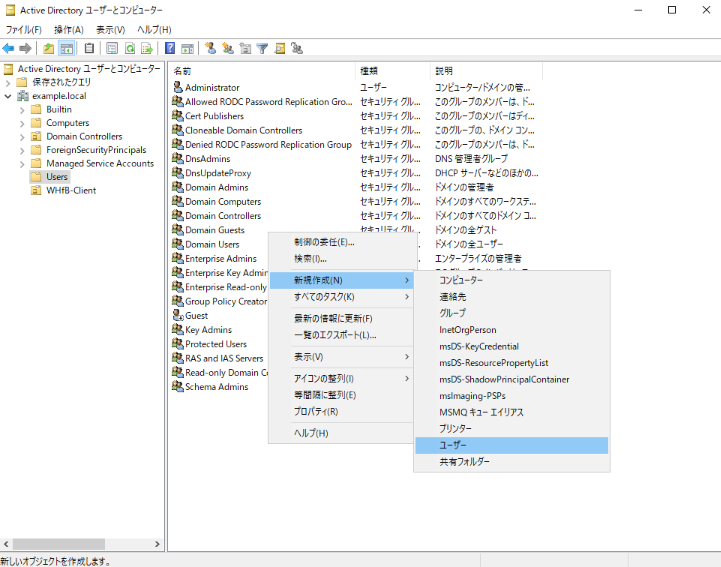
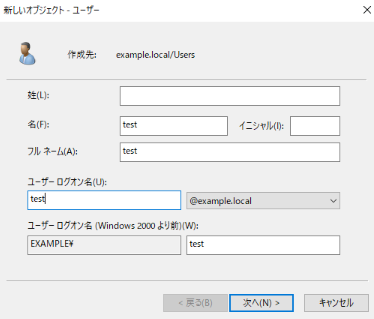
Go to “{domain name}” → “Users”, right-click on the blank space and click “New” → “User”.
Create a user with any username.
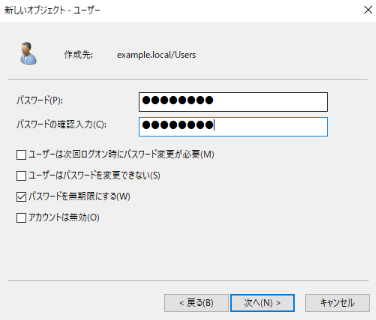
Enter any password. In this case, the password is set to never expire.
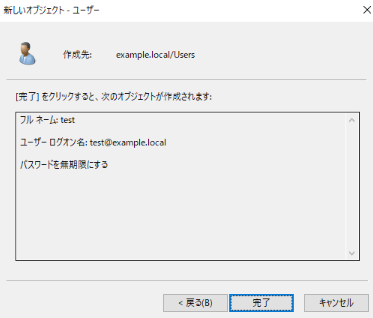
Check your creation and click “Finish”.
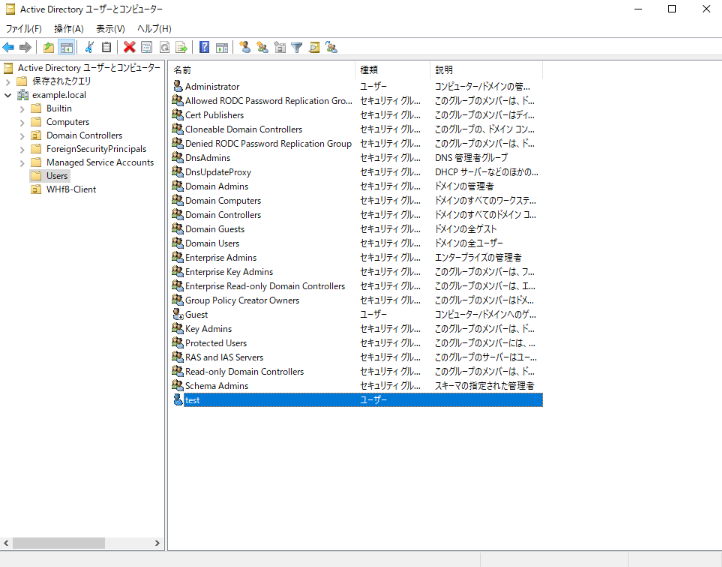
Verify that the user was created.
Joining the device to AD
Join the test client device to the Active Directory domain. To use WHfB, the device must be domain-joined.
On the client device, search for “ncpa.cpl” in the search field.
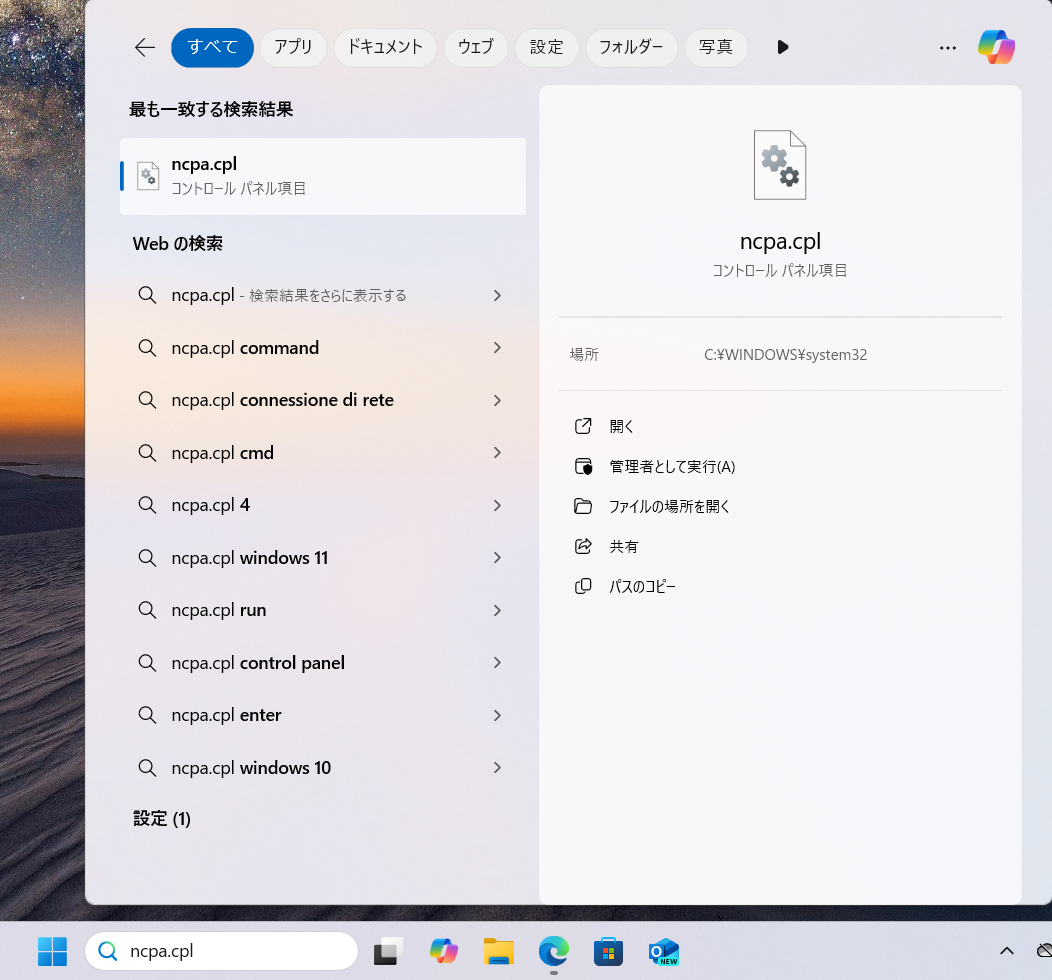
Right-click the adapter and click Properties.
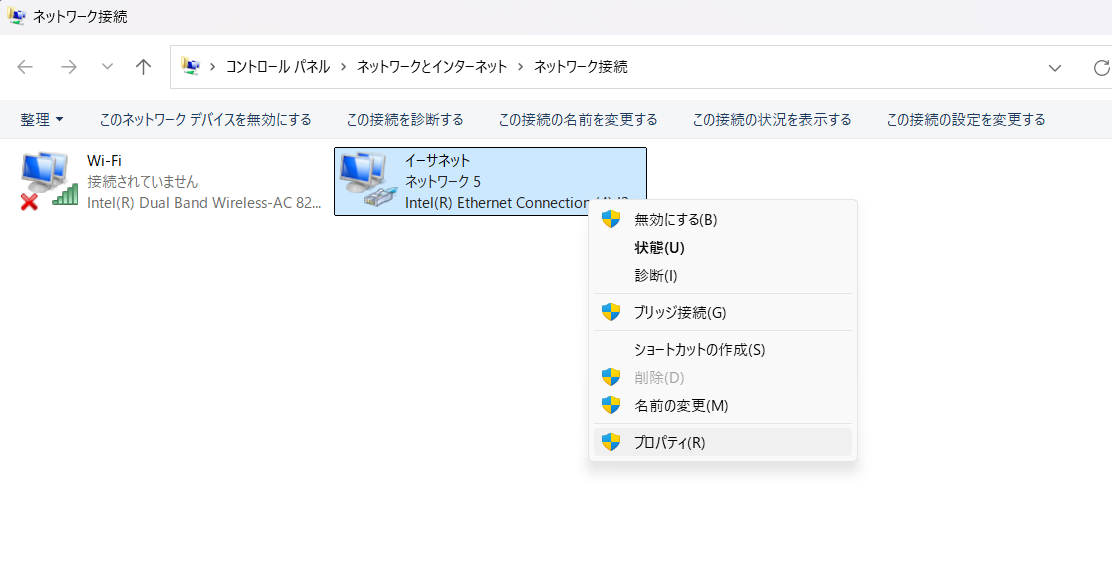
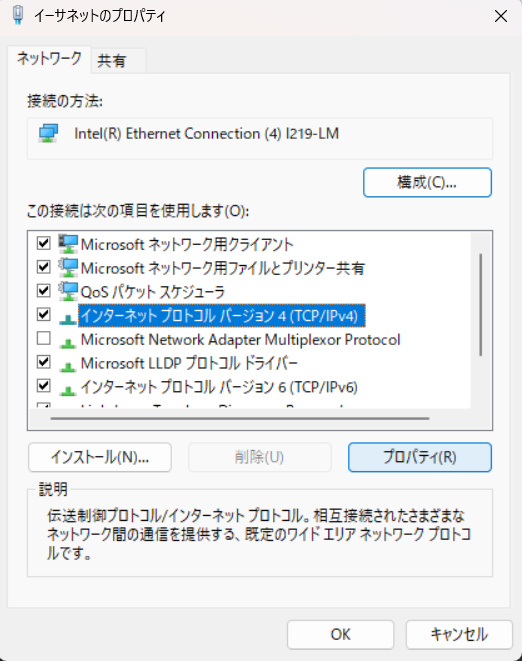
Open the properties for “Internet Protocol Version 4”.
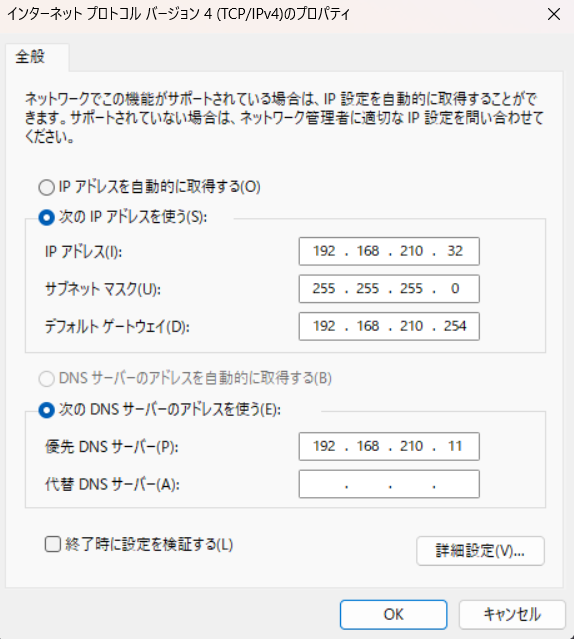
Specify the IP address of the AD DS server as the DNS server.
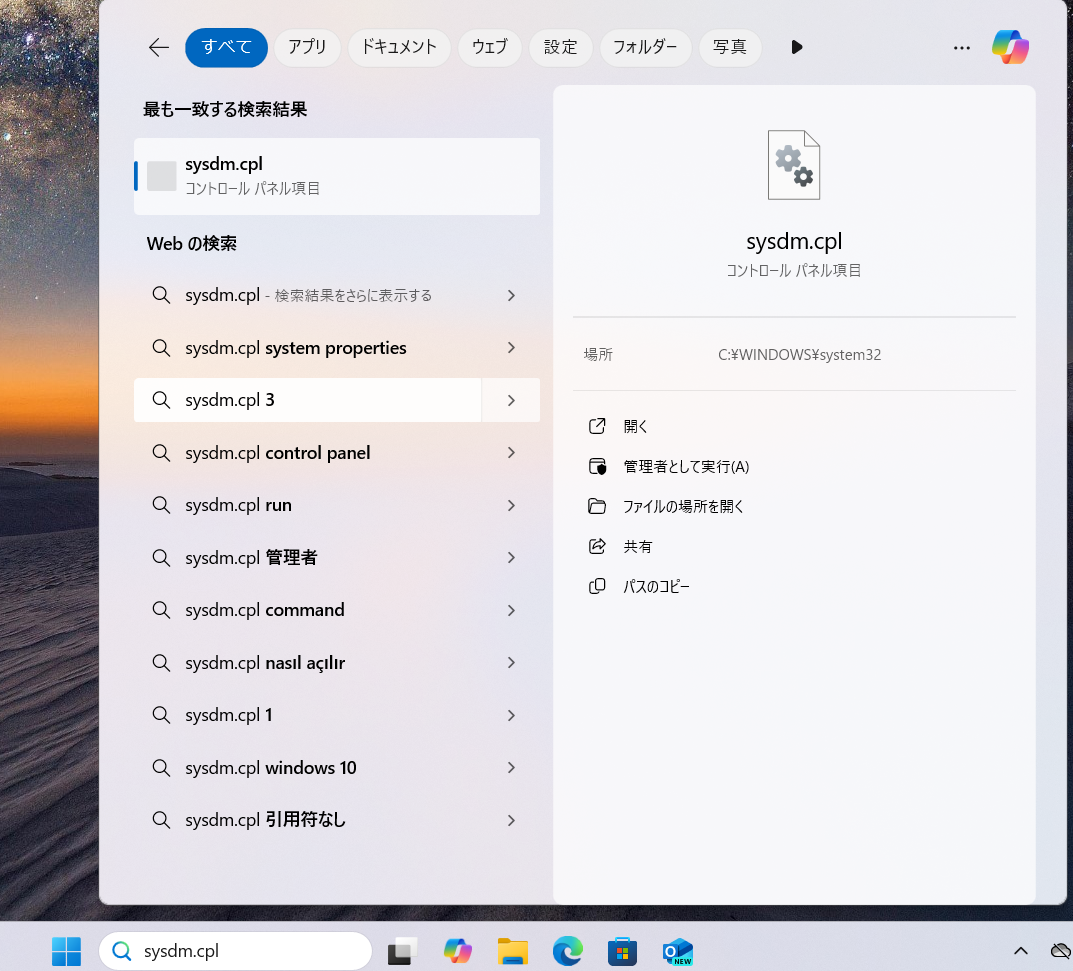
Search for “sysdm.cpl” in the search field.
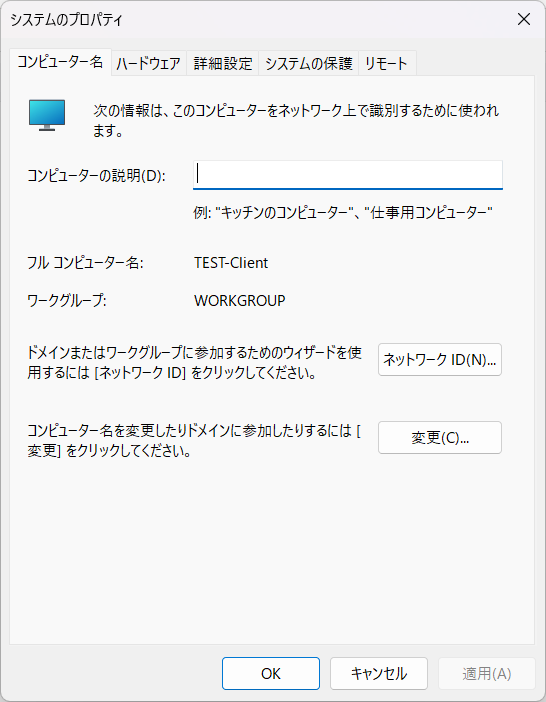
Click Change.
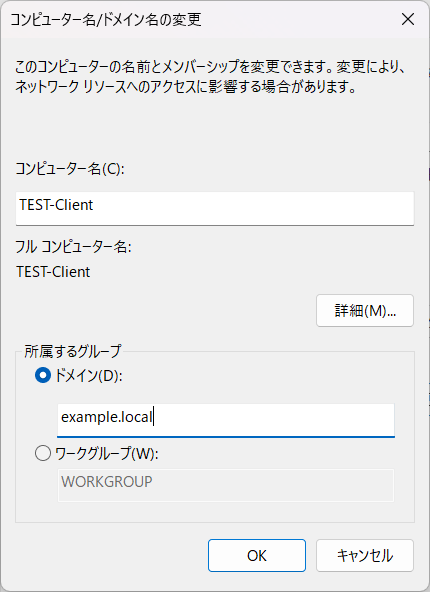
Enter any computer name, enter the AD DS domain name in Domain, and click “OK”.
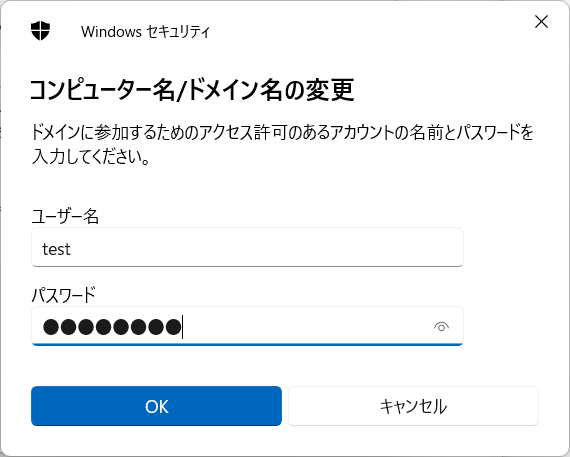
When asked for domain join credentials, enter the user information you created earlier.
Click “OK” to confirm.
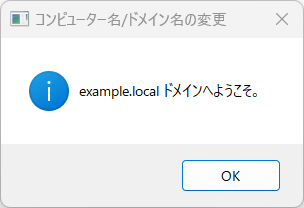
You will be asked to confirm the restart, so click “OK”.
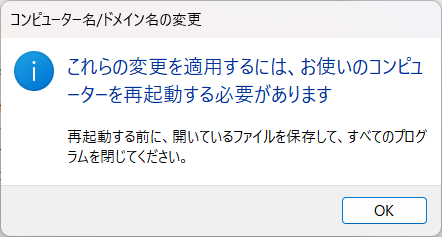
Click “Close” and restart the client device.
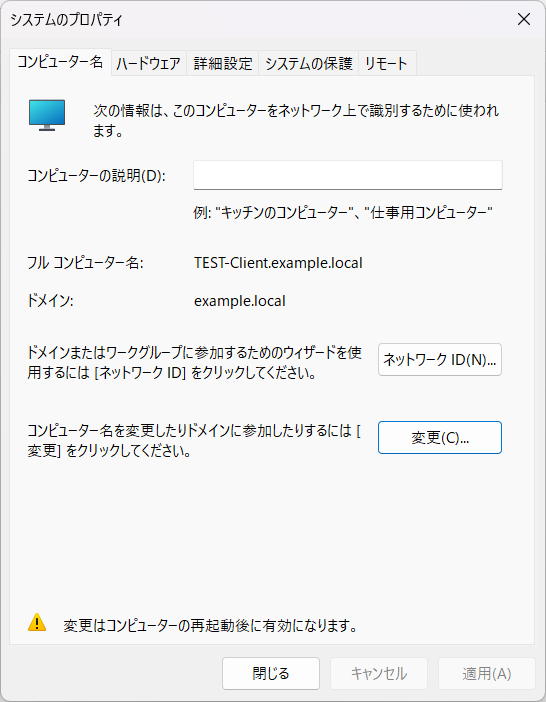
Creating an OU
Create an organizational unit (OU) to manage the devices for which you want to enable WHfB. Apply group policy to this OU and configure WHfB settings.
In Server Manager, click “Active Directory Users and Computers” from the tools at the top.
Click “Create new” → “Organizational unit” in “{domain name}”.
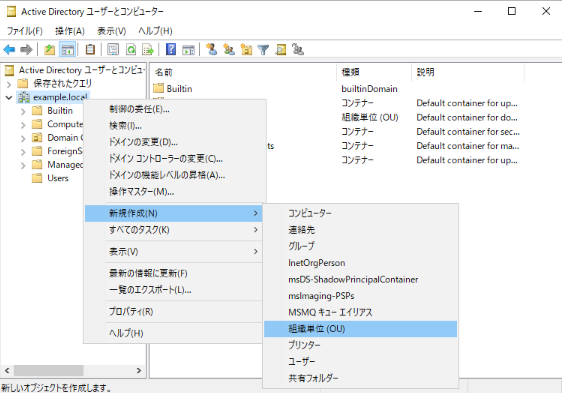
Enter any name and click OK.
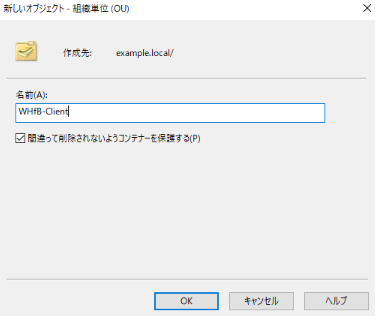
Add the device to the OU
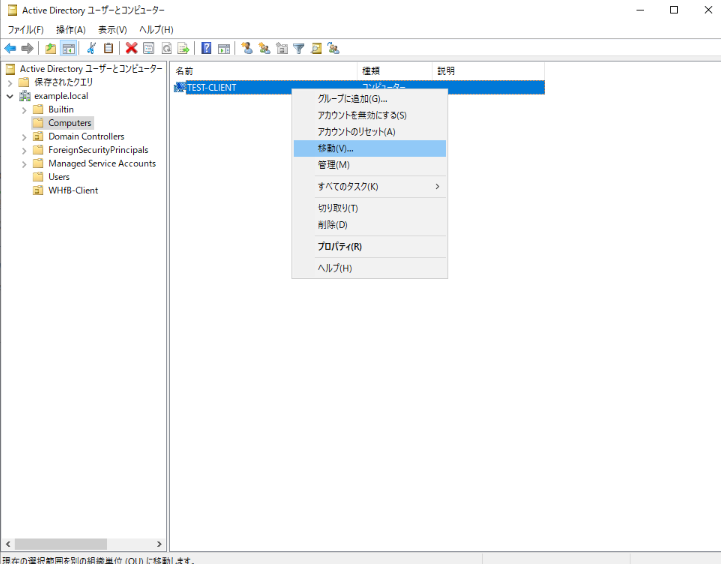
Move the client device to the created OU. This clarifies which devices the WHfB settings apply to.
The client device you registered earlier is in “{domain name}” → “Computers”, so right-click it and click “Move”.
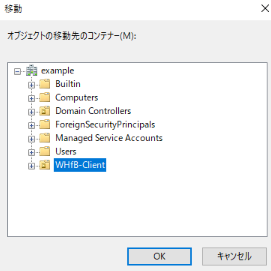
Specify the OU you created earlier as the destination.
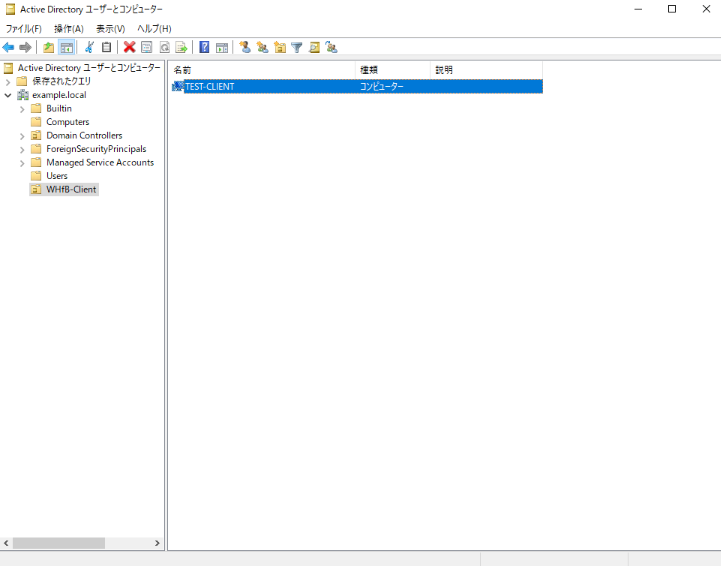
Verify that it has been moved.
Enabling AD FS MFA
When building WHfB with AD FS, you need to integrate with external services and configure MFA. In general, integration with cloud services such as Microsoft Entra ID or Okta is recommended. This article uses the open-source adfsmfa project because the environment is a fully on-premises PoC. Production deployment requires careful consideration. https://learn.microsoft.com/en-us/windows-server/identity/ad-fs/operations/configure-additional-authentication-methods-for-ad-fs
Installing adfsmfa
Install the open-source adfsmfa project. This tool enables MFA authentication in an on-premises environment.
Download the MSI file from the link below.
https://github.com/neos-sdi/adfsmfa/releases/tag/3.1

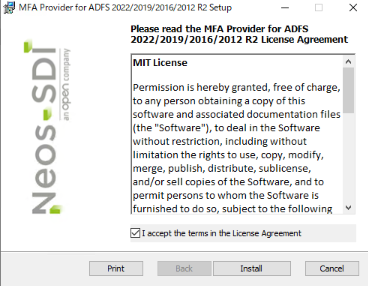
Place it on the AD FS server and run the MSI. Click “Install” on the welcome screen.
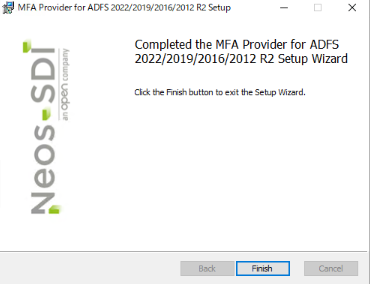
When the installation is complete, click “Finish”.
Run the following command in PowerShell.
Register-MFASystem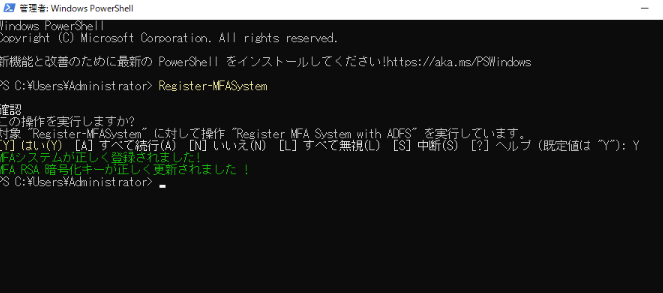
Edit adfsmfa configuration file
Edit the adfsmfa schema definition file according to your environment. Environment-specific information, such as the domain name, must be configured correctly.
Edit the following file.
C:\Program Files\MFA\ADDSTools\mfa-schema.ldfReplace all occurrences of “DC=X” below with your domain name.
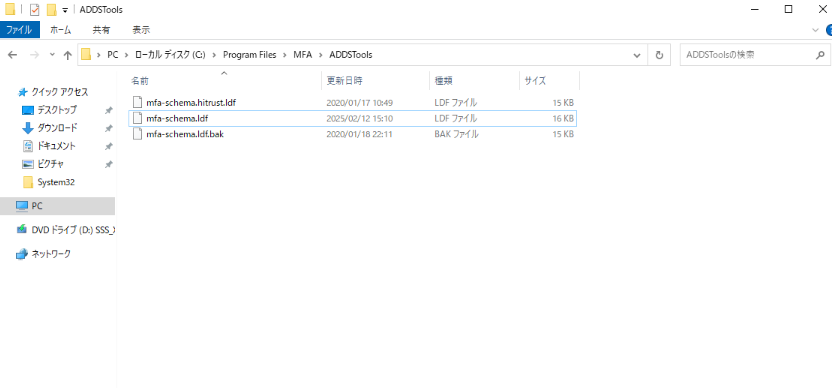
Before change
dn: CN=MFA-TOTP-Key,CN=Schema,CN=Configuration,DC=XAfter change
dn: CN=MFA-TOTP-Key,CN=Schema,CN=Configuration,DC=example,DC=localAfter editing the file, run the following command to configure adfsmfa.
LDIFDE -i -u -f mfa-schema.ldf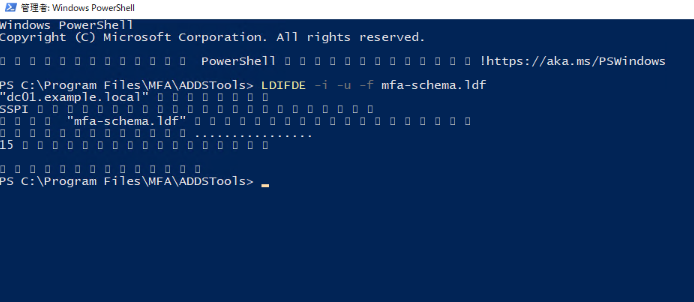
Configuring adfsmfa
Configure adfsmfa. Configure settings such as administrator contact settings and assigning MFA keys to users. This article uses an Authenticator app for MFA. If you have an SMTP server available, you can also use email authentication.
In Server Manager, click “Manage AD FS” from the tools at the top.
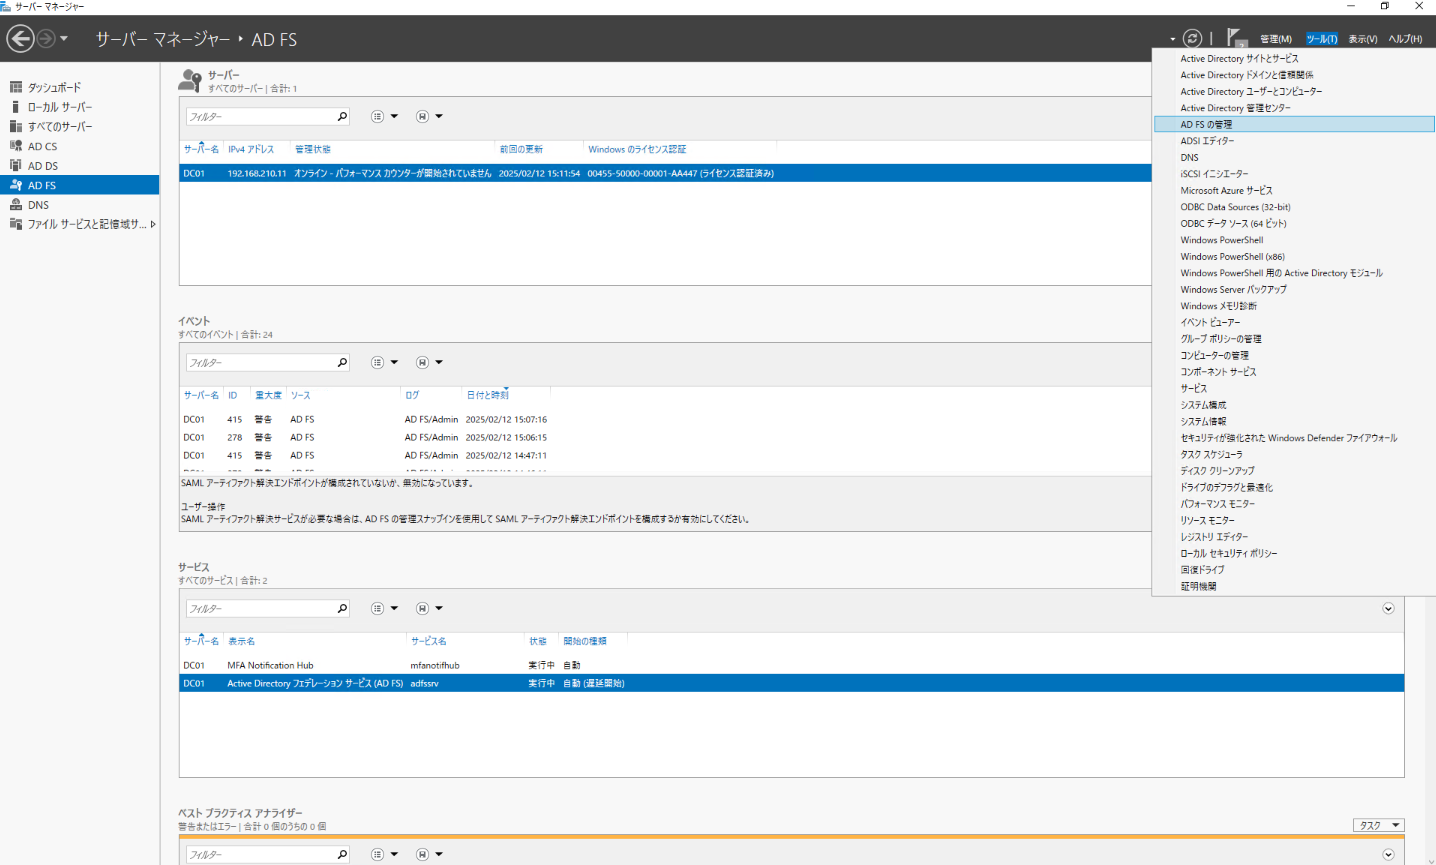
Under “AD FS”, click “Add claims provider trust”.
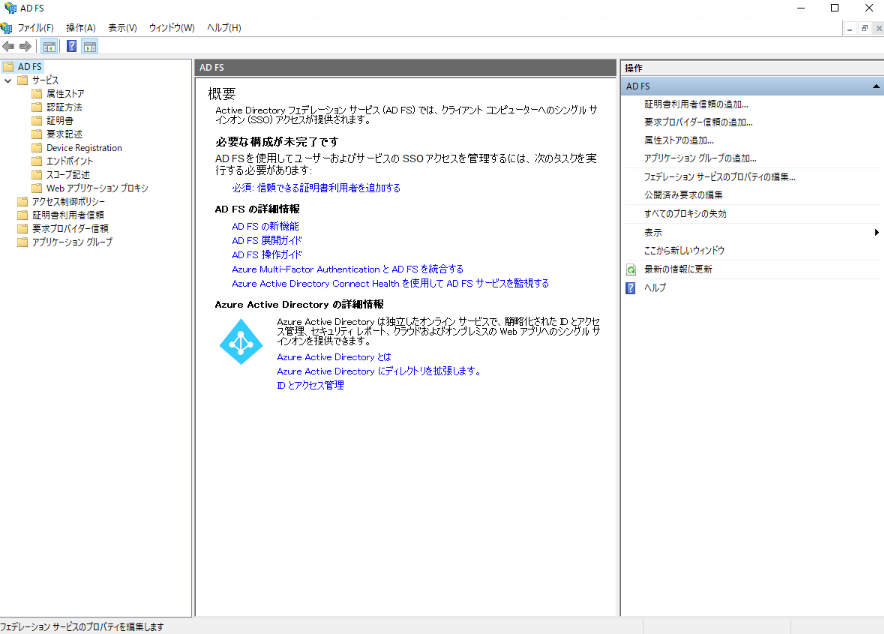
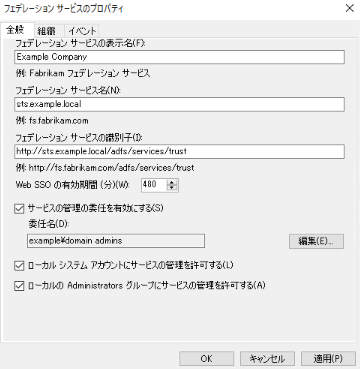
Check “Enable delegated management of services” and click “Edit”.
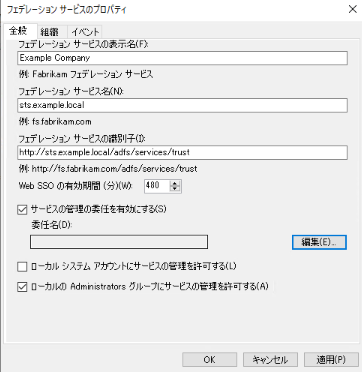
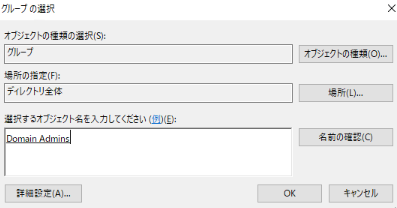
Specify Domain Admins.
Check “Allow local system account to manage services” and click “OK”.
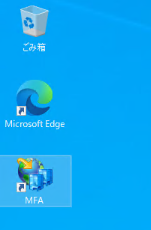
Launch “MFA” added to the desktop.
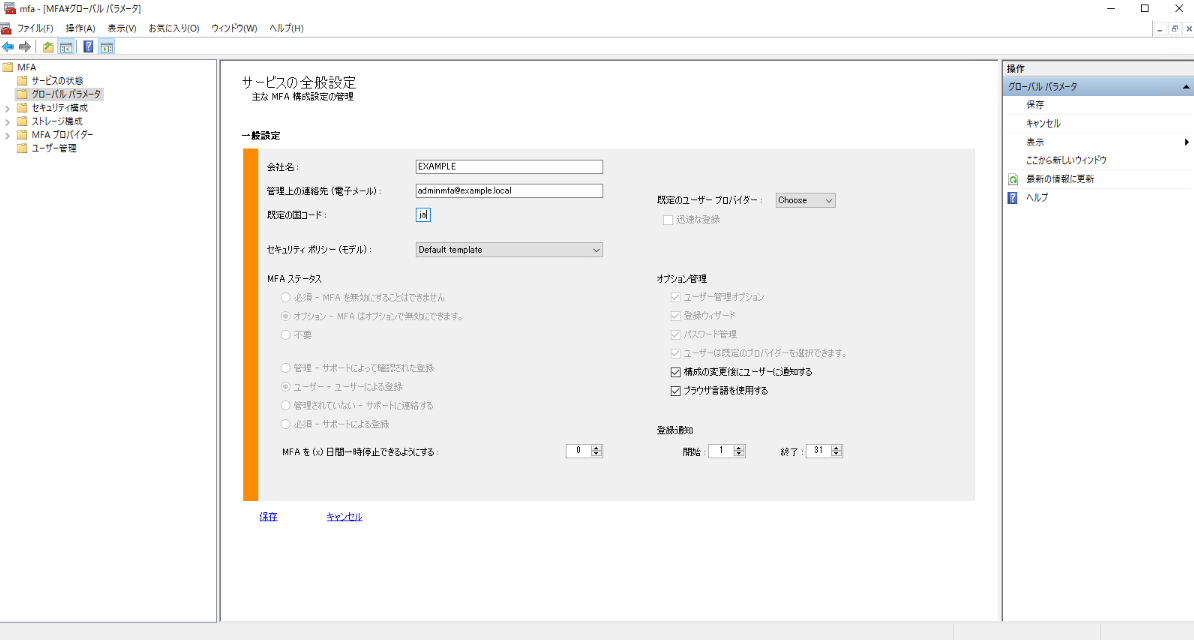
Configure general settings in “Global Parameters”.
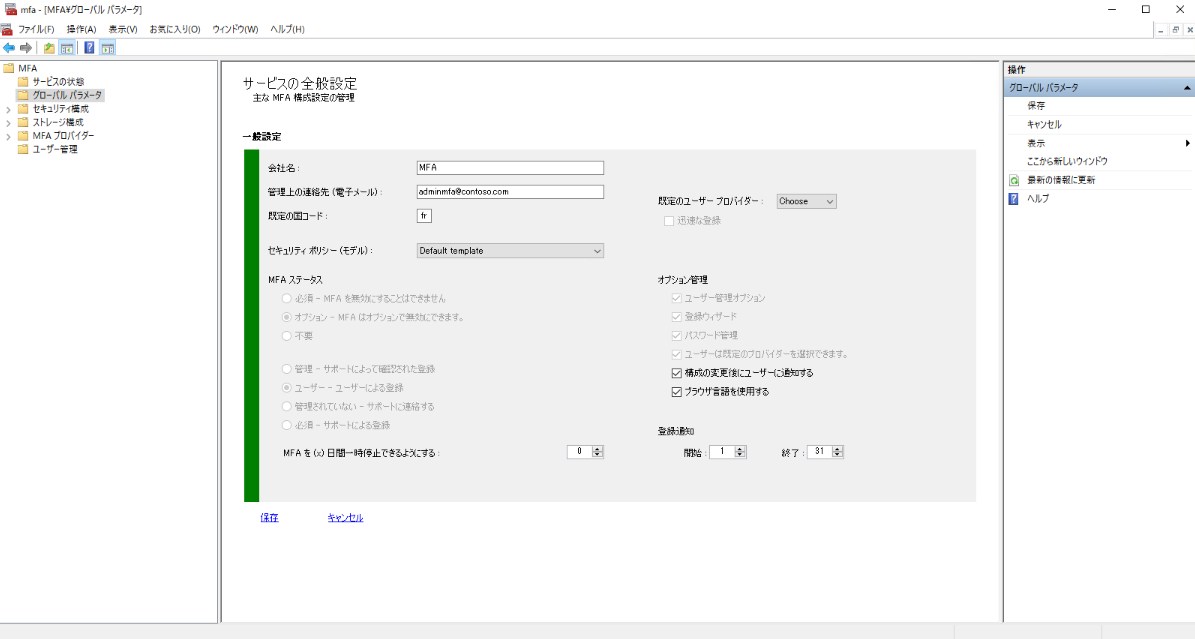
Change “Administrative Contact” to your desired contact and “Default Country Code” to “ja”, then click “Save”.
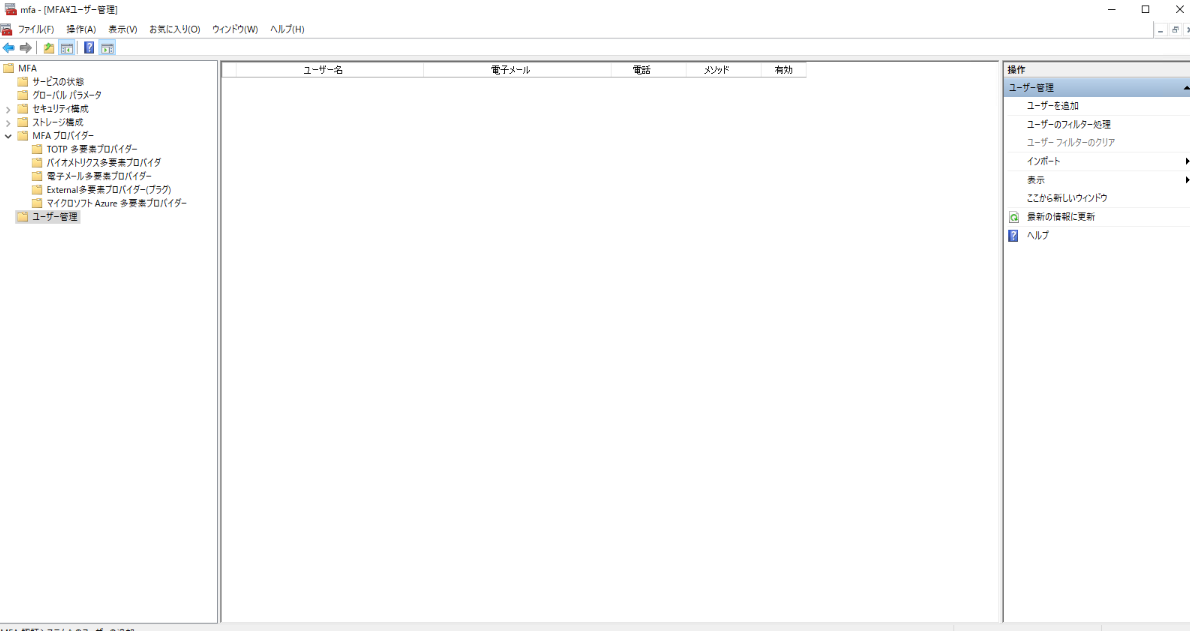
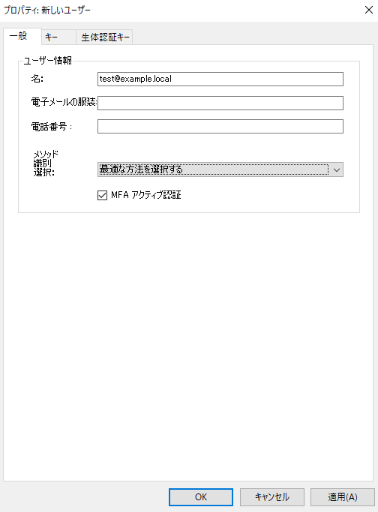
In “User Management”, specify the UPN of the user registered in AD DS (example: [email protected]) for “First Name”. Register your actual email address in “Email Address”.
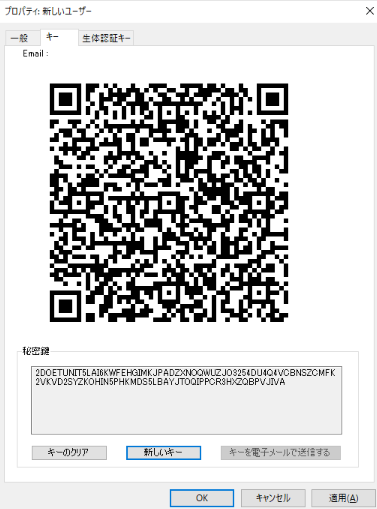
Click “New Key” on the “Keys” tab.
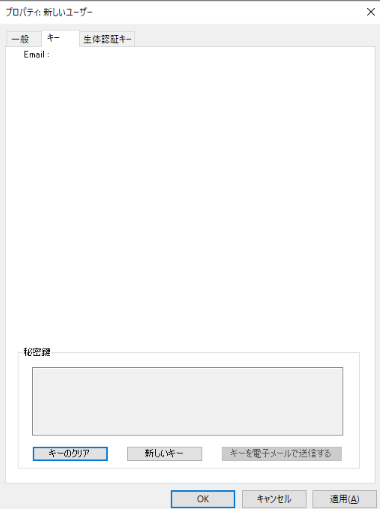
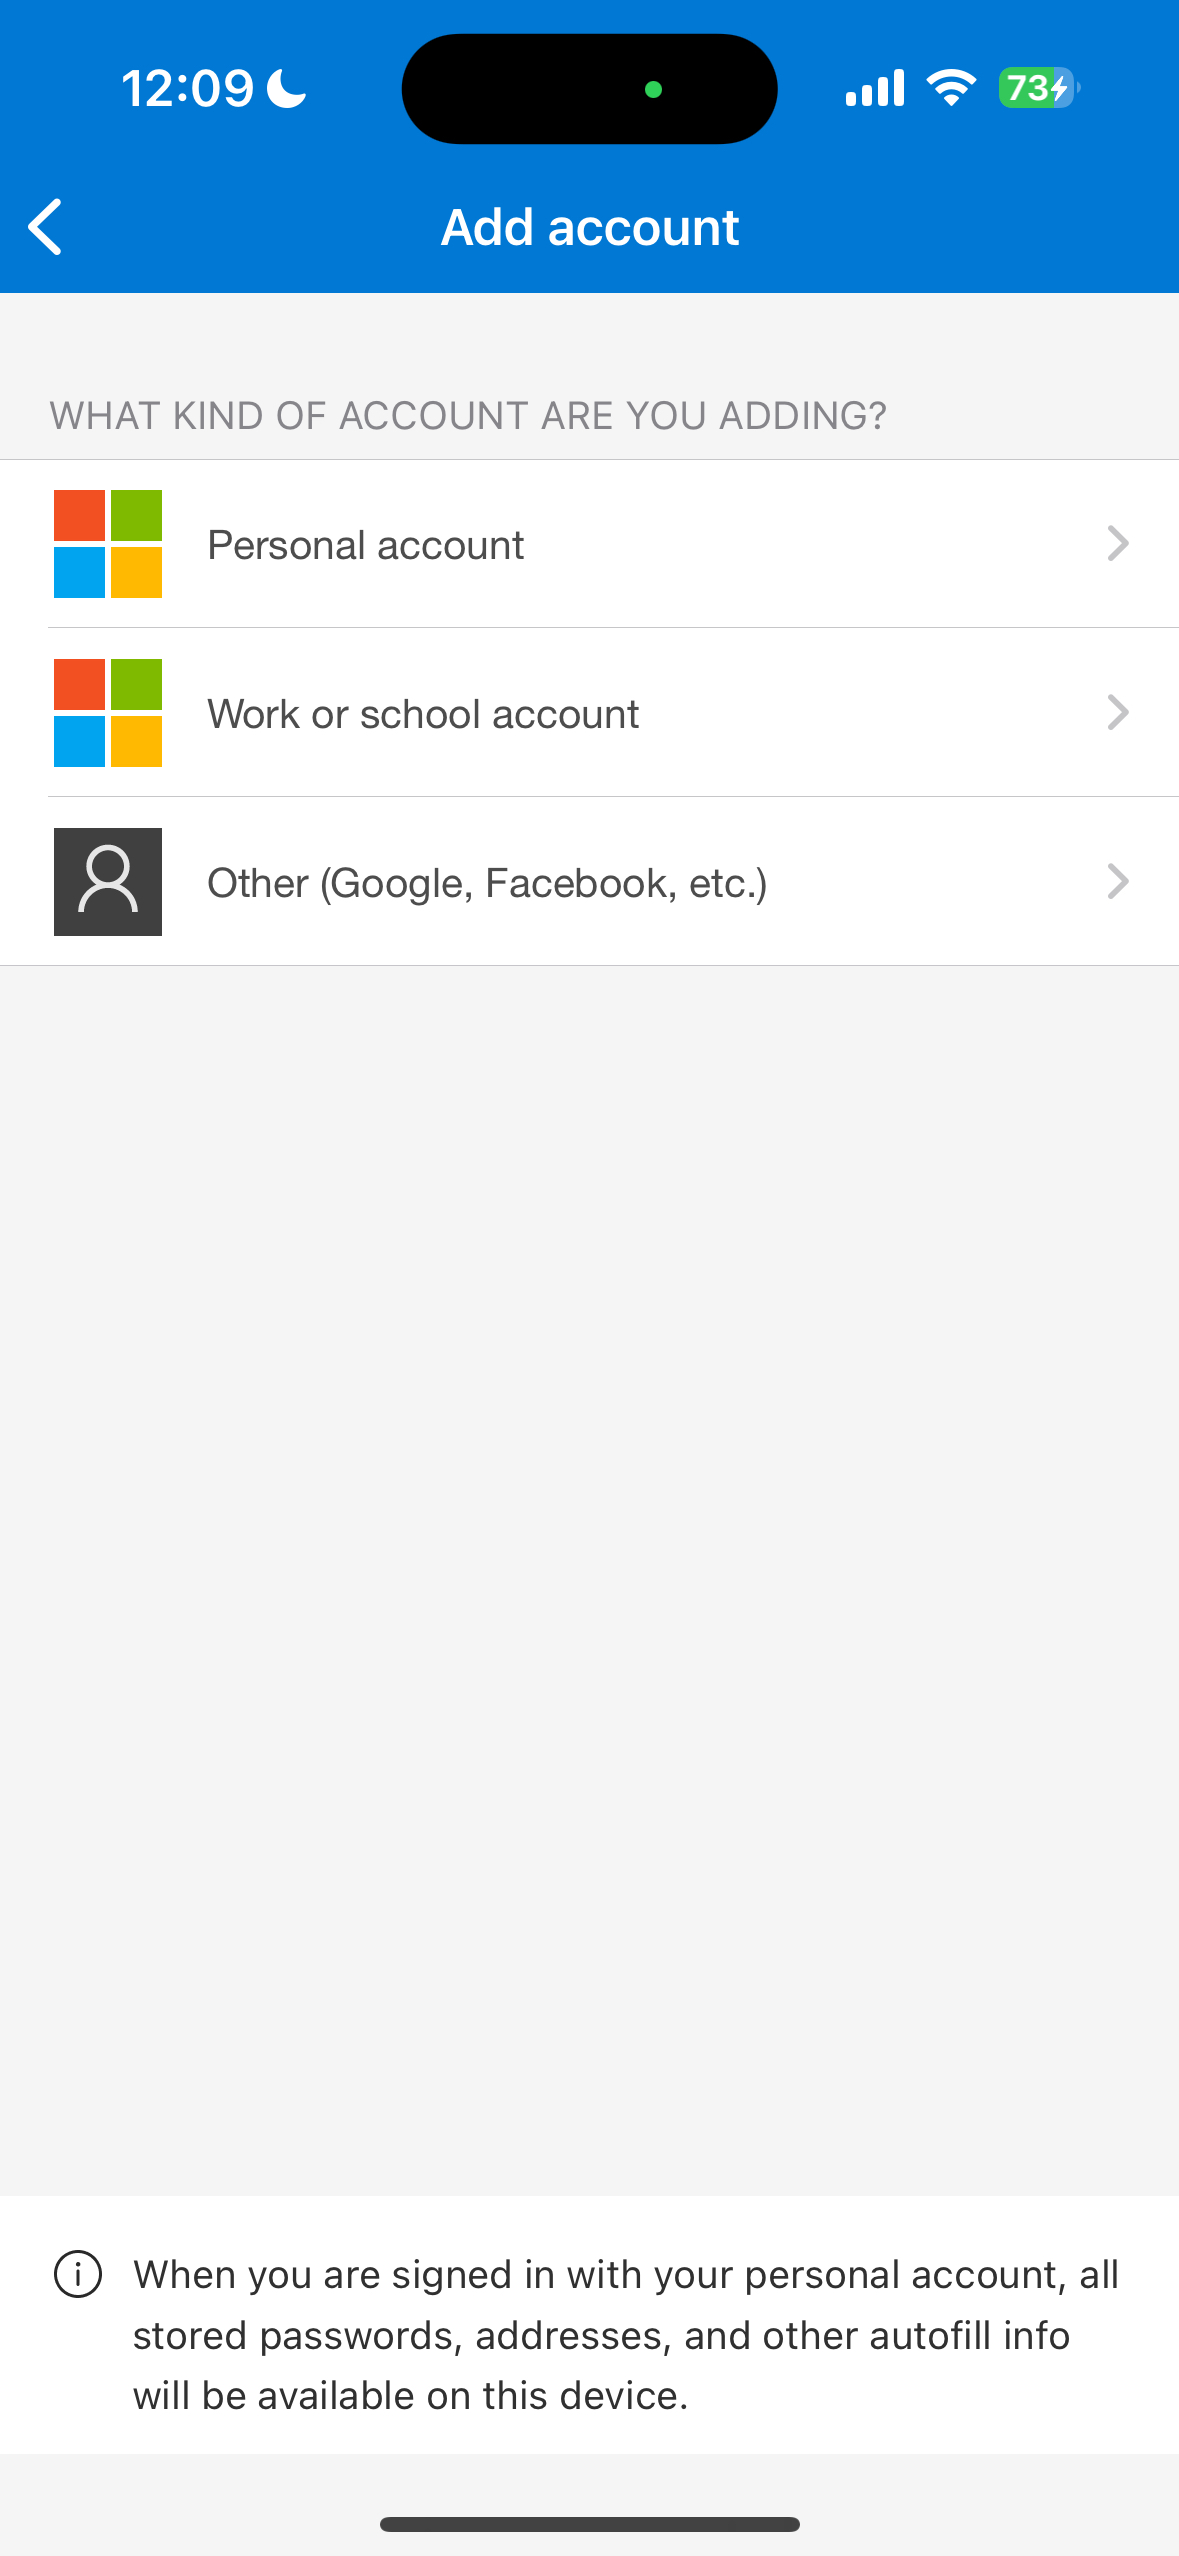
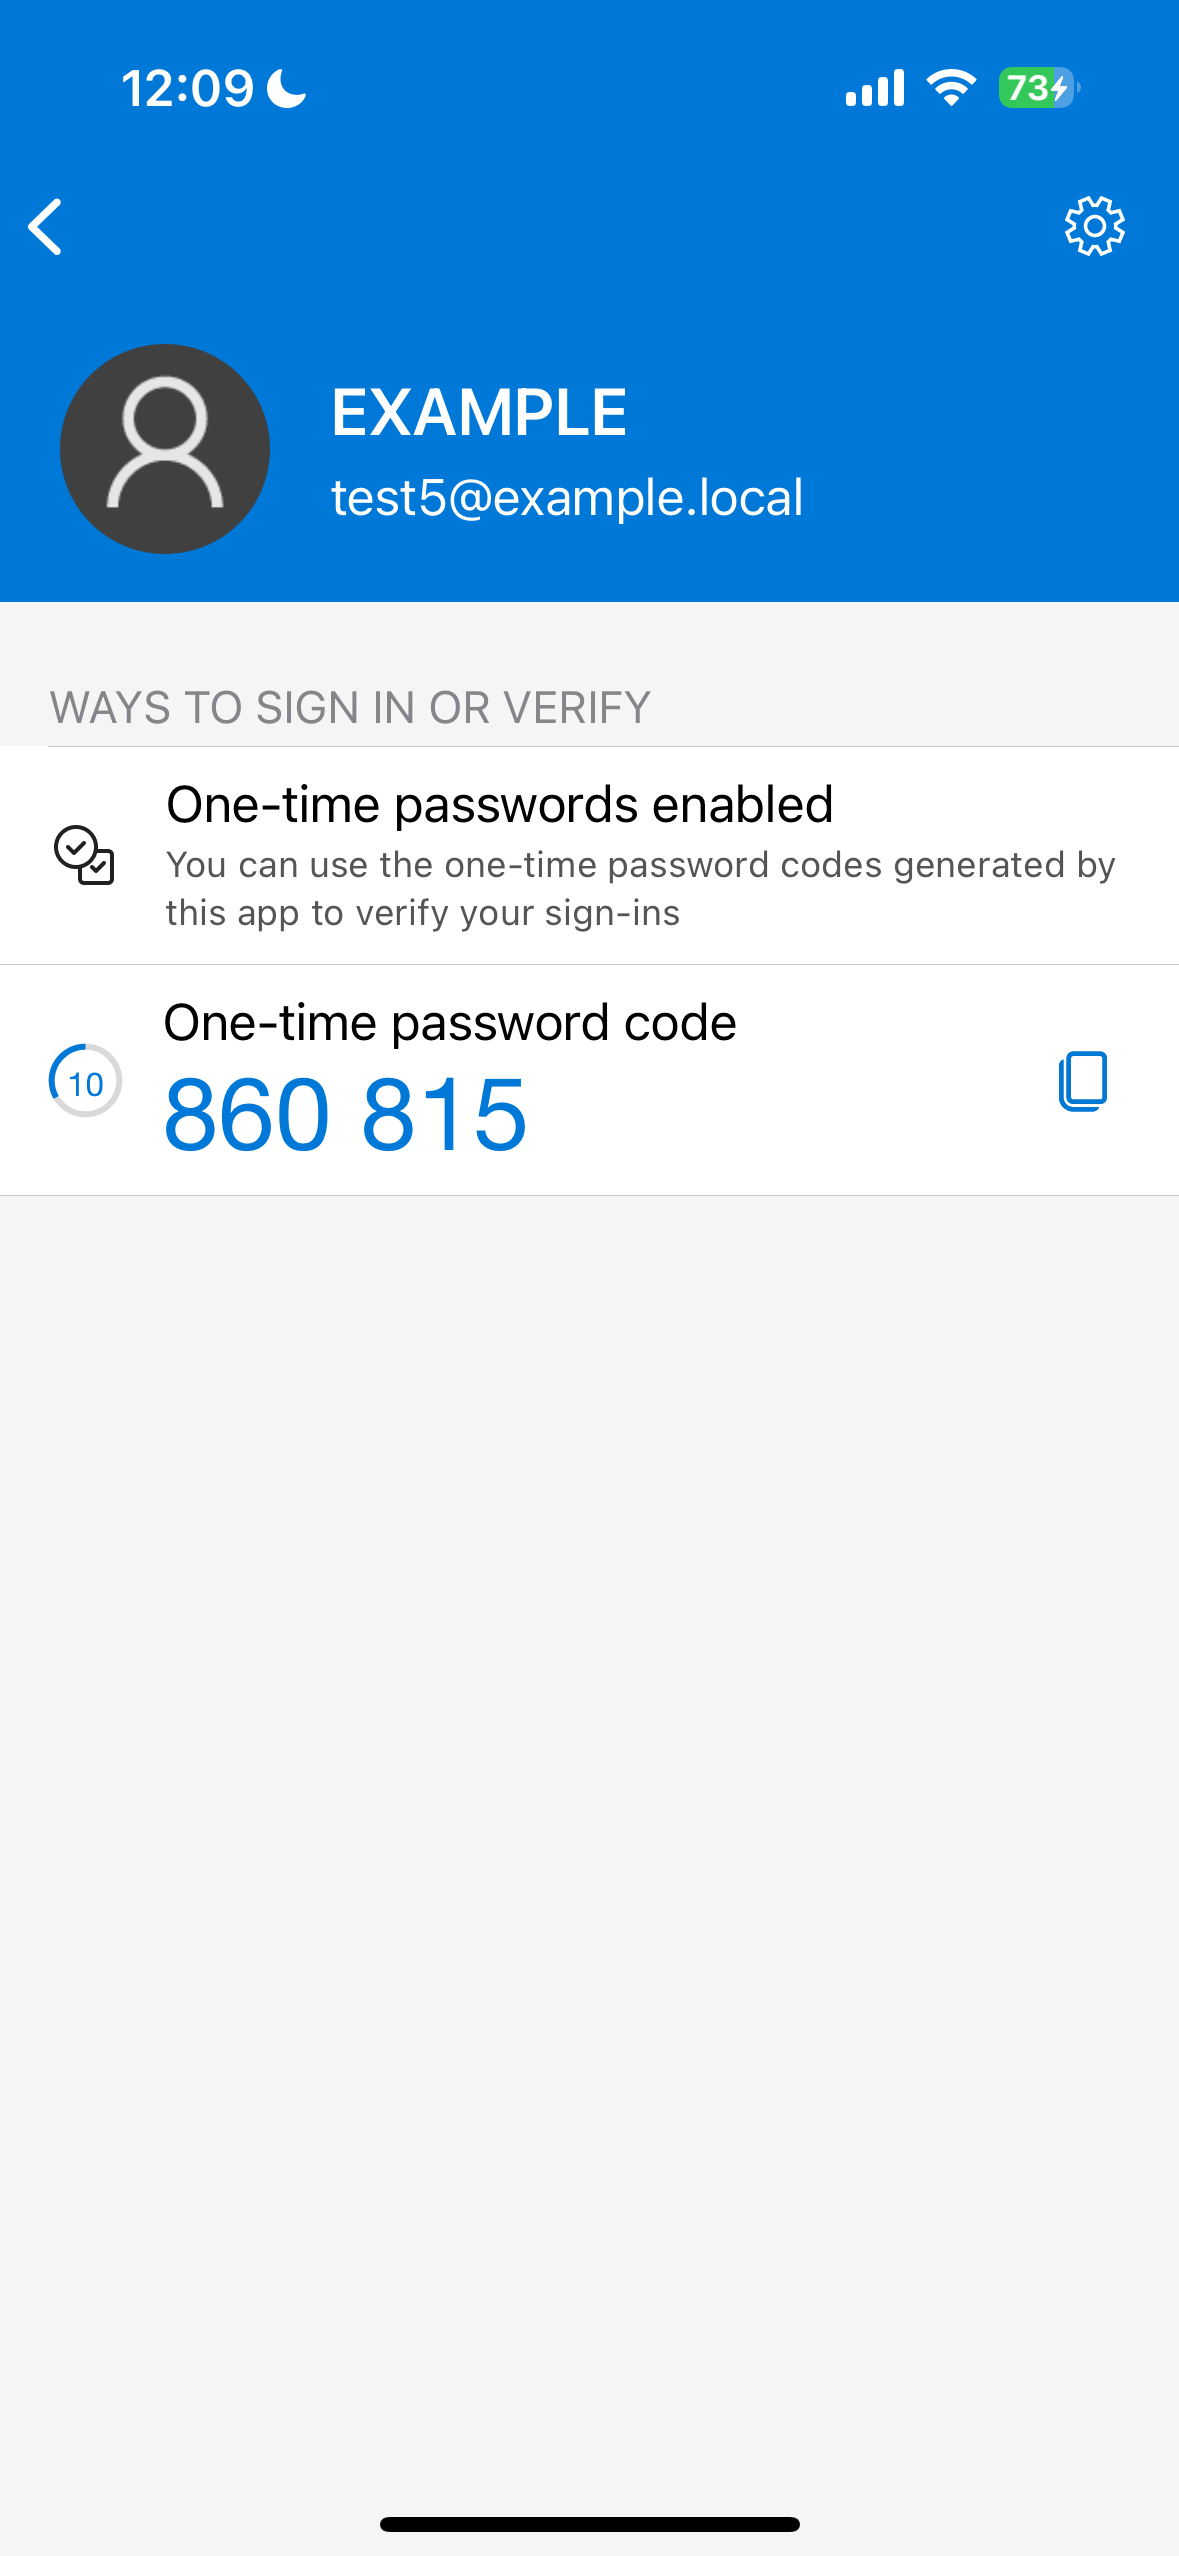
When the QR code is displayed, scan it with a smartphone app such as Google Authenticator or Microsoft Authenticator. Then click OK.
Configuring WHfB
Configuring GPOs
Create and configure a group policy to enable Windows Hello for Business.
In Server Manager, click “Group Policy Management” from the tools at the top.
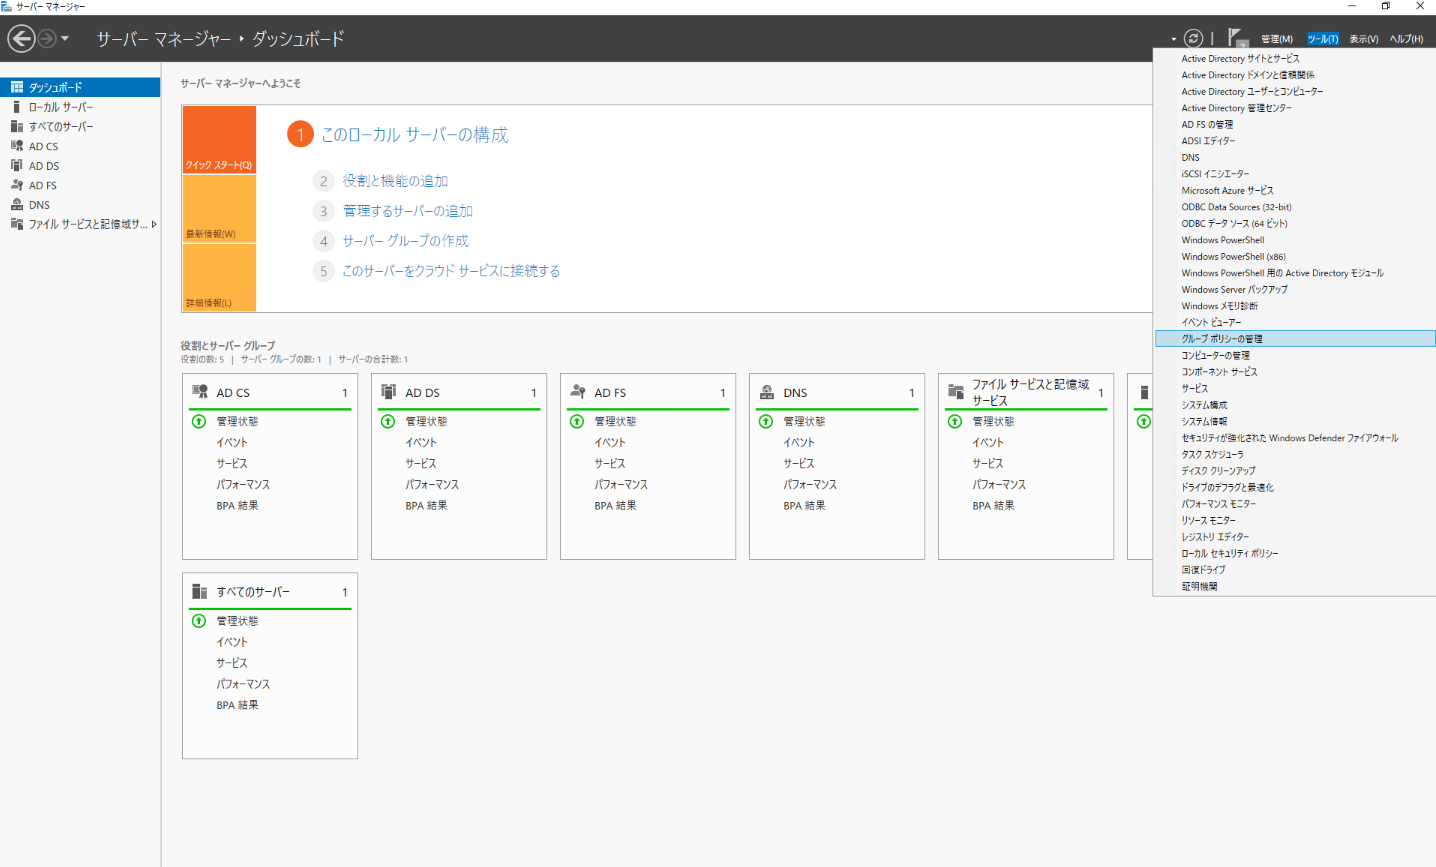
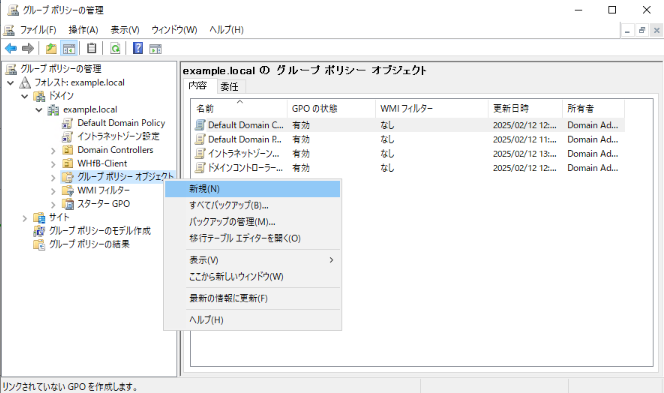
Right-click “Group Policy Management” → “Forest” → “Domains” → “{domain name}” → “Group Policy Object” and click “New”.
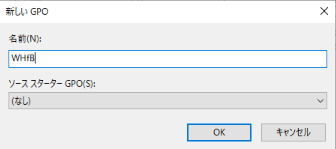
Enter “WHfB” in “Name” and click “OK”.
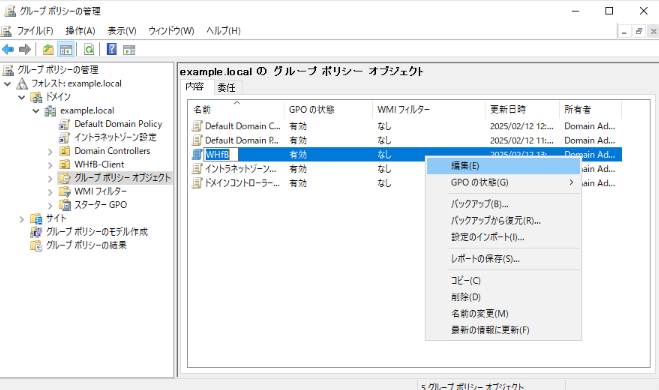
Right-click the GPO you created and click Edit.
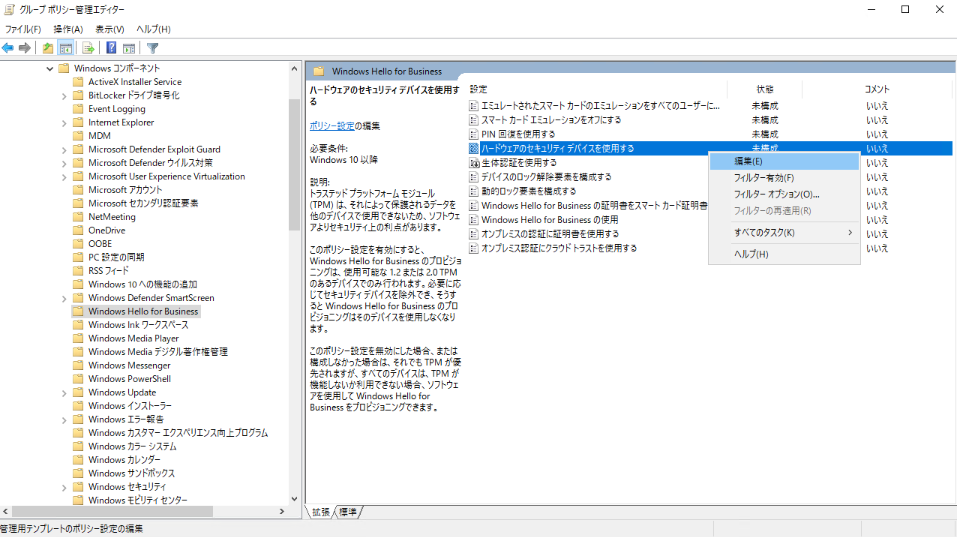
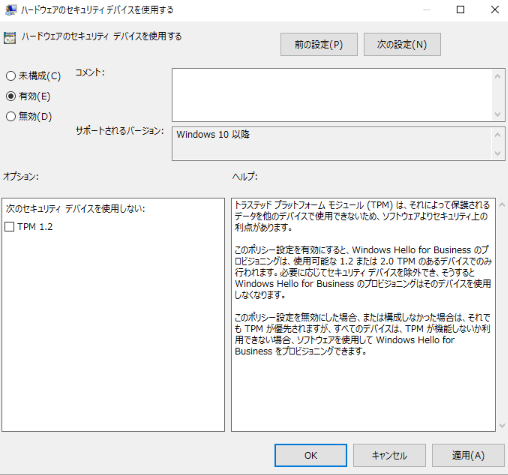
Go to Computer Configuration → Administrative Templates → Windows Components → Windows Hello for Business, right-click Use Hardware Security Devices, and click Edit.
Check “Enabled” and click “OK”.
Also, right-click “Use Windows Hello for Business” and click “Edit”.
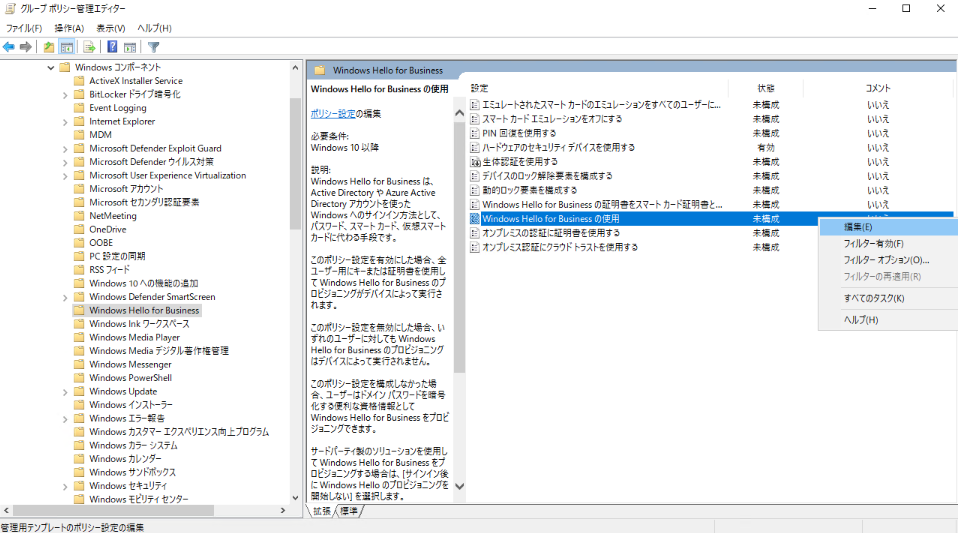
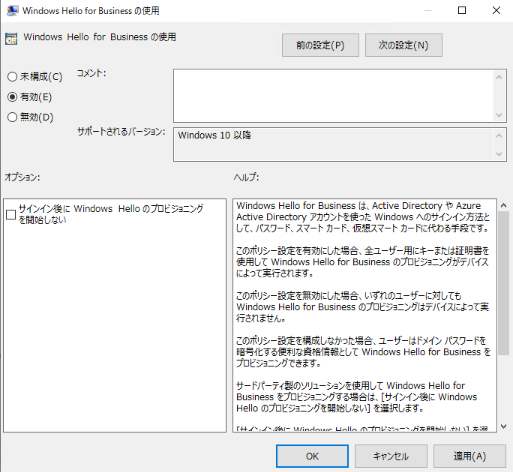
Check “Enabled” and click “OK”.
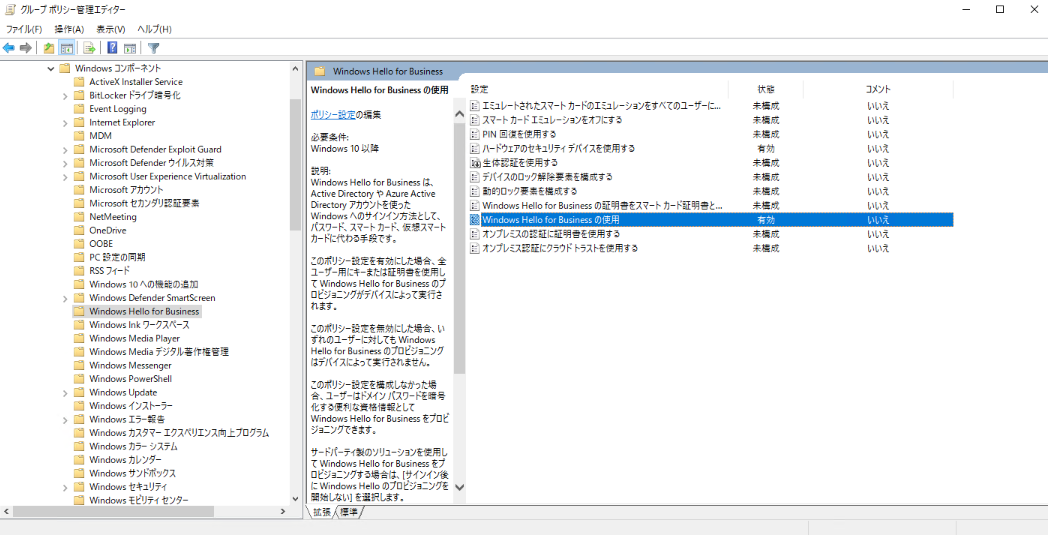
Check your settings.
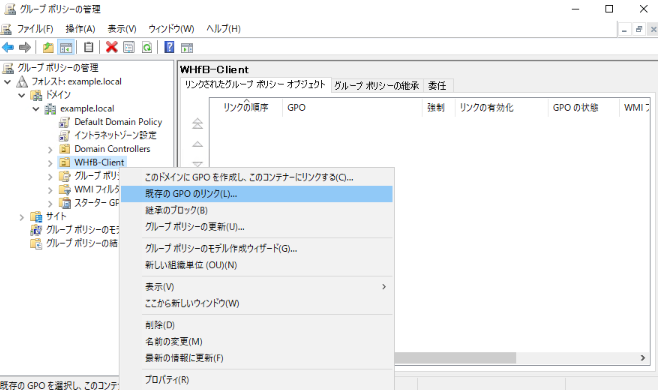
“Group Policy Management” → “Forest” → “Domain” → “{Domain Name}” → Right-click “{Created OU Name}” and click “Link Existing GPO”.
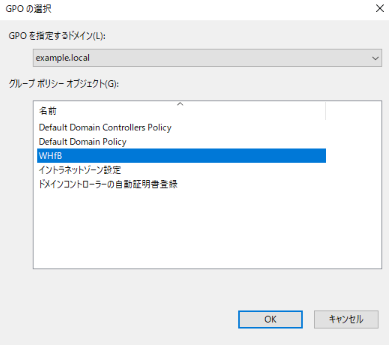
Select “WHfB” and click “OK”.
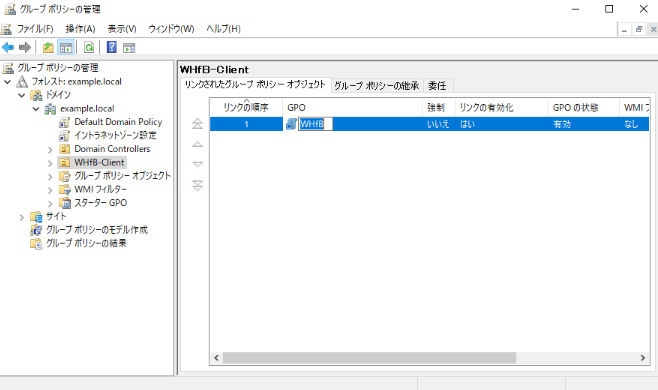
Check your settings.
Client verification
Verify that WHfB actually works on the client.
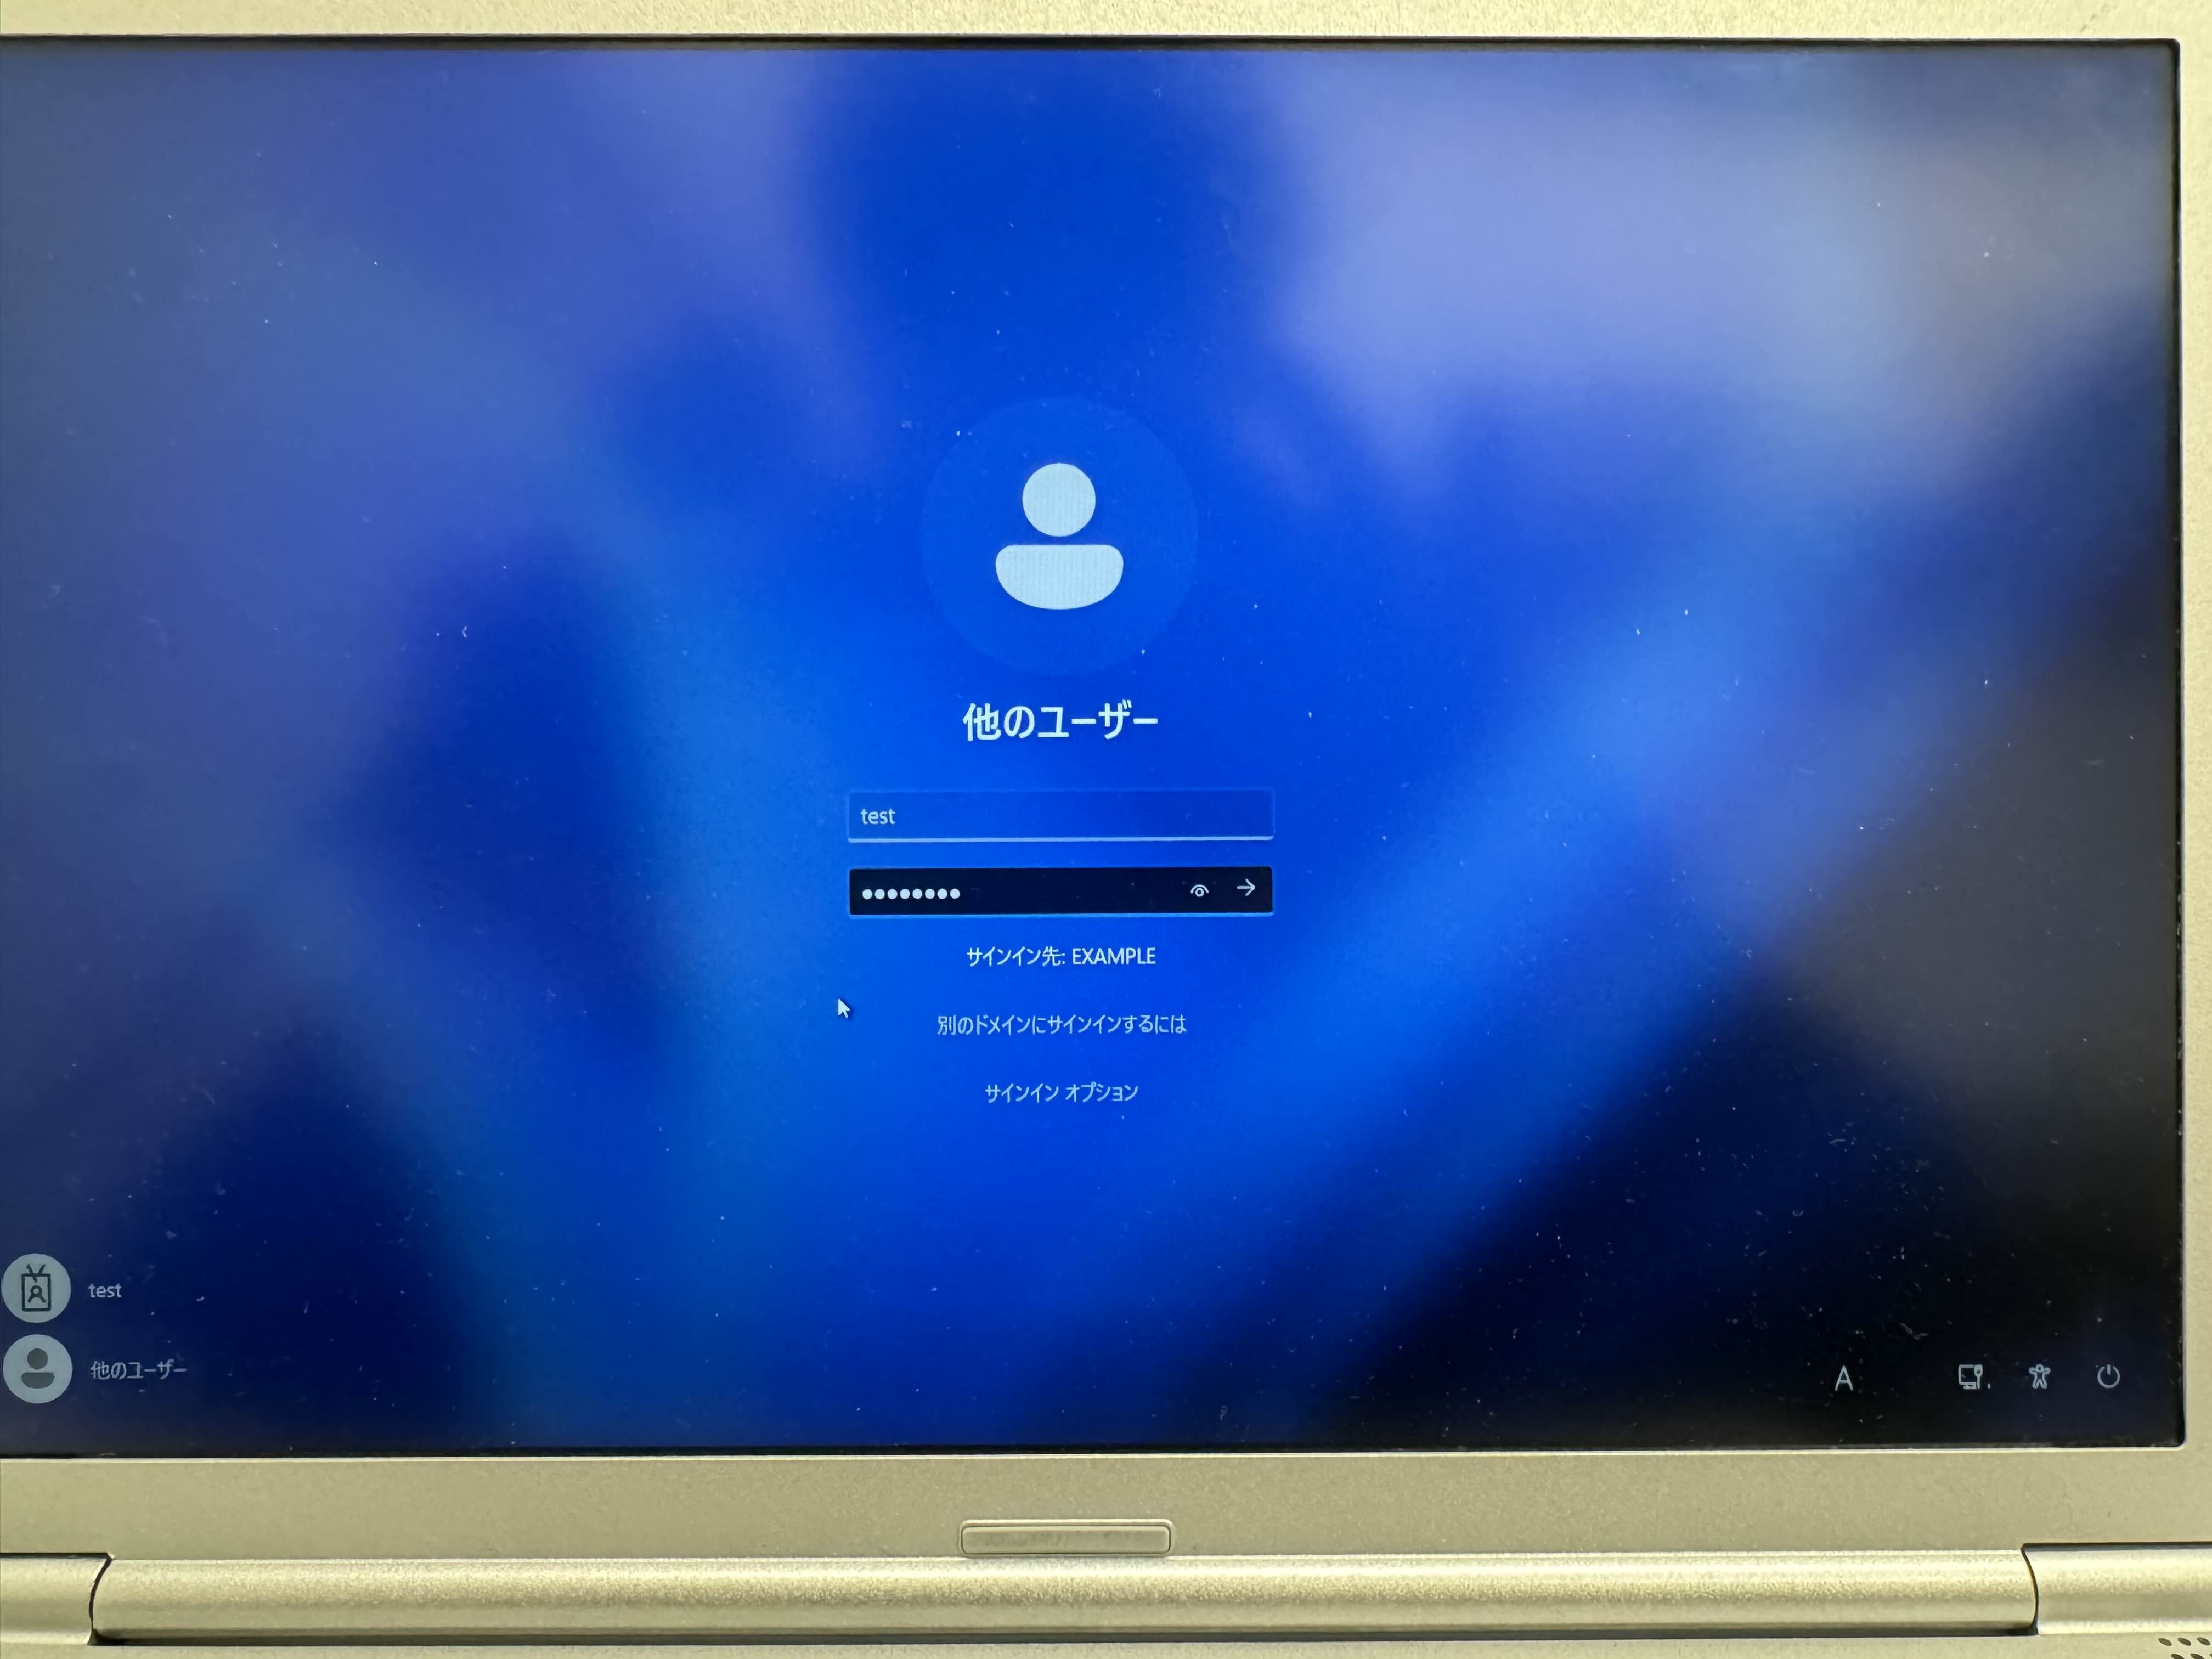
Log out from the existing user on the client device.
Log in as the user you want to apply WHfB to. The WHfB configuration setup will then start when you log in for the first time.
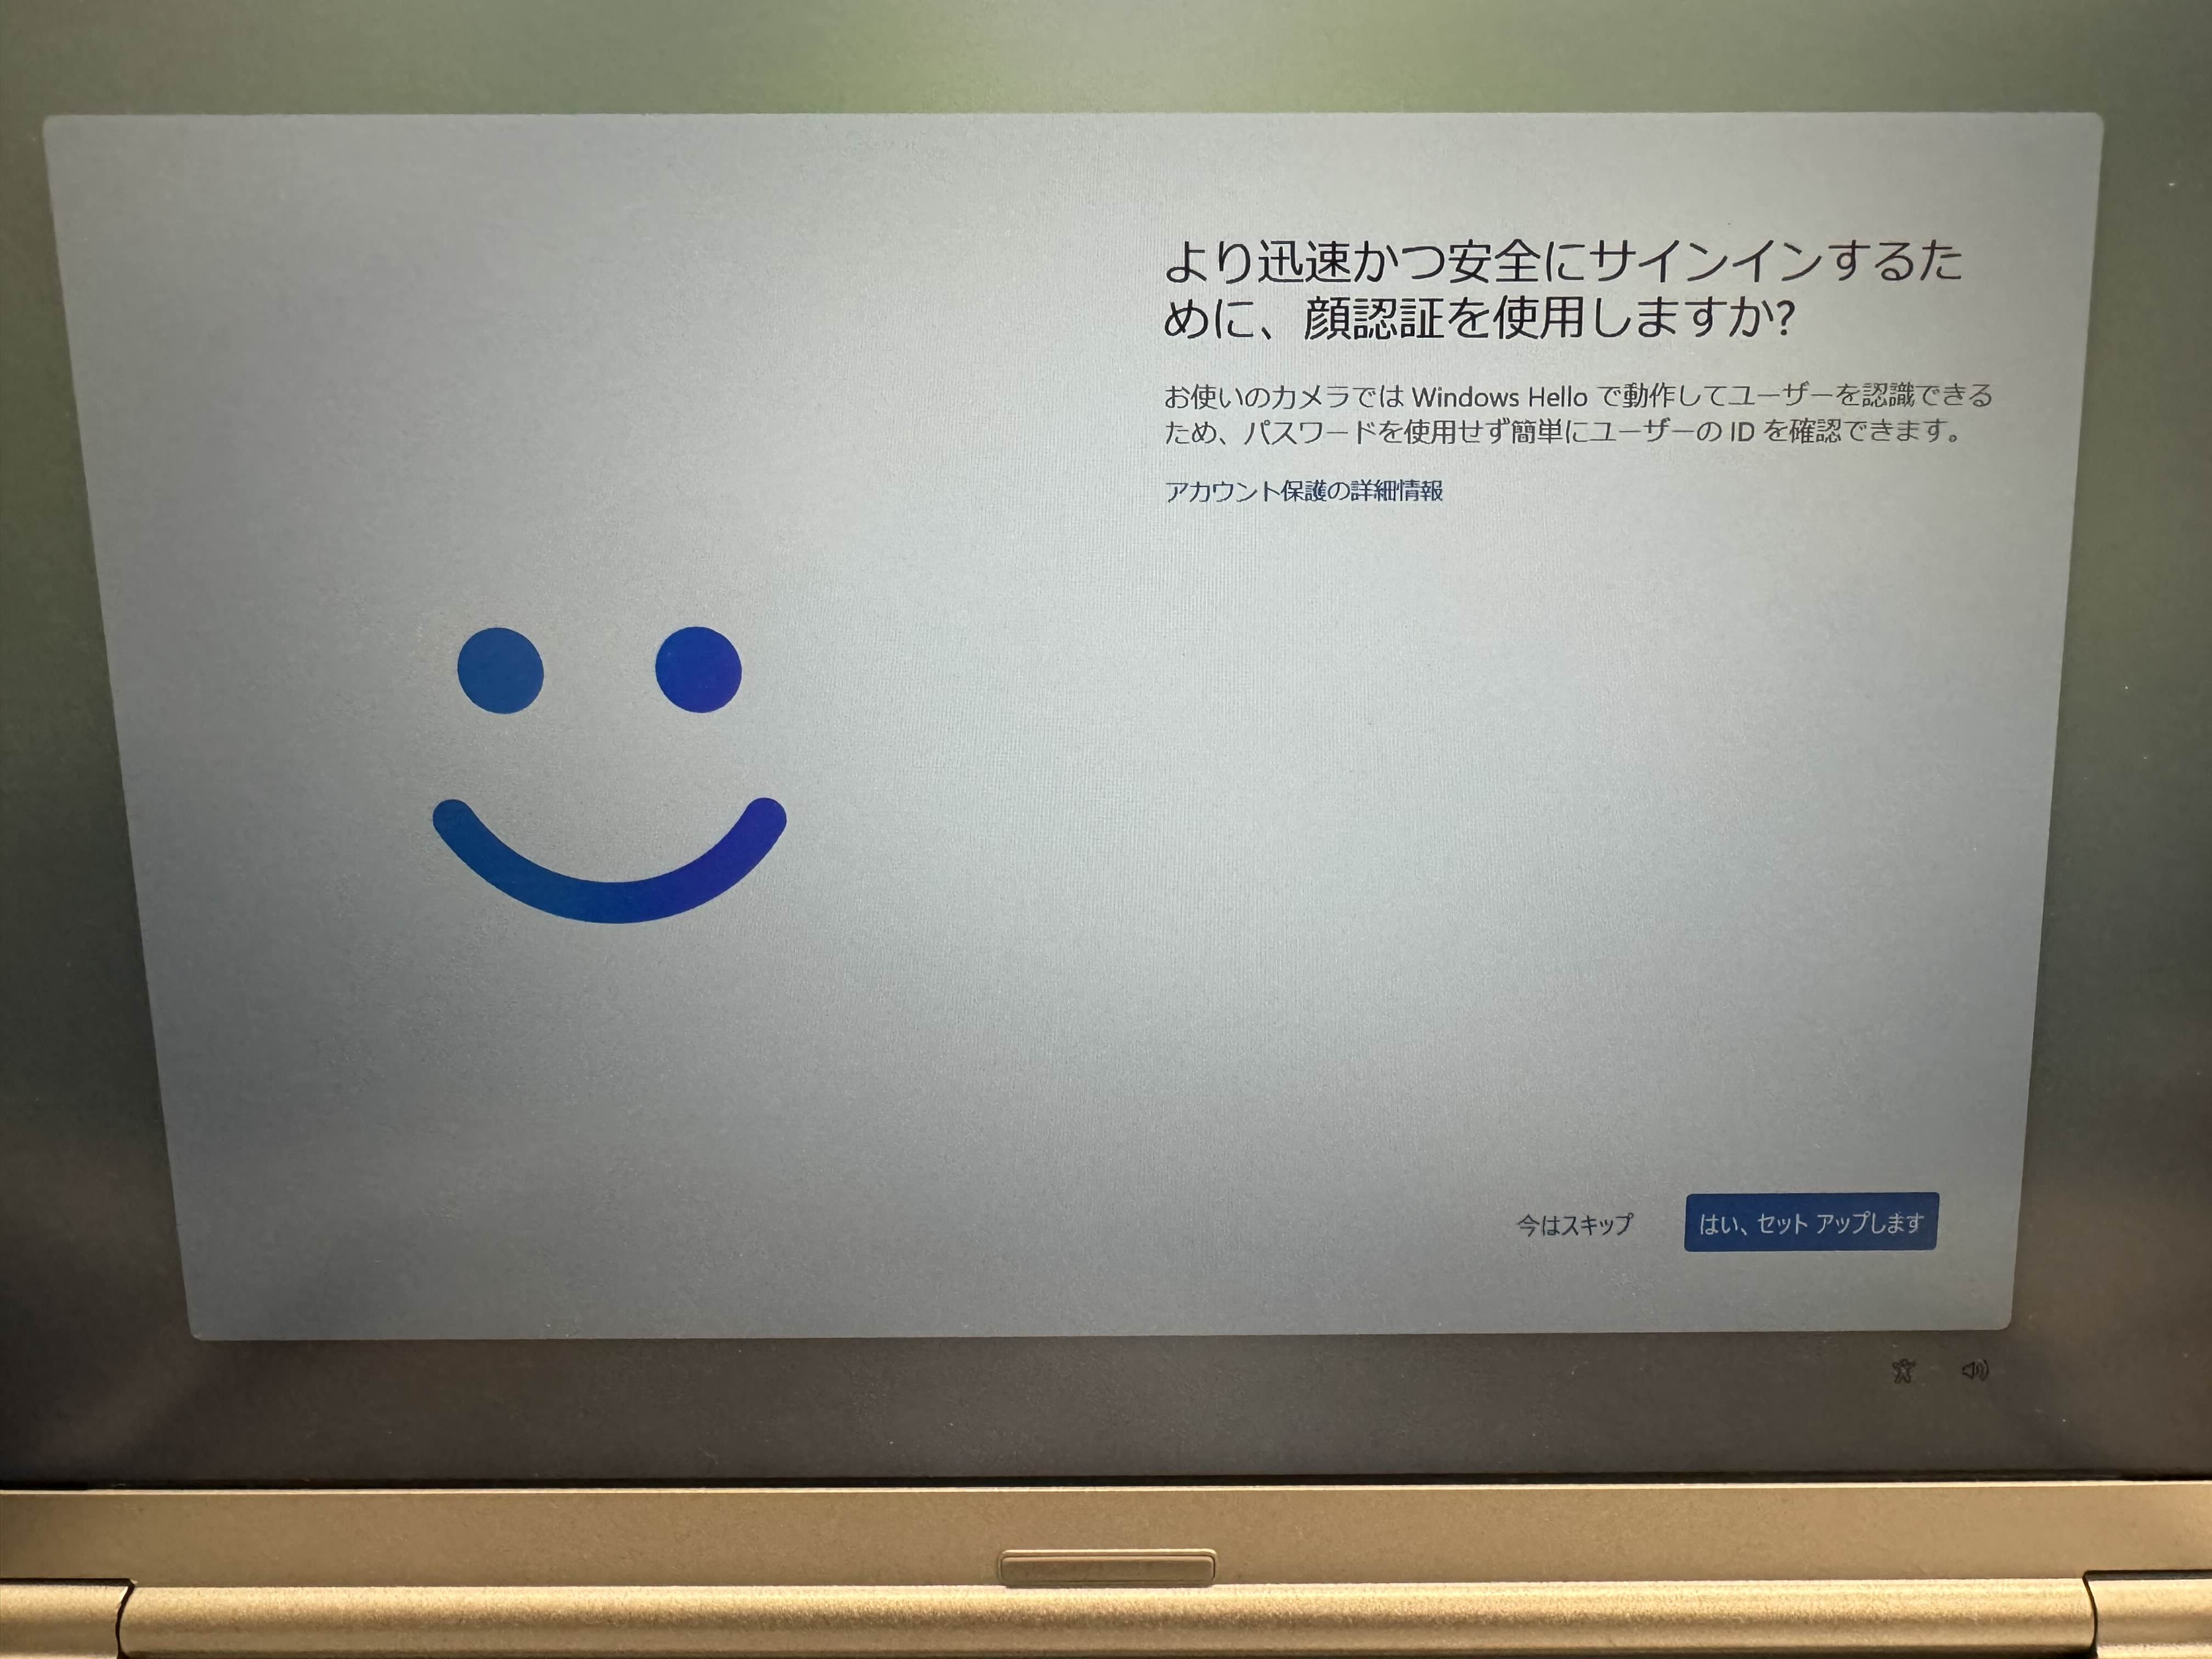
Follow the guide to register for biometric authentication.


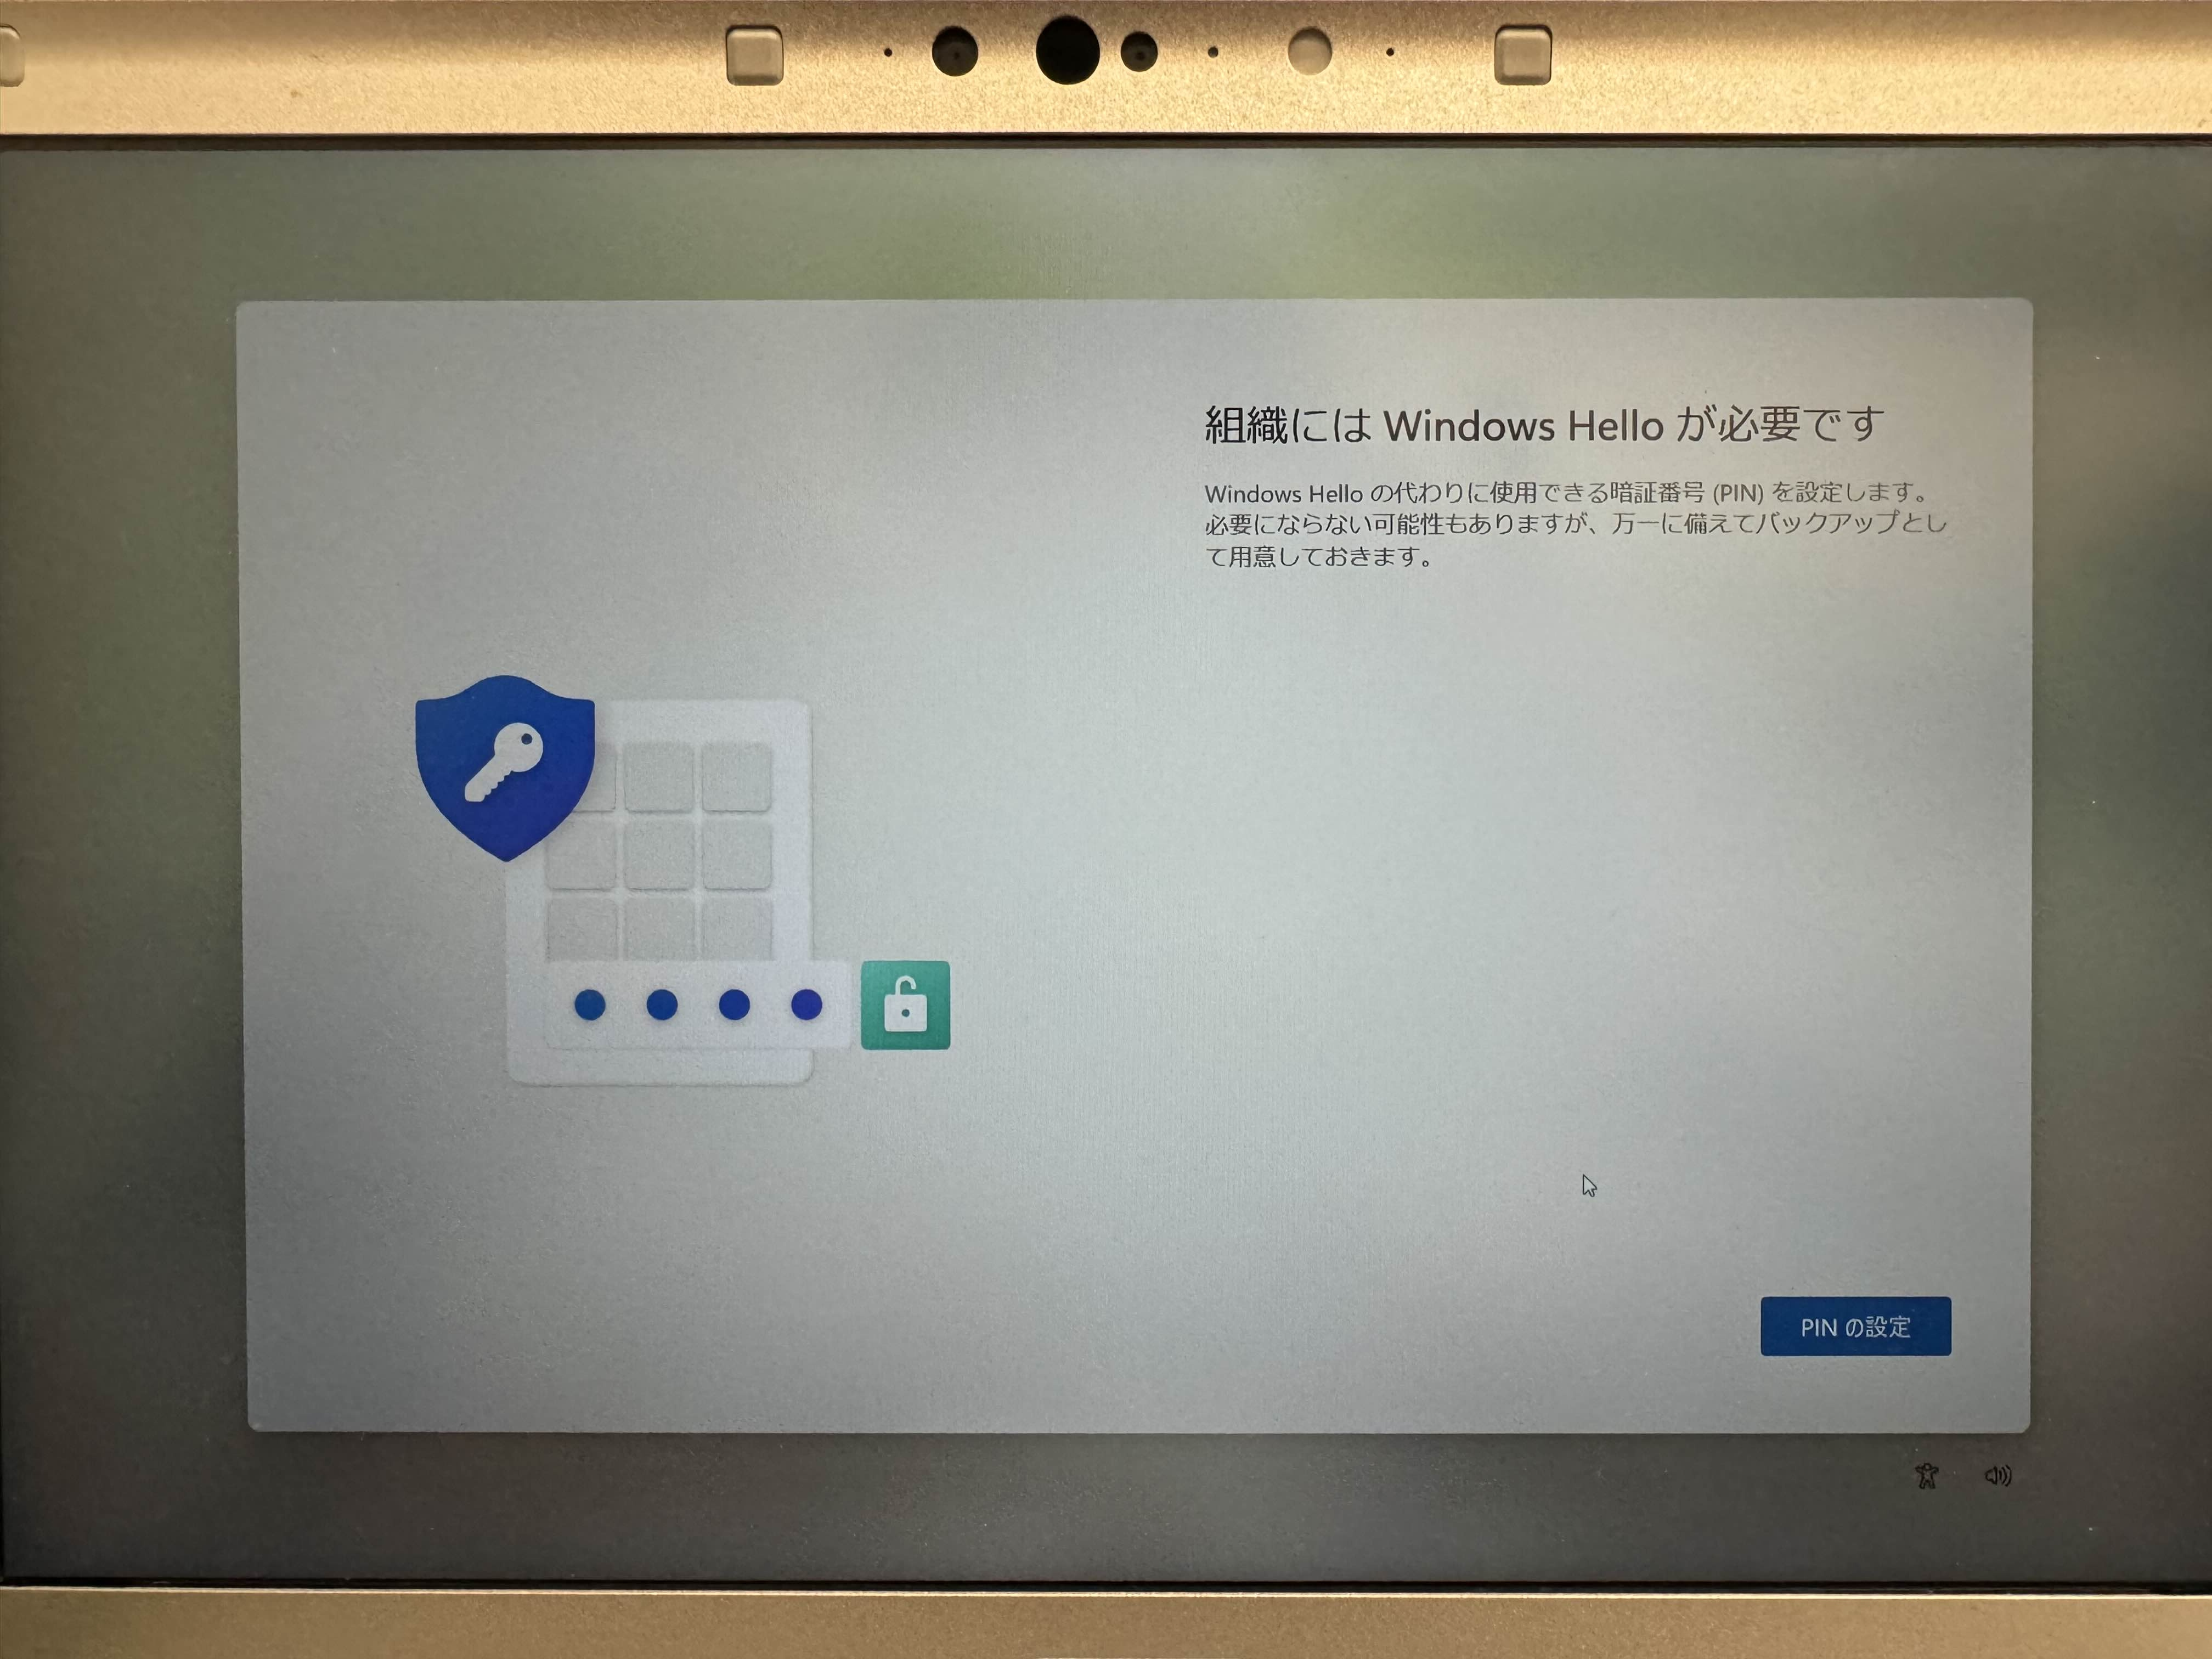
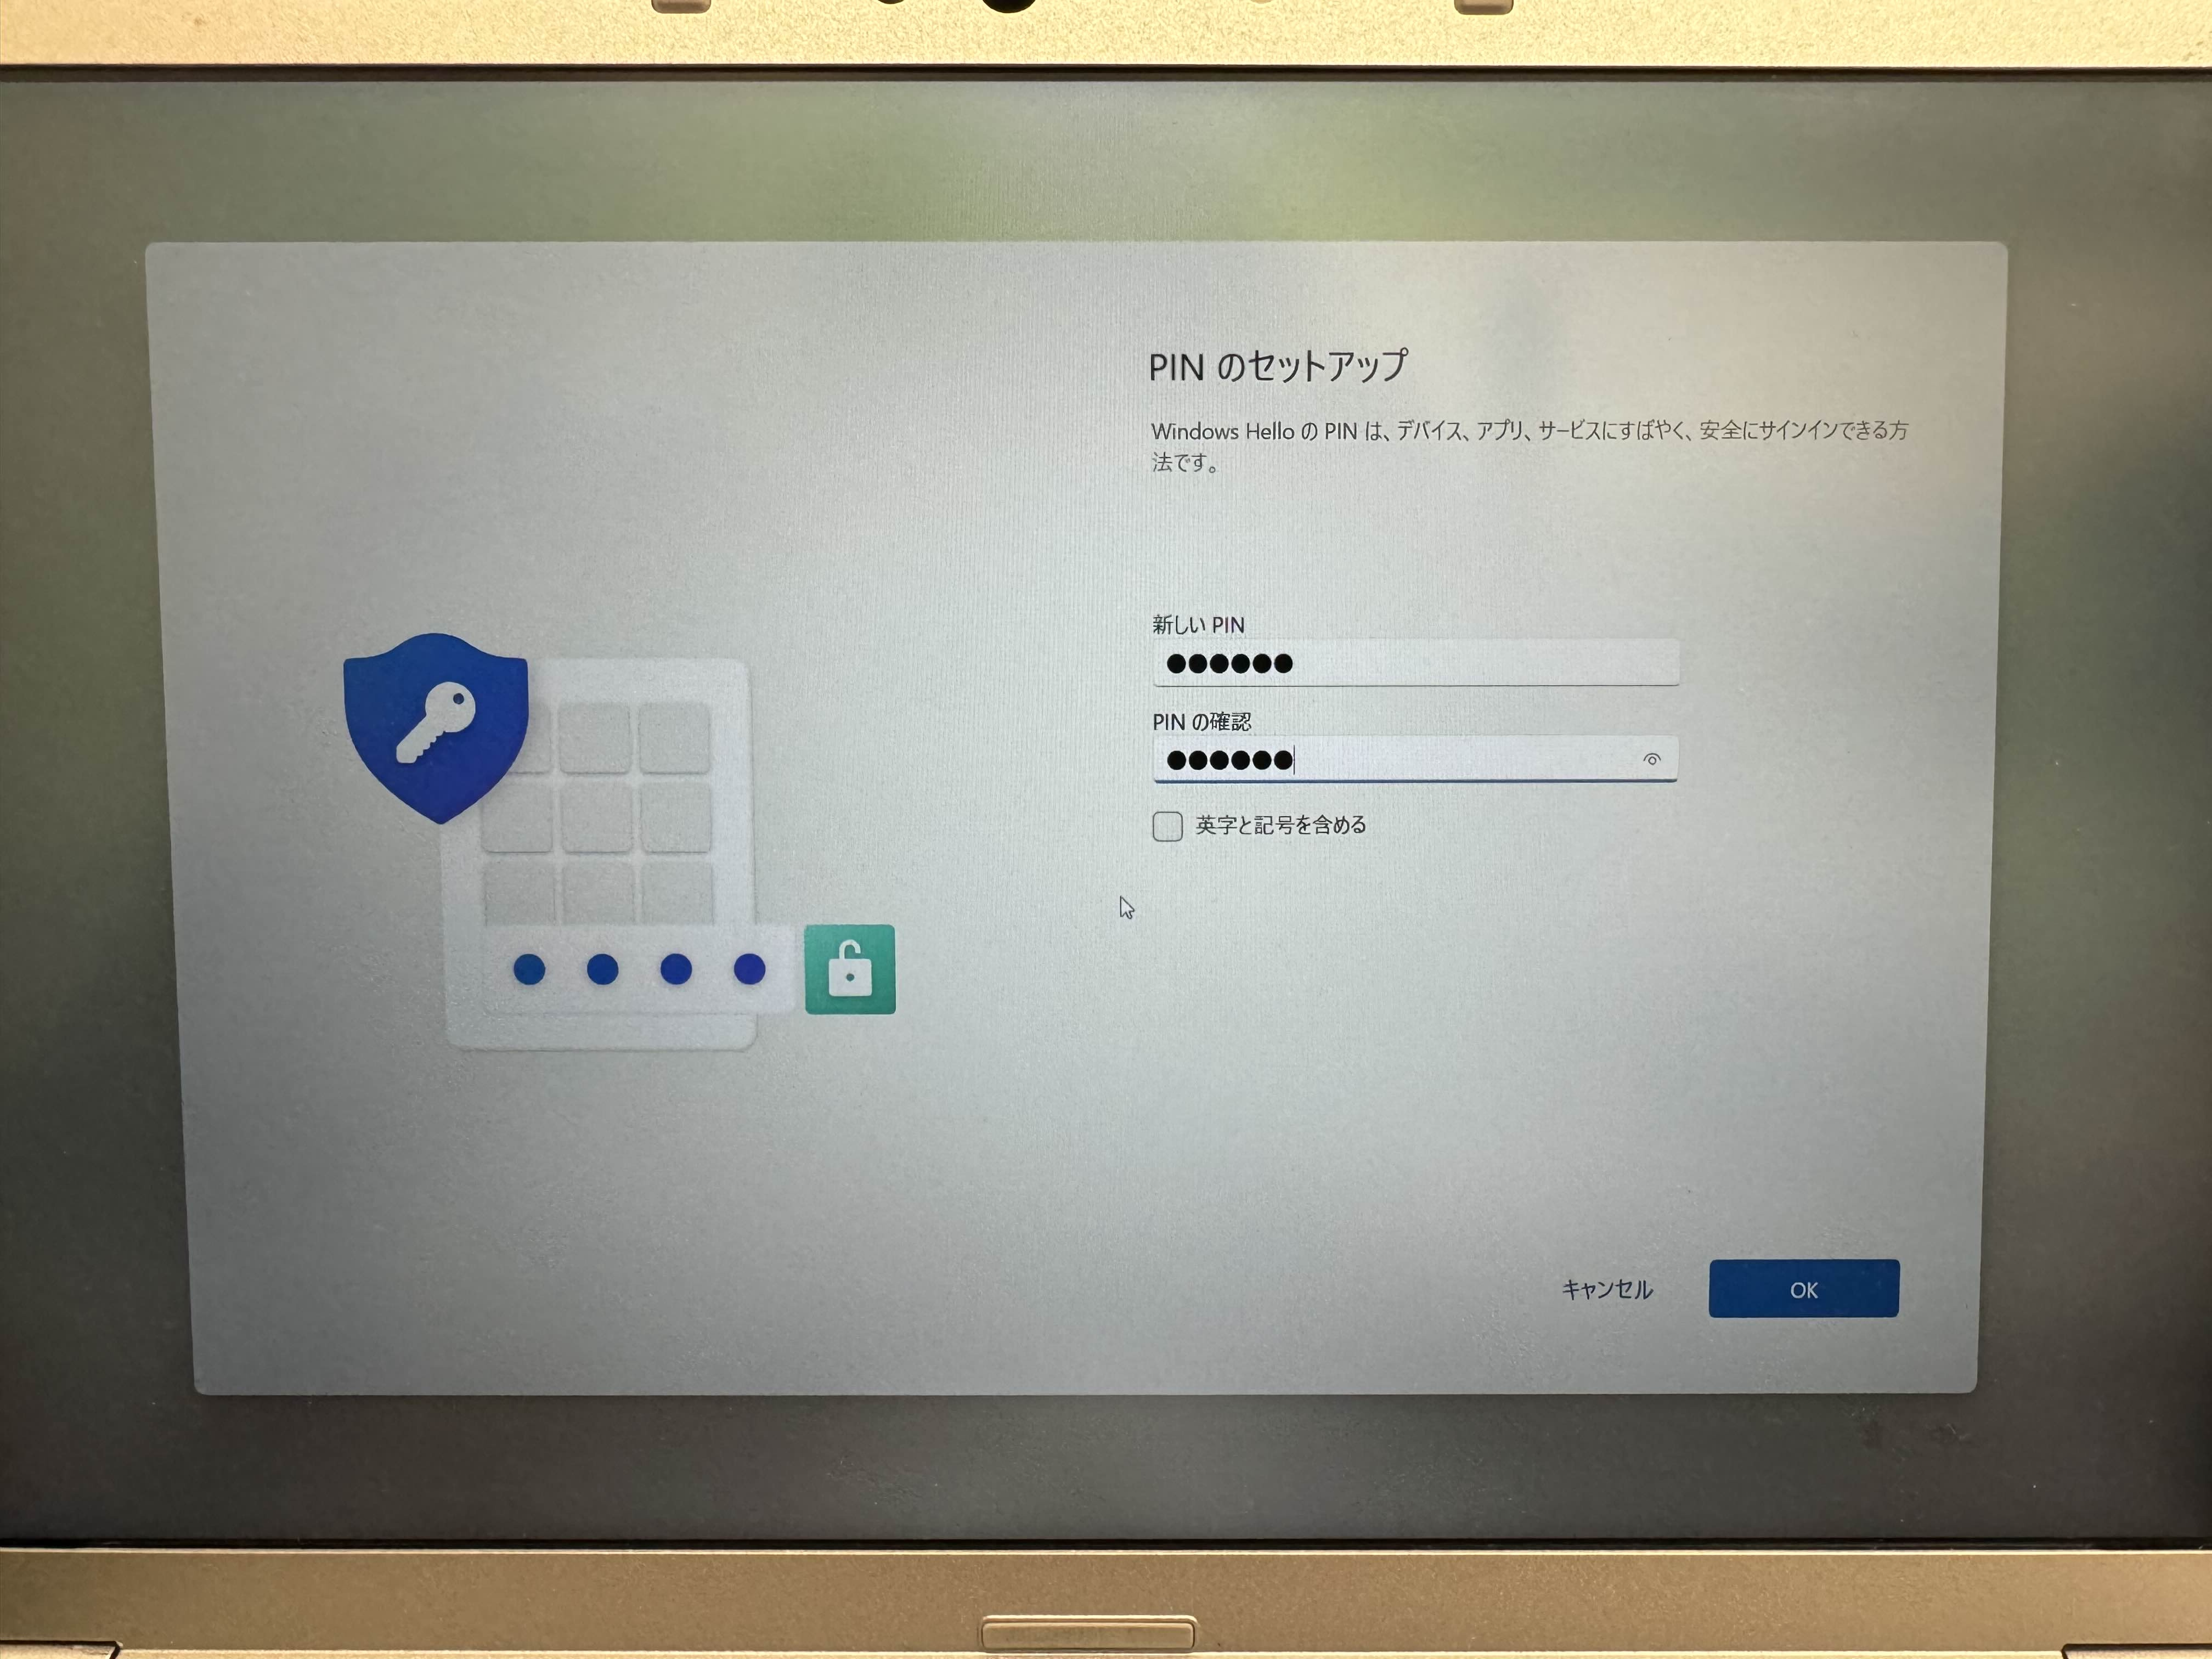
Next, you will be asked to create a PIN, so create one.
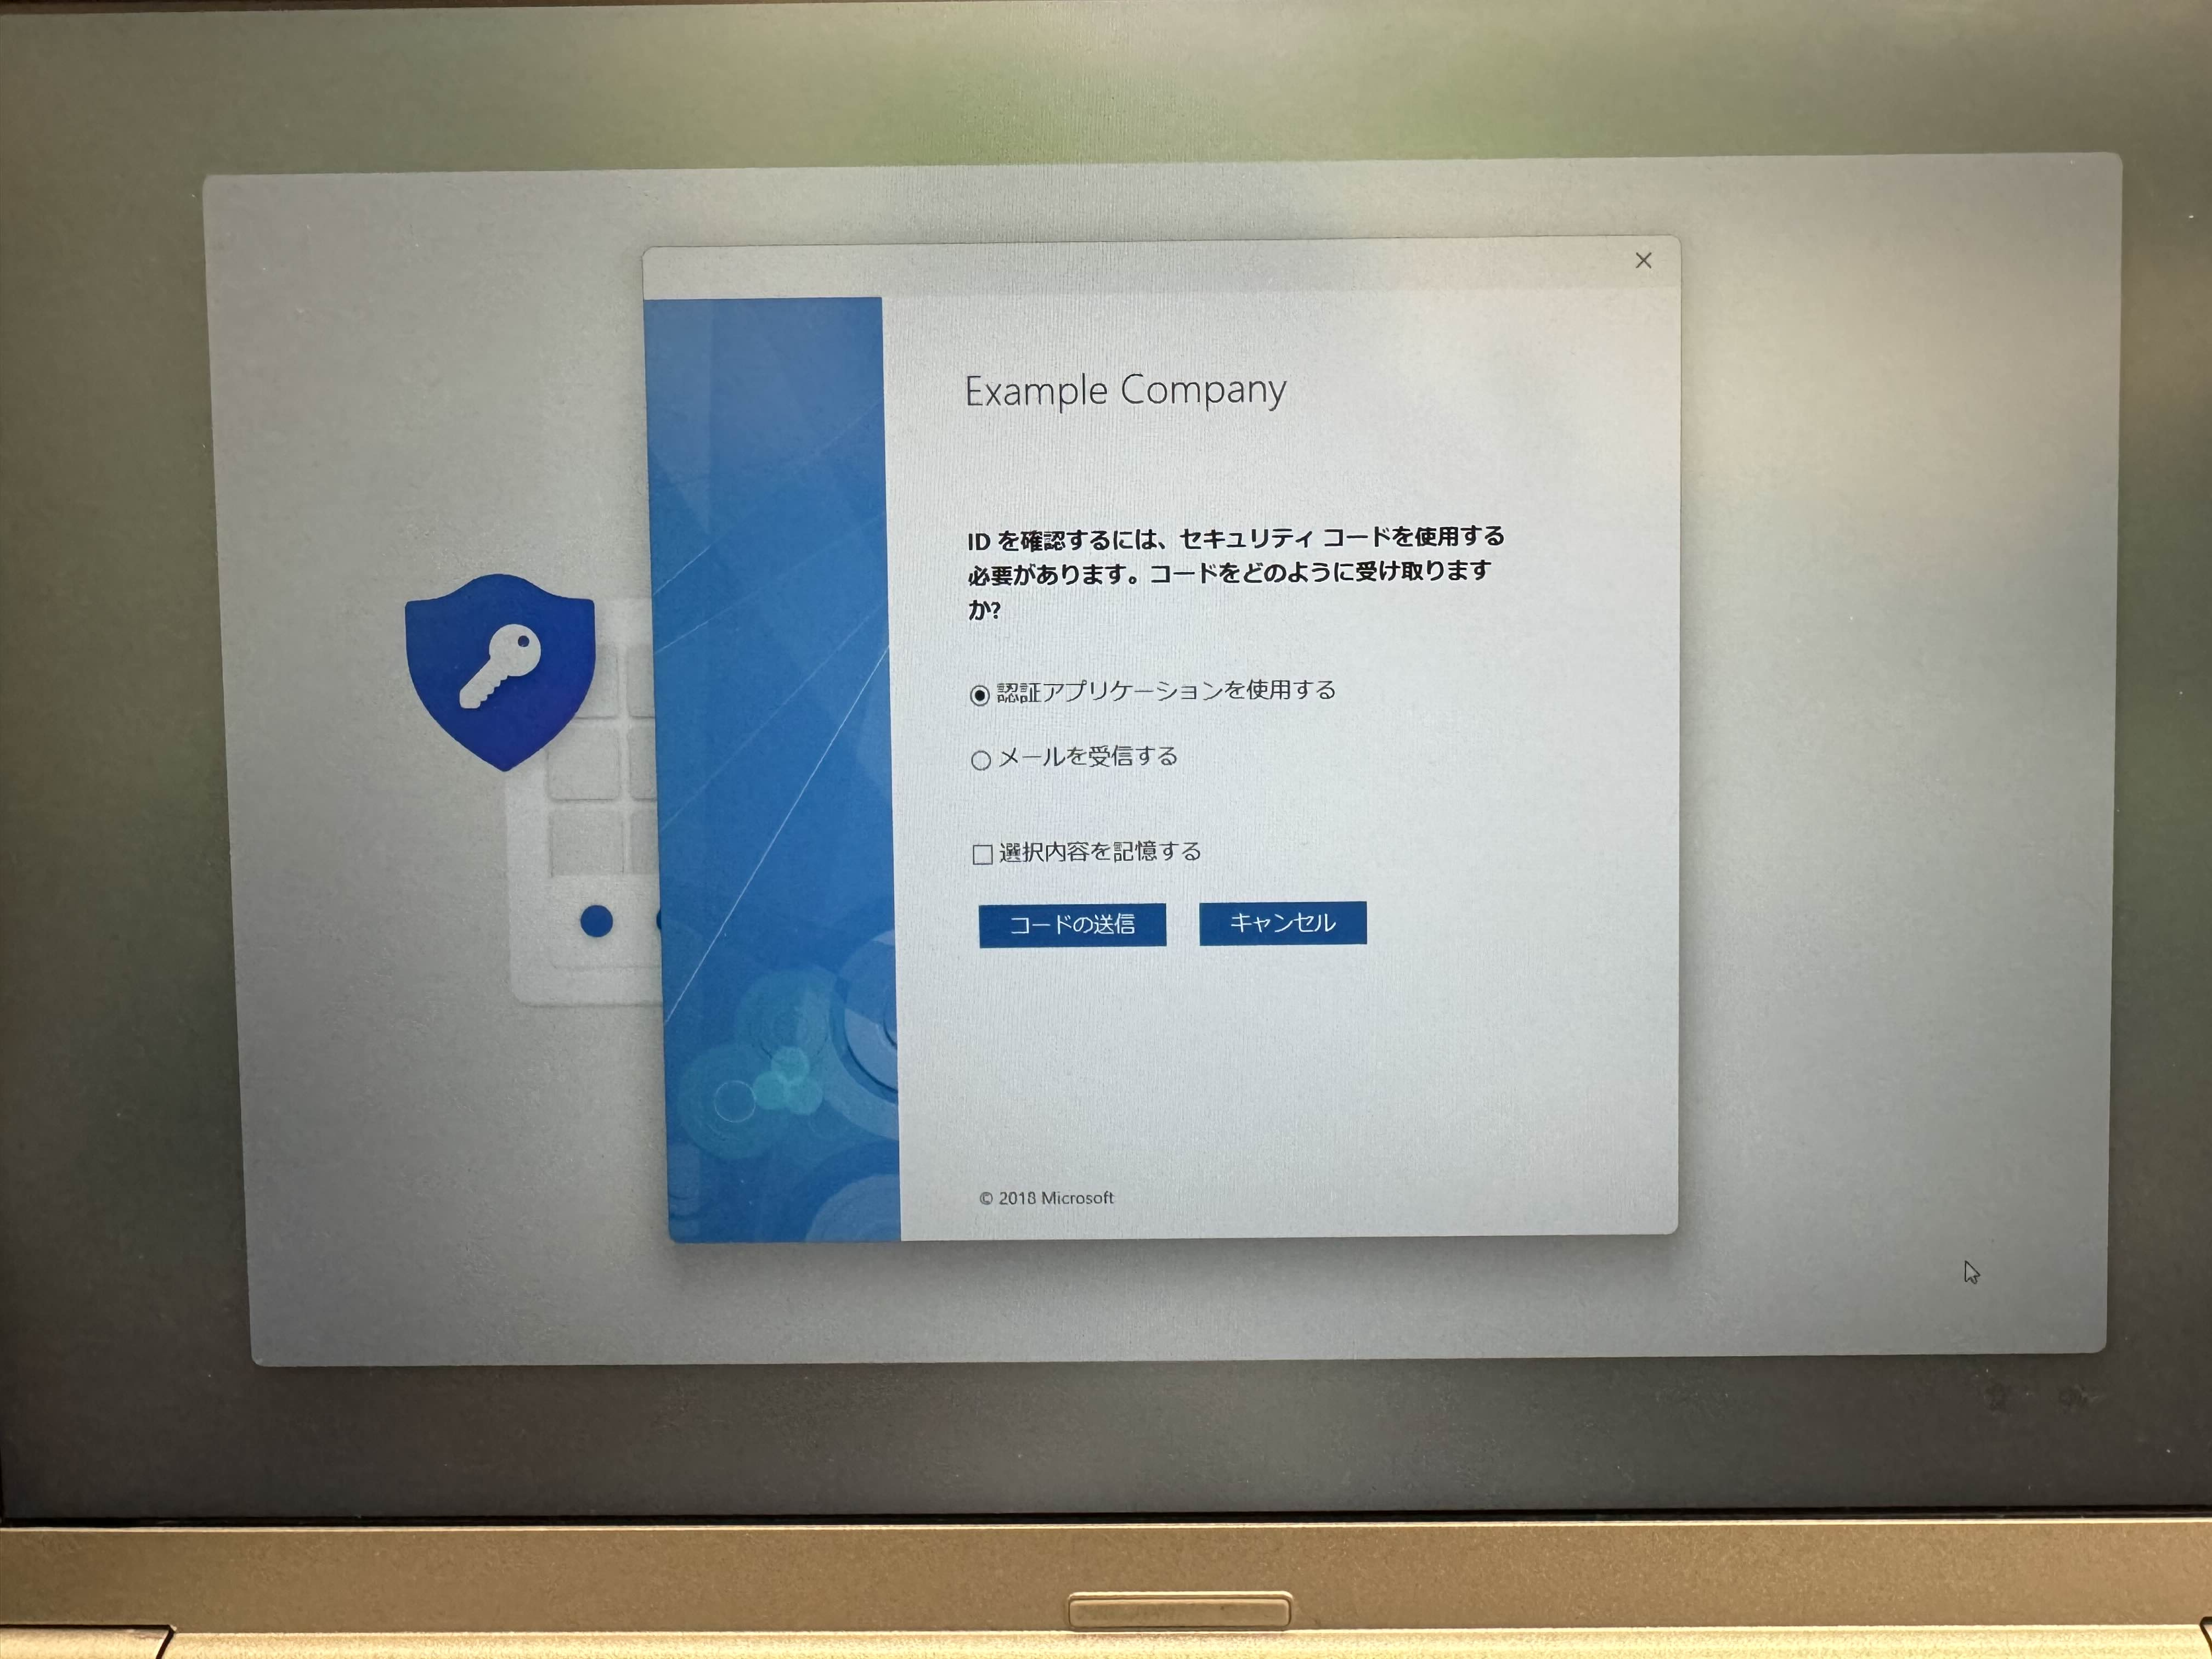
The screen changes depending on the MFA type. This article uses an Authenticator app, so check “Use an authenticator application” and click “Send code”.
Launch the Authenticator app and confirm your one-time password.
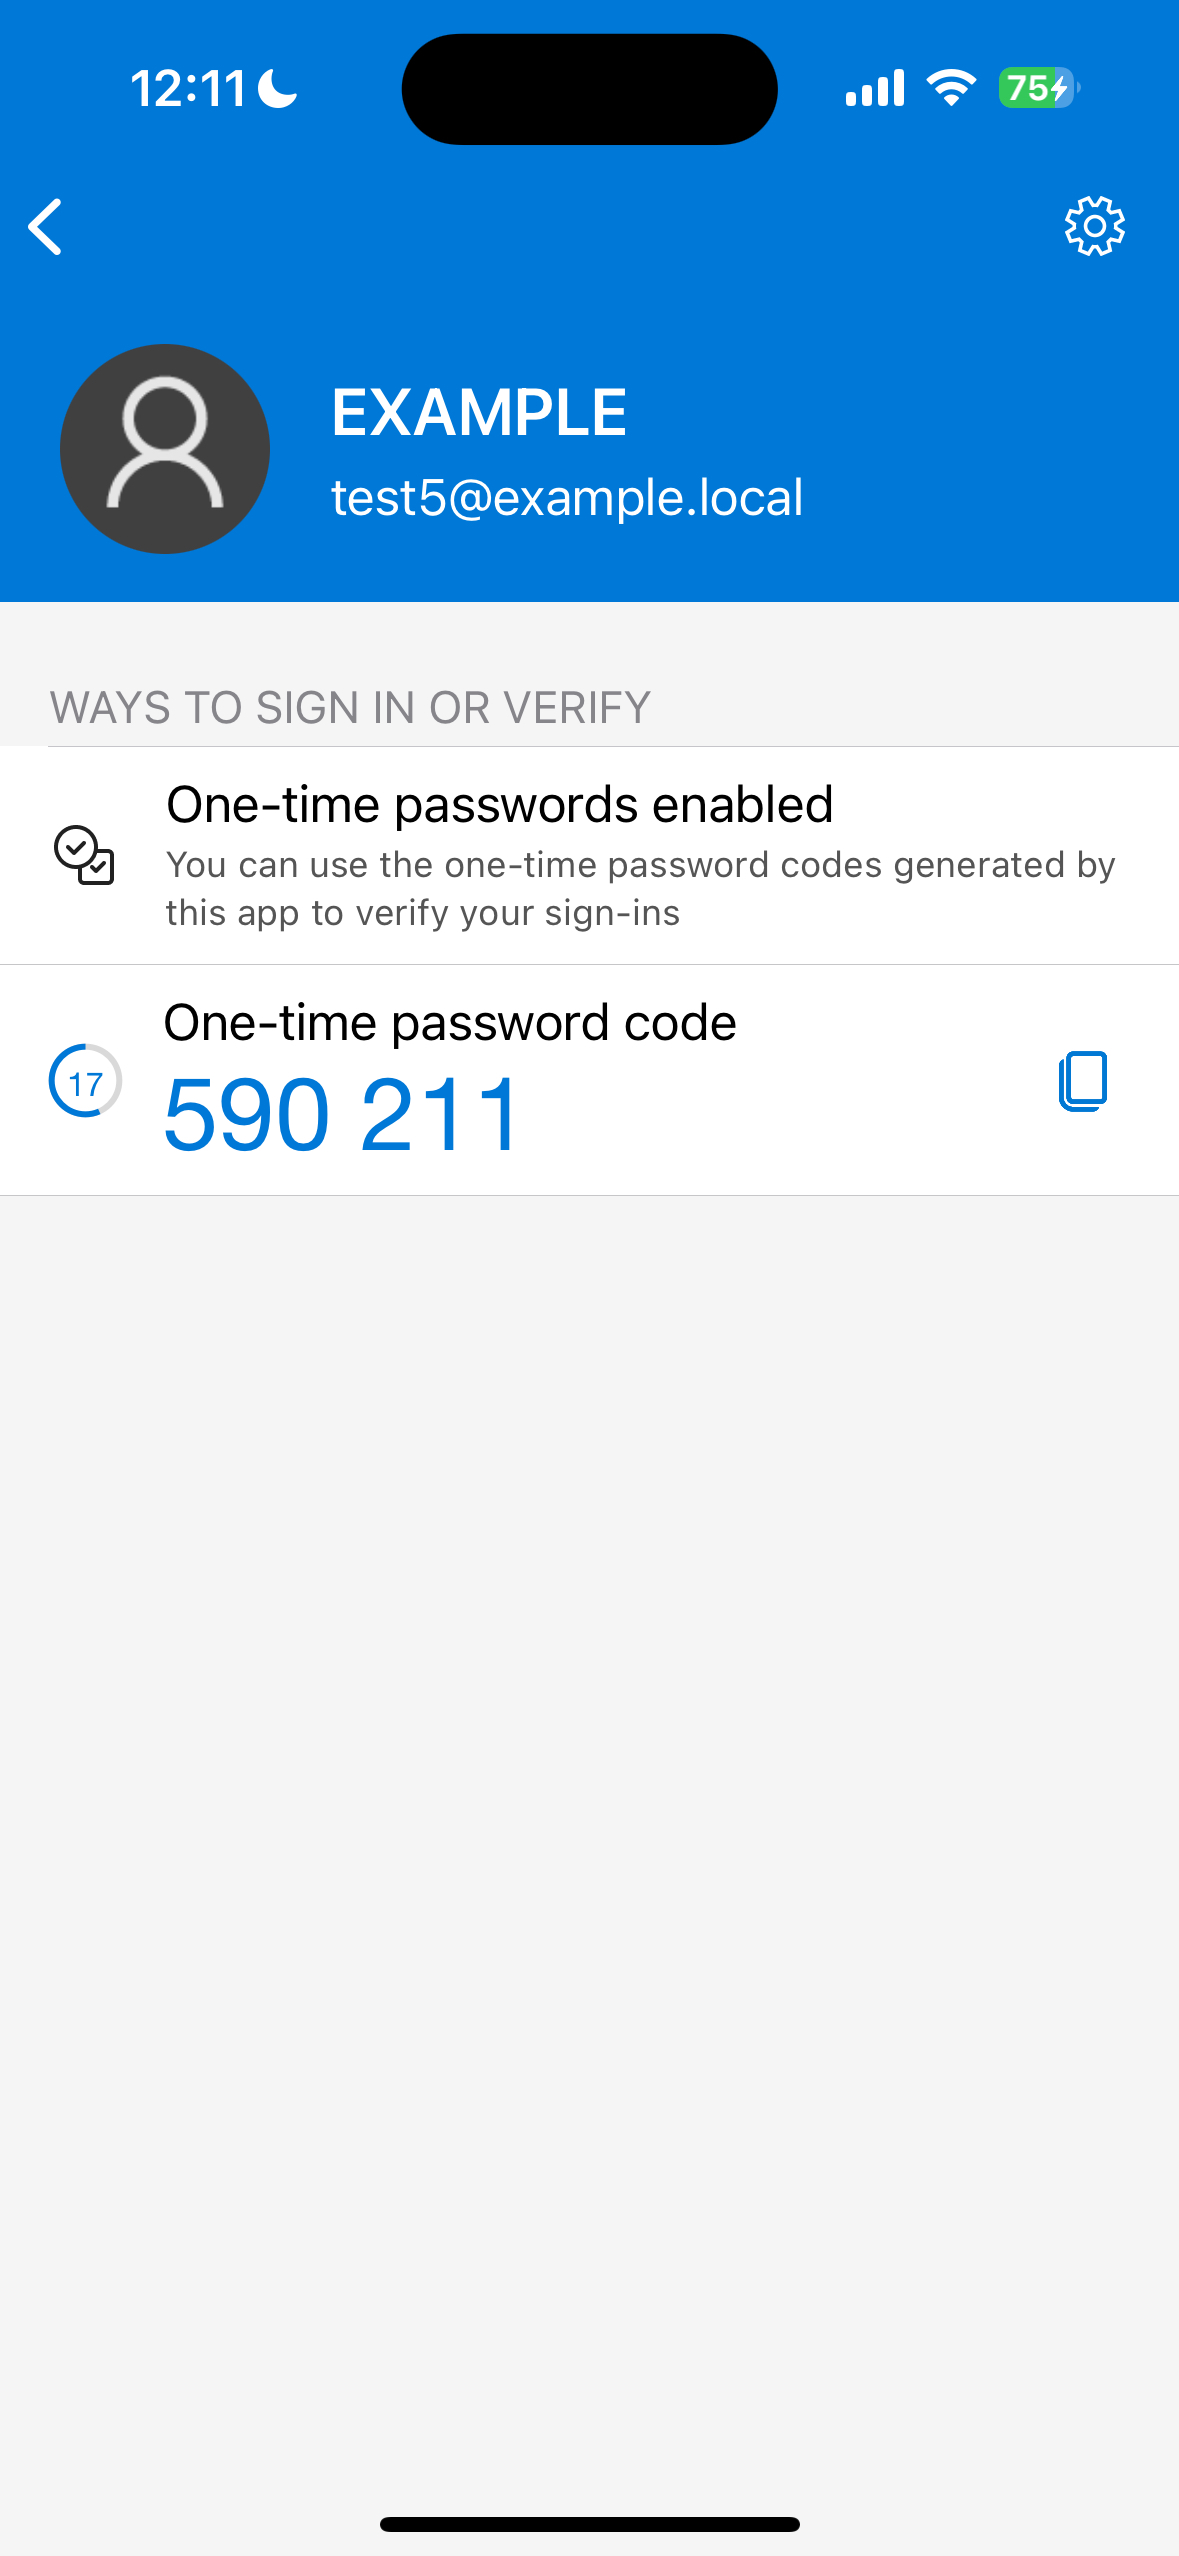
Enter the code and click Sign In.
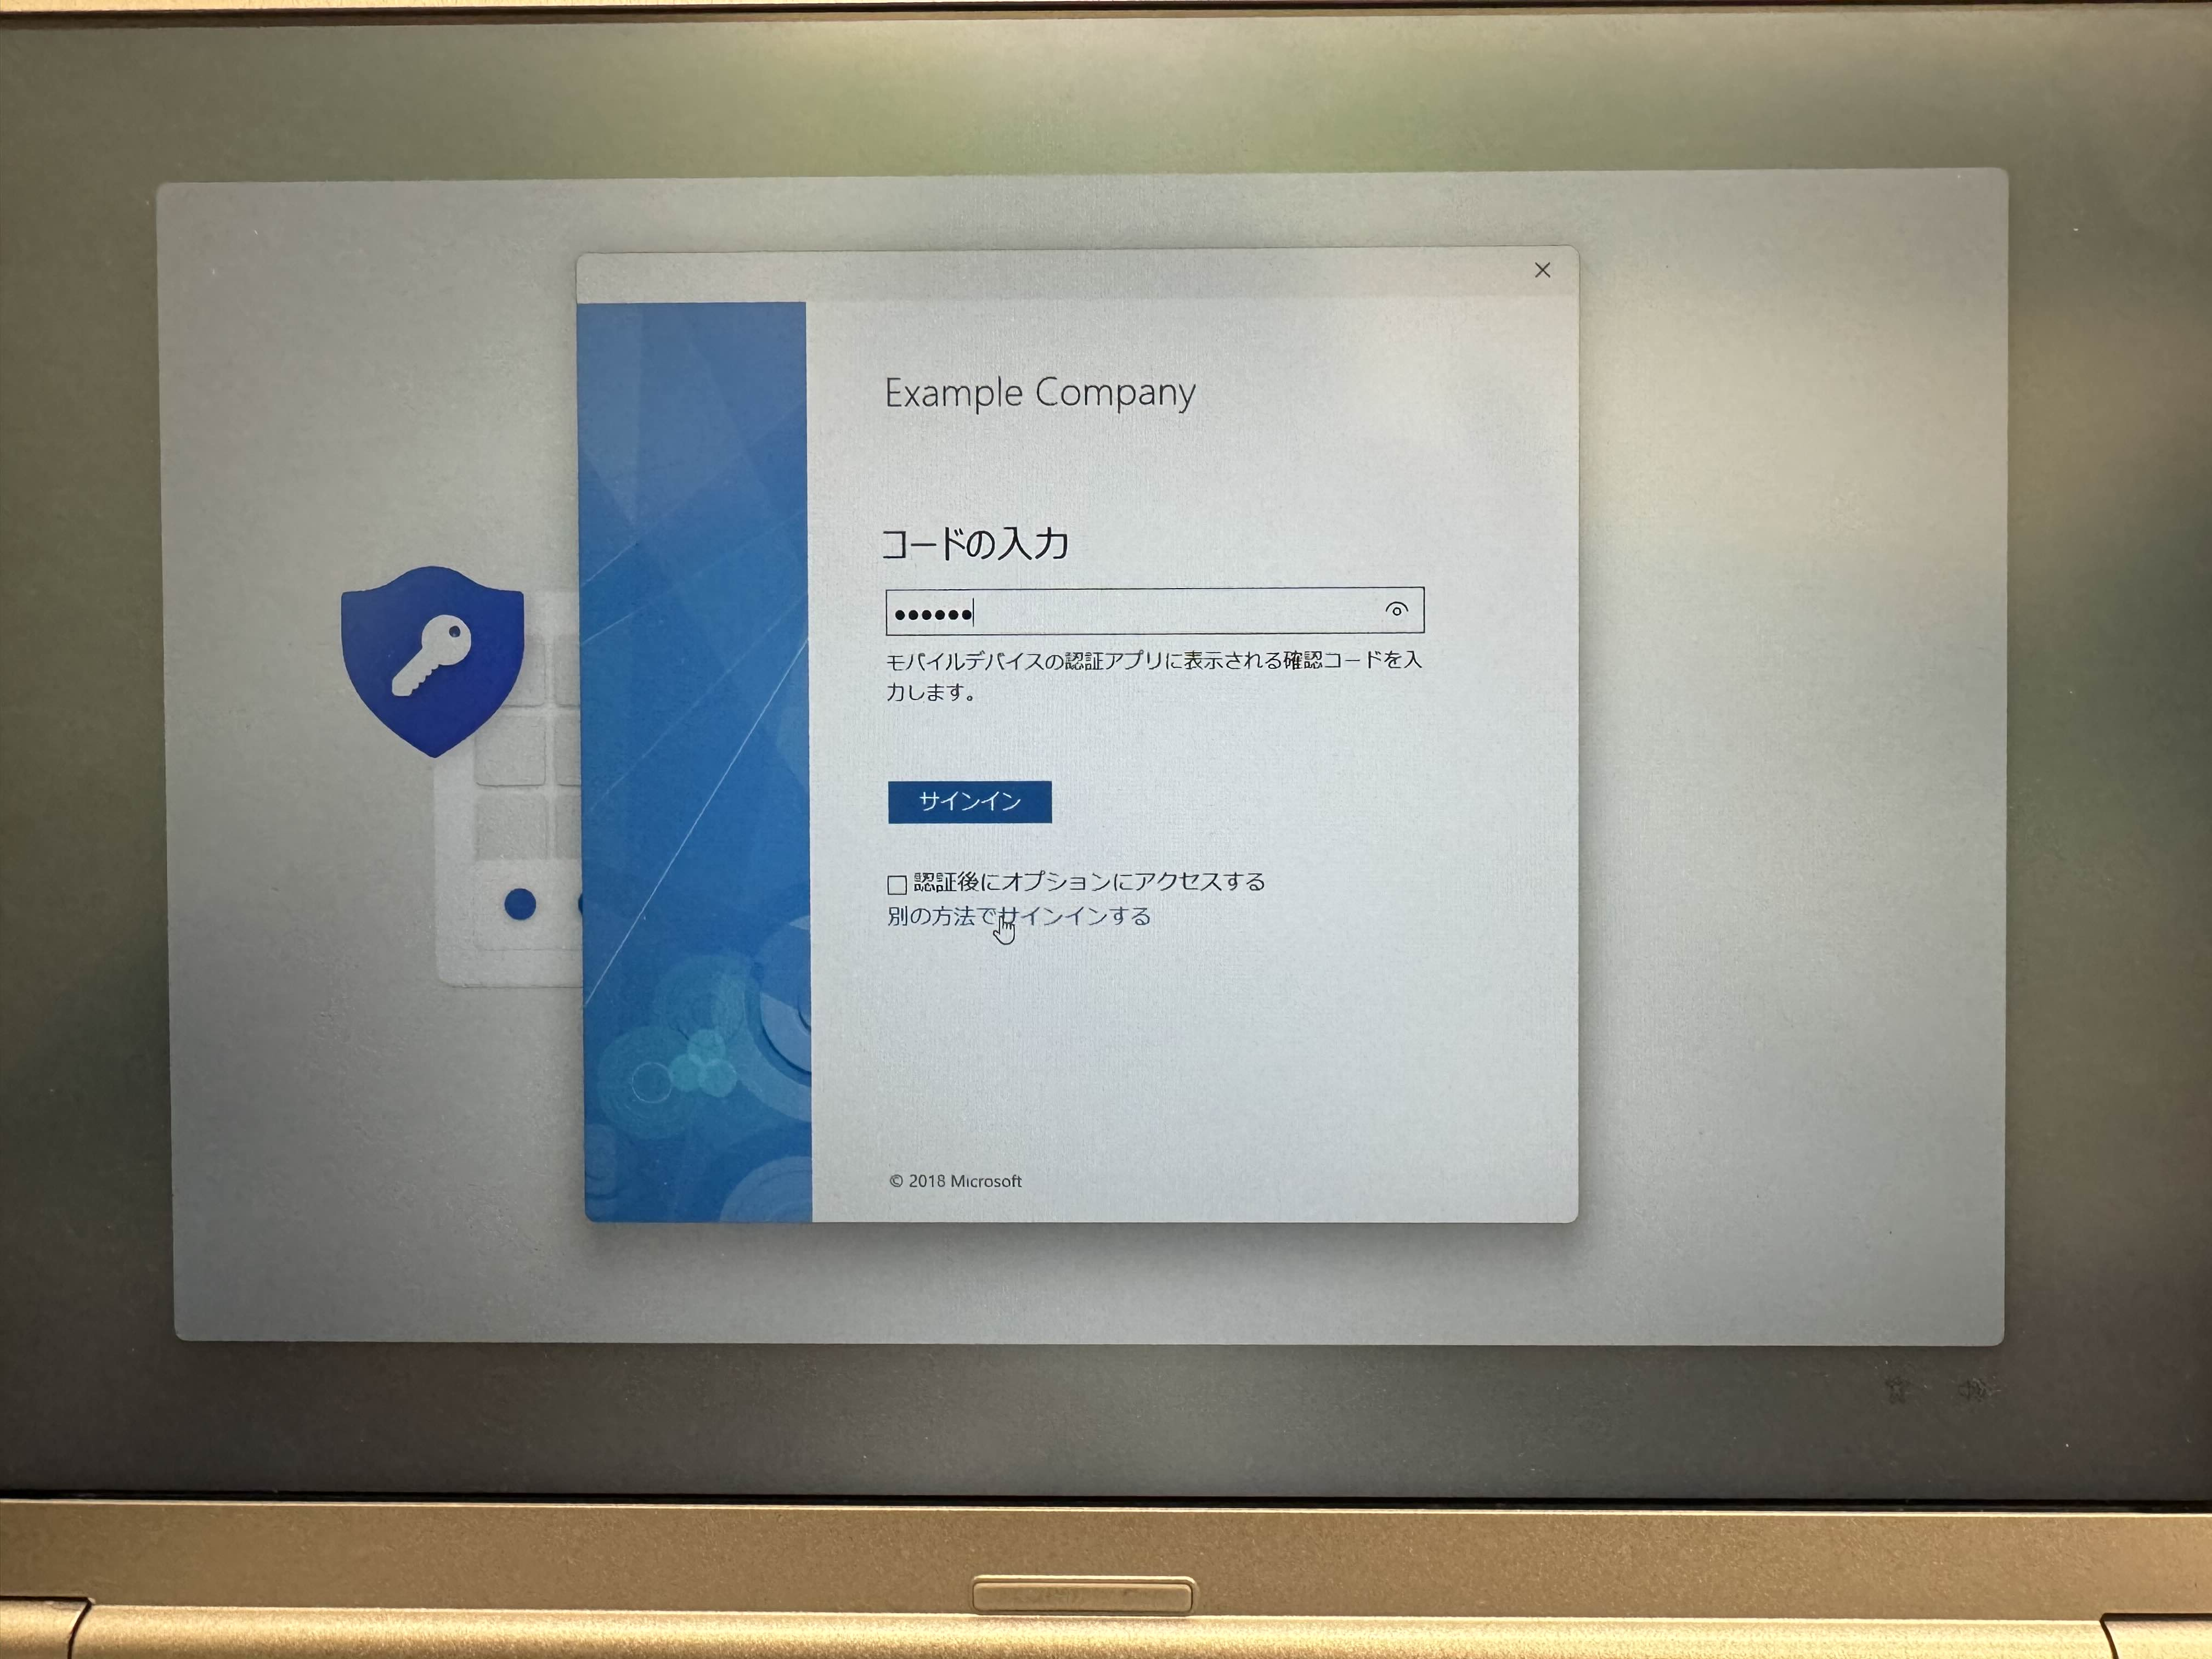
You can then set up a PIN, so set the PIN of your choice.
This completes the WHfB settings.
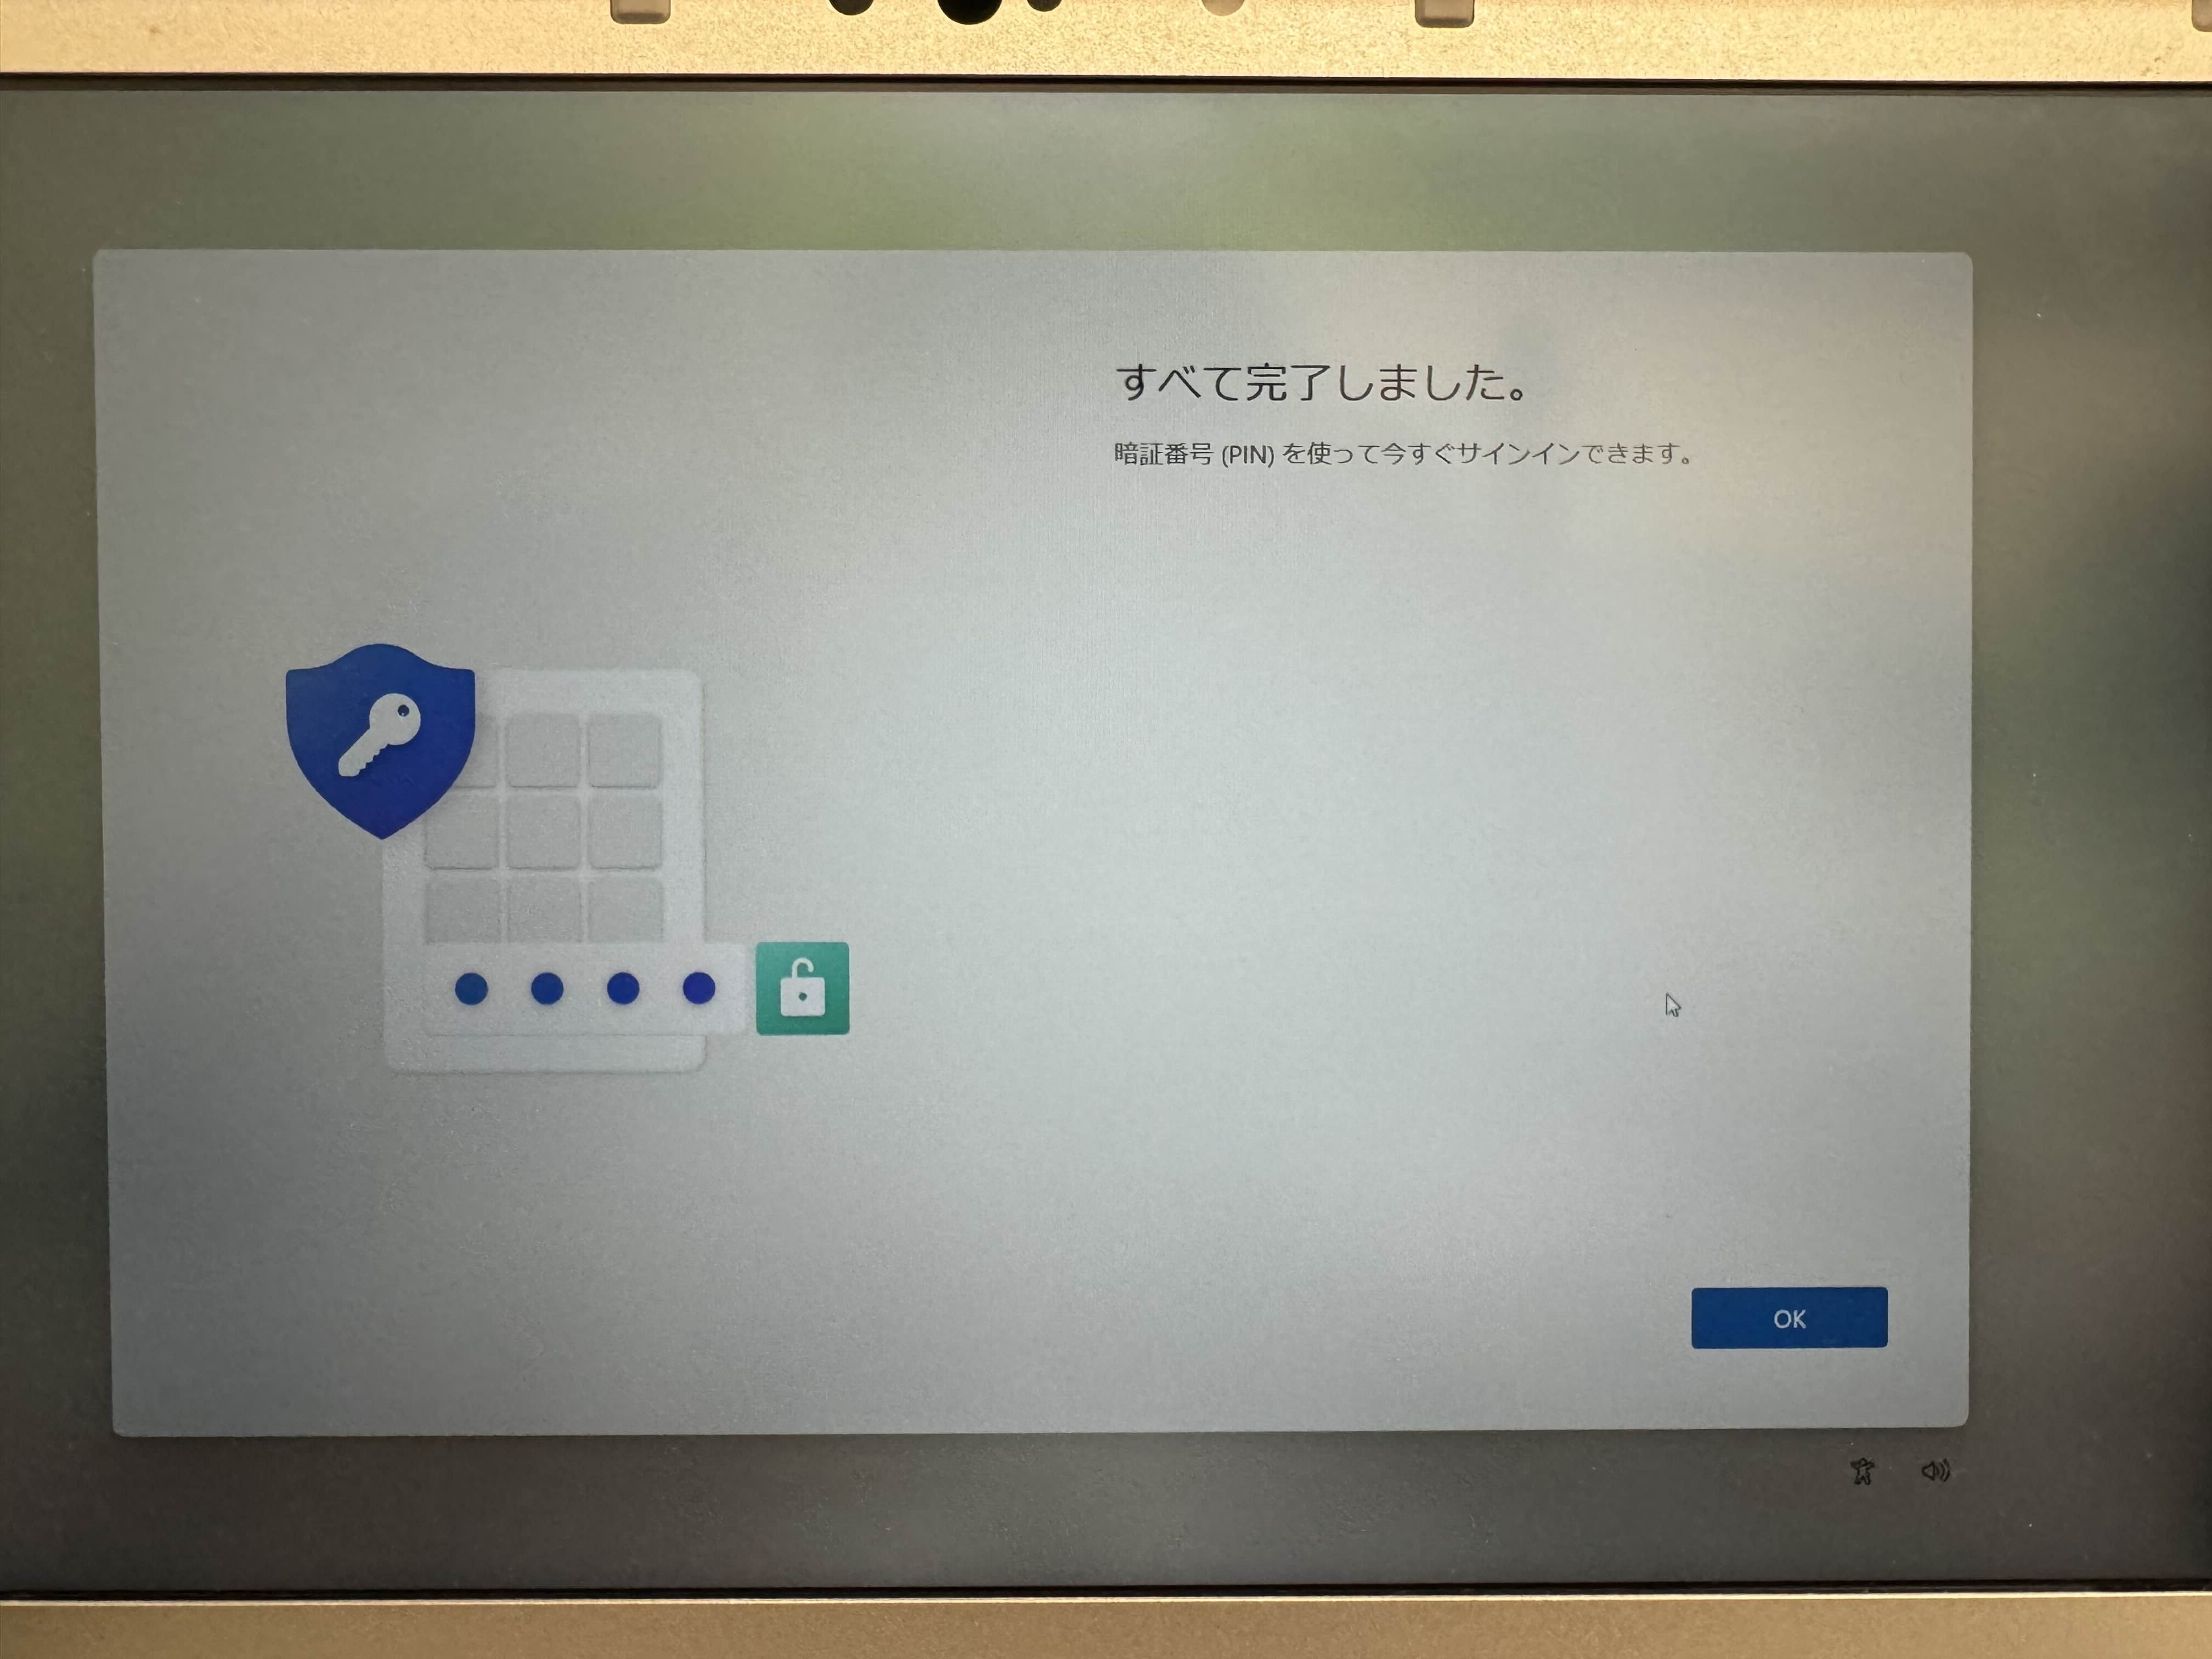
From then on, you can log in automatically using biometric authentication.