
Introduction
This article shows how to virtualize and run VMware ESXi with VMware Workstation Player on Windows 10.
Prerequisite knowledge
What is VMware ESXi?
VMware ESXi provides direct access and management of the underlying resources, allowing you to effectively partition your hardware for application consolidation and cost reduction. Its industry-leading, efficient architecture sets the standard for reliability, performance, and support. https://www.vmware.com/jp/products/esxi-and-esx.html
What is VMware vSphere?
VMware vSphere is VMware’s virtualization platform that transforms data centers into a unified computing infrastructure that includes CPU, storage, and network resources. vSphere manages these infrastructures as a unified operating environment and provides tools to manage the data centers that participate in that environment. https://docs.vmware.com/jp/VMware-vSphere/index.html
What is VMware vSphere Client?
Use the vSphere Client to connect to your vCenter Server system and manage vSphere inventory objects. The vSphere Client requires a supported web browser. The vSphere Client home screen is your system’s dashboard. A single, unified view brings together data from various sources in your environment. https://docs.vmware.com/jp/VMware-vSphere/7.0/com.vmware.vsphere.vcenterhost.doc/GUID-A618EF76-638A-49DA-991D-B93C5AC0E2B1.html
What is VMware Workstation Player?
VMware Workstation 16 Player is a platform for running a single virtual machine on a Windows or Linux PC that can be used to deliver managed desktops in your enterprise. https://www.vmware.com/jp/products/workstation-player/workstation-player-evaluation.html
Installing VMware Workstation Player
Visit the site
https://www.vmware.com/jp/products/workstation-player/workstation-player-evaluation.html
Download the installer
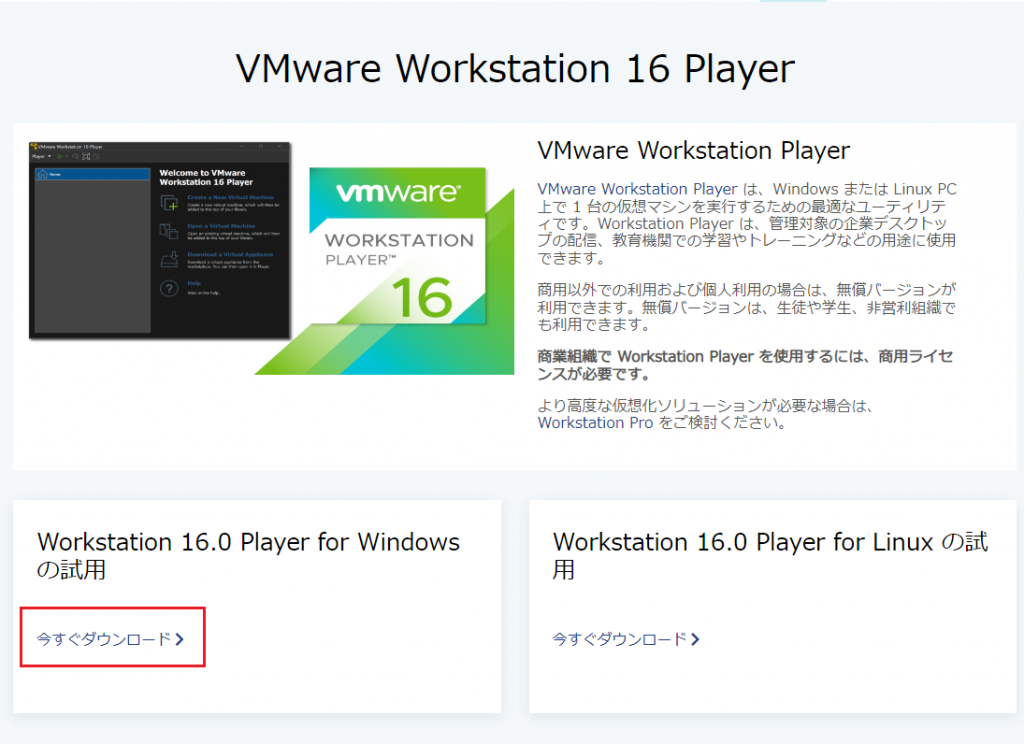
Scroll down and click “Download now” under “Workstation xx.x Player for Windows”
Installation
- Once the download is complete, launch the installer.
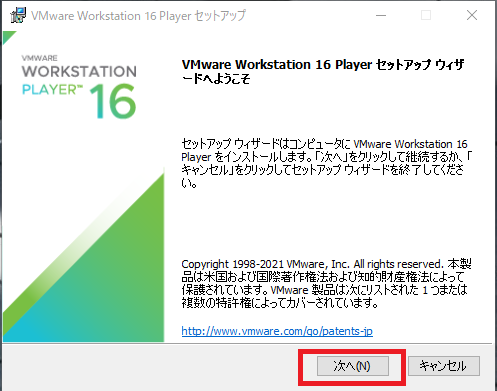
- When the welcome screen appears, click “Next”.
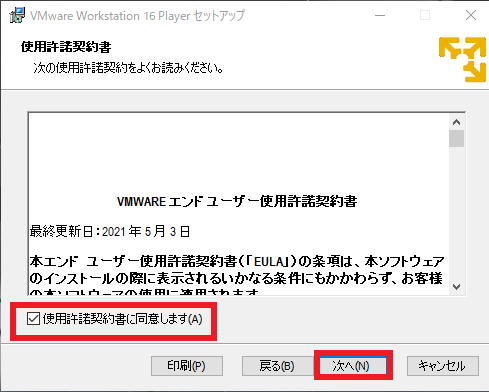
- If you agree to the license agreement, check the box and click “Next”.
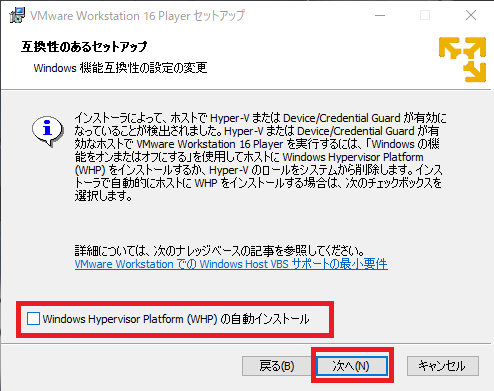
- If you are using Hyper-V, check the checkbox and click “Next”.
- Choose where to install it. If you do not want to make any changes, leave the default and click “Next”.
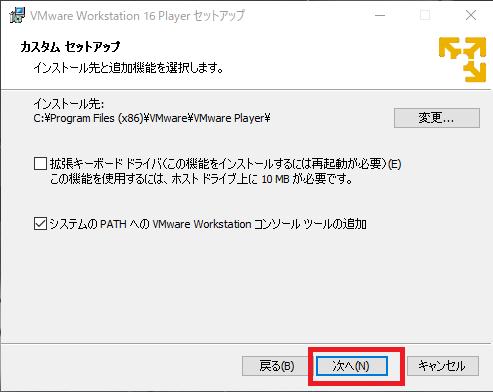
- Leave the defaults and click “Next”.
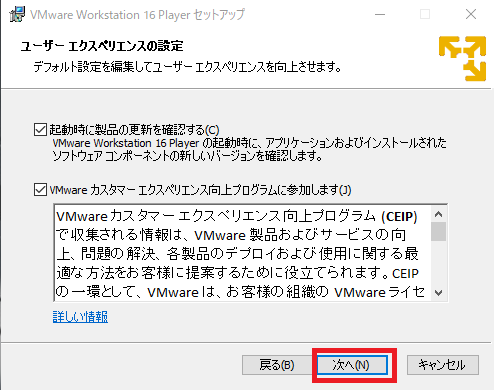
- Leave the defaults and click “Next”.
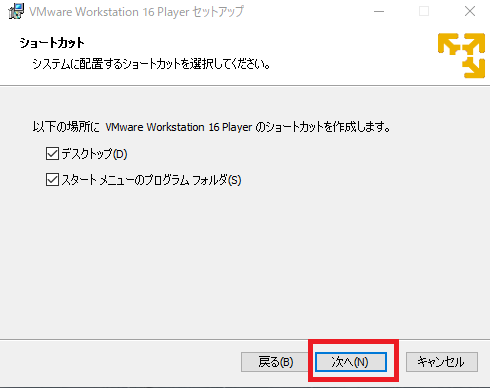
- Click “Install”.
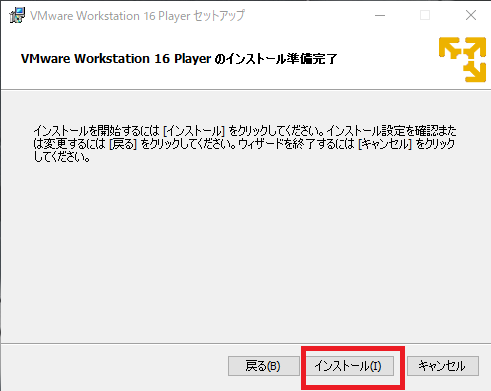
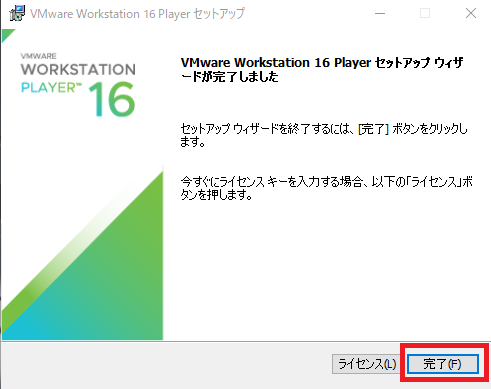
- Click “Finish”.
Download VMware ESXi
Visit the site

Create an account
-
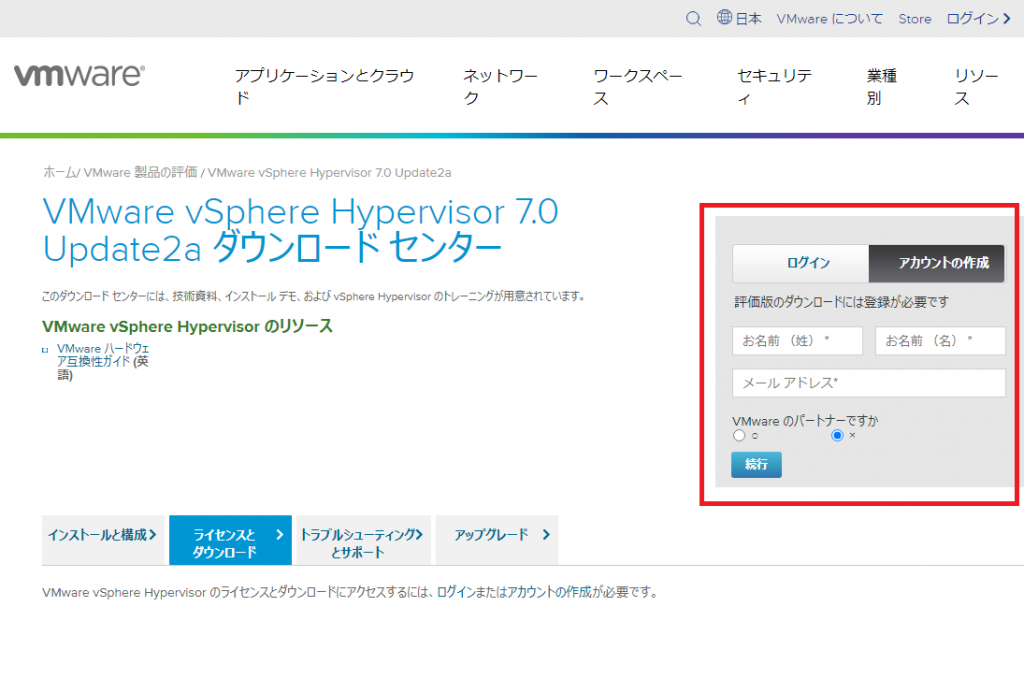
A VMware account is required to download ESXi. Enter the required information in “Login” or “Create an account” and click “Continue”.
-
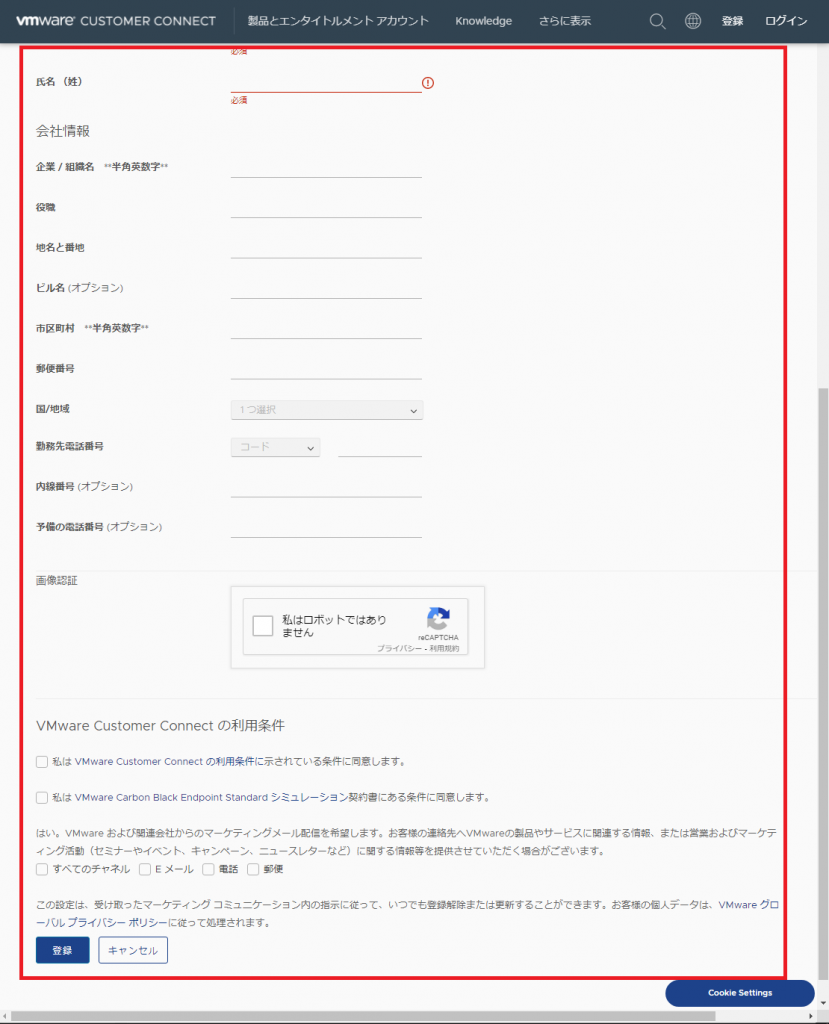
Fill in the required fields. If you agree to the terms and conditions, check the checkbox and click “Register”.
-
Log in after creating an account.
Download image
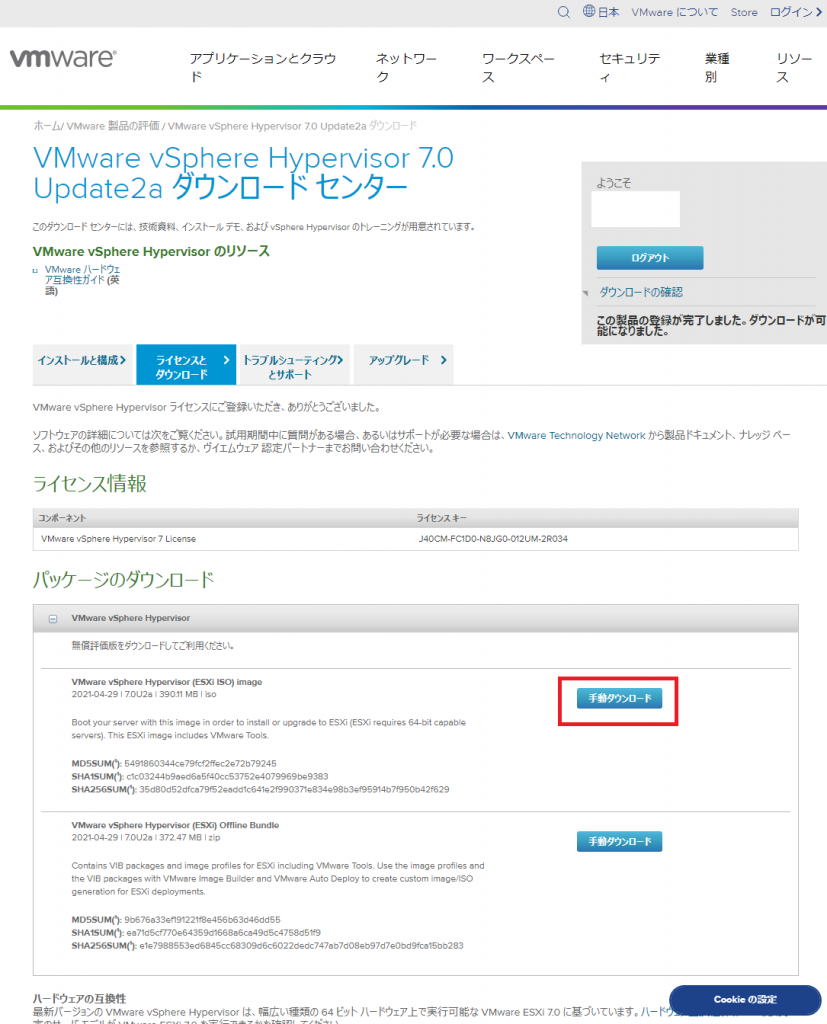
Open the “Licenses and Downloads” tab and click “Manual Download” under “VMware vSphere Hypervisor (ESXi ISO) image”
Build a VMware ESXi virtual machine
First launch
- Launch VMware Workstation Player.
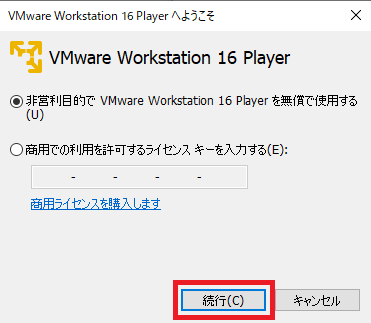
- When the welcome screen opens, click “Continue”.
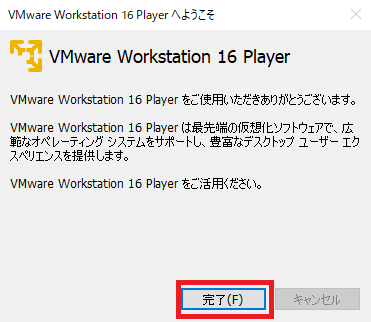
- Click “Finish”.
Creating a virtual machine
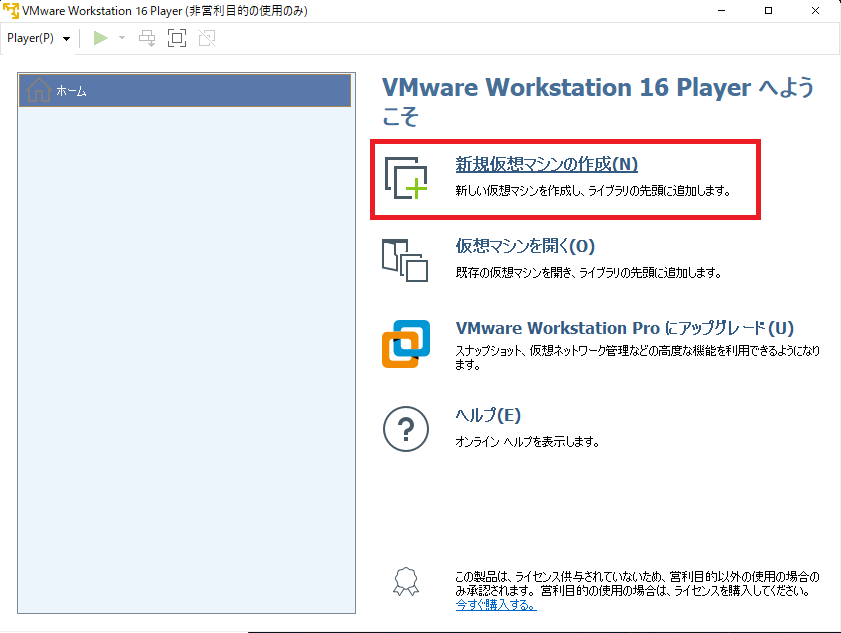
- Once VMware Workstation Player starts, click “Create a new virtual machine”.
- When the new virtual machine wizard opens, click Browse.
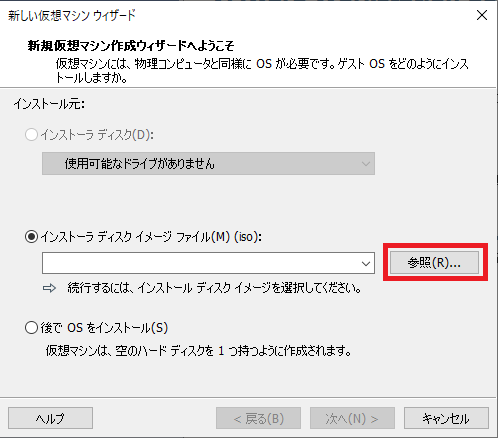
- Select the ISO file you downloaded earlier and click “Next”.
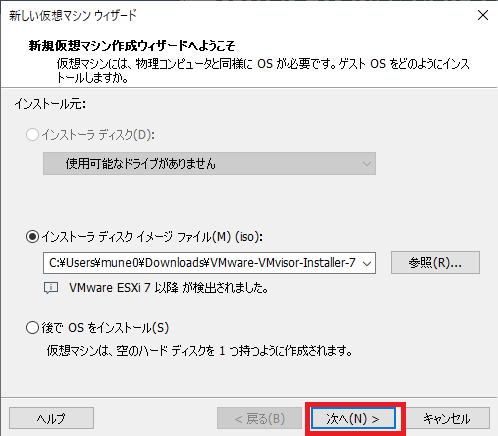
- Set any virtual machine name, choose any save location, and click “Next”.
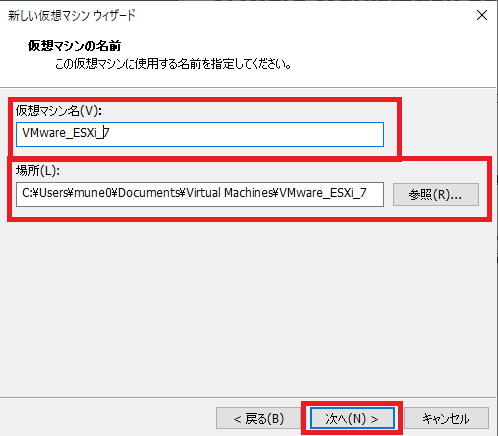
- Set the maximum disk size and click “Next”.
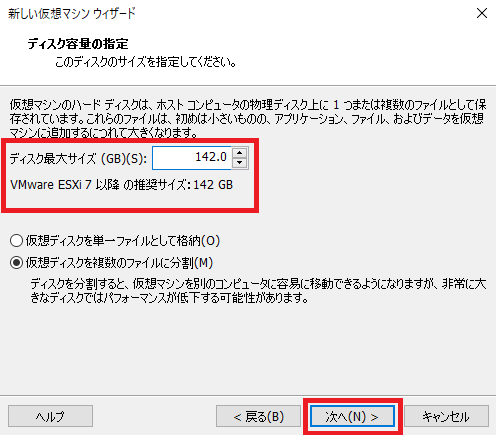
- Click “Customize Hardware”.
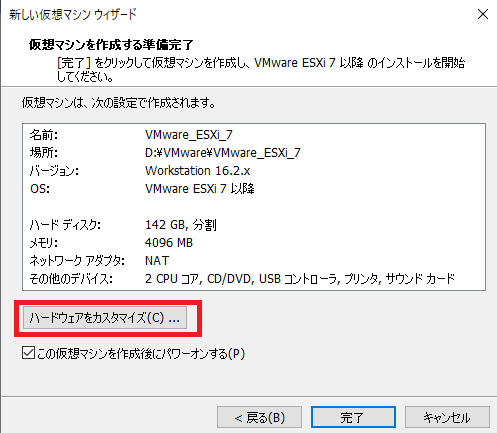
- Set “Memory” according to your PC’s specifications.
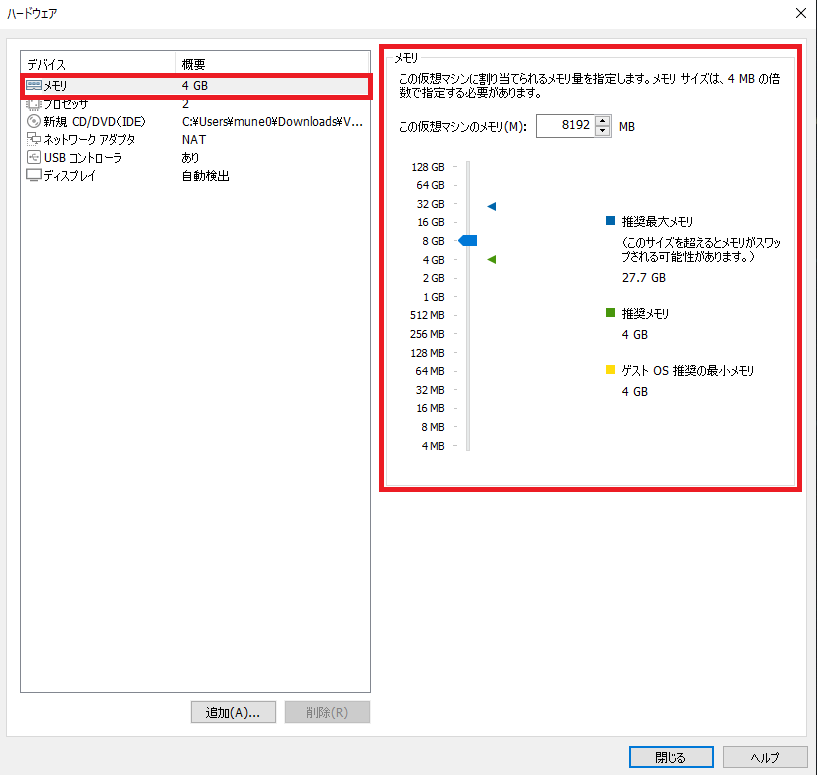
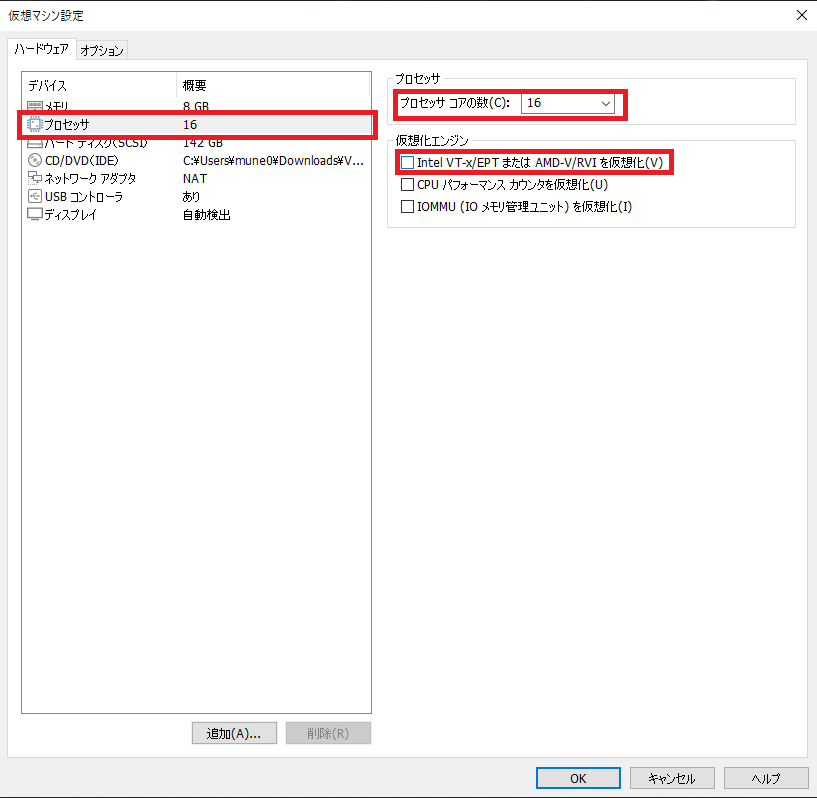
- Set “Number of processor cores” under “Processor” according to your PC’s specifications.
Check “Virtualize Intel VT-x/EPT or AMD-V/RVI”.
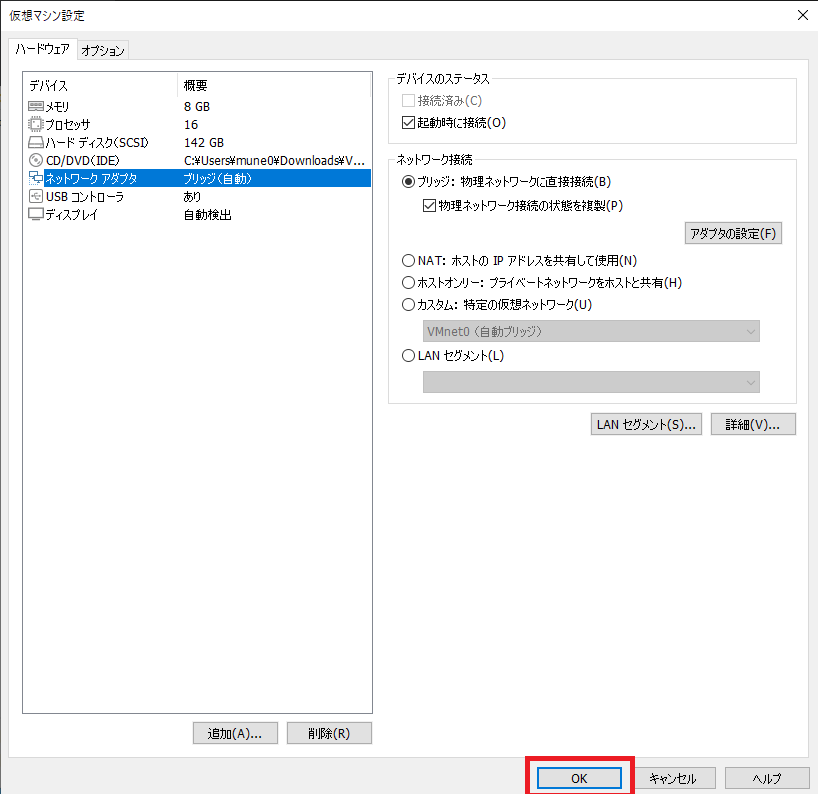
- Change “Network Adapter” to “Bridge” and check “Replicate physical network connection state”.
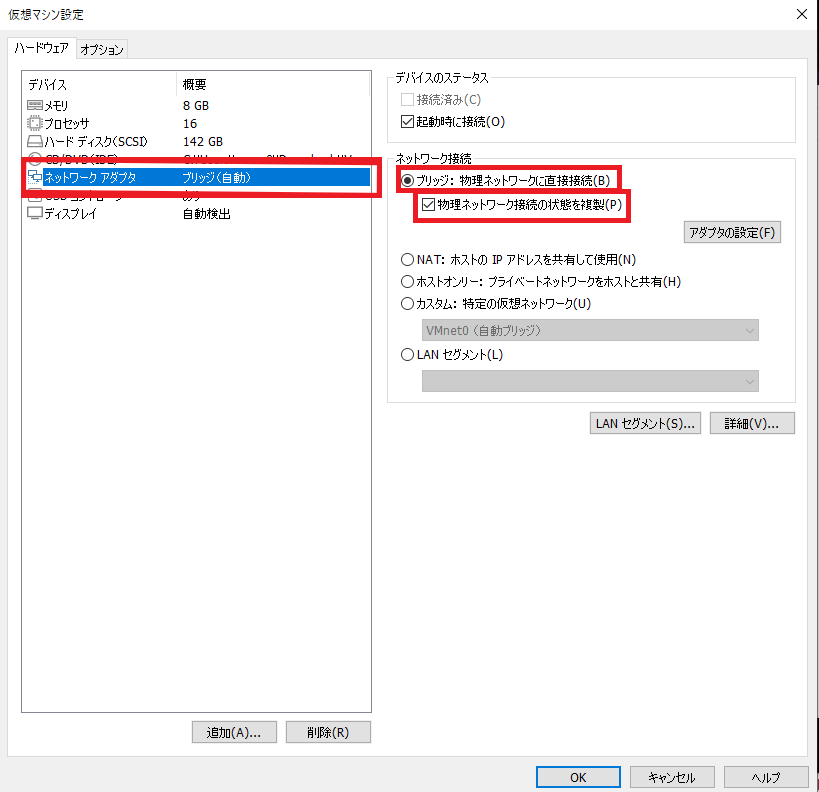
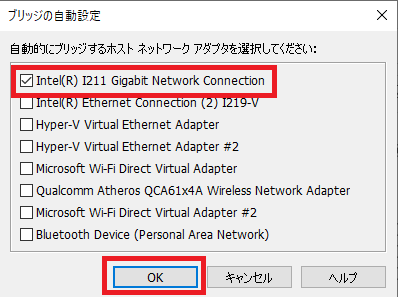
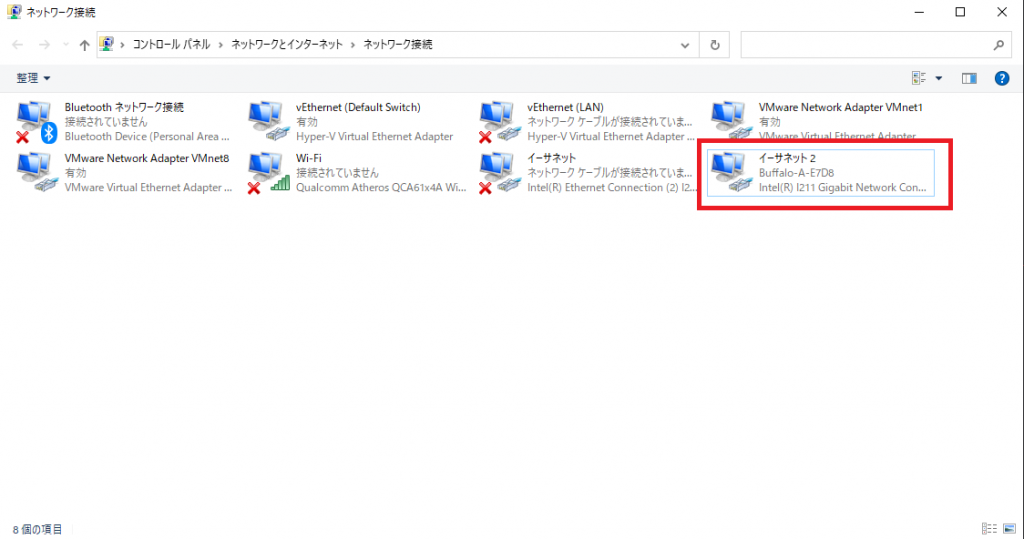
- Click “Configure Adapter”, select the network adapter connected to your network, confirm the settings, and click “Finish”.
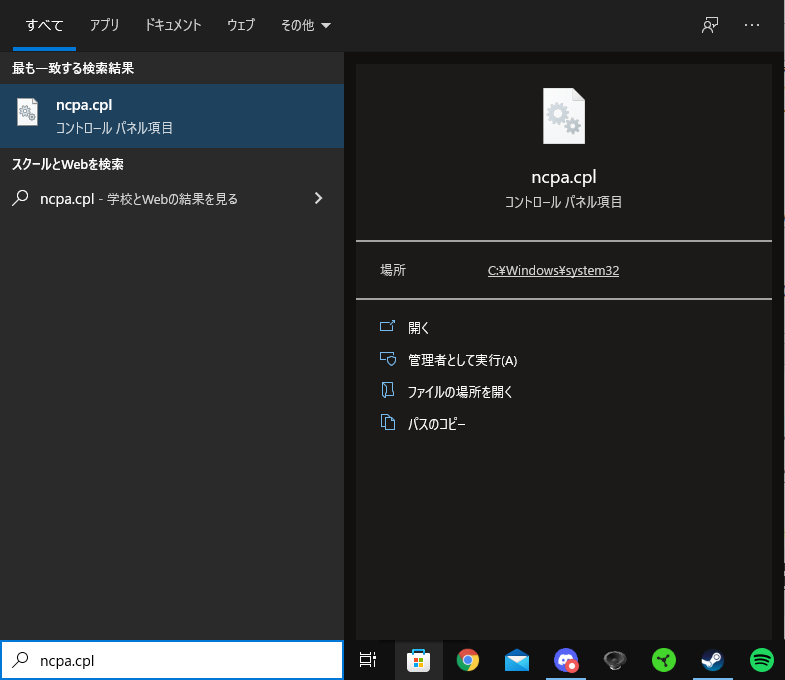
*If you do not know which network adapter to use, enter “ncpa.cpl” in the search field at the bottom left and open “Network Connections”.
- Click OK and close the settings.
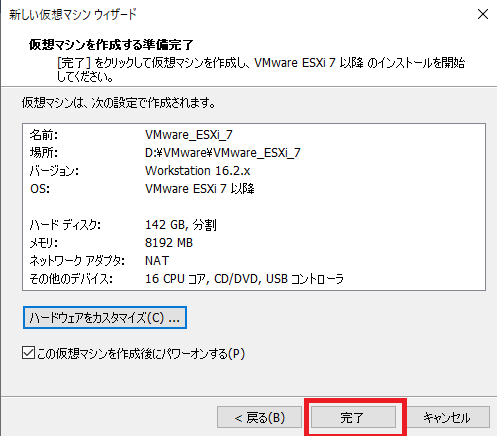
- After confirming the settings, click “Finish”.
Installing VMware ESXi
Starting the virtual machine
- Start the created virtual machine.
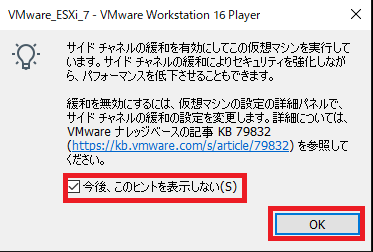
- When the hint appears, check the checkbox and click “OK”.
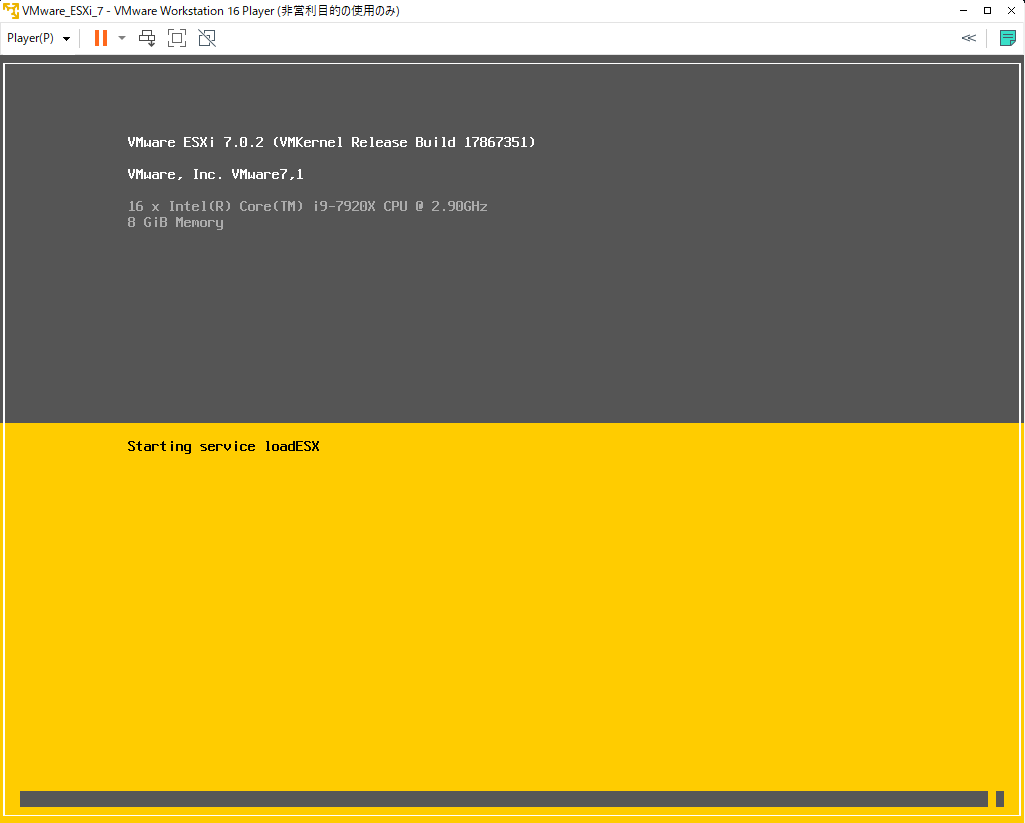
- Wait for VMware ESXi to start.
Installing ESXi
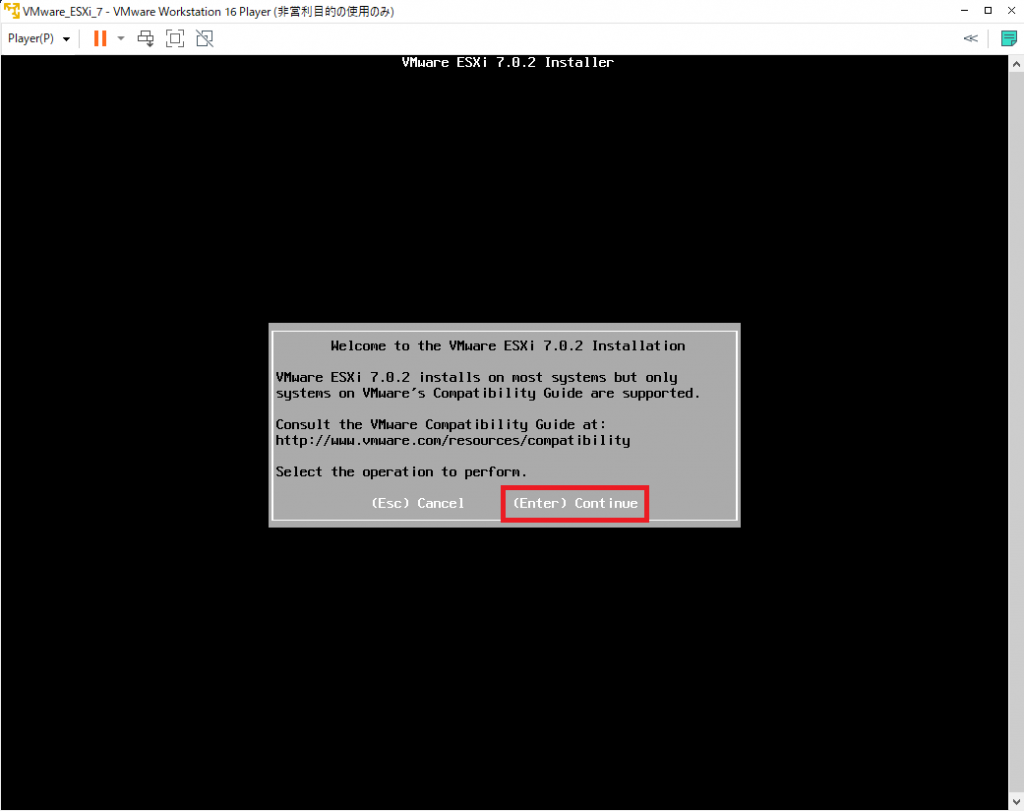
- When the welcome screen appears, press the “Enter” key to proceed to the next step.
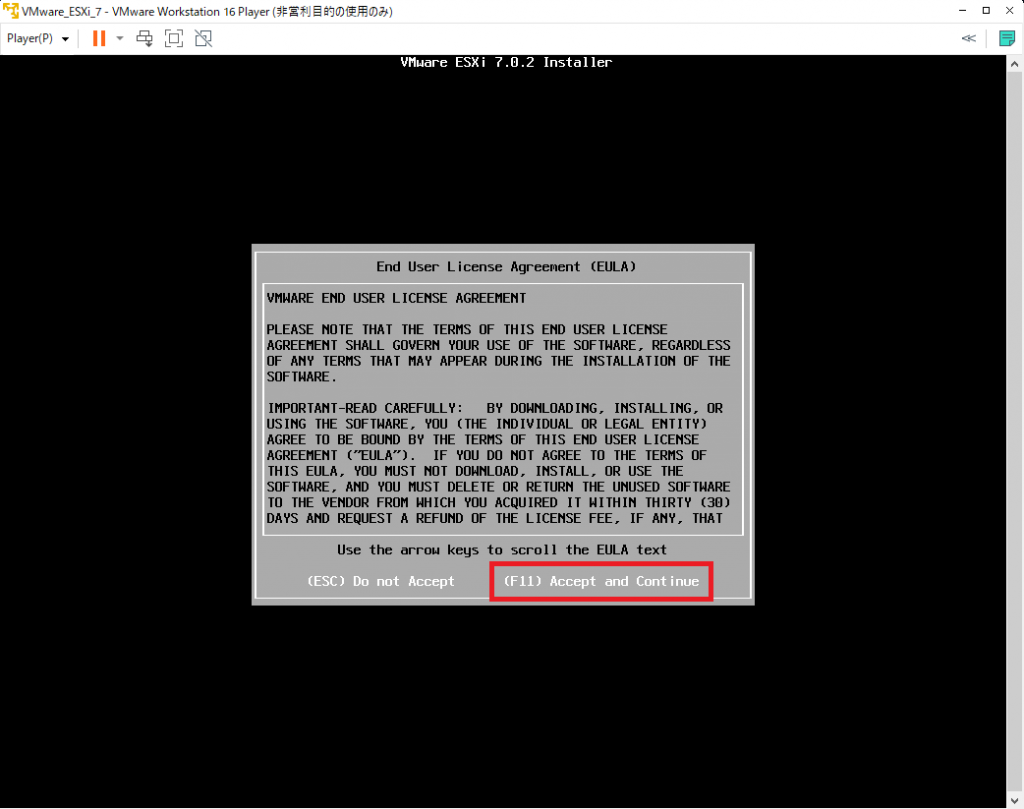
- If you agree to the terms of use, press the F11 key to proceed.
- On the storage selection screen, the default settings are fine, so press “Enter” to proceed to the next step.
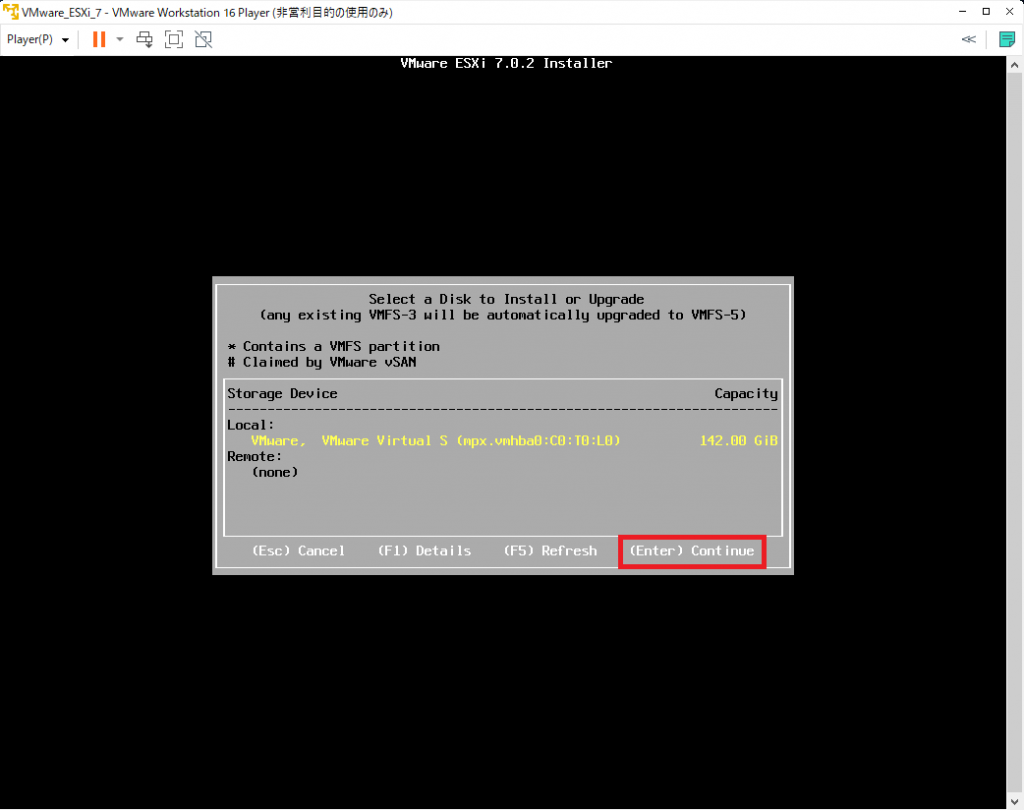
- Select your keyboard layout and press “Enter” to proceed.
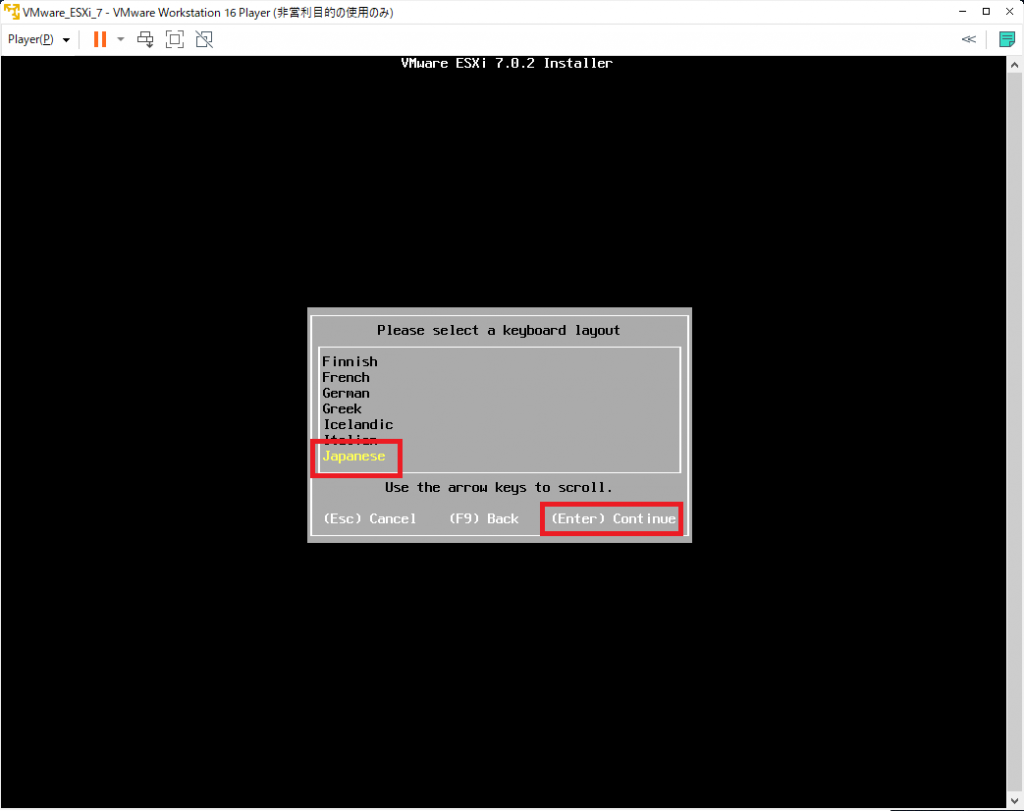
- Enter the administrator password in “Root password” and “Confirm password”, then press “Enter” to proceed. *The password must contain uppercase and lowercase letters, numbers, and symbols.
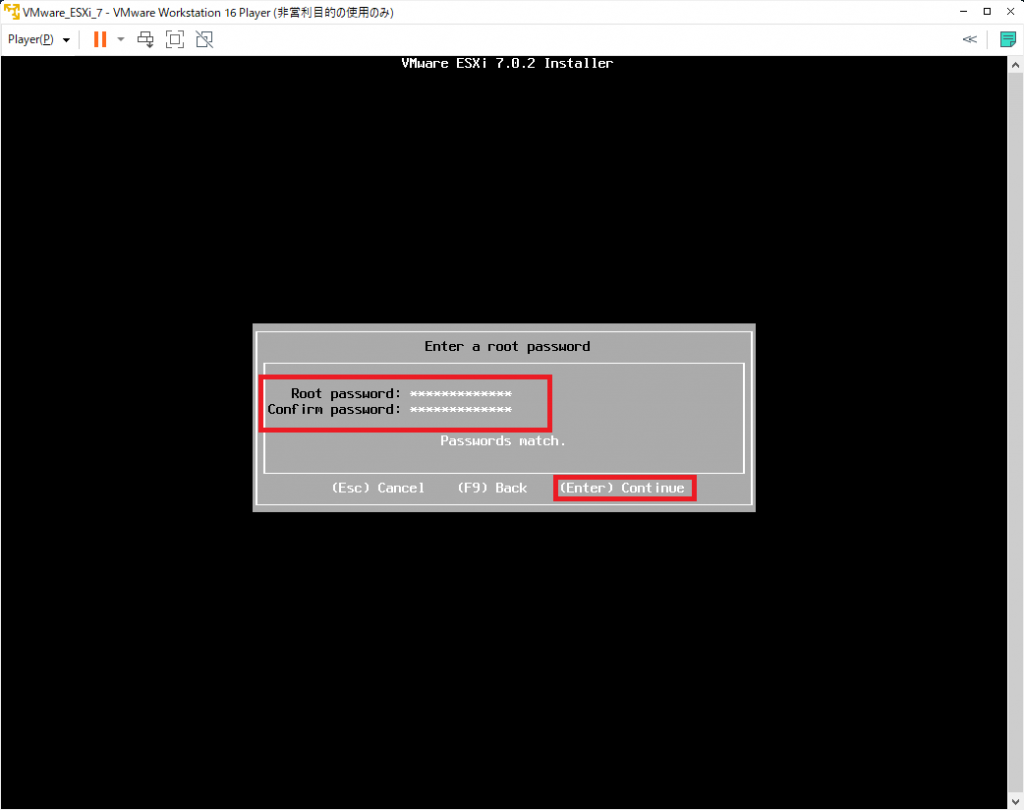
- When a warning is displayed, press “Enter” to proceed.
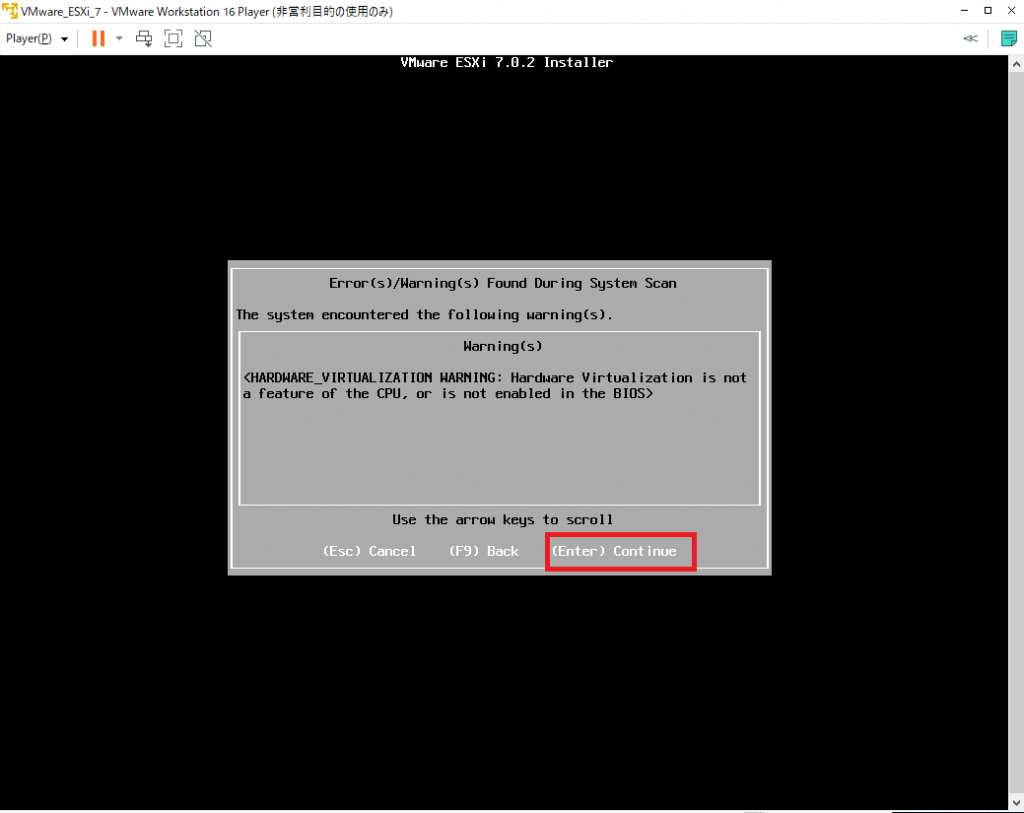
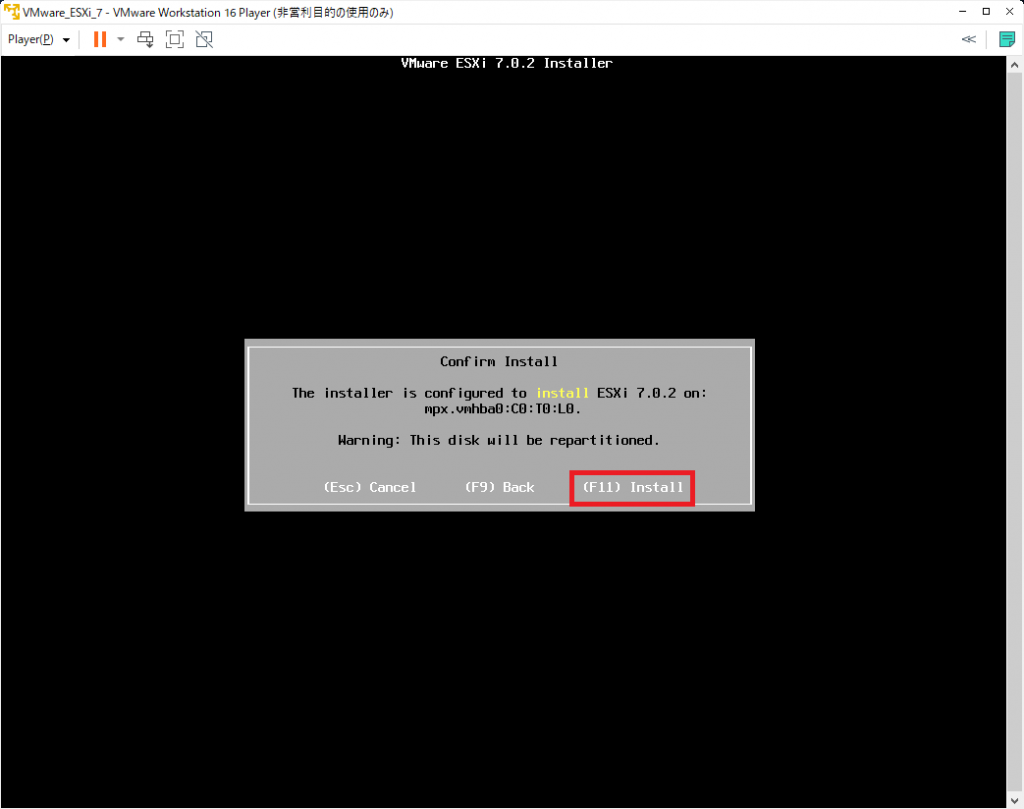
- When prompted to confirm the installation, press the F11 key to start the installation.
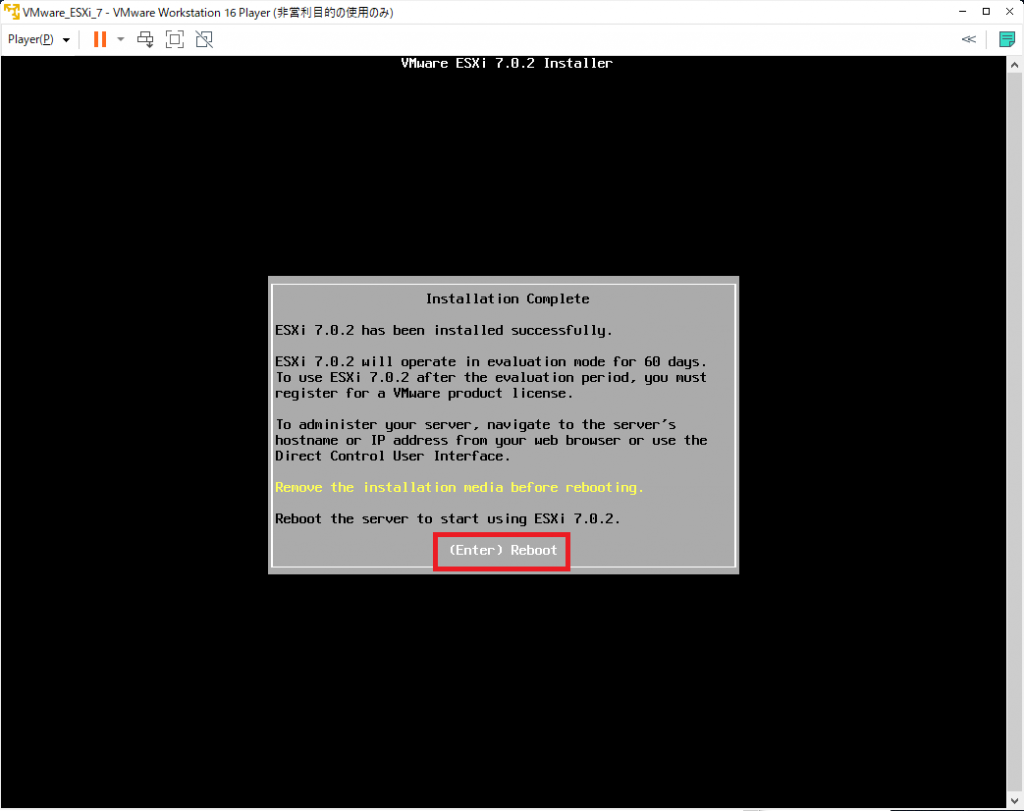
- Once the installation is complete, press “Enter” to restart.
Initial setup of VMware ESXi
Open settings
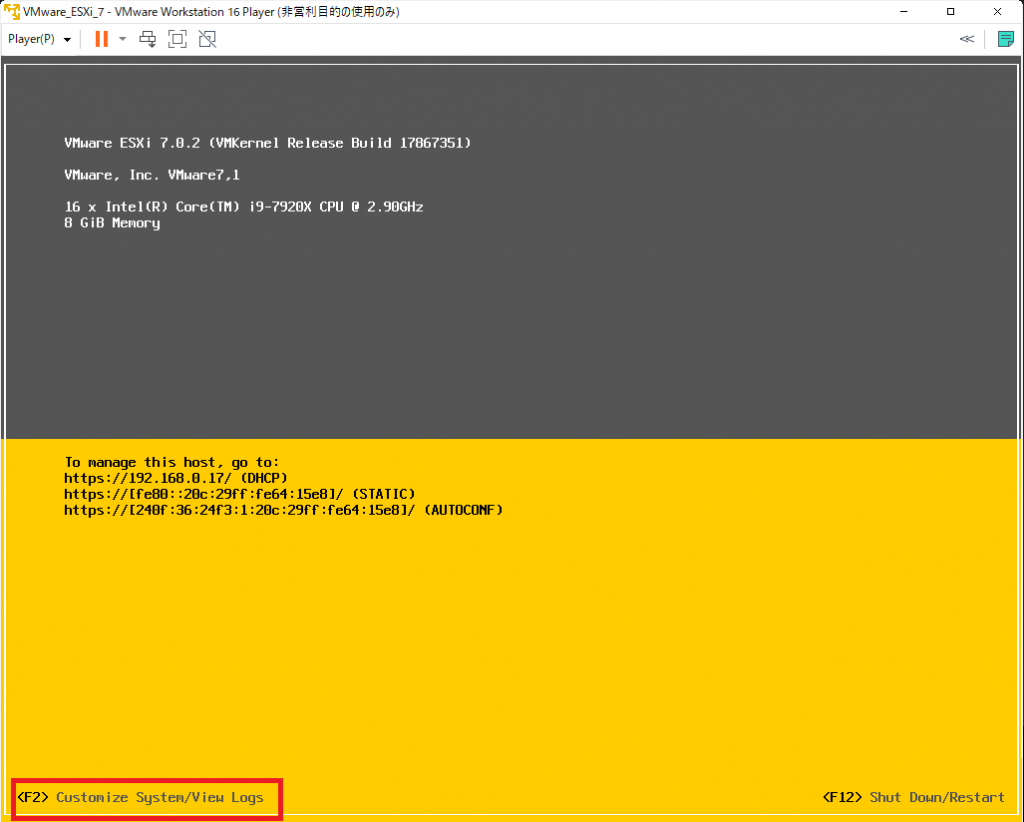
- Press F2 to open the settings.
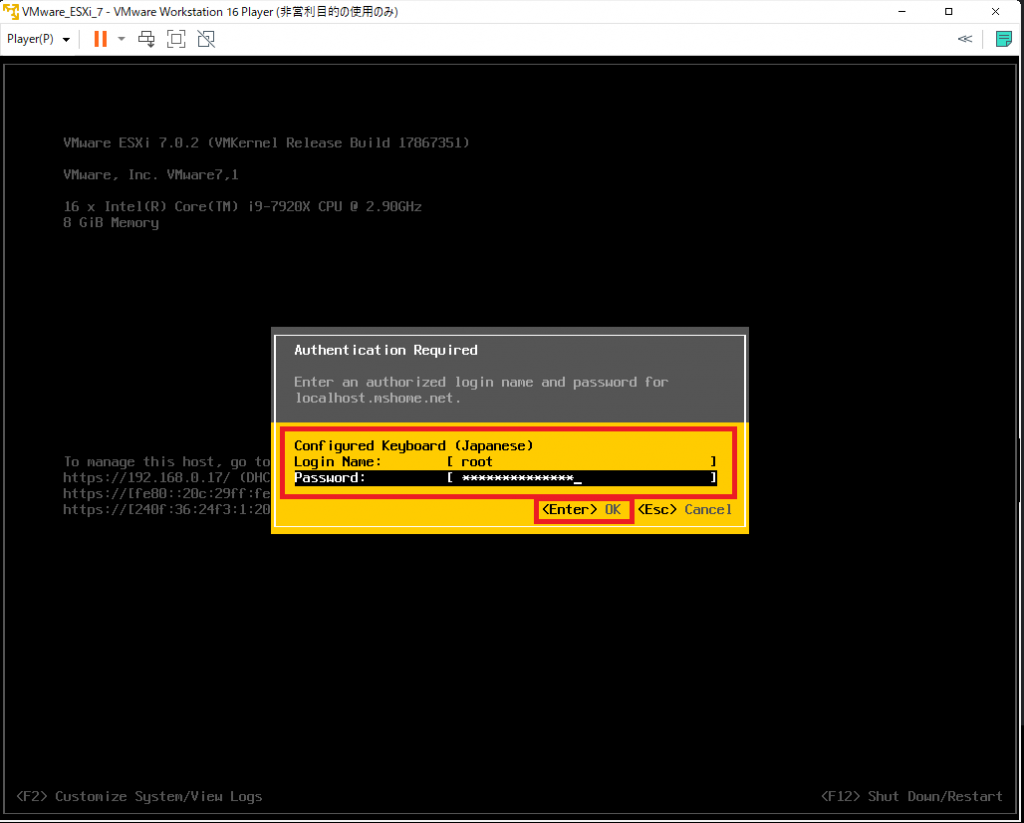
- When prompted to log in, leave the username as “root”, enter the administrator password you set earlier, and press “Enter” to proceed.
Network settings
- Select “Configure Management Network” and press “Enter” to proceed.
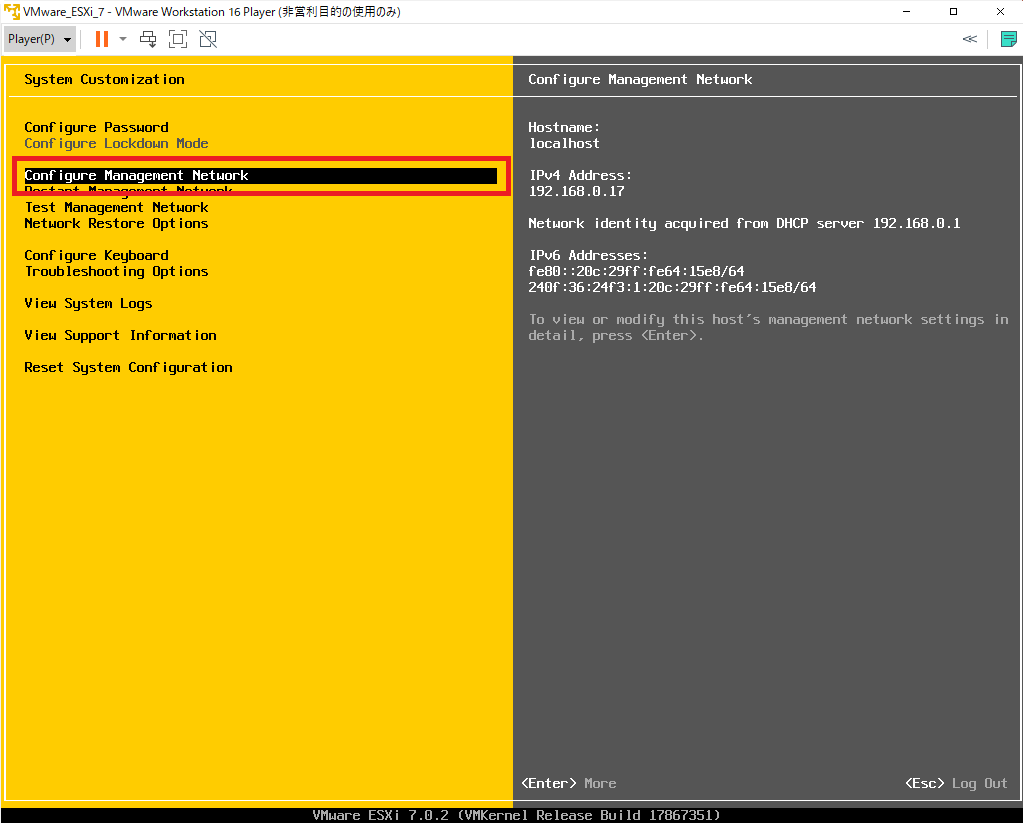
- Select “IPv4 Configuration” and press “Enter” to proceed.
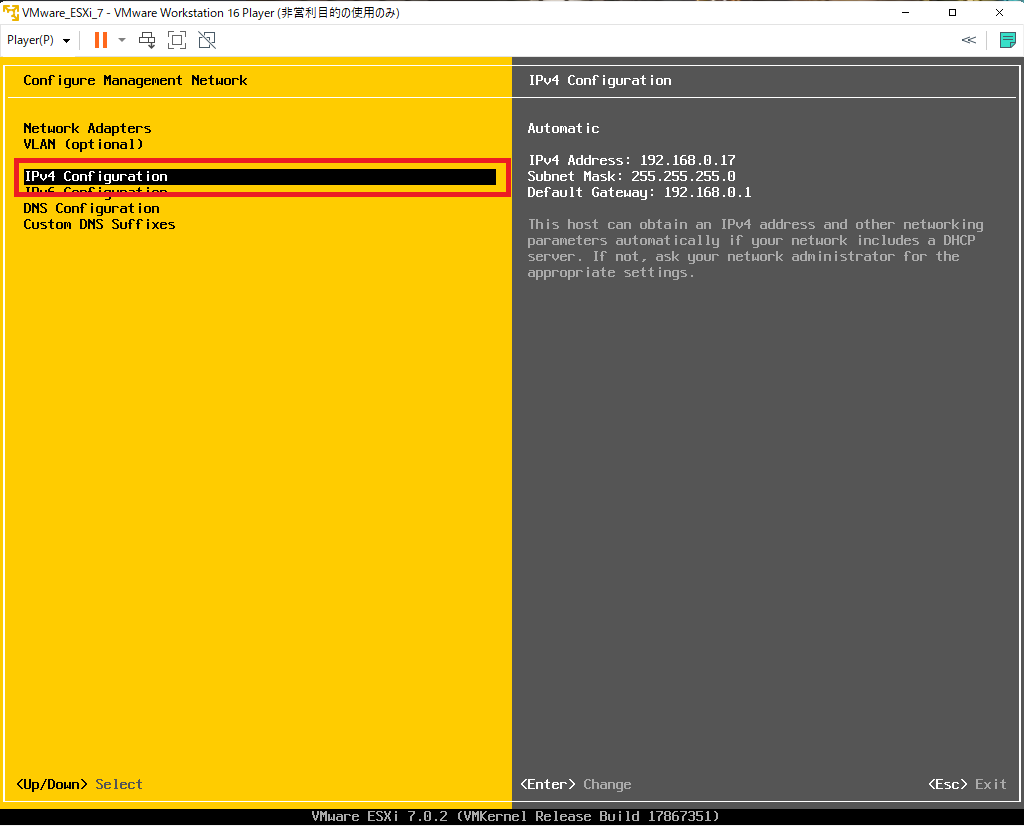
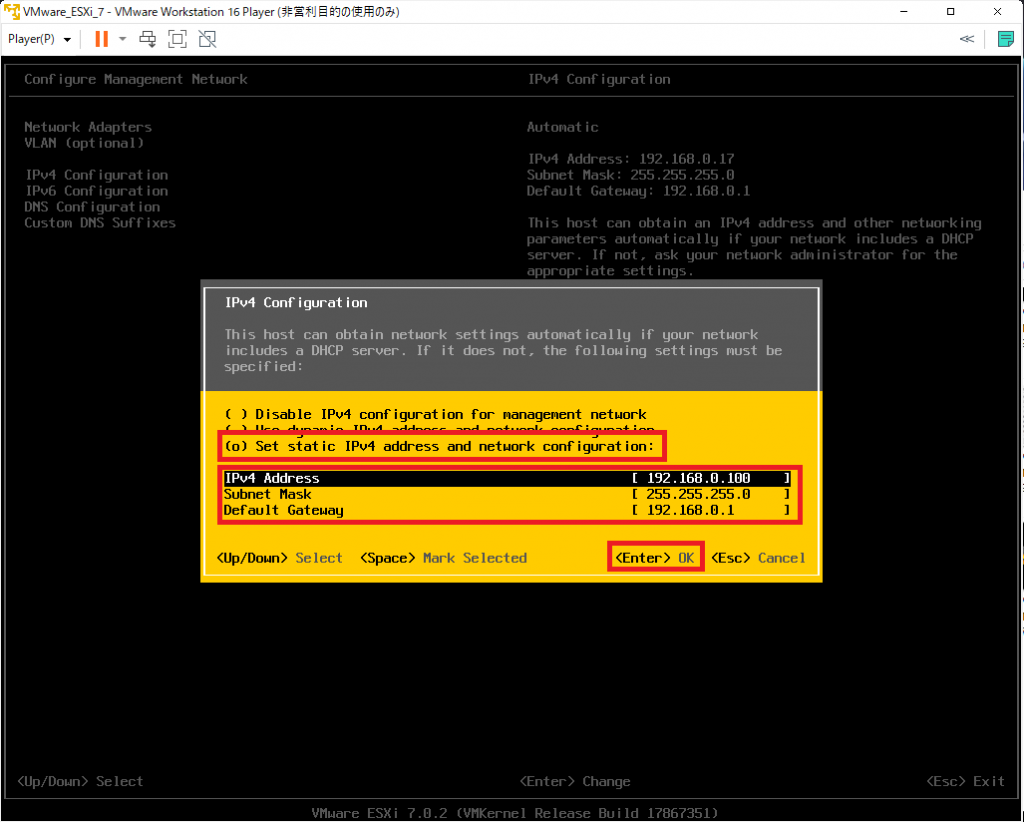
- Select “Set static IPv4 address and network configuration” and confirm with the Space key.
Set “IPv4 Address”, “Subnet Mask”, and “Default Gateway” to the desired values, then press “Enter” to complete the setting.
- Press Esc to return.
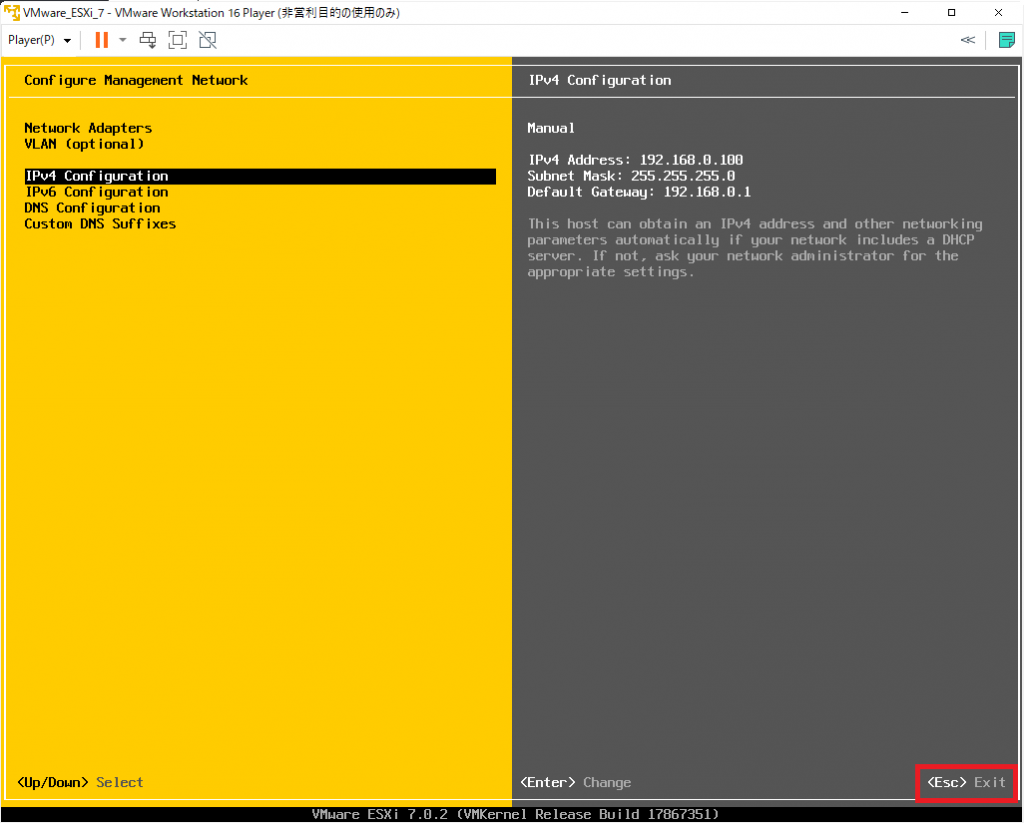
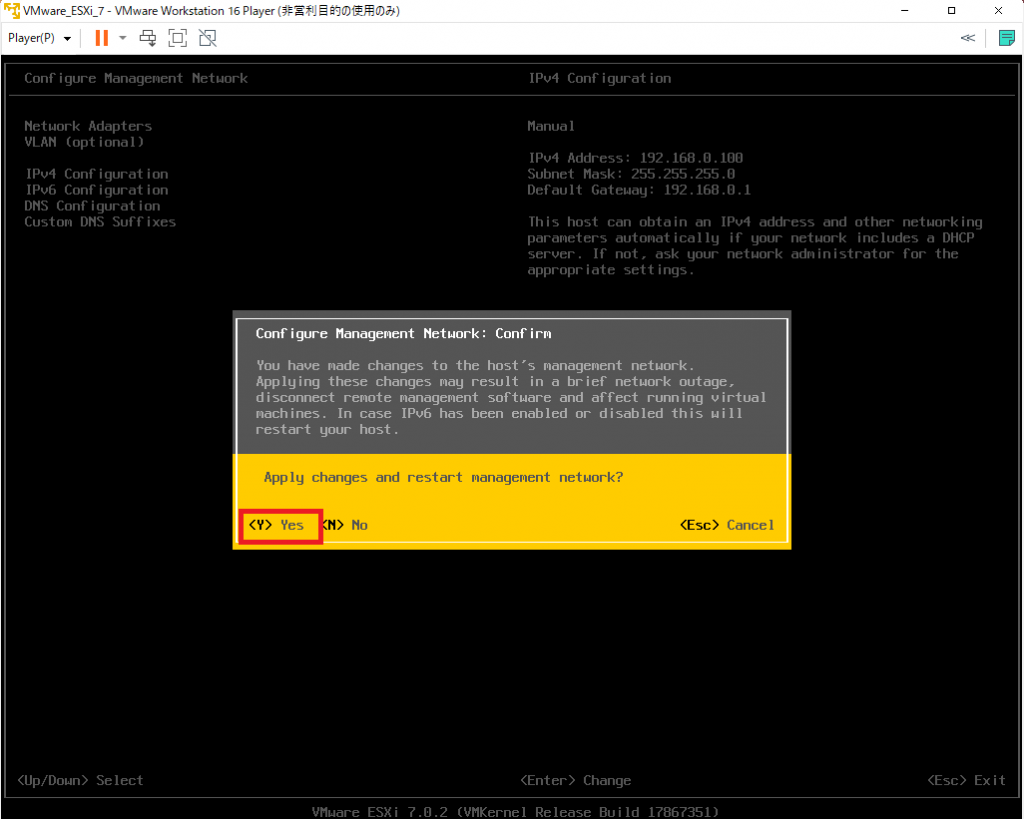
- When the settings confirmation screen appears, press Y to confirm the settings.
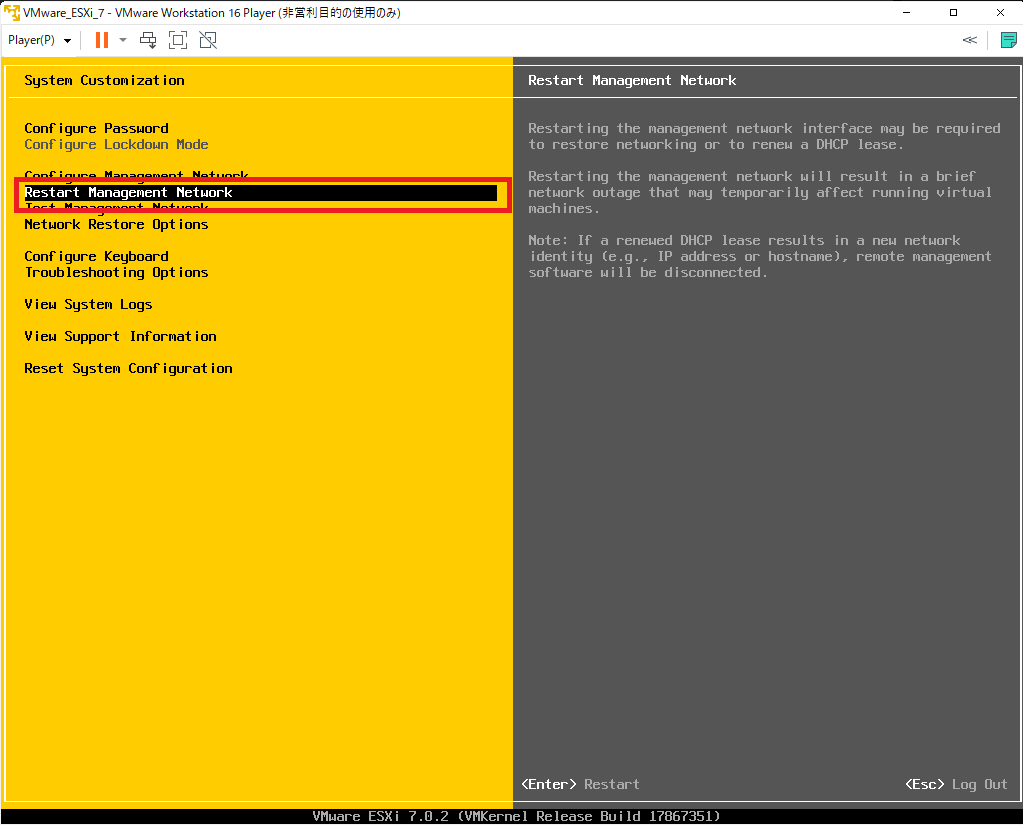
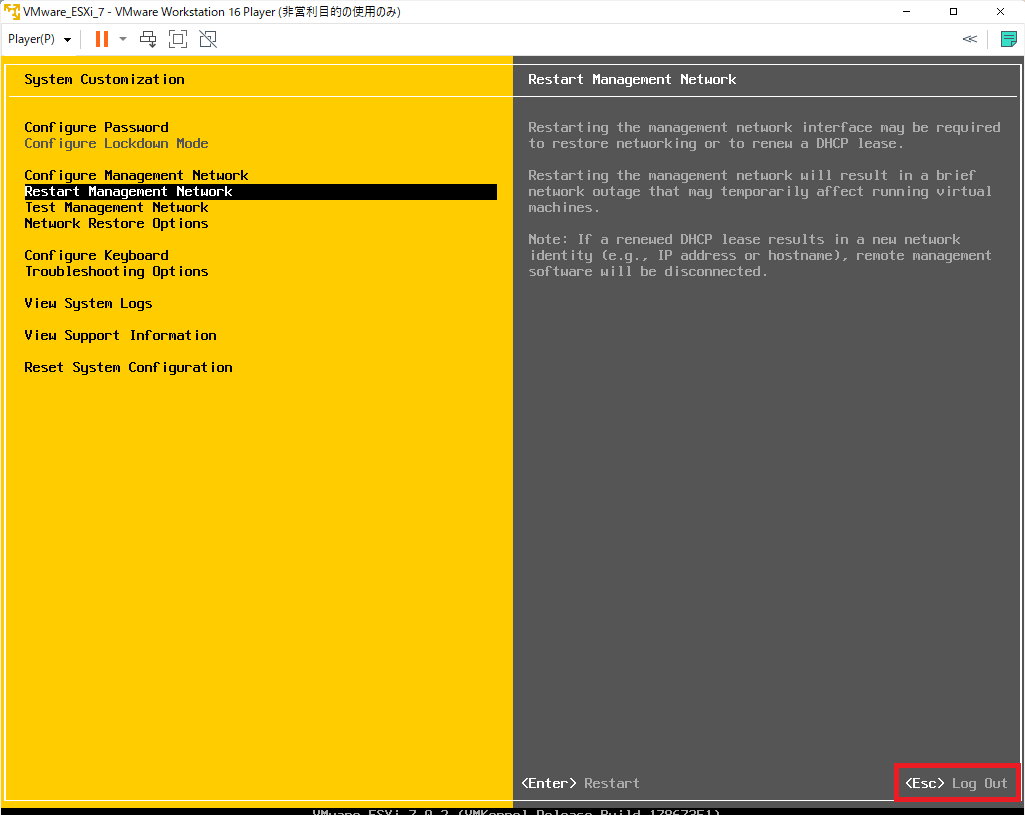
- Select “Restart Management Network” and press “Enter” to proceed.
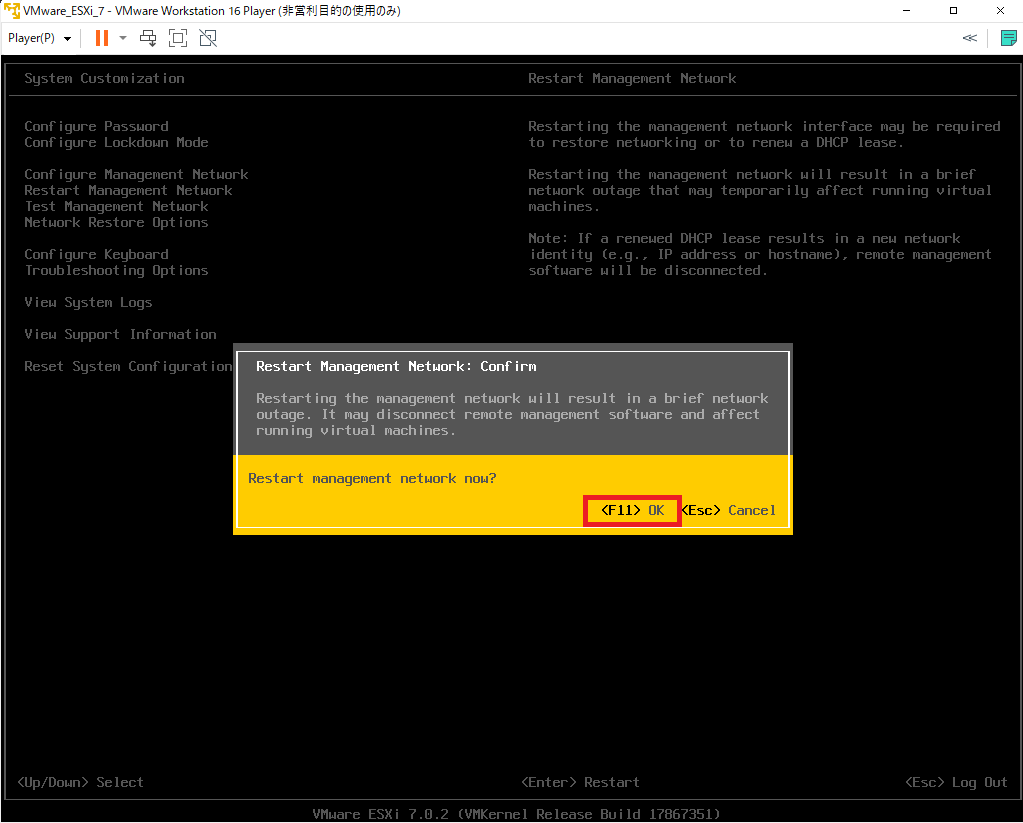
- Press F11 to restart the management network.
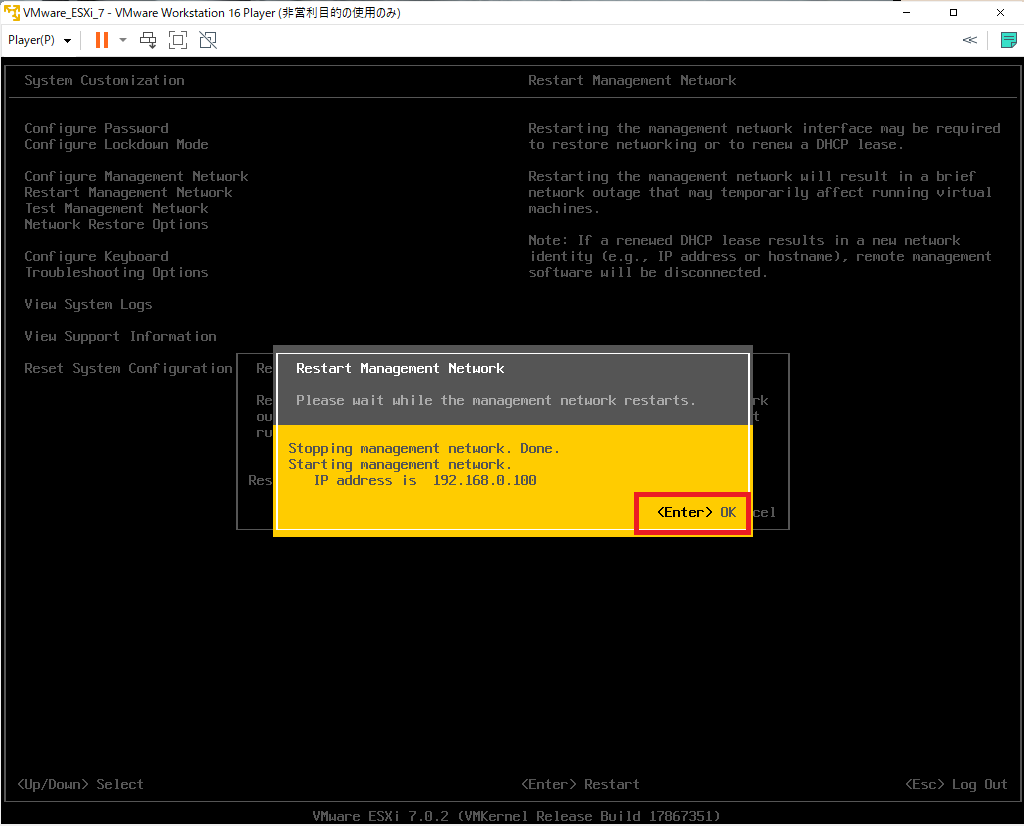
- Press “Enter” to return
Setup complete
Press Esc to exit the settings.
Access VMware vSphere Client
Access from browser
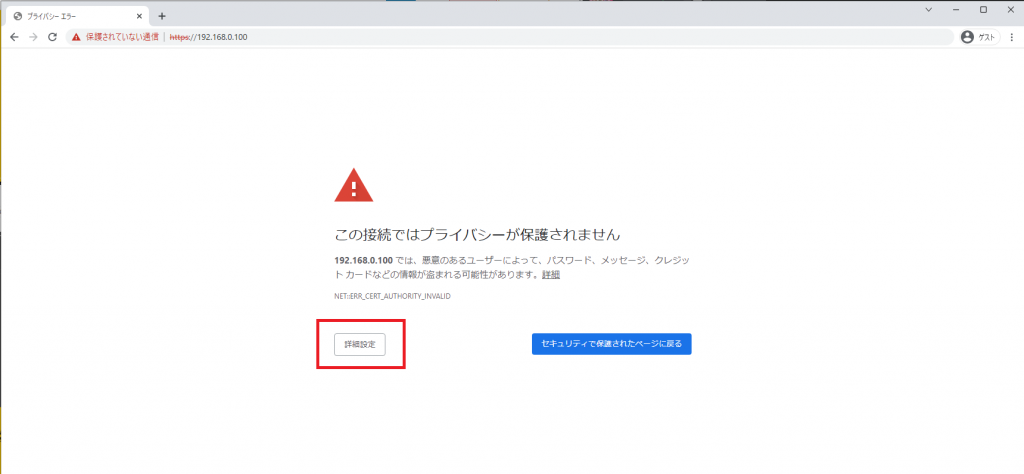
- On Windows, enter “https://the IP address you set earlier” in the address bar of Google Chrome or Microsoft Edge, and click “Details”.
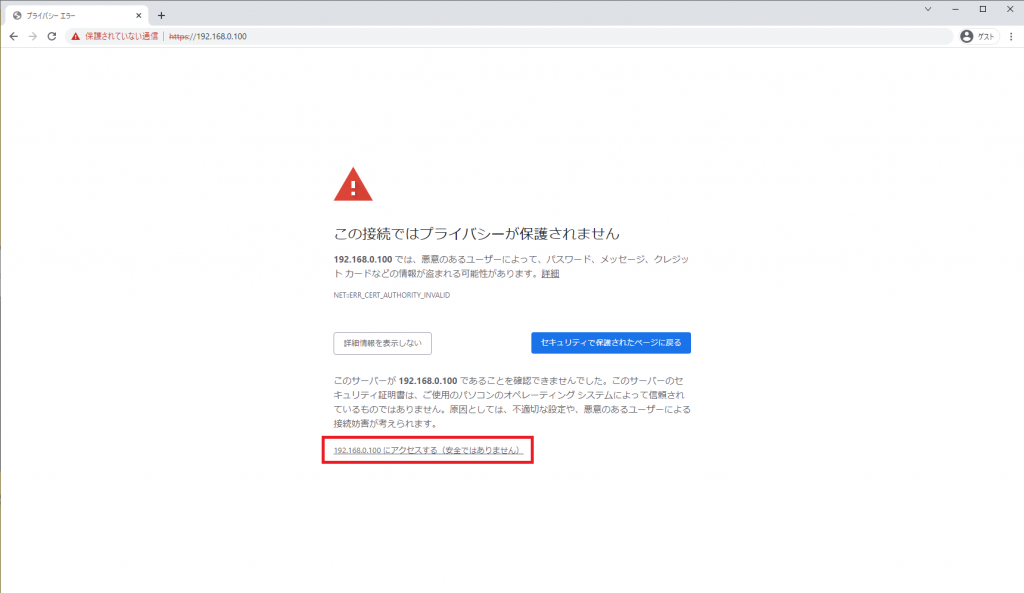
- Click “Access (not secure)”.
Login to vSphere Client
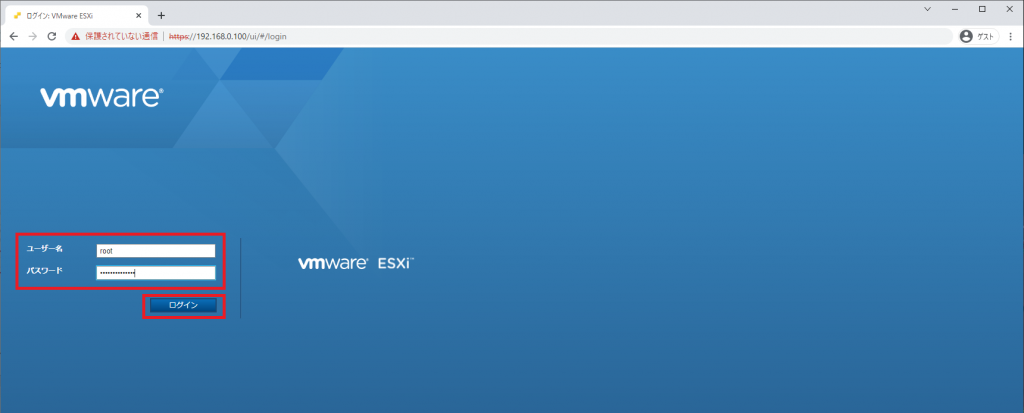
Enter “root” in “Username” and “Administrator Password” in “Password”, then click “Login”. If you cannot access it even after entering the correct password, go to Troubleshooting.
Confirm access
-
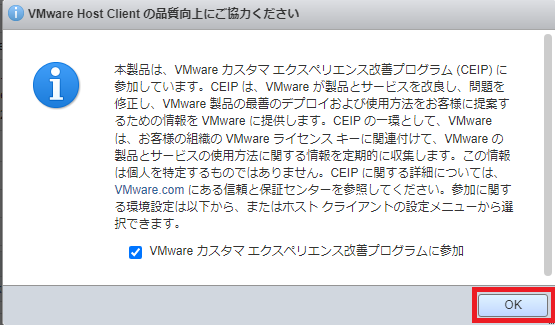
Click “OK” when prompted.
-
Confirm that you can access it.
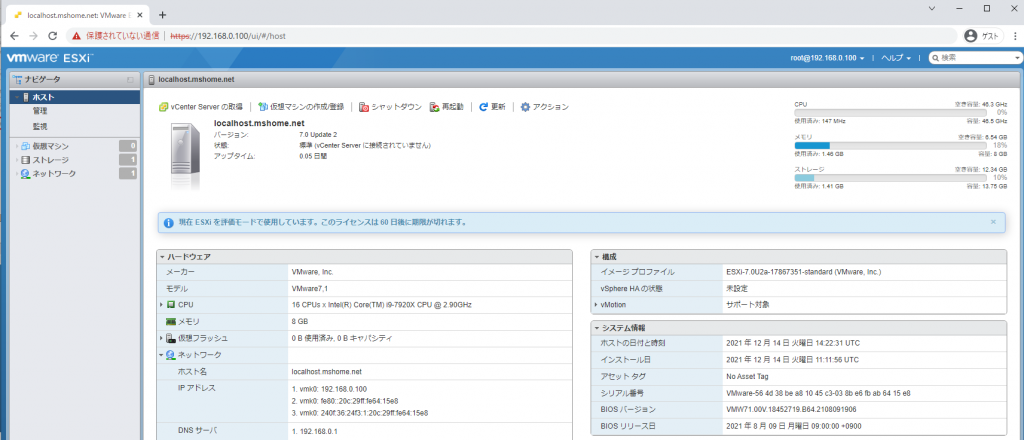
This concludes the installation of VMware ESXi.
Troubleshooting
If you cannot access VMware vSphere Client even when the password is correct, try restarting the management agents.
Restarting the management agent
-
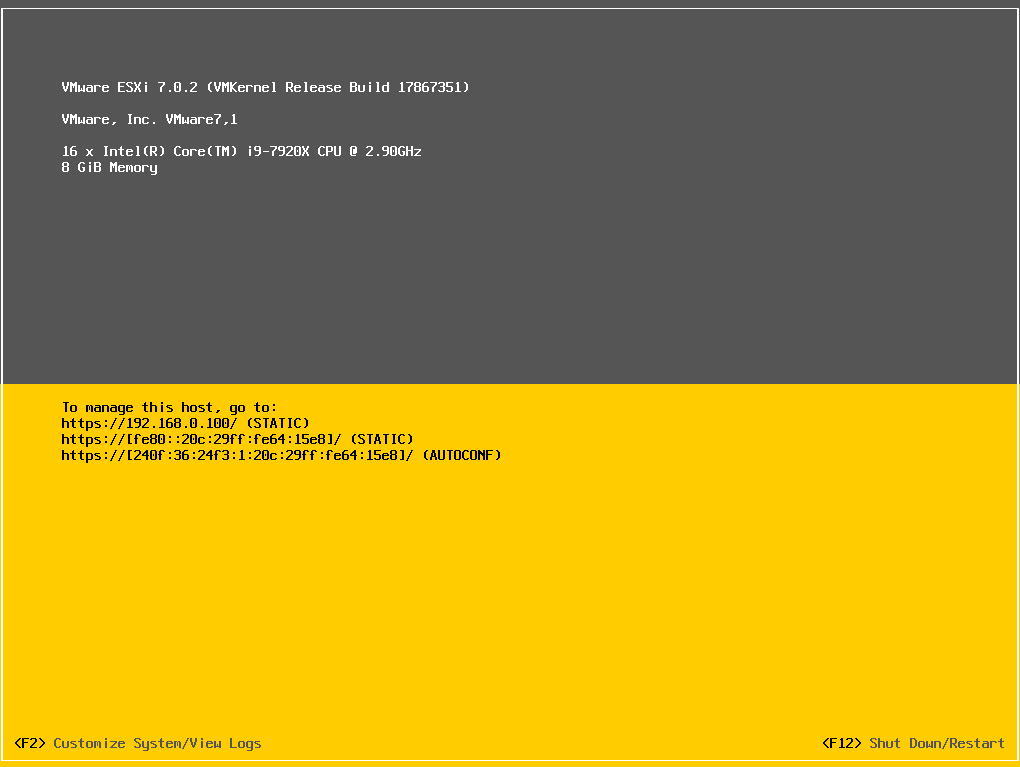
Access the ESXi console.
-
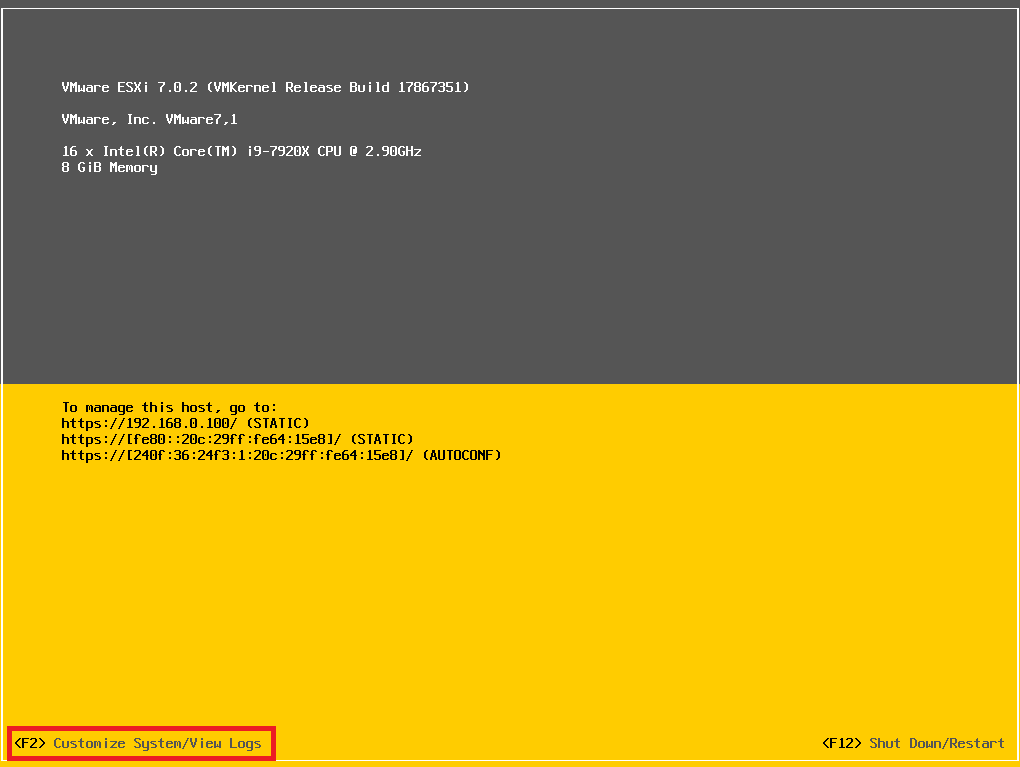
Press F2.
-
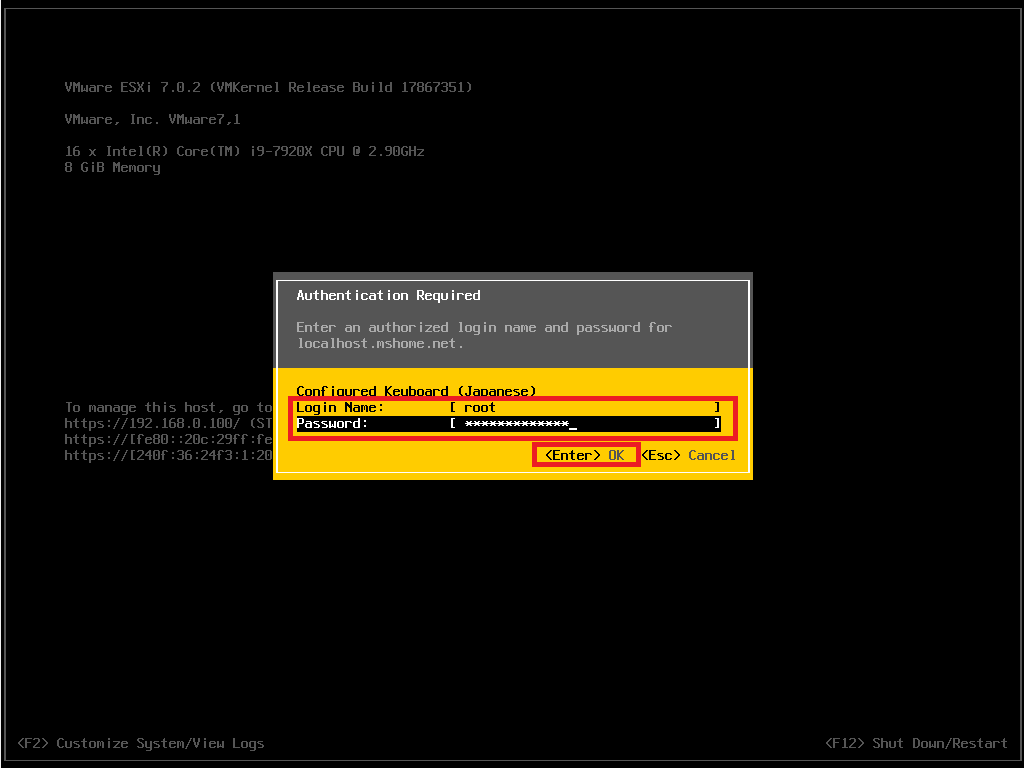
Enter “root” for Login Name and the password you set for Password, then press “Enter” to open the settings.
-
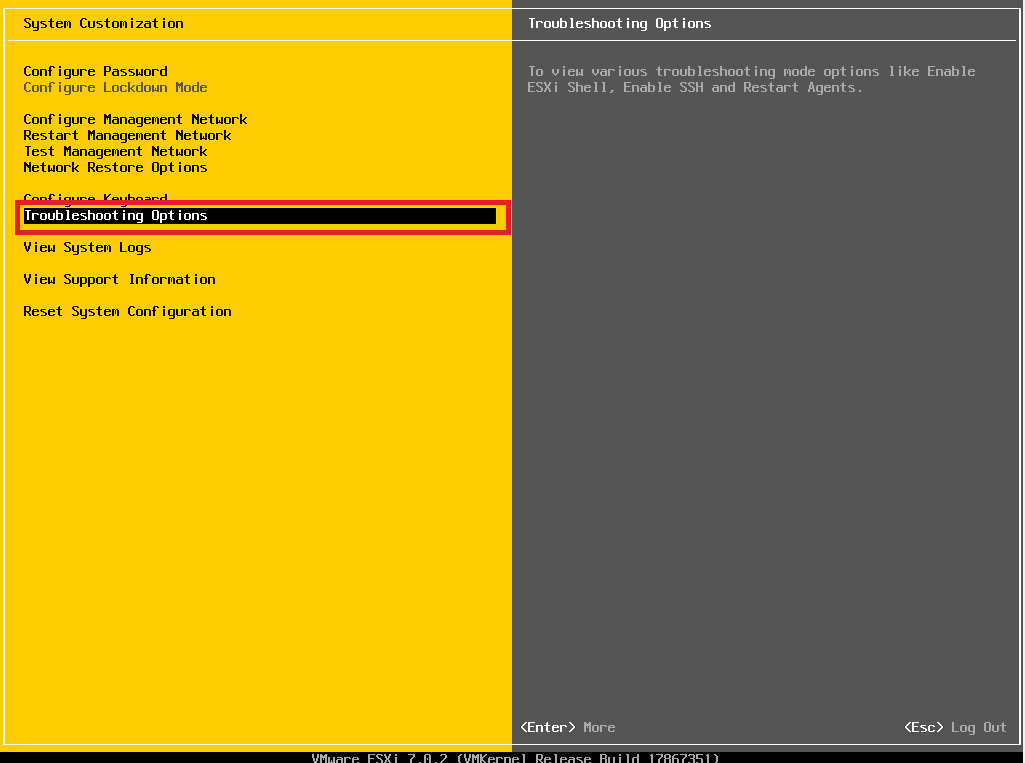
Select “Troubleshooting Options” and press “Enter” to proceed.
-
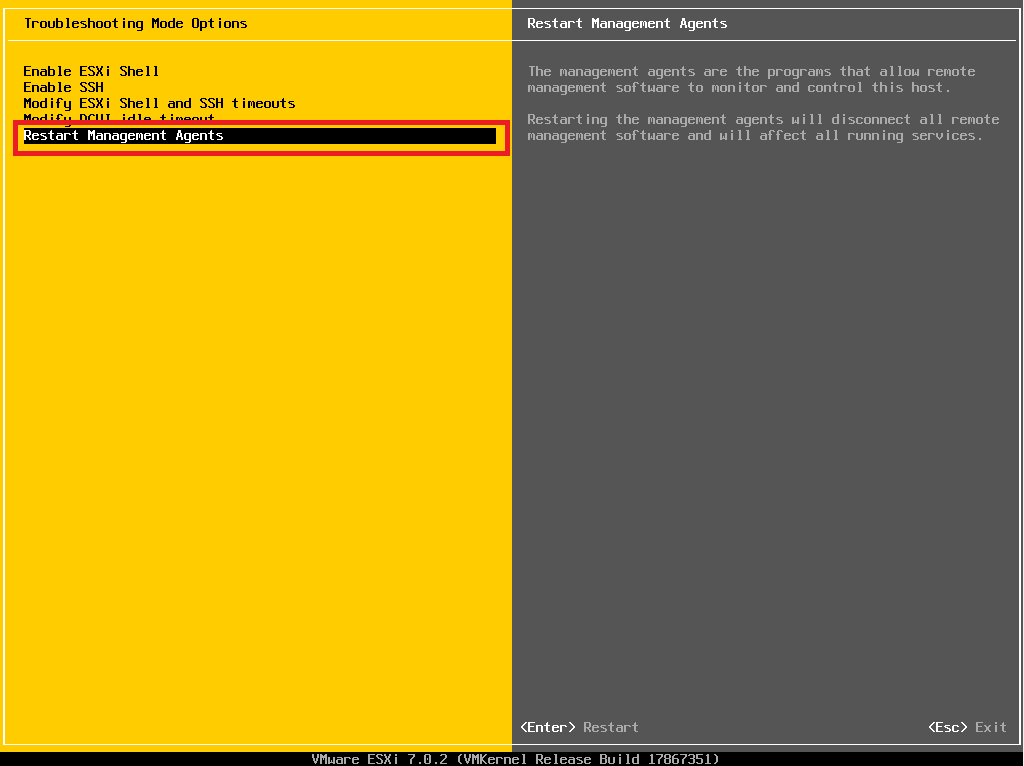
Select “Restart Management Agents” and press “Enter” to proceed.
-
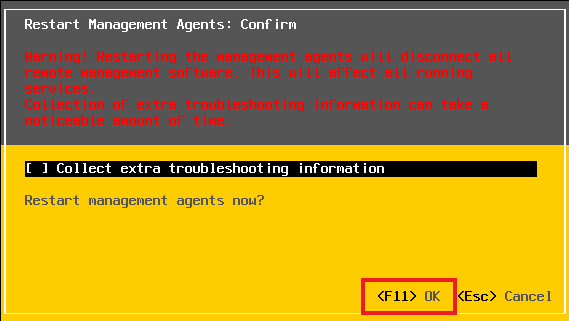
Press F11 to restart the management agents.
Conclusion
This article introduced how to install VMware ESXi on VMware Workstation Player. I have a server and run ESXi directly on it, but many people do not have a server. I wrote this article so more people can try ESXi. Future articles will assume a VMware ESXi environment, so if you do not have a server, try installing VMware ESXi with this method.