
Introduction
This article shows how to build a minimal CentOS 8 VM on VMware ESXi and perform initial setup, including disabling SELinux.
Prerequisite knowledge
What is VMware ESXi?
VMware ESXi allows you to directly access and manage the underlying resources, so you can partition hardware for application consolidation and cost reduction. Its efficient architecture sets the standard for reliability, performance, and support. https://www.vmware.com/jp/products/esxi-and-esx.html
What is CentOS?
CentOS is an open source project that has released two Linux® distributions: CentOS Stream and CentOS Linux.
What is SELinux?
SELinux (Security-Enhanced Linux) is a security architecture for Linux® systems that gives you more control over who can access your system. https://www.redhat.com/ja/topics/linux/what-is-selinux
Download CentOS8
Visit the site


Download image
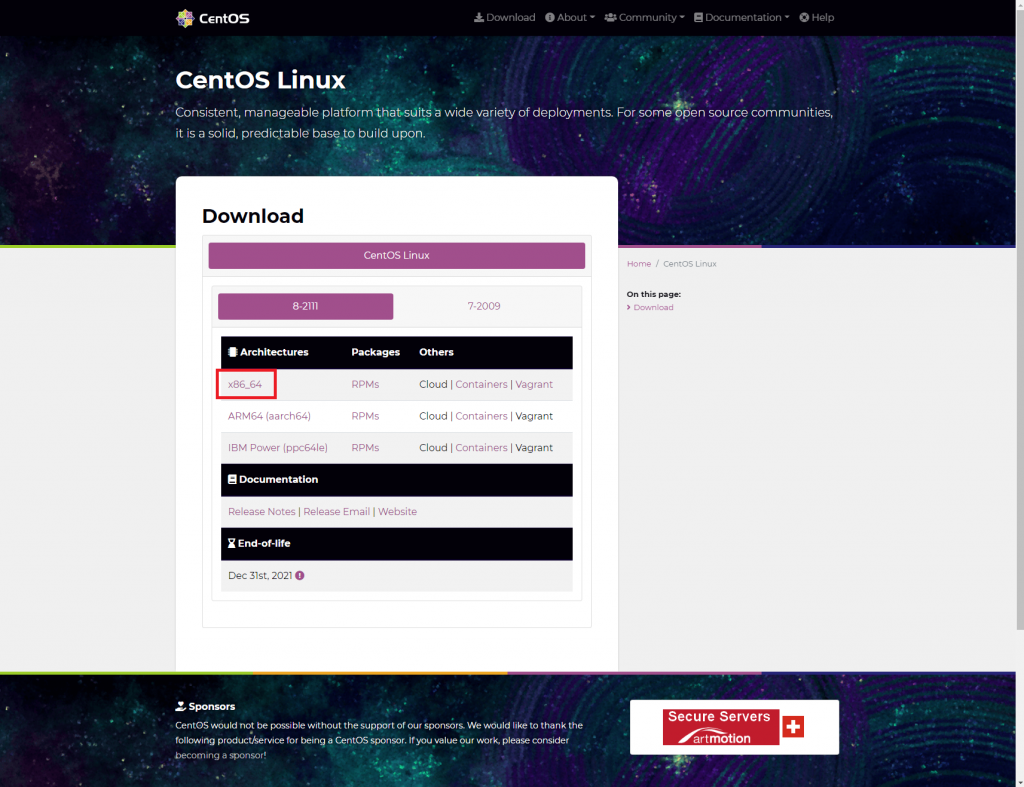
- Open the site below and click “x86_64”.
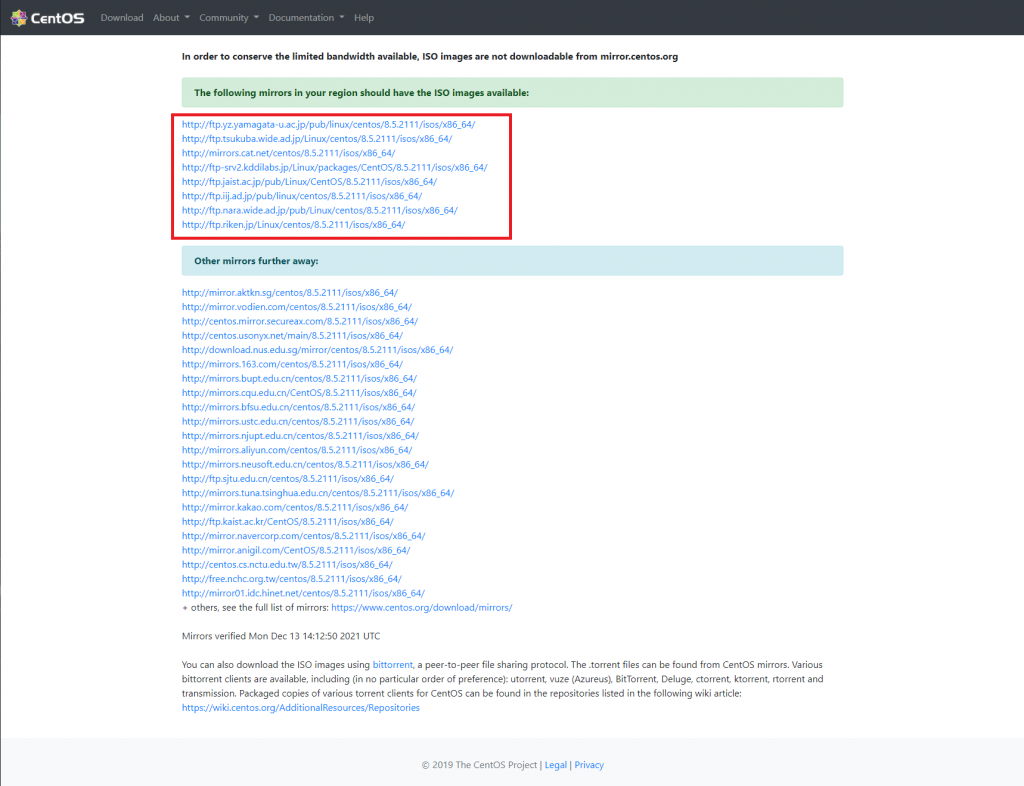
- Choose any mirror link.
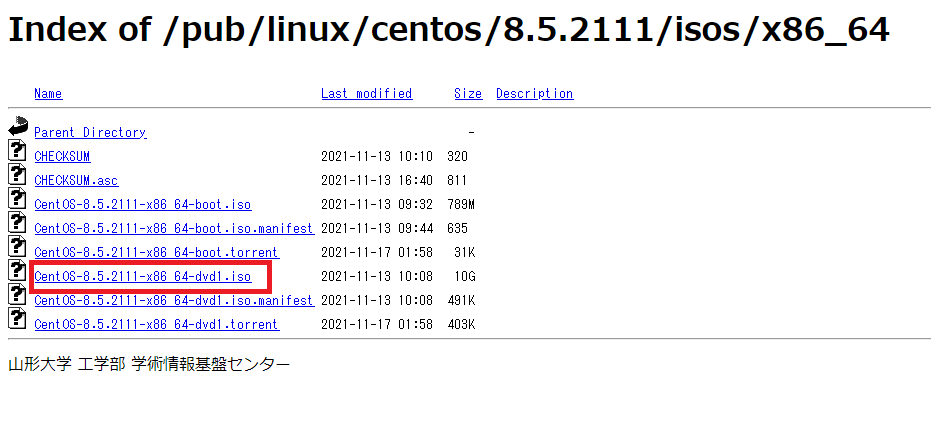
- Click “CentOS-x.x.xxx-x86_64-dvd1.iso” and download the ISO.
Upload ISO to VMware
- Log in to the VMware vSphere Client.
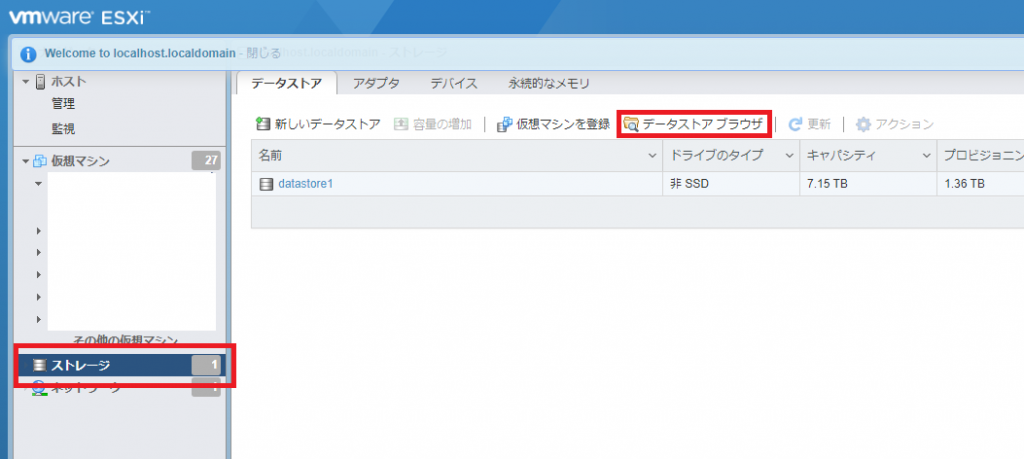
- Select “Storage” from the tab list on the left and click “Datastore browser”.
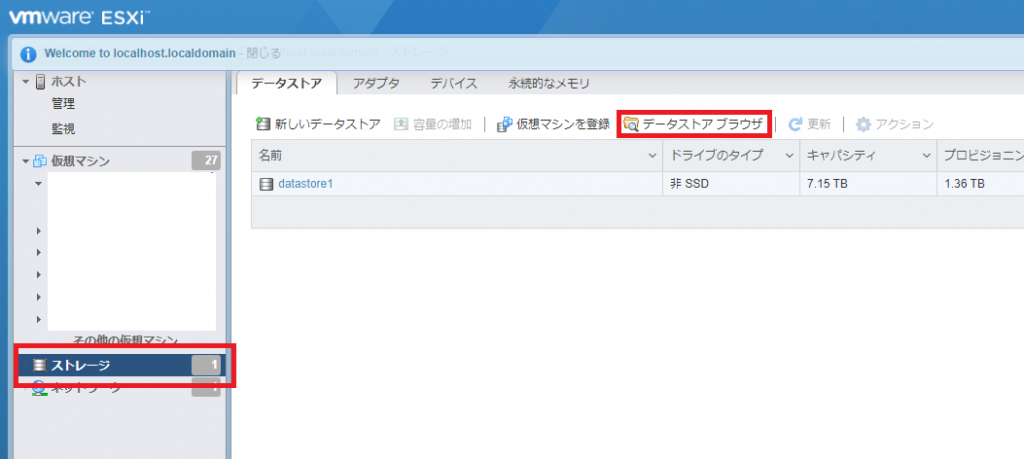
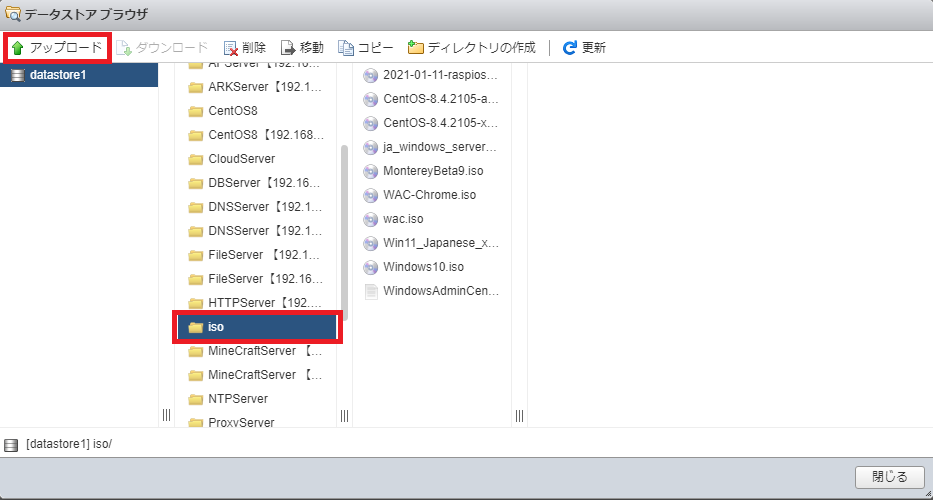
- Select any directory and click “Upload” to upload the ISO file you downloaded earlier.
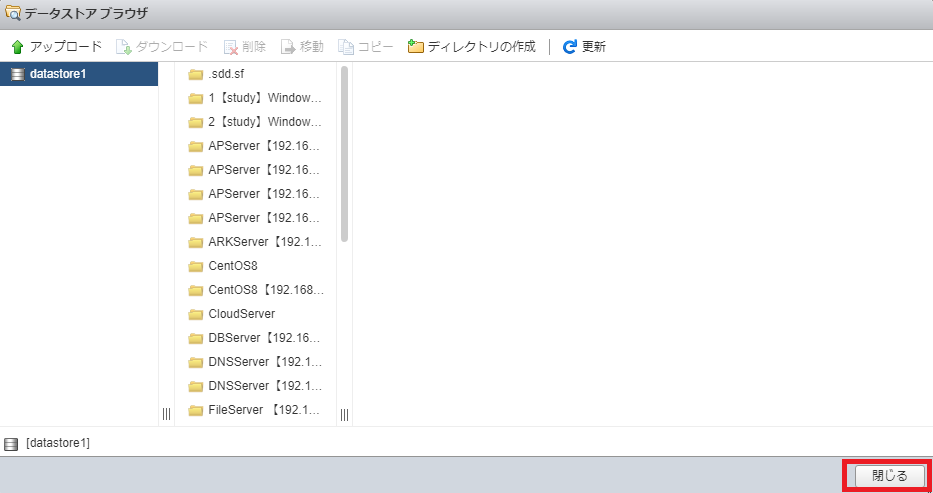
- Click Close.
Create a virtual machine on VMware
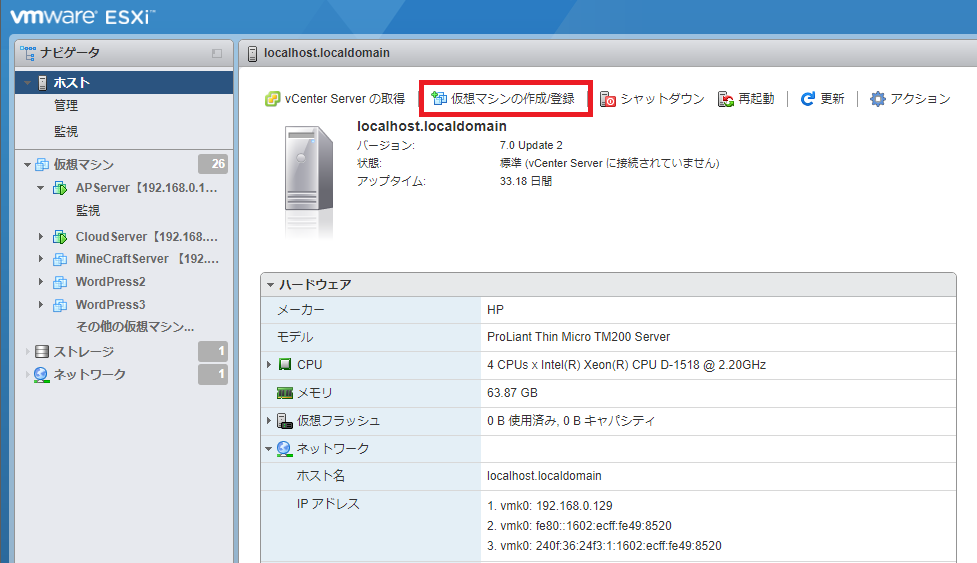
- Click Create/Register Virtual Machine.
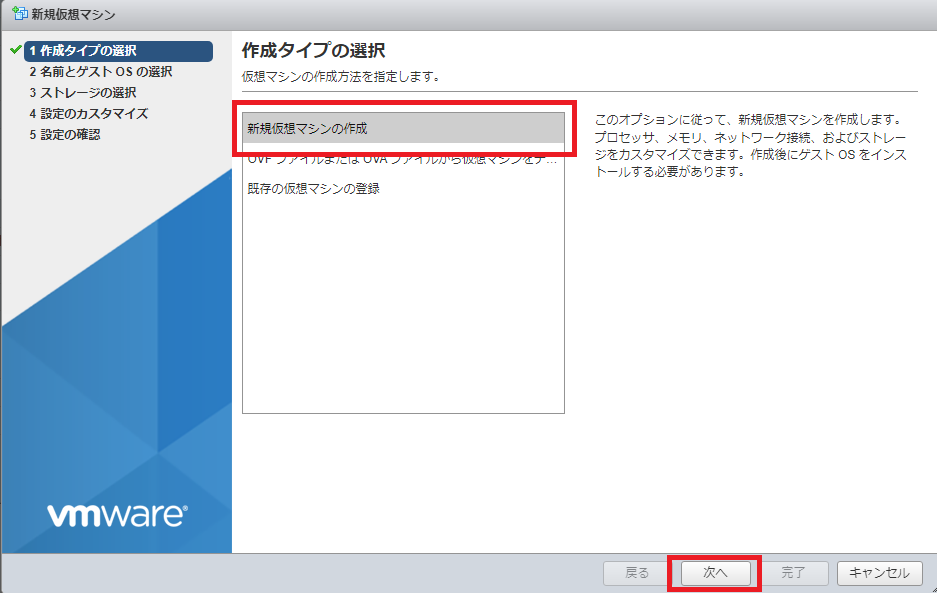
- Select Create a new virtual machine and click Next.
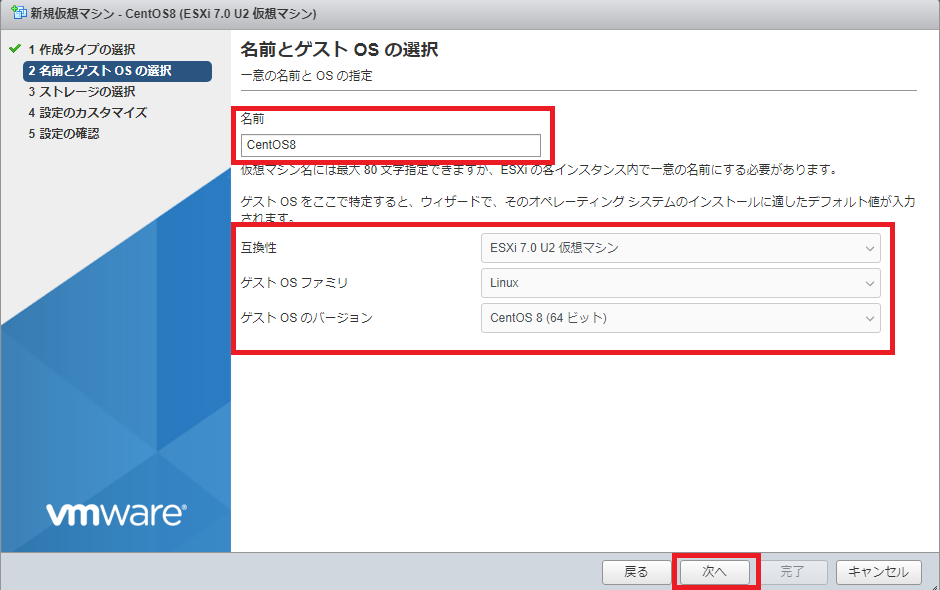
- Enter any VM name. Select the latest compatibility, choose “Linux” for the guest OS family, choose “CentOS8 (64 bit)” for the guest OS version, and click Next.
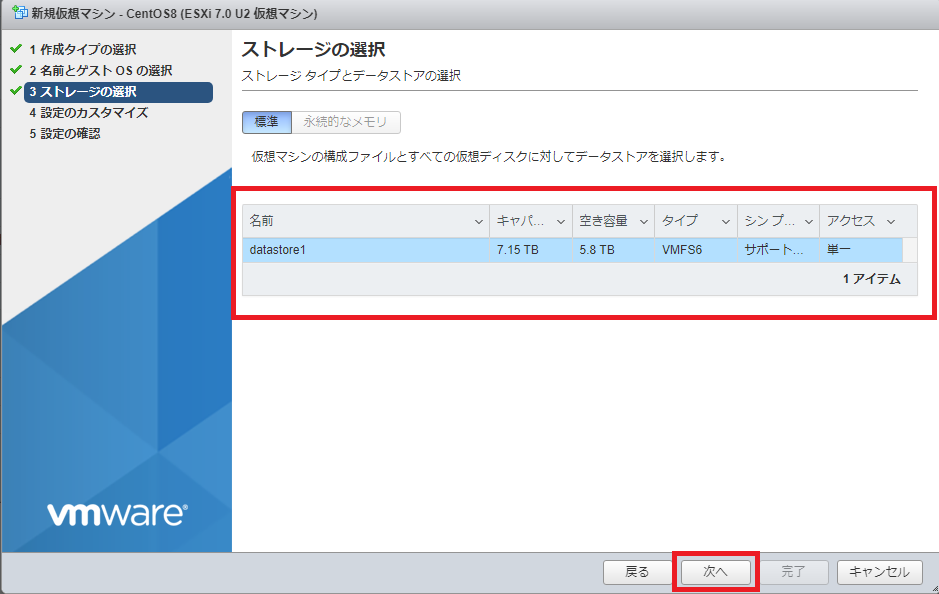
- Select the appropriate datastore and click Next.
- Set “CPU” and “Memory” according to your intended use.
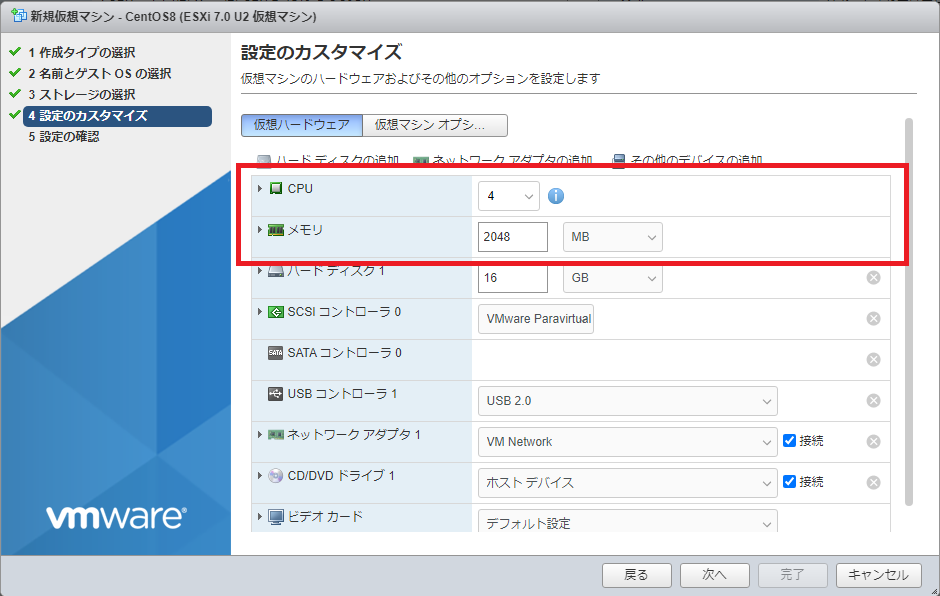
- Set the capacity of hard disk 1 appropriately according to your usage, and change “Disk Provisioning” to “Thin Provisioning”.
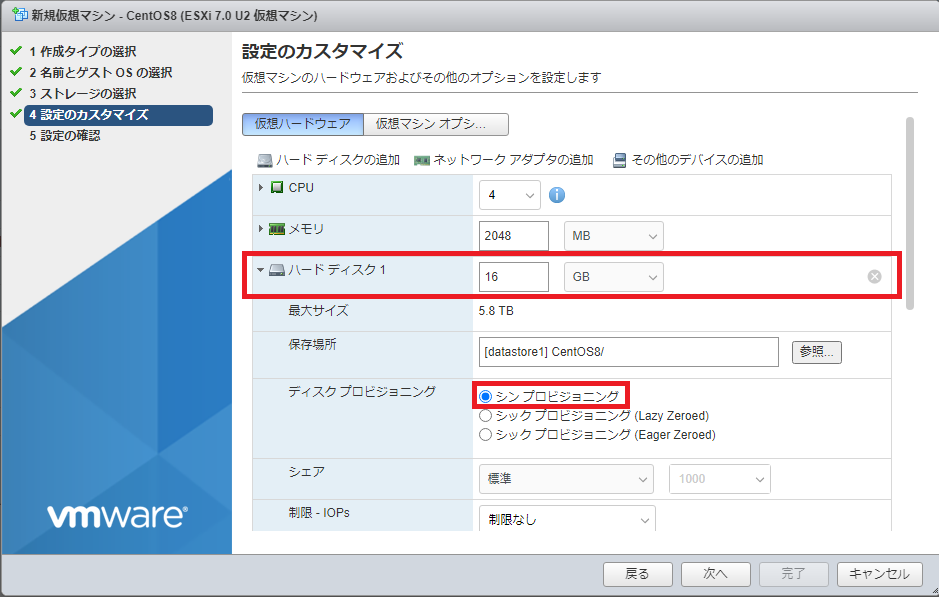
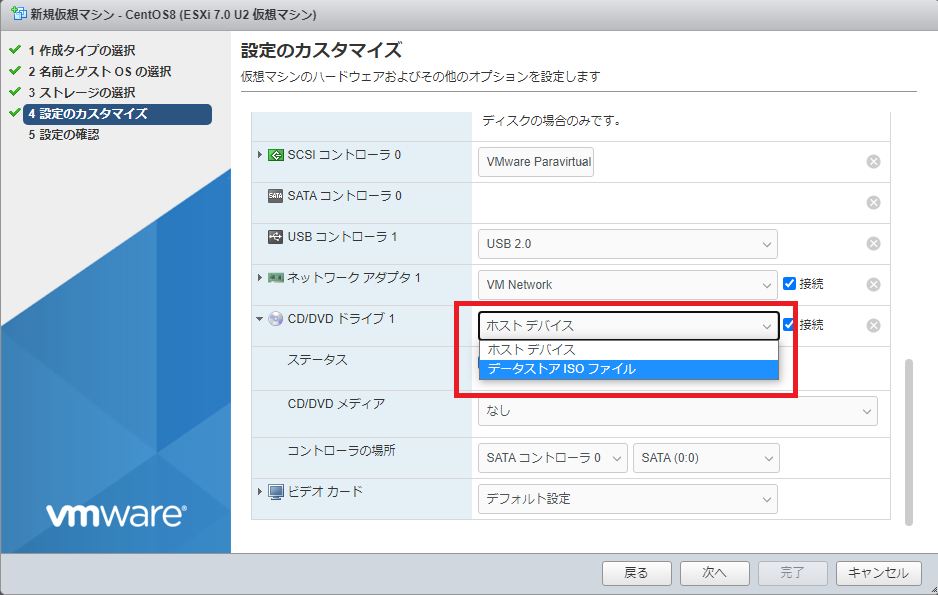
- Scroll down, select “Host Device” under “CD/DVD Drive”, and change it to “Datastore ISO File”.
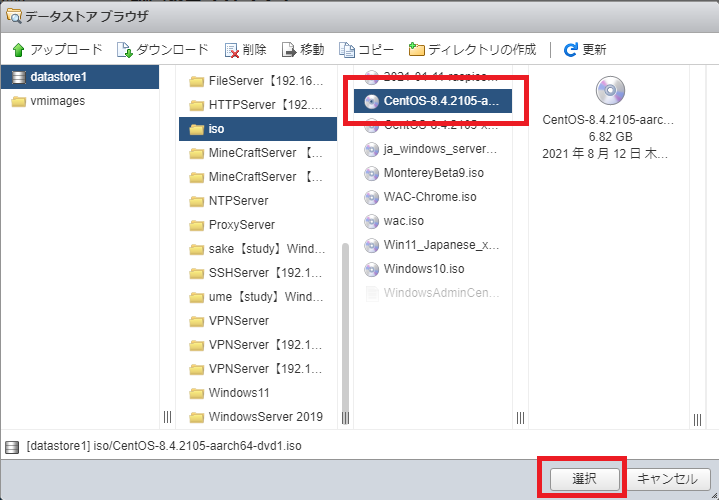
- When the datastore browser opens, navigate to the directory where the ISO file is stored and select “CentOS8”.
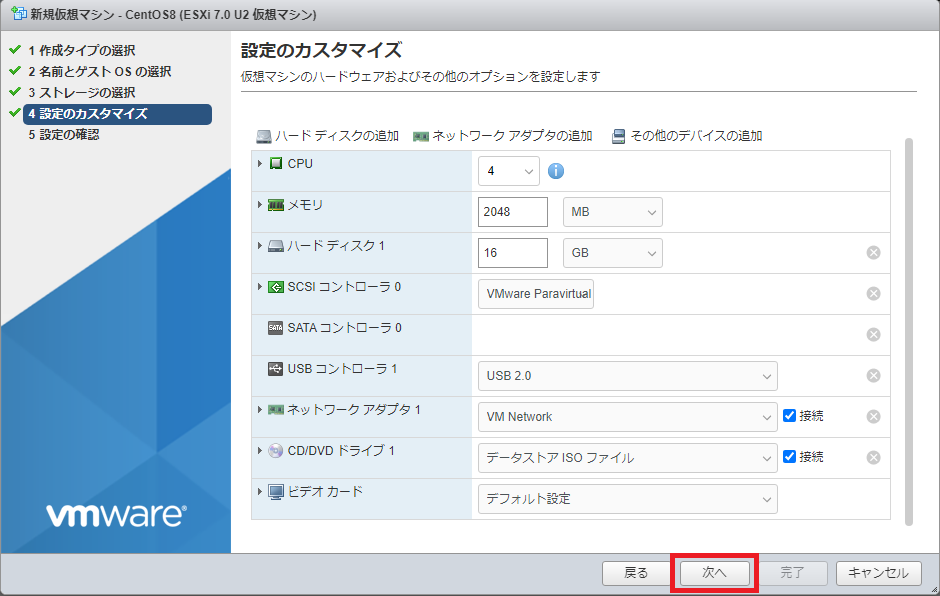
- After completing the settings, click Next.
- After confirming the settings, click Finish.
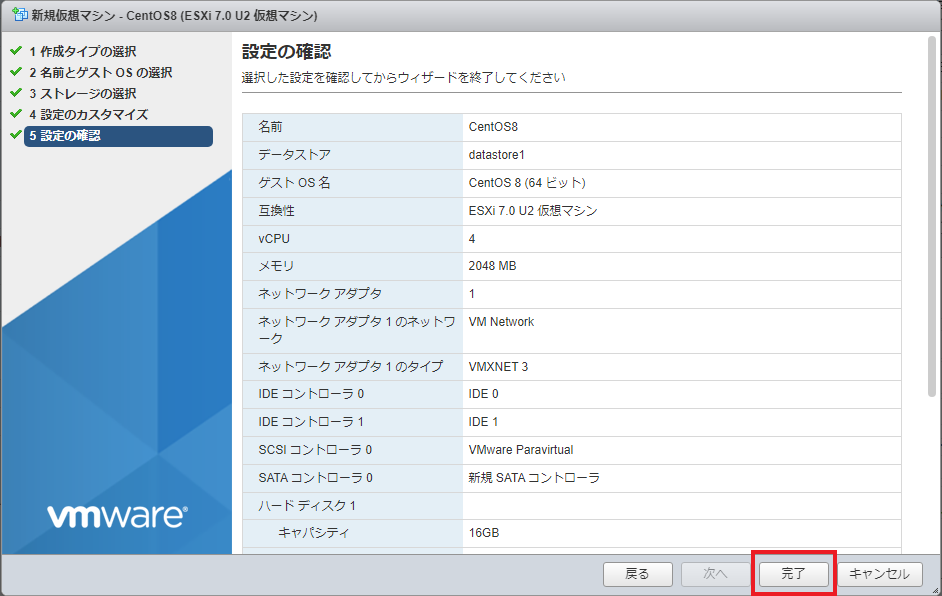
Starting a virtual machine
From the virtual machine tab on the left, select the virtual machine you created and click “Power on”.
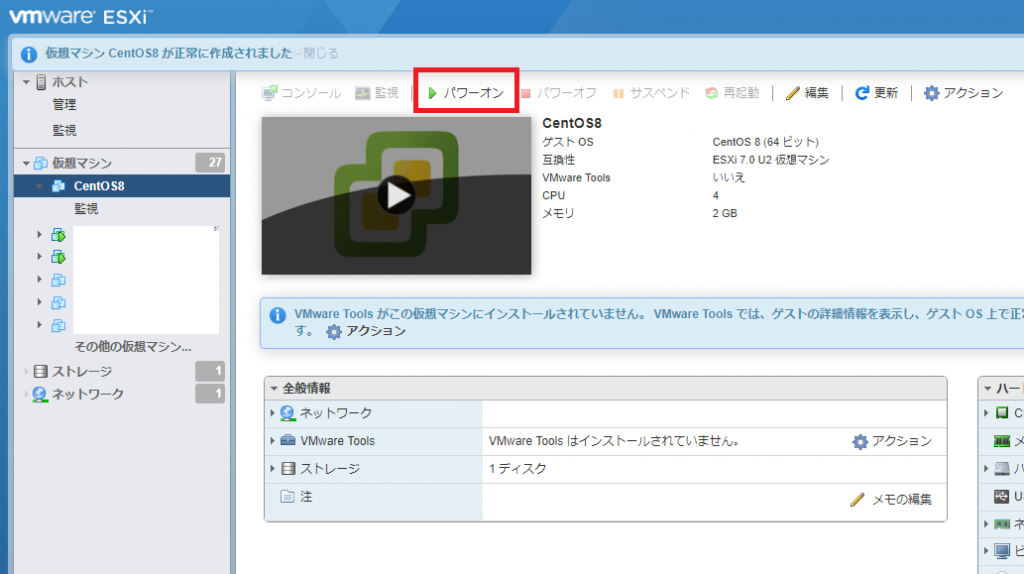
Installing CentOS8
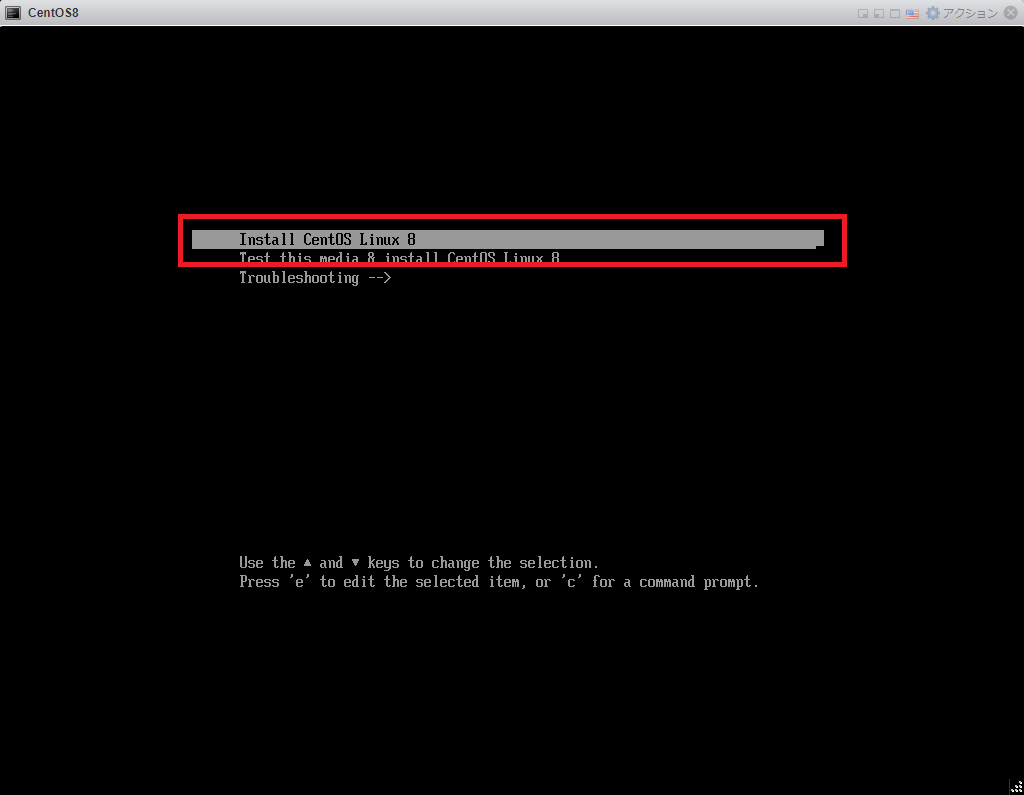
- When the OS console opens, select “Install CentOS Linux 8” and press Enter.
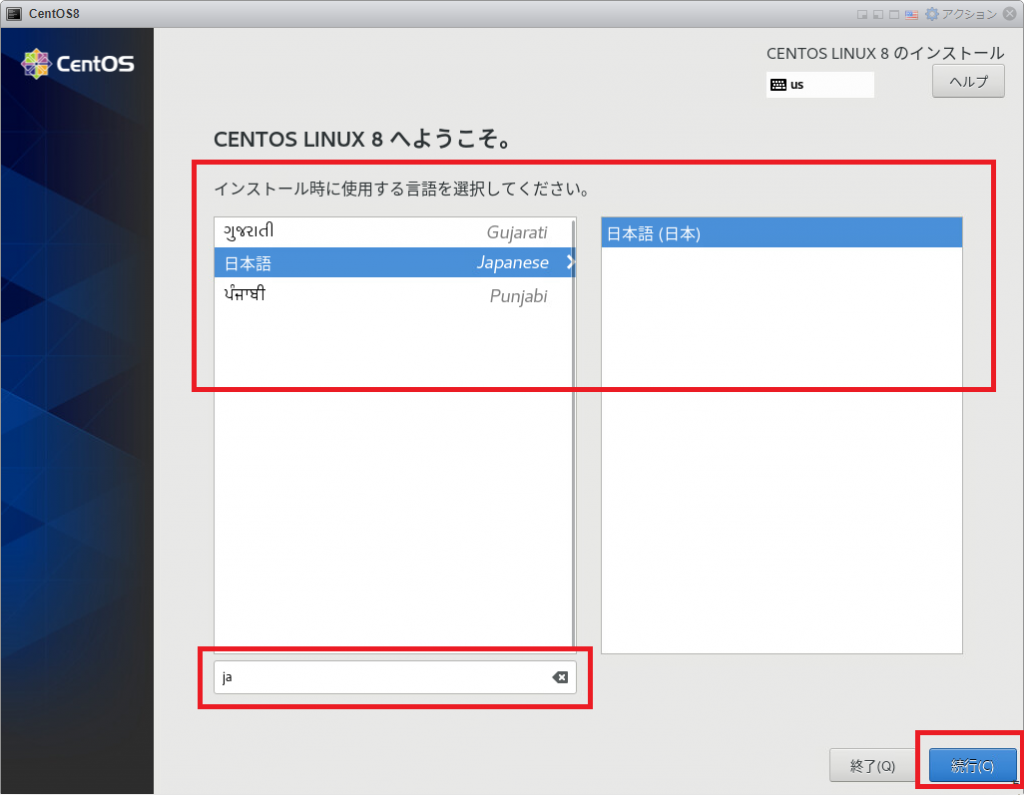
- When you move to the WELCOME TO CENTOS LINUX 8 screen, enter “ja” in the search field, select “Japanese”, and click Continue.
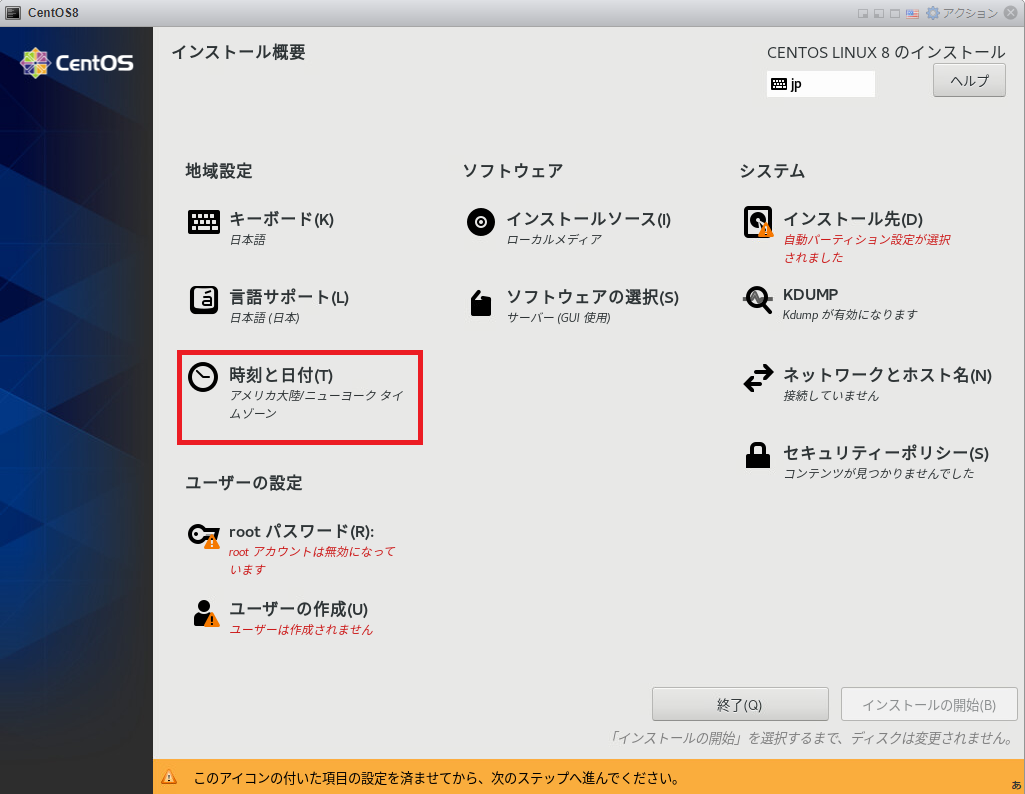
- When the installation summary opens, click “Time and date”.
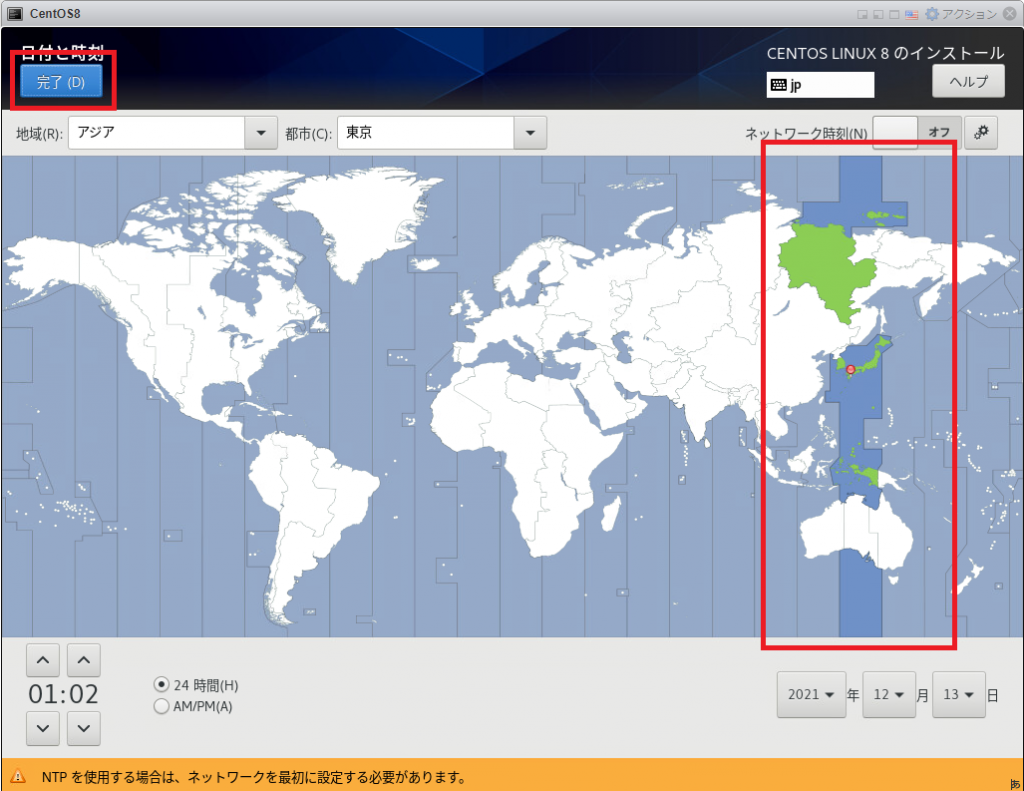
- Once you open the time and date, select your location and click Done.
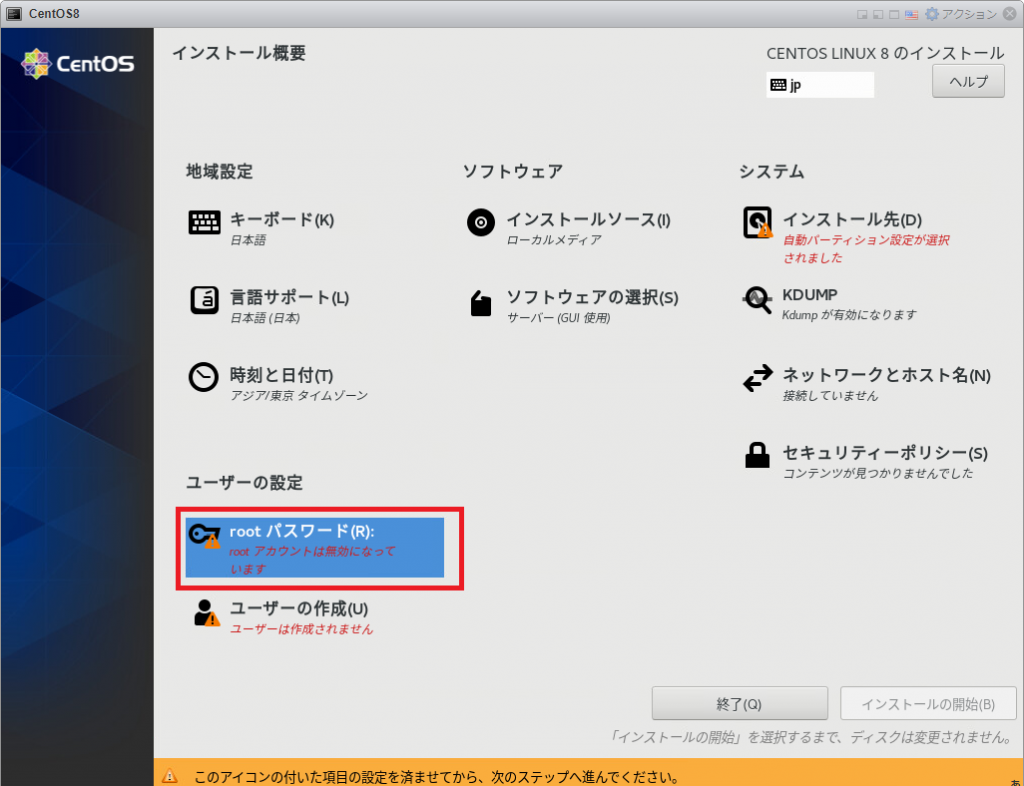
- Click “root password”.
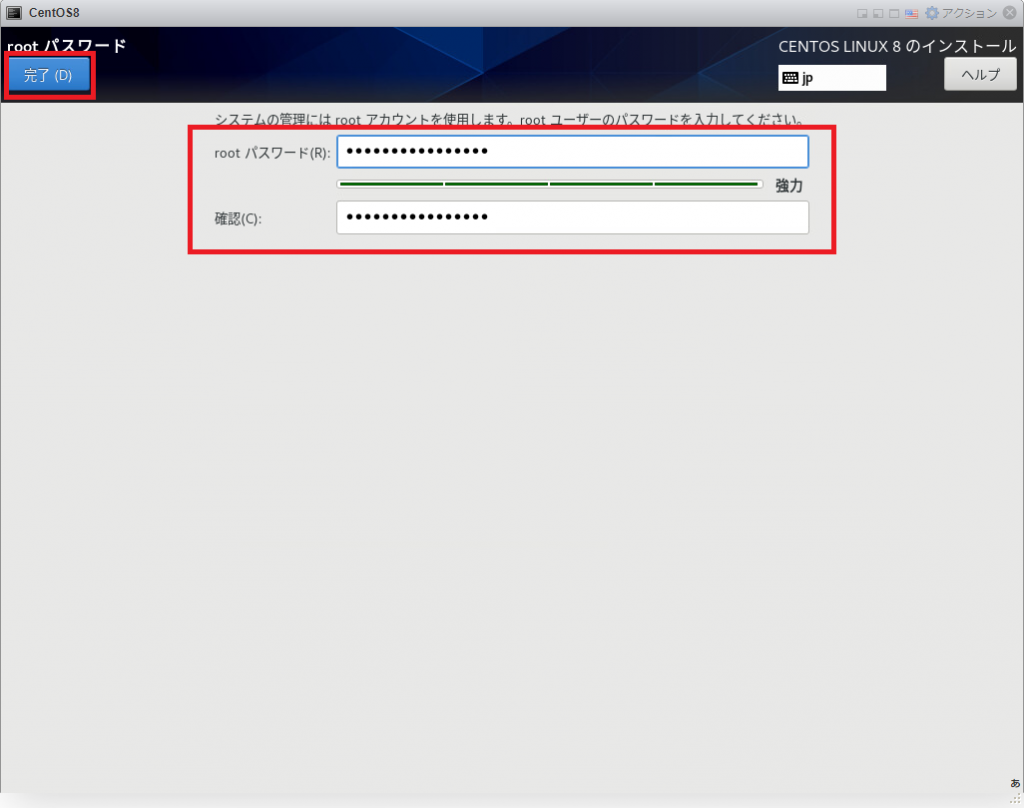
- Set the administrator password in “root password” and “confirm” and click Finish.
- Click “Select Software”.
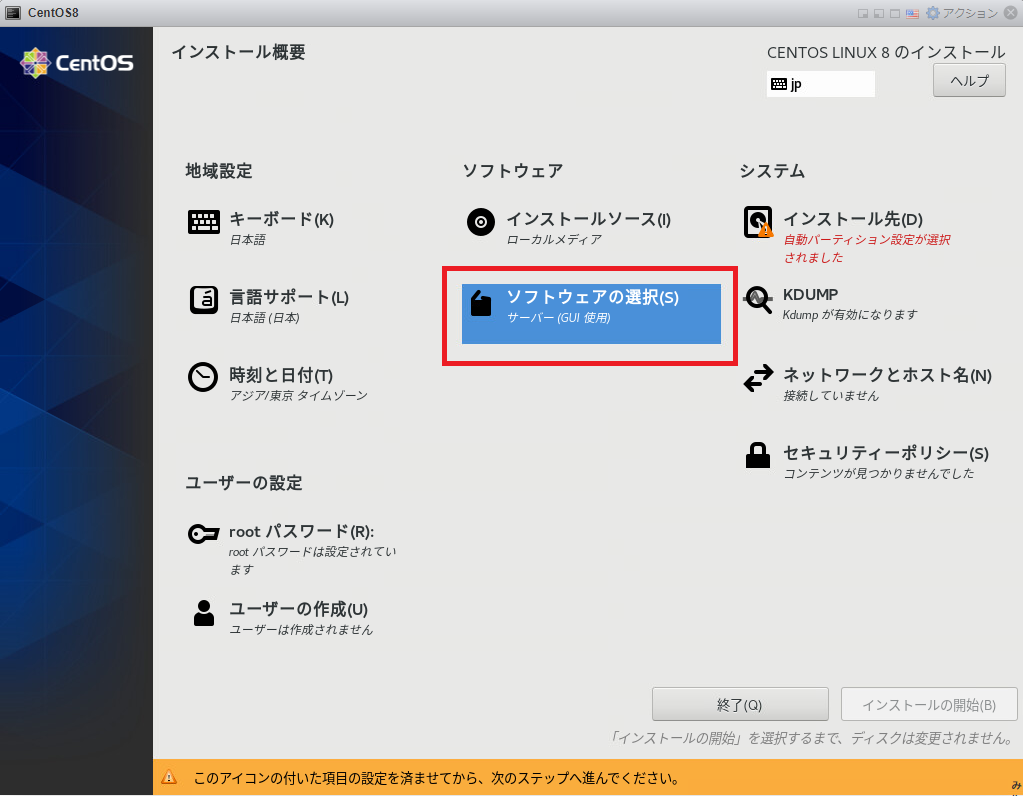
- Select “Minimal installation” and click Finish.
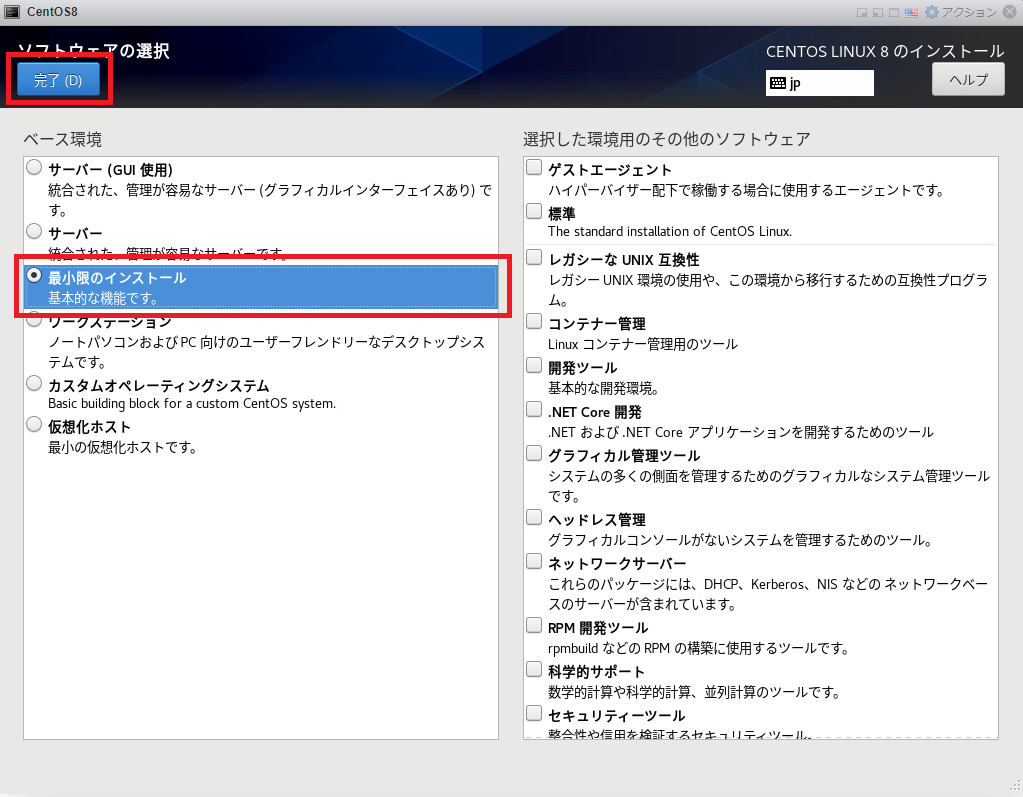
- Click “Installation location”.
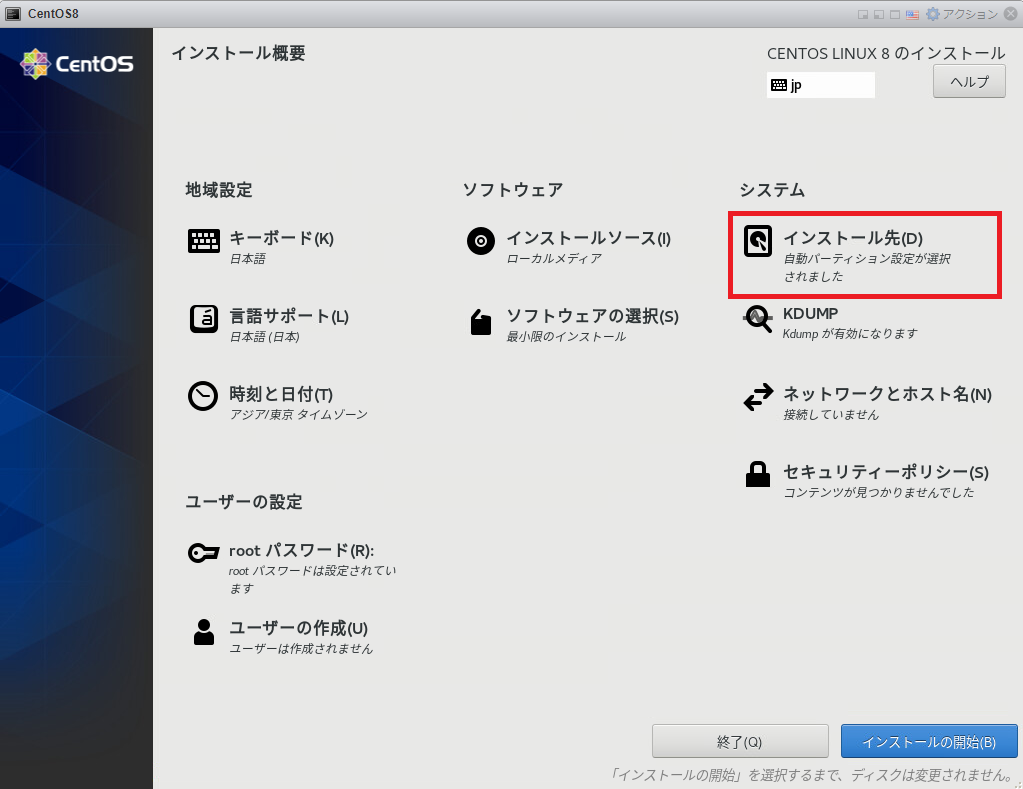
- Click Finish without making any changes.
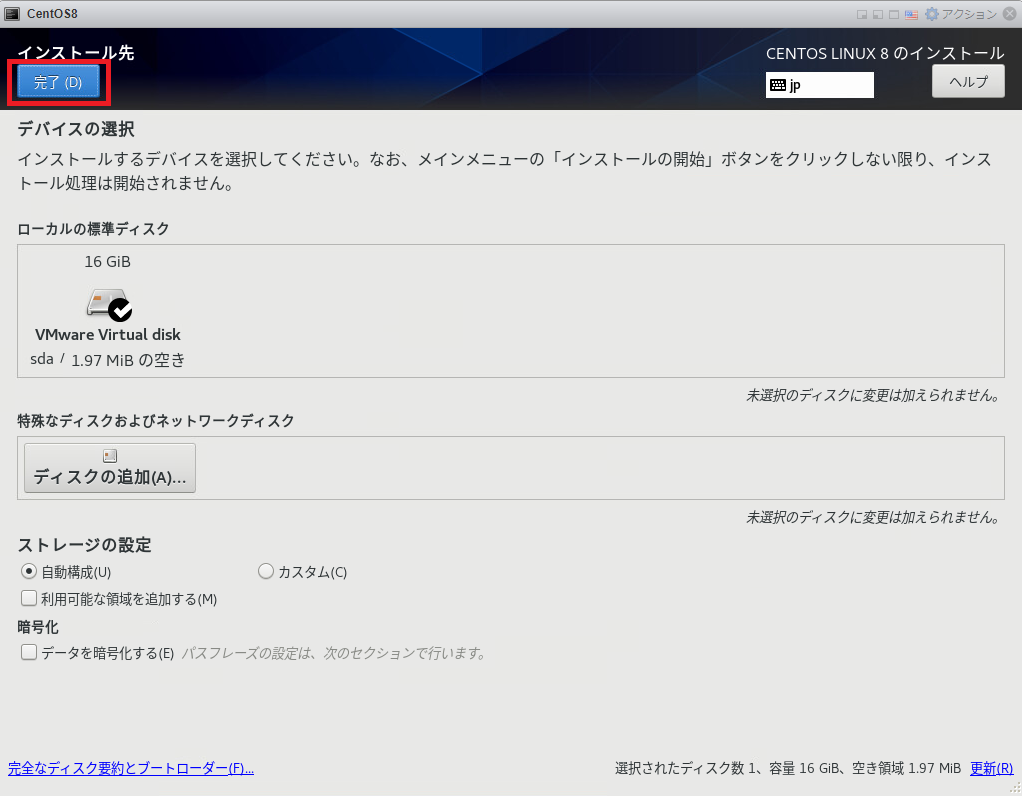
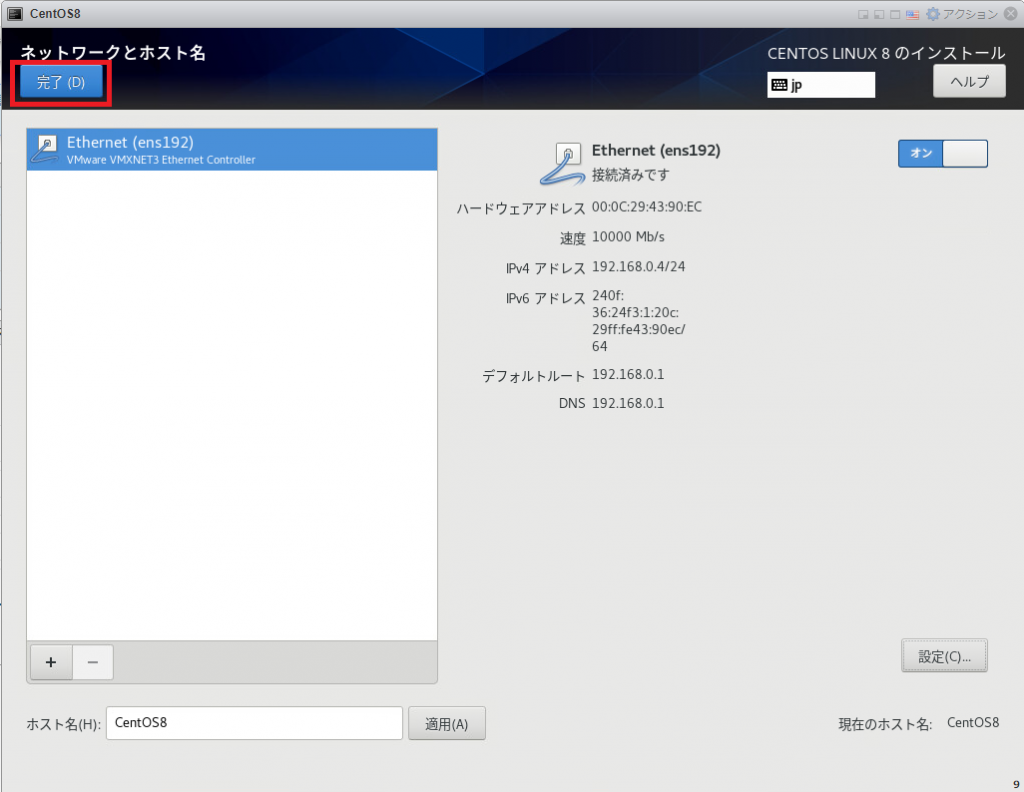
- Click “Network and hostname”.
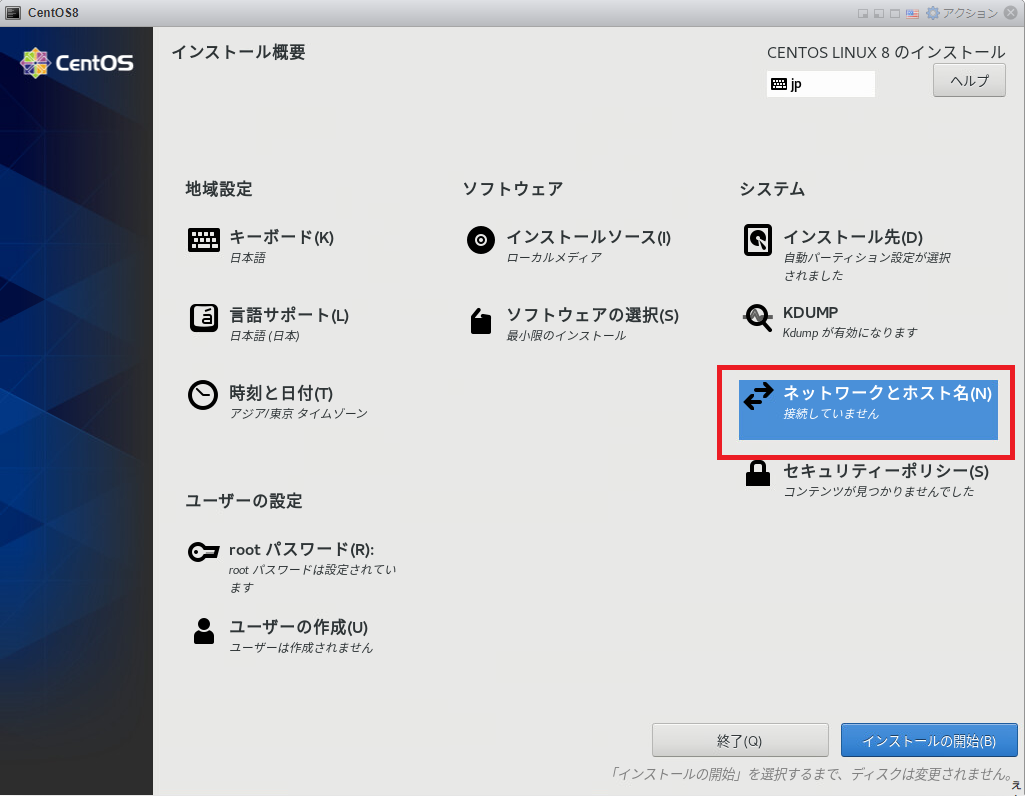
- Set the appropriate host name in the bottom left and click Apply.
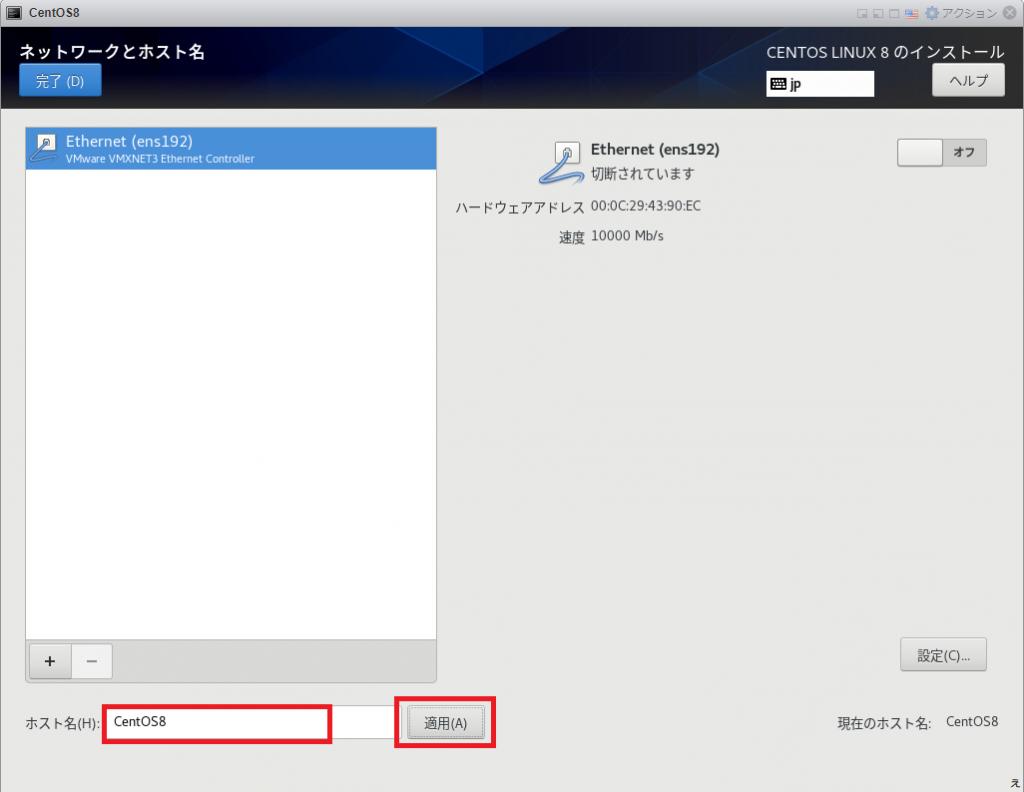
- Turn on the switch in the top right corner and click Settings.
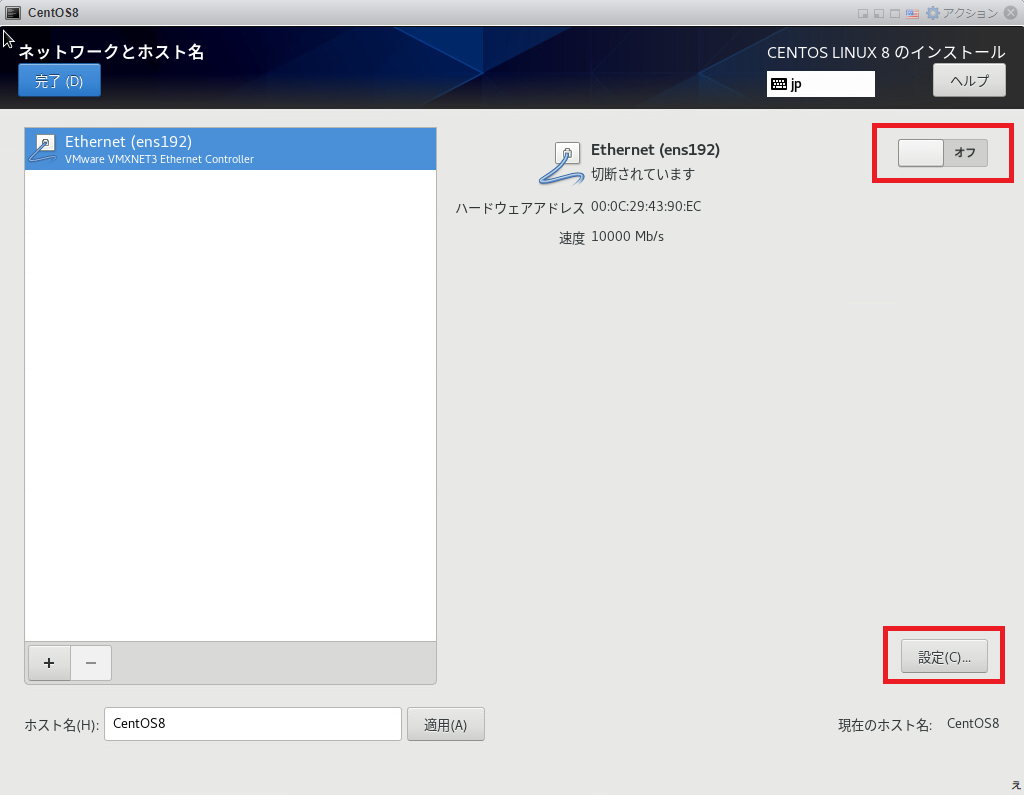
- Select “IPv4” and change “Method” to “Manual”. Click the “Add” button and enter appropriate values for “Address”, “Netmask”, and “Gateway”. After completing the settings, click Save.
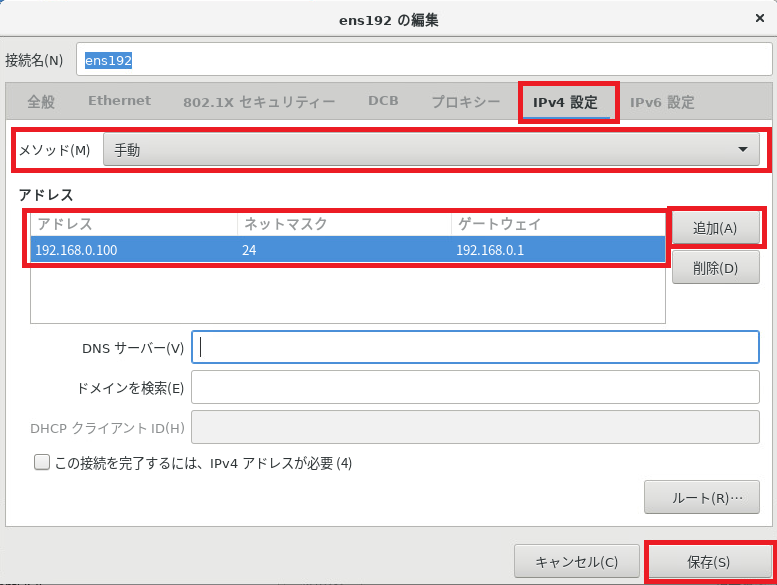
- Click Finish.
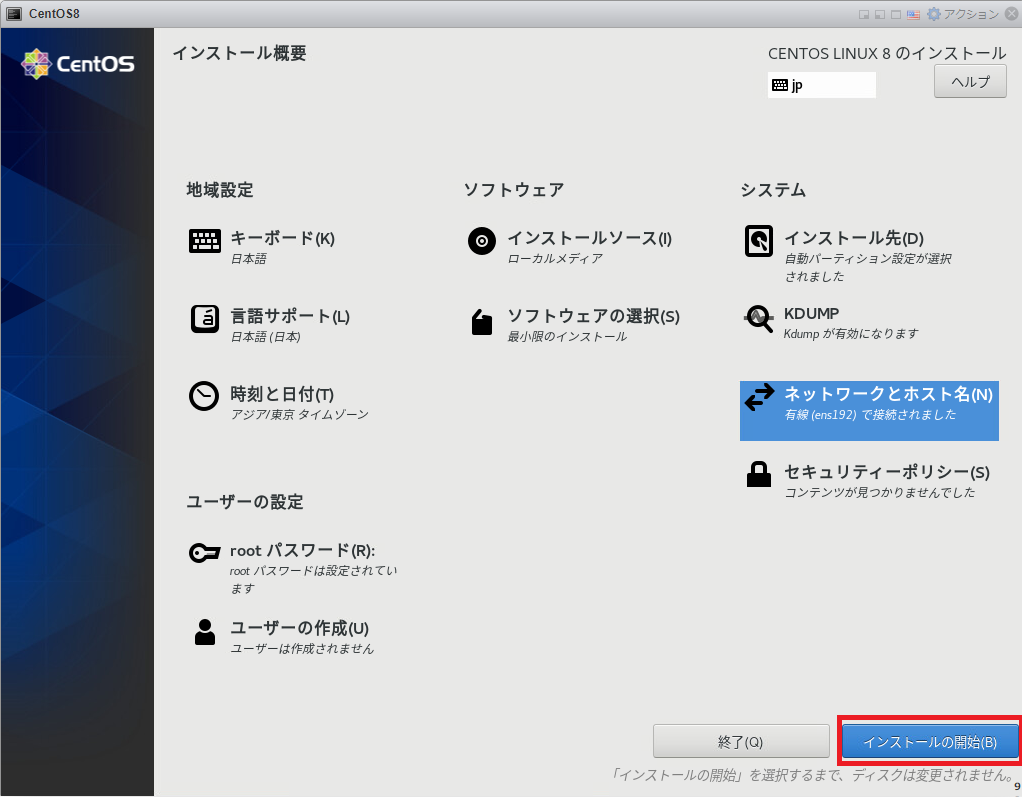
- After completing the settings, click Start Installation.
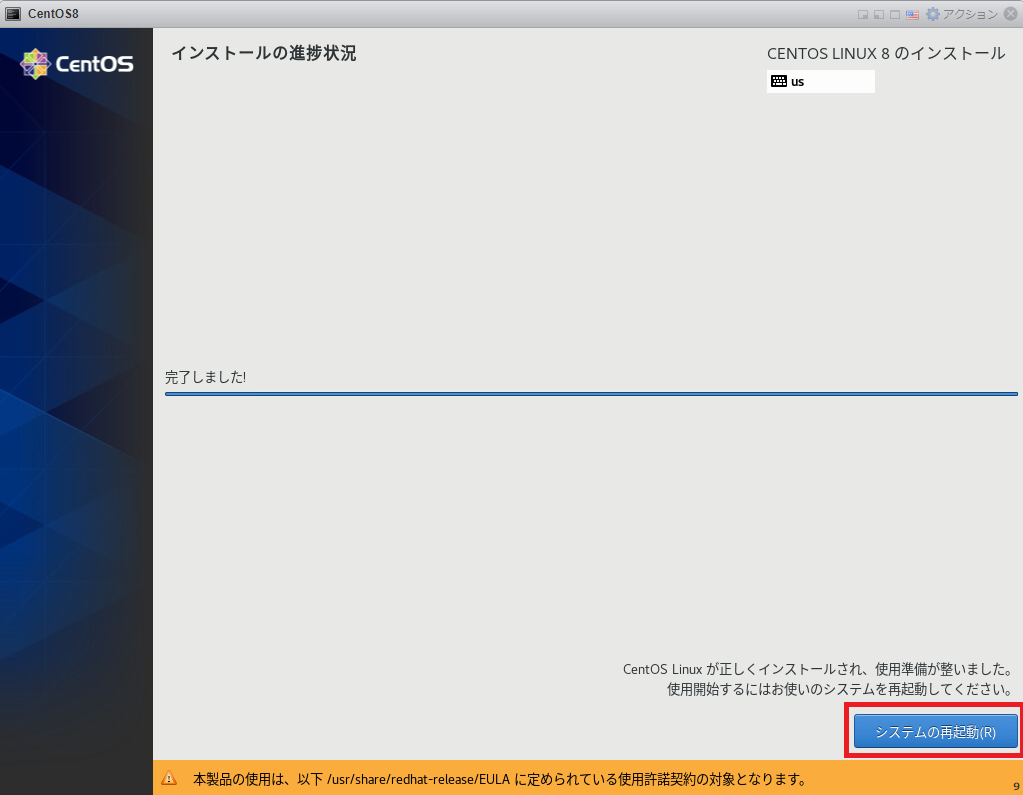
- Once the installation is complete, click Restart System.
Initial setup of CentOS8
Login
CentOS8 login: root
Password: ←Password you set
Disabling SELinux
Unexpected behavior caused by SELinux is often observed in development environments. In some cases, SELinux is disabled for that reason.
- Enter the following commands to disable SELinux.
[root@CentOS8 ~]# setenforce 0
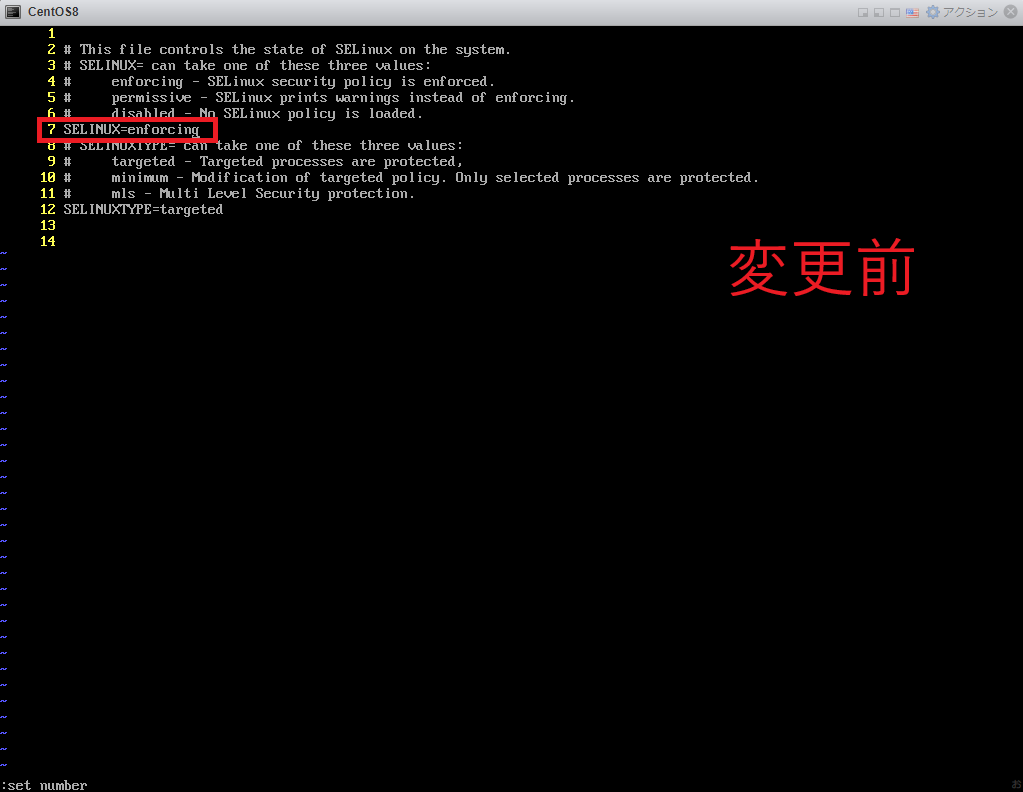
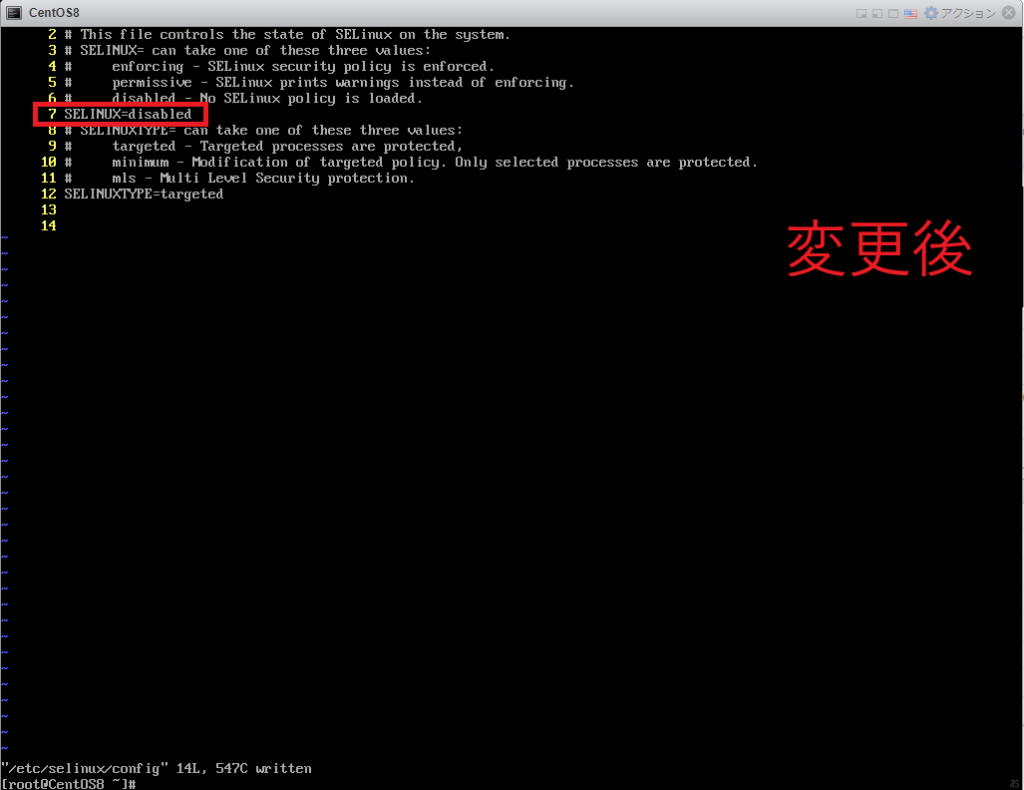
[root@CentOS8 ~]# vi /etc/selinux/config- When the editor opens, change “SELINUX=enforcing” on line 7 to “SELINUX=disabled” and save.
- Enter the following command to reboot the system.
[root@CentOS8 ~]# reboot- Log in as root again, enter the following command, and confirm that the result is “Disabled”.
[root@CentOS8~]# getenforce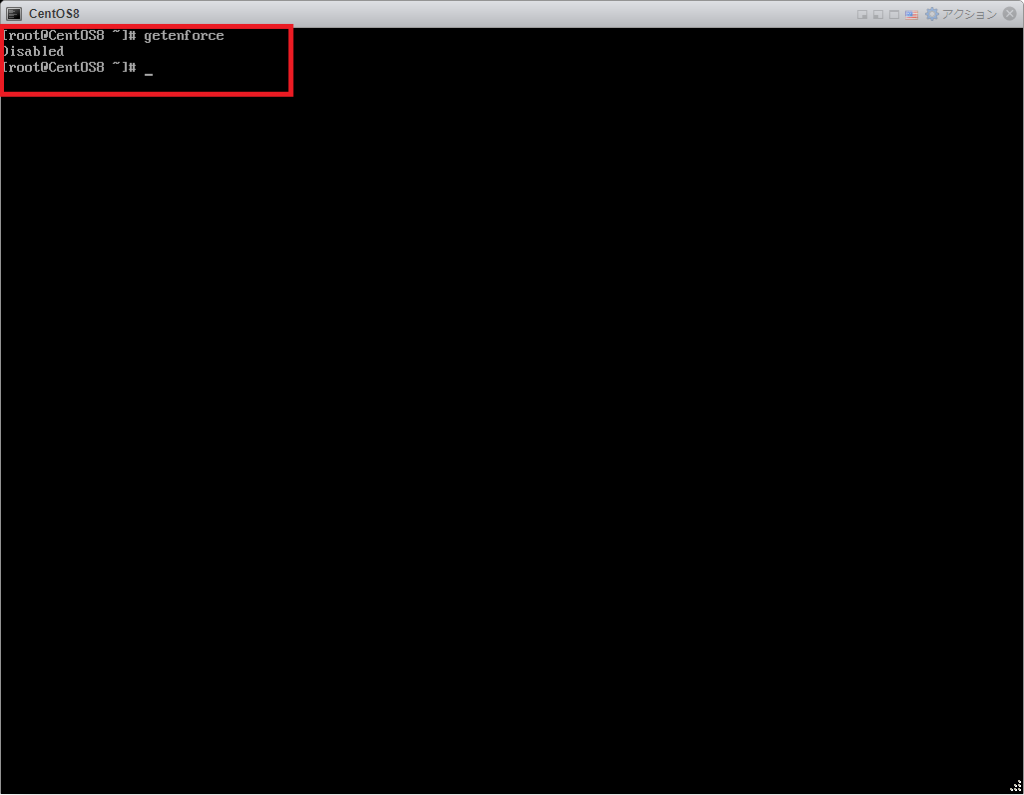
Package updates
- Enter the following command to update CentOS.
[root@CentOS8~]# dnf -y update- Confirm that “Complete!” is displayed.
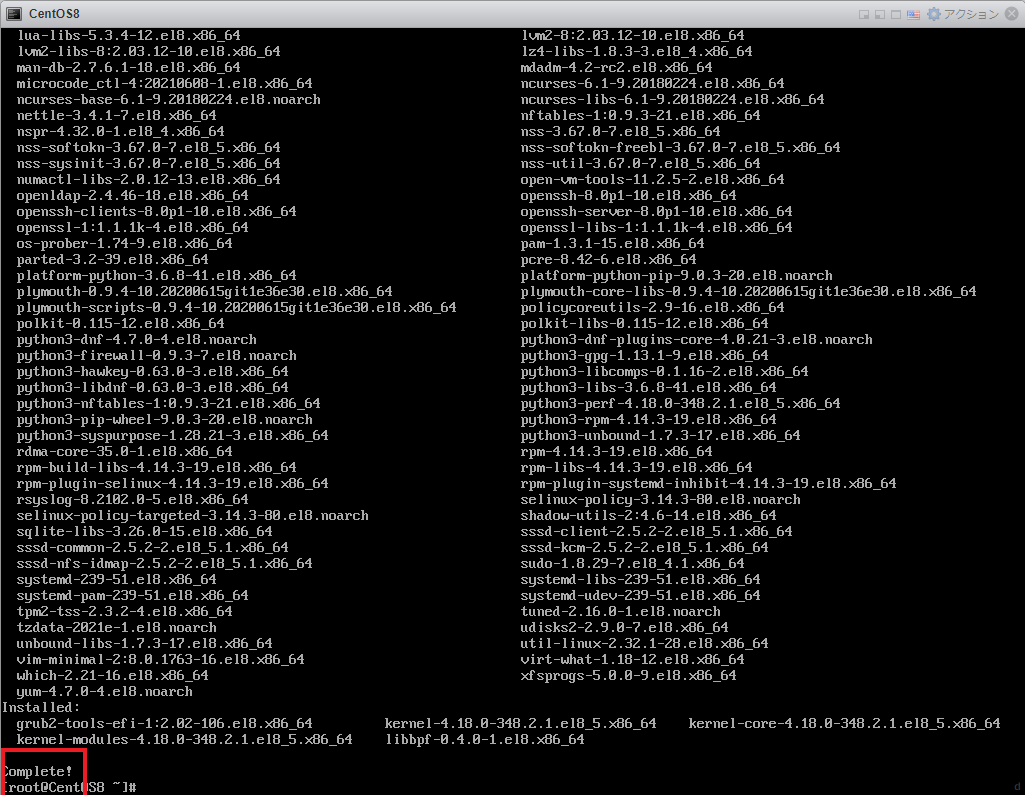
This completes the installation and initial setup of CentOS 8. Thank you for following along.
Conclusion
This article covered the installation and initial setup of CentOS 8. Future Linux server articles will assume that you have followed this installation procedure.